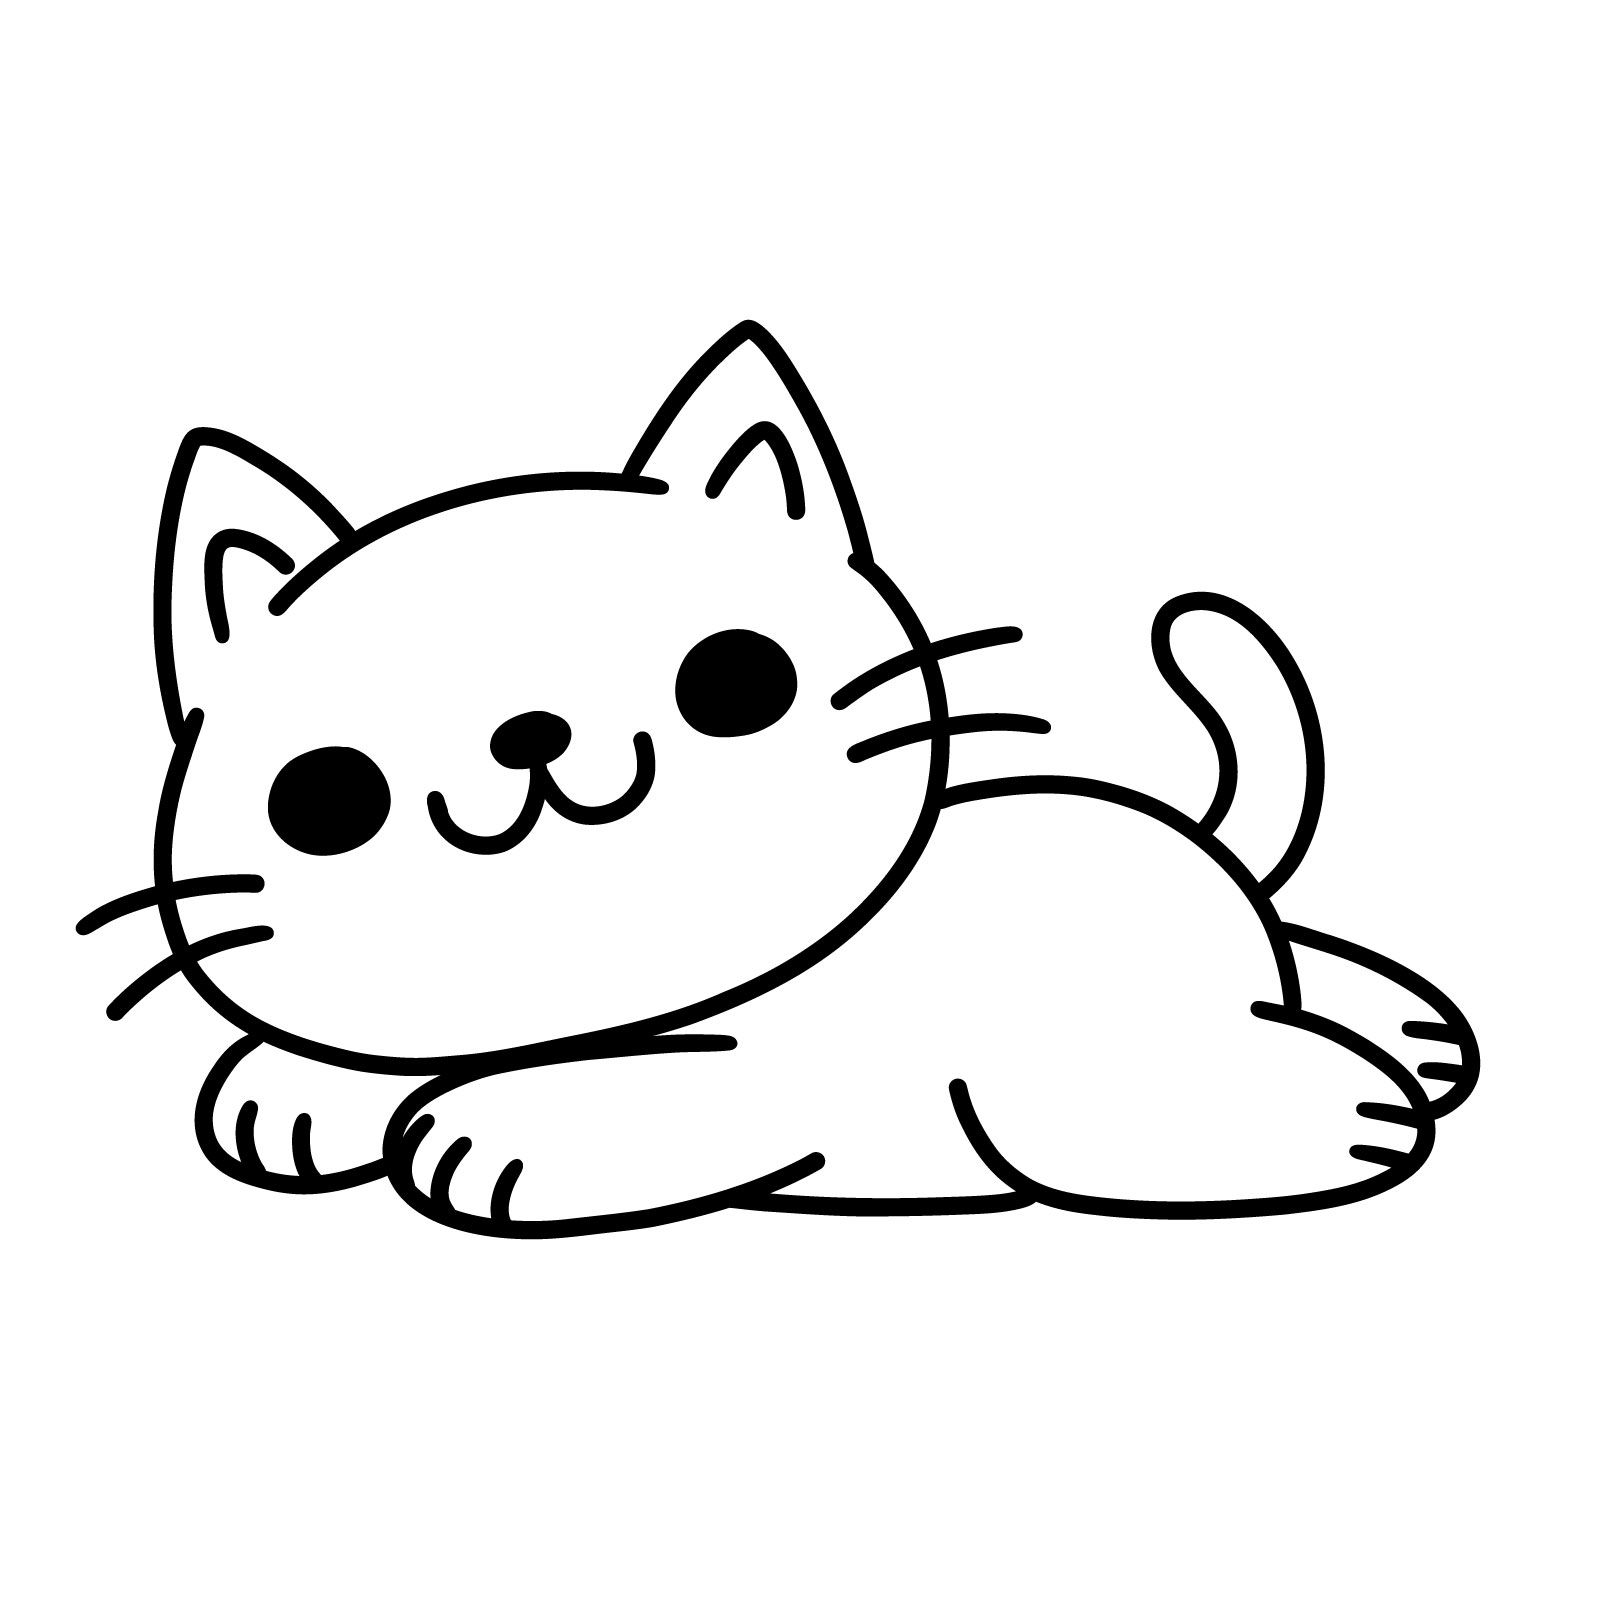
How to Draw Cats – 19 Easy Guides in One Tutorial

Welcome to a all over tutorial on how to draw cat . This guide is ideal if you ’ re looking to overcome make cats in several mode , without take to dig into complex guy form . Each of the 19 guides live simplified , make it possible for you to pull cats effortlessly , even if you own no former experience . We ’ ll start with simple cat outlines , then gradually move to more realistic depictions of cat in unlike poses – walking , jumping , consist on their rear , sit down from different angles , stretching , and bring with a ball .
In increase to these poses , we ’ ll also cover how to draw a cat ’ s look and dig into respective styles such as minimalistic , cartoon , anime , and kawaii cats . The last four guides , added as a bonus , equal quite straightforward . I created them while originate this article and include them for their simplicity and fun – they live perfect for drawing with kid . So , let ’ s begin our journey into the delightful globe of guy drawing !
Table of Contents
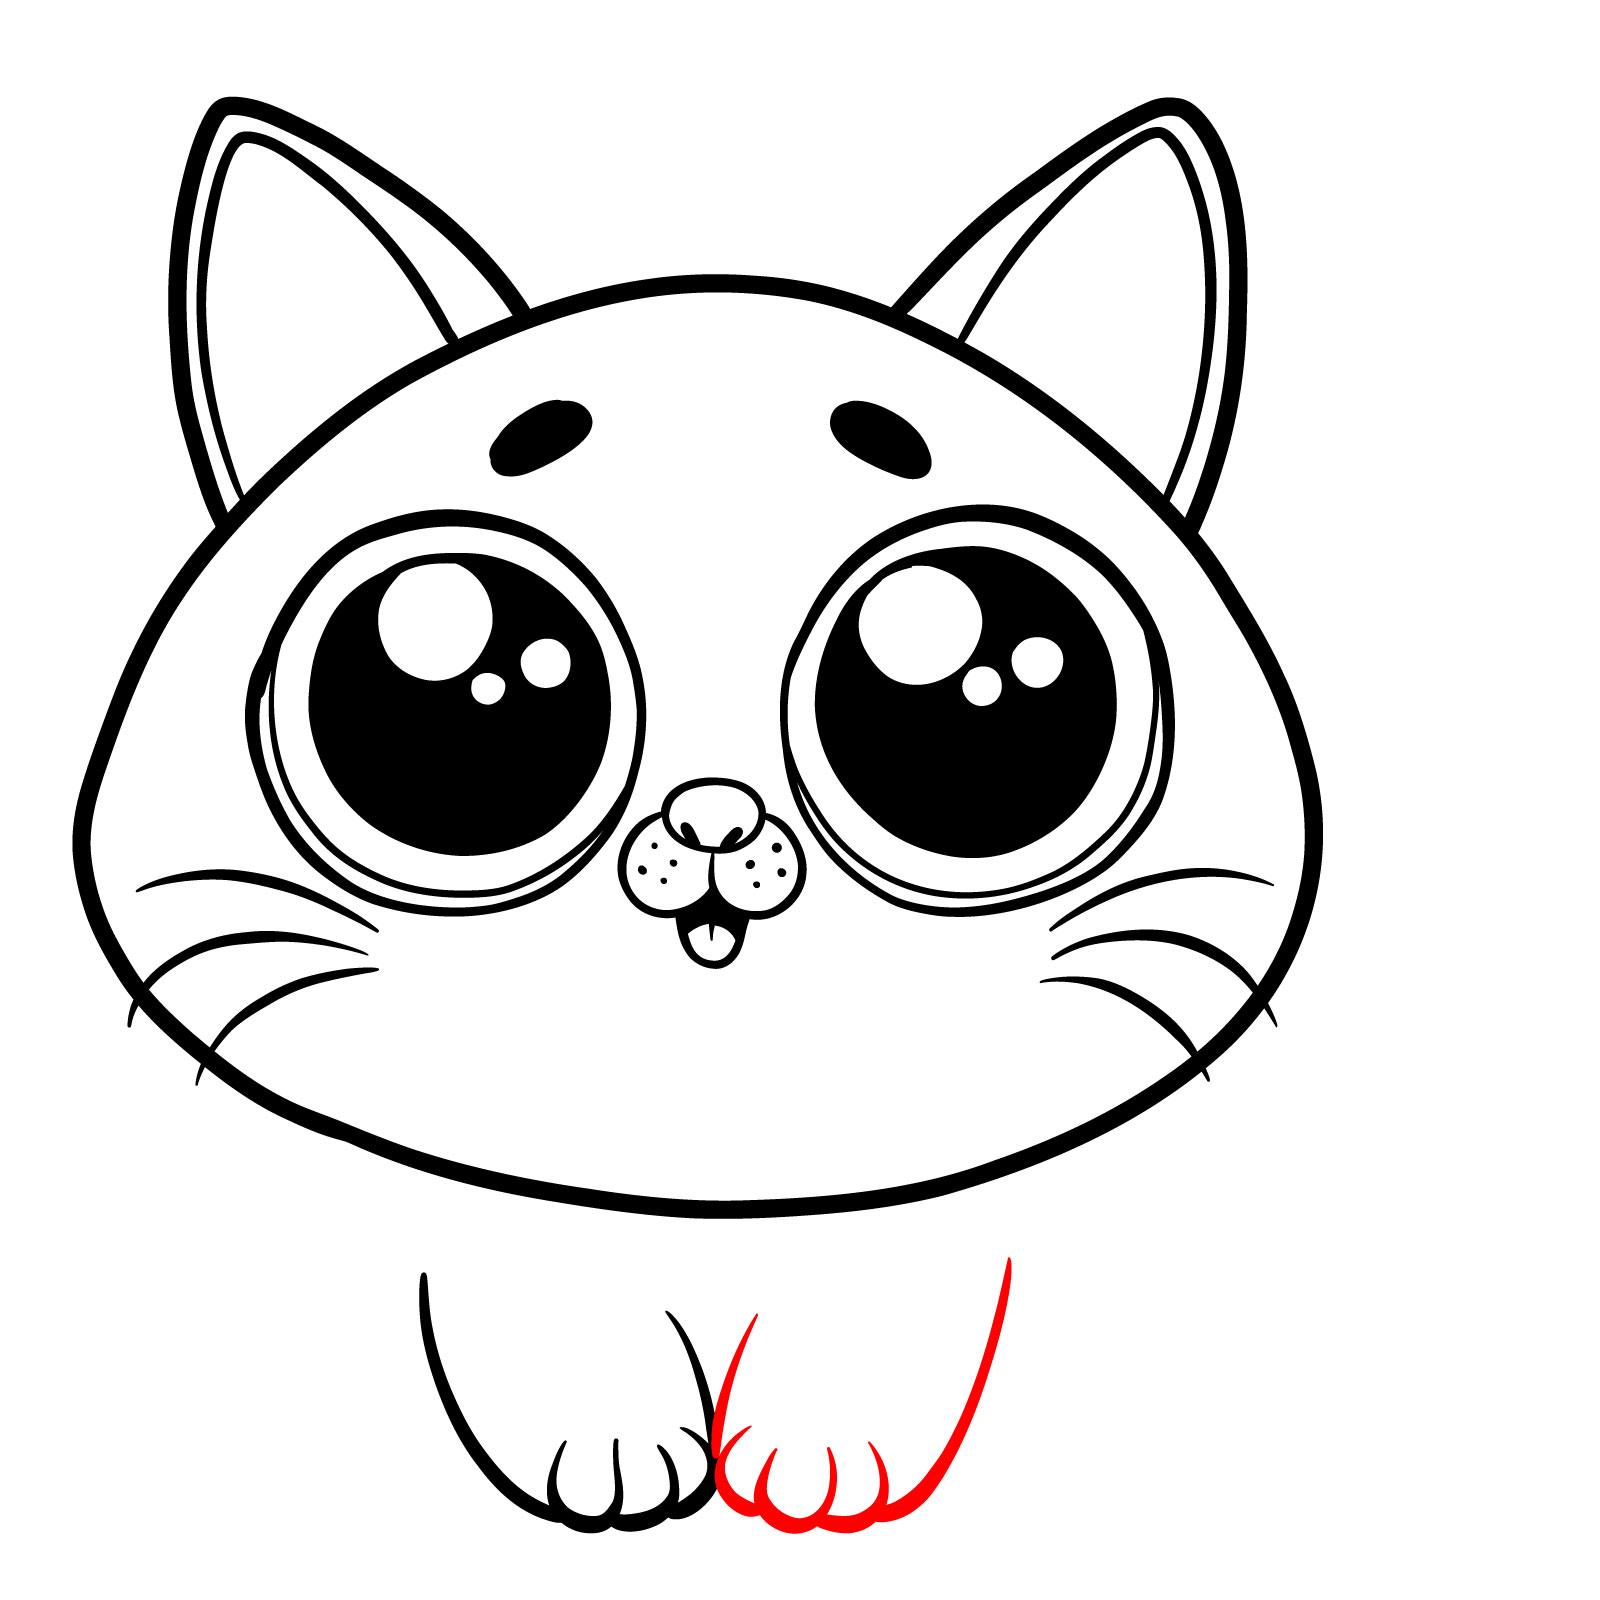
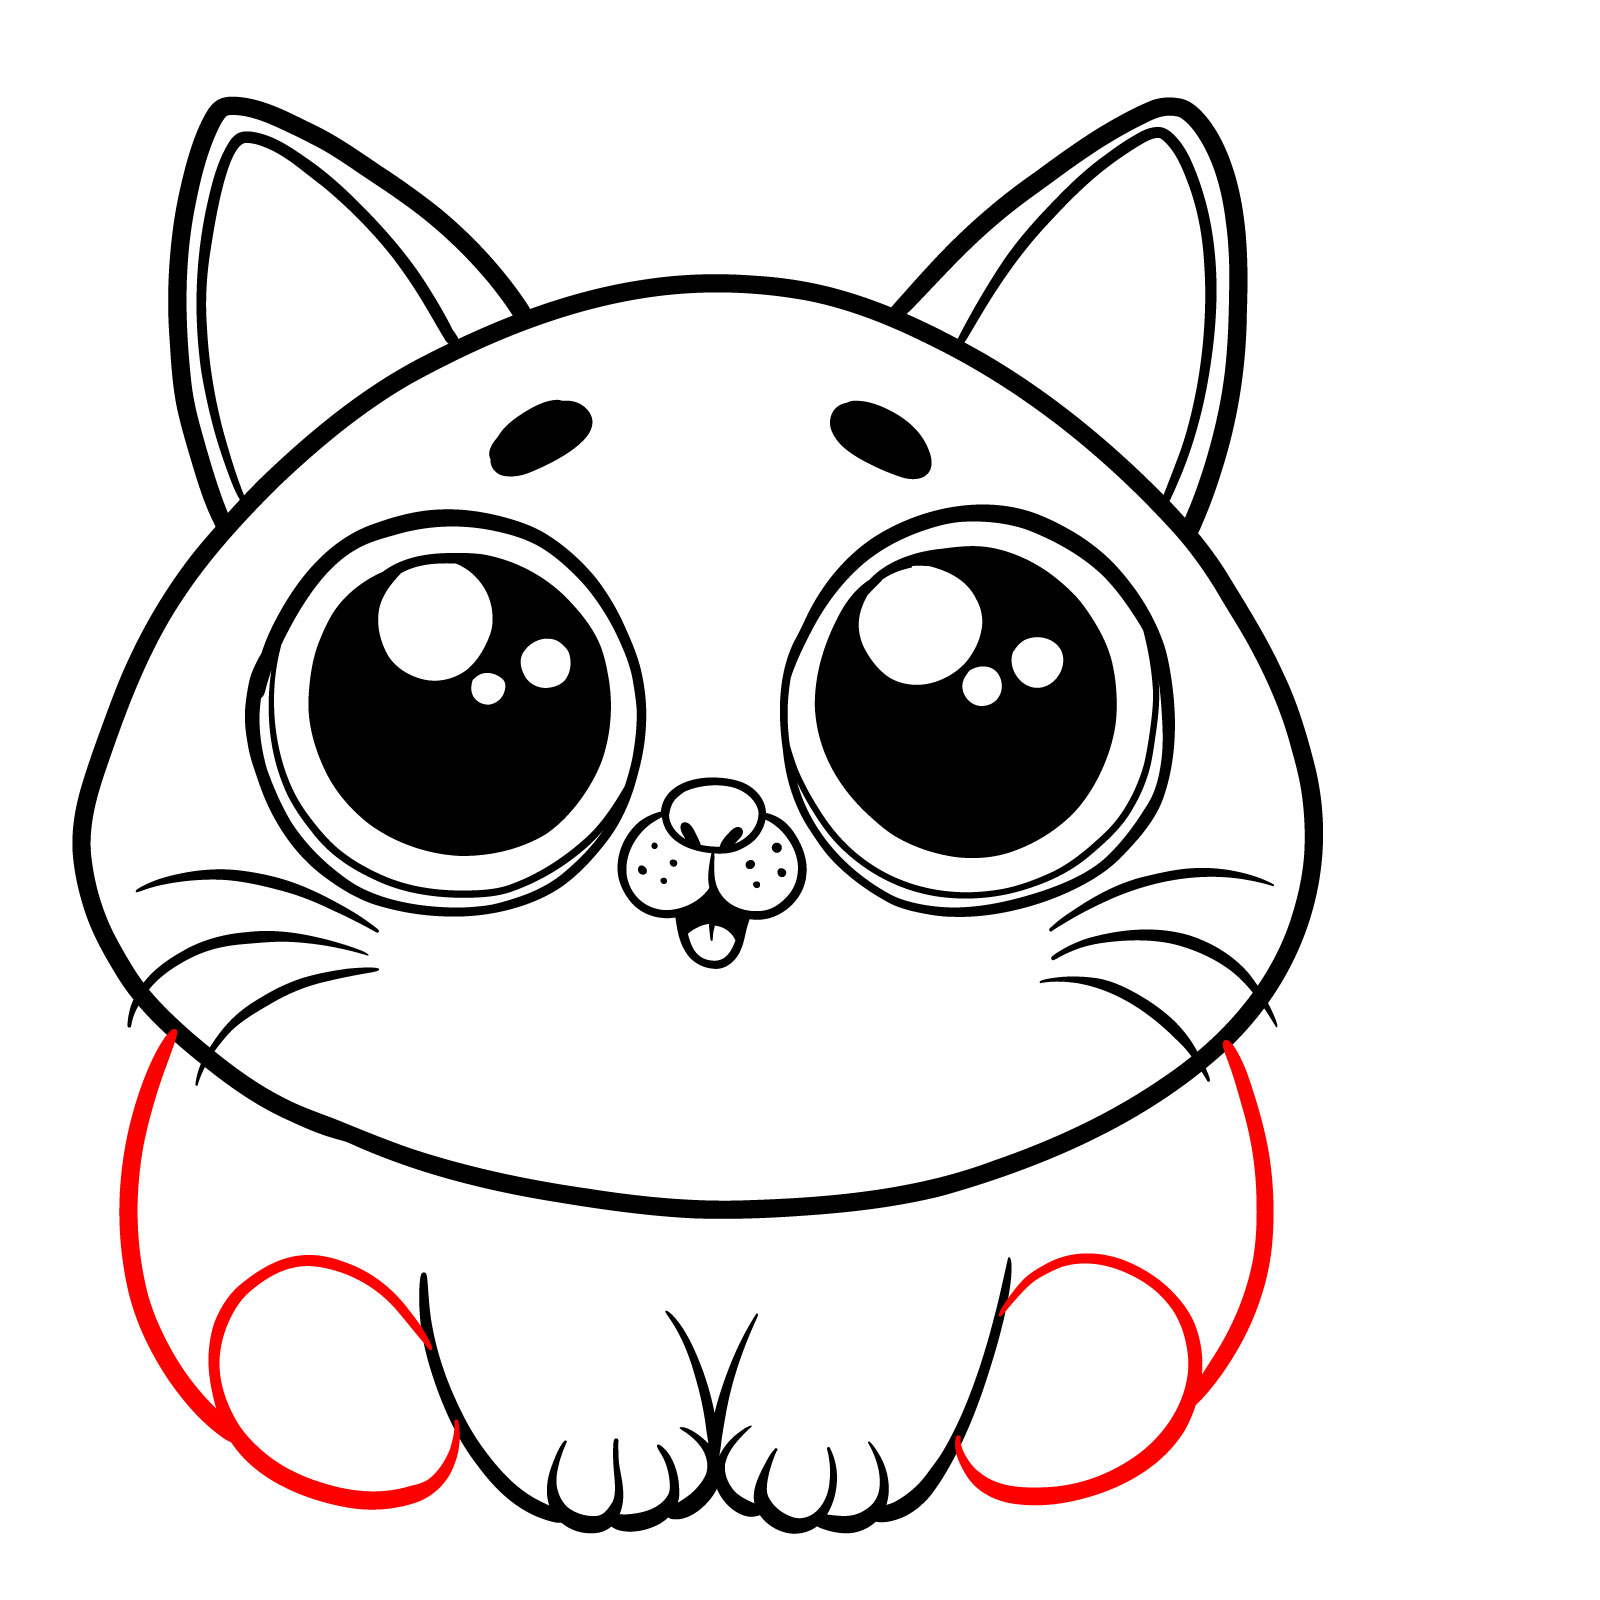
- Guide 1 : Simple Cartoon Cat – 5 Measure
- Guide 2 : Cartoon Cat Lying on Its Belly – 8 Steps
- Guide 3 : Bipedal Cartoon Cat – 8 Stairs
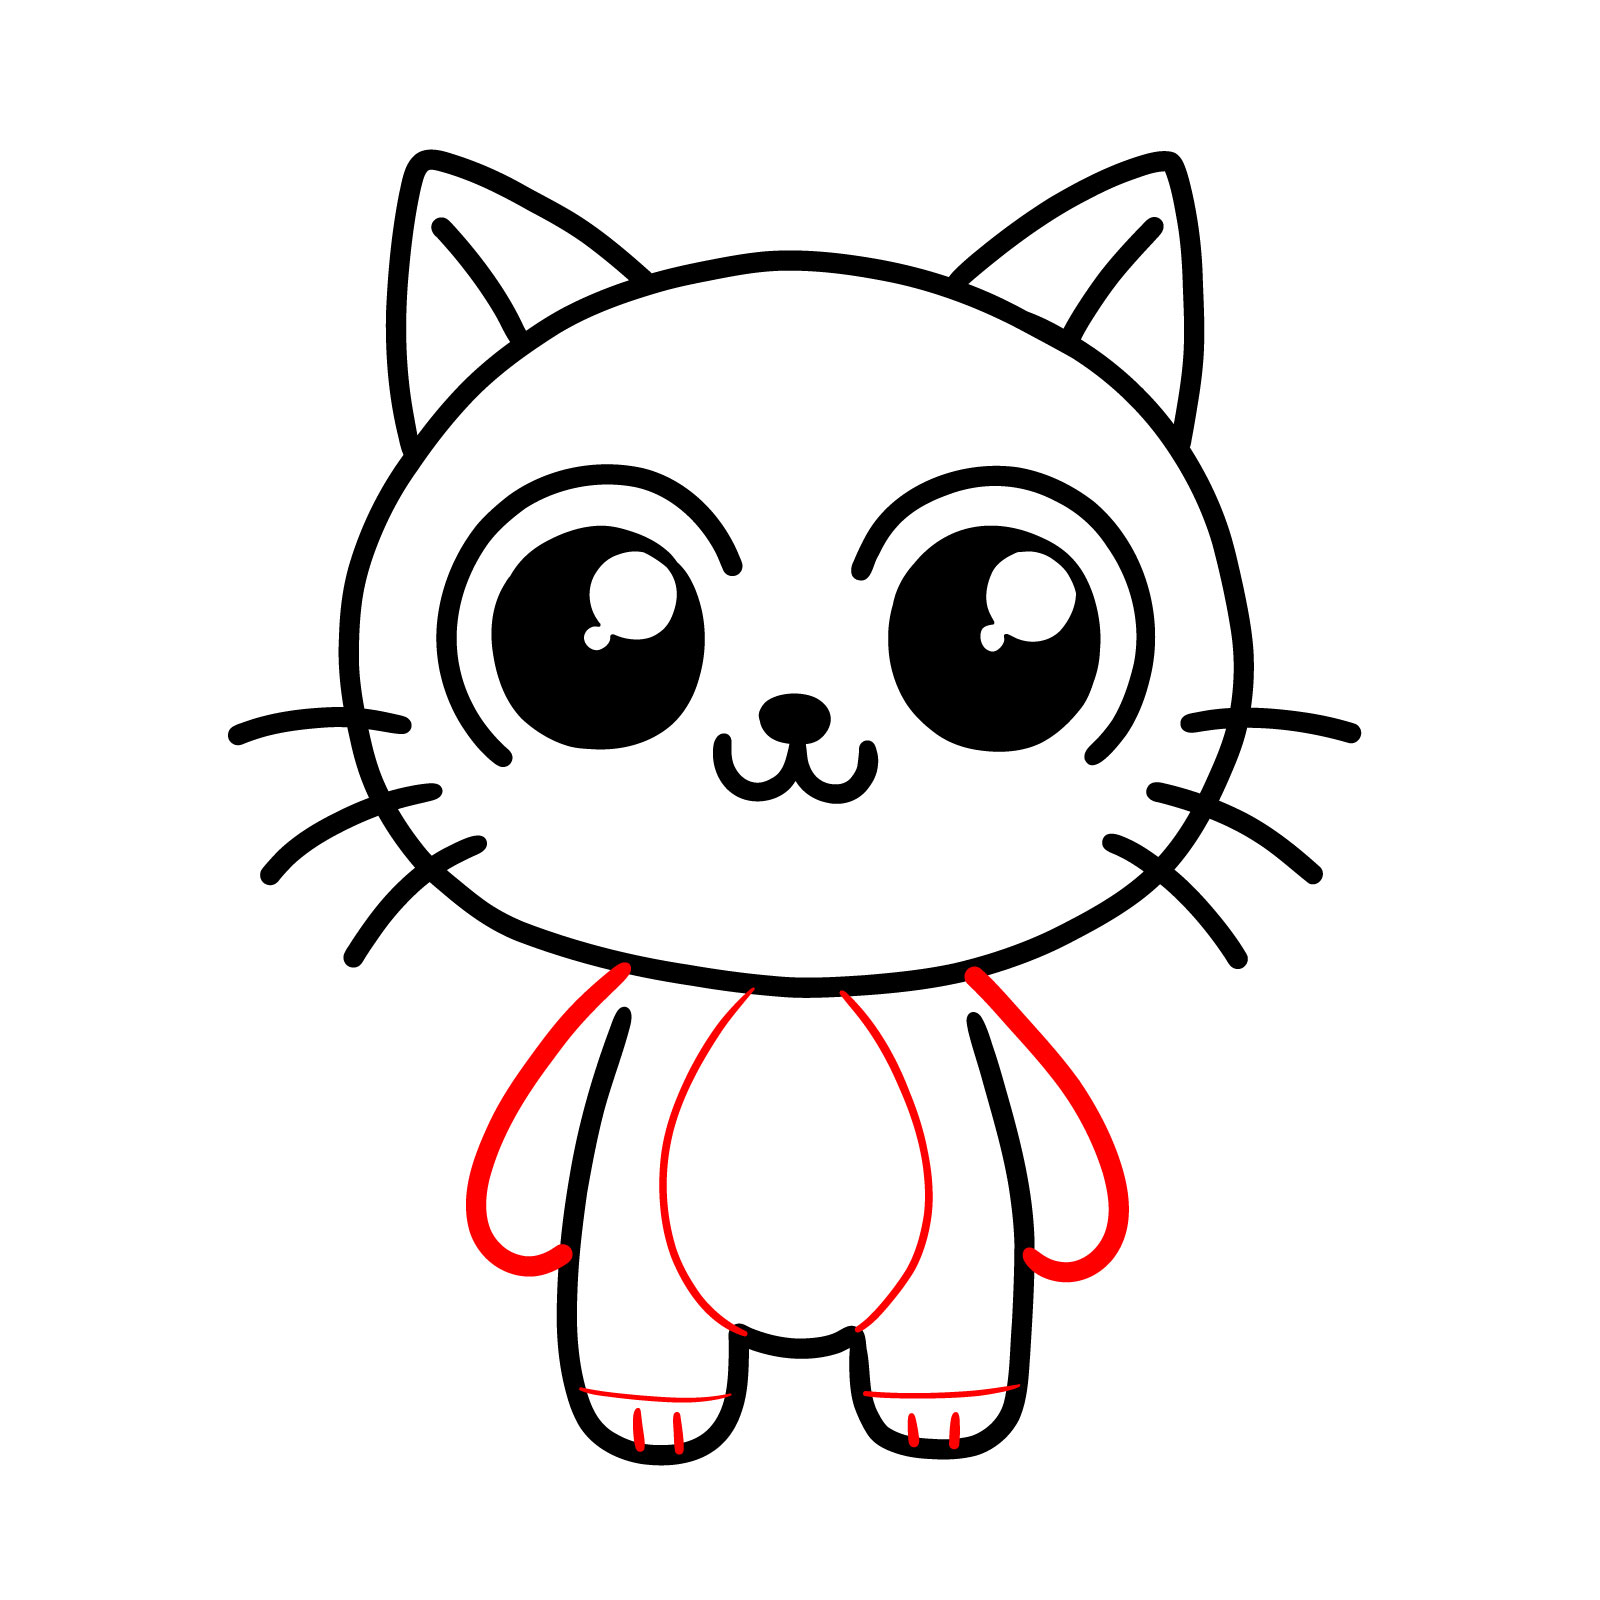
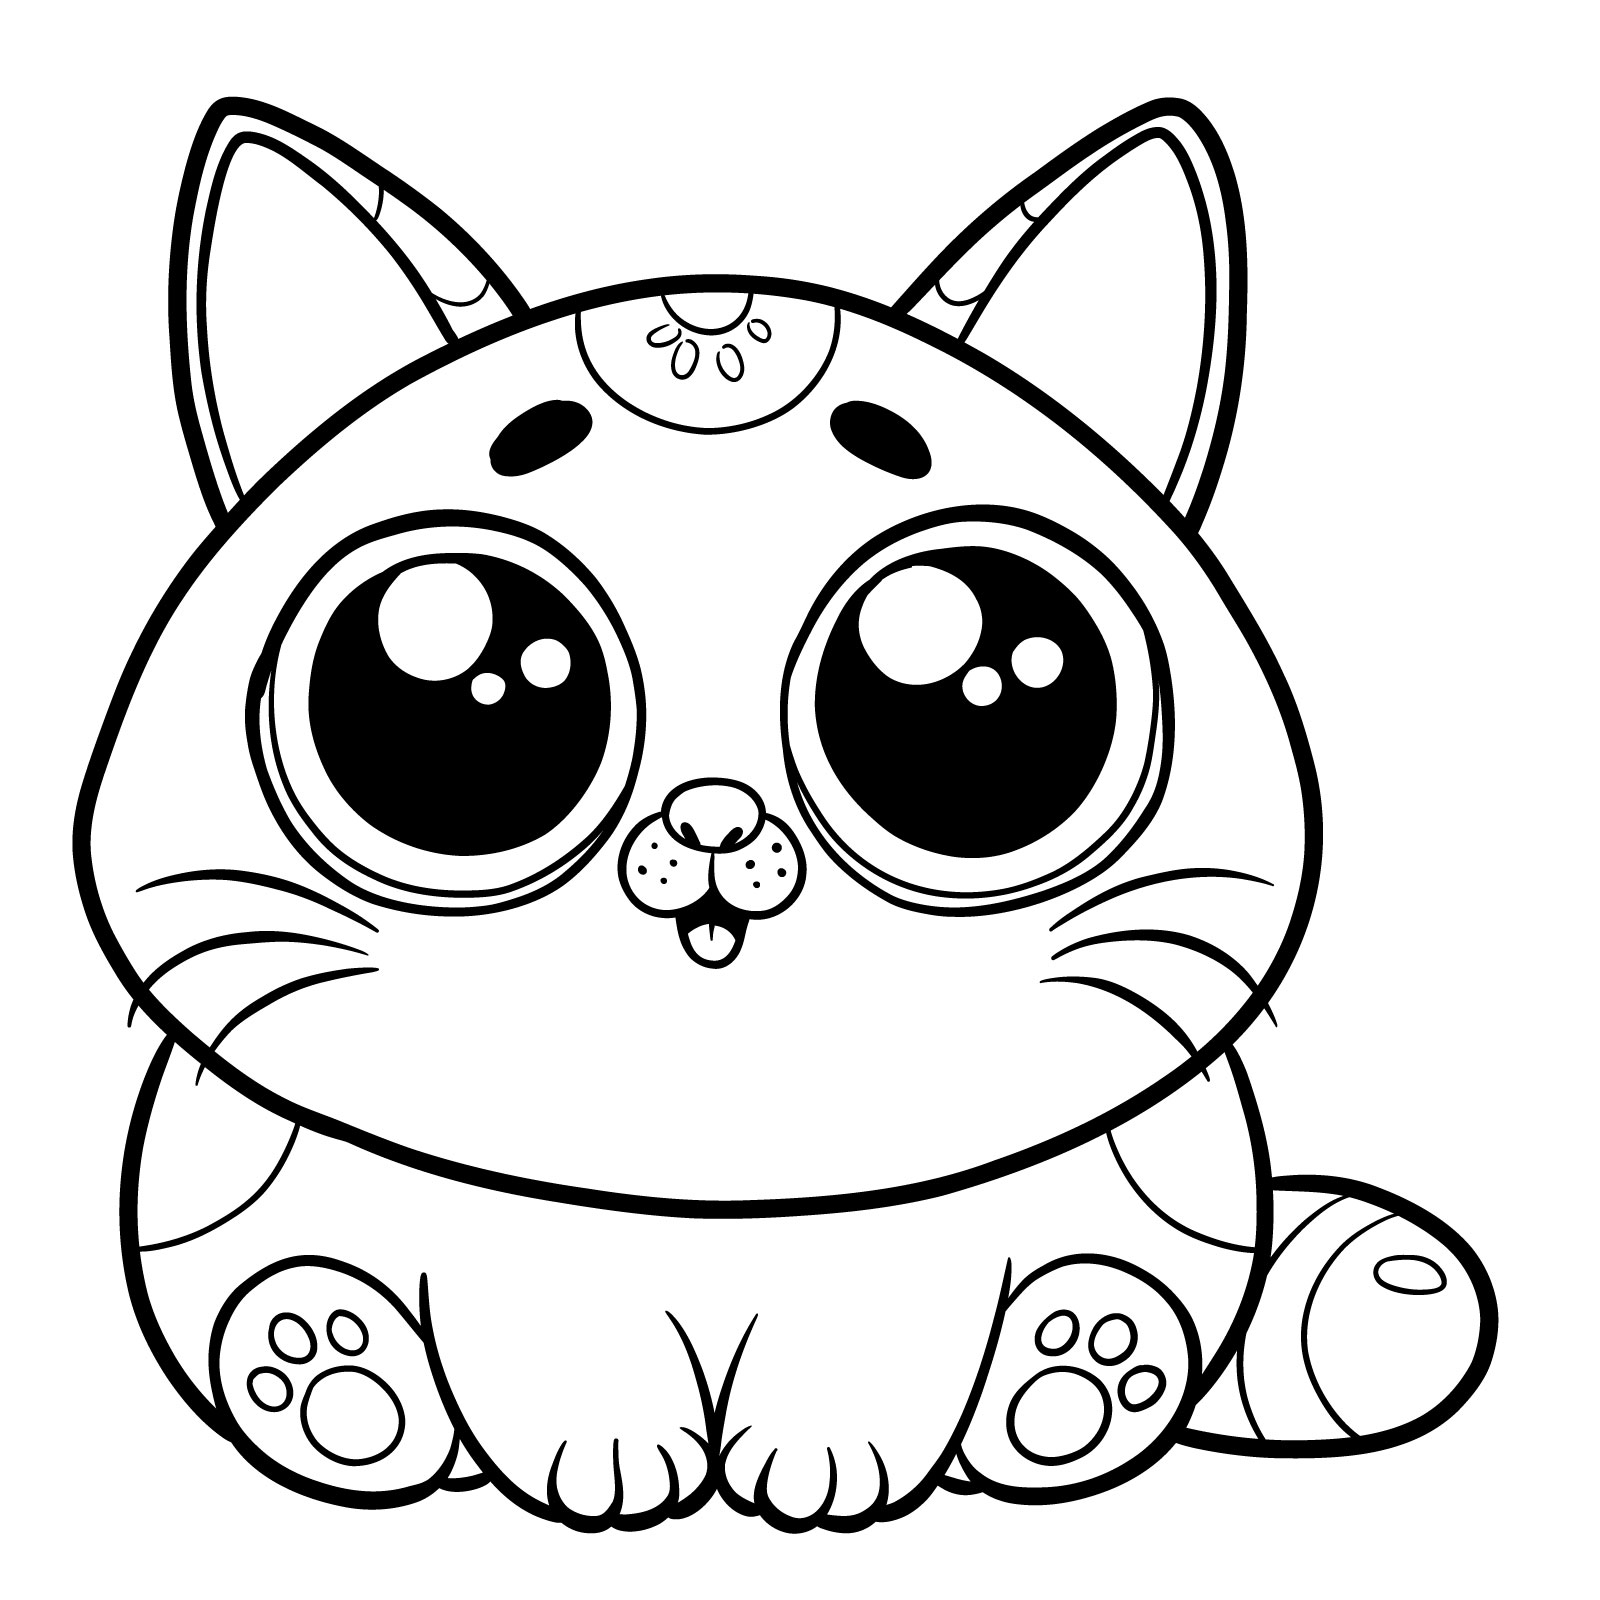
- Guide 4 : Detailed Cartoon Kitten Sitting – 12 Steps
- Guide 5 : Minimalistic Sleeping Cat – 6 Steps
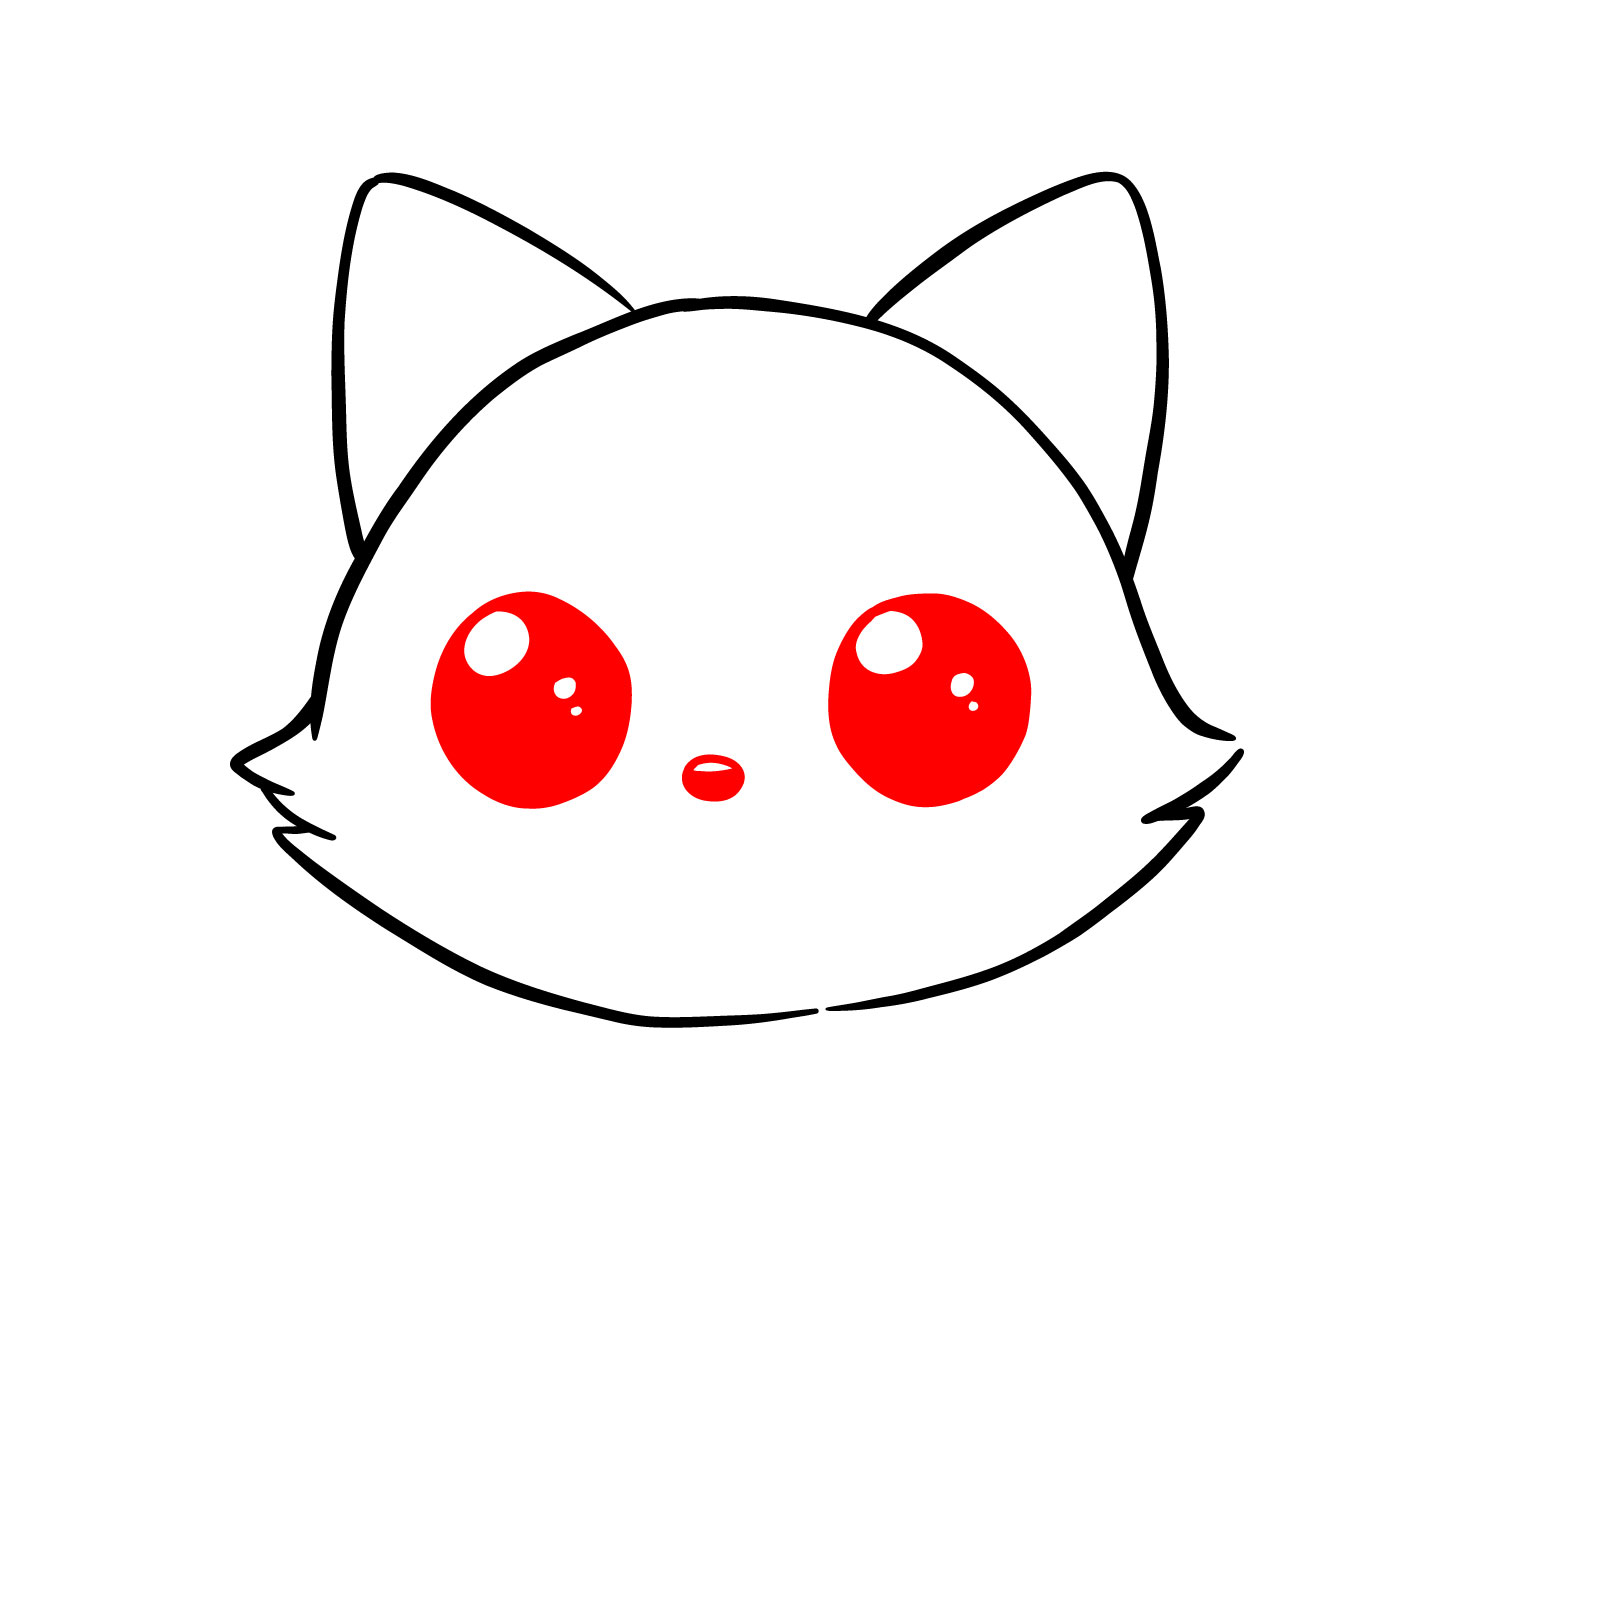
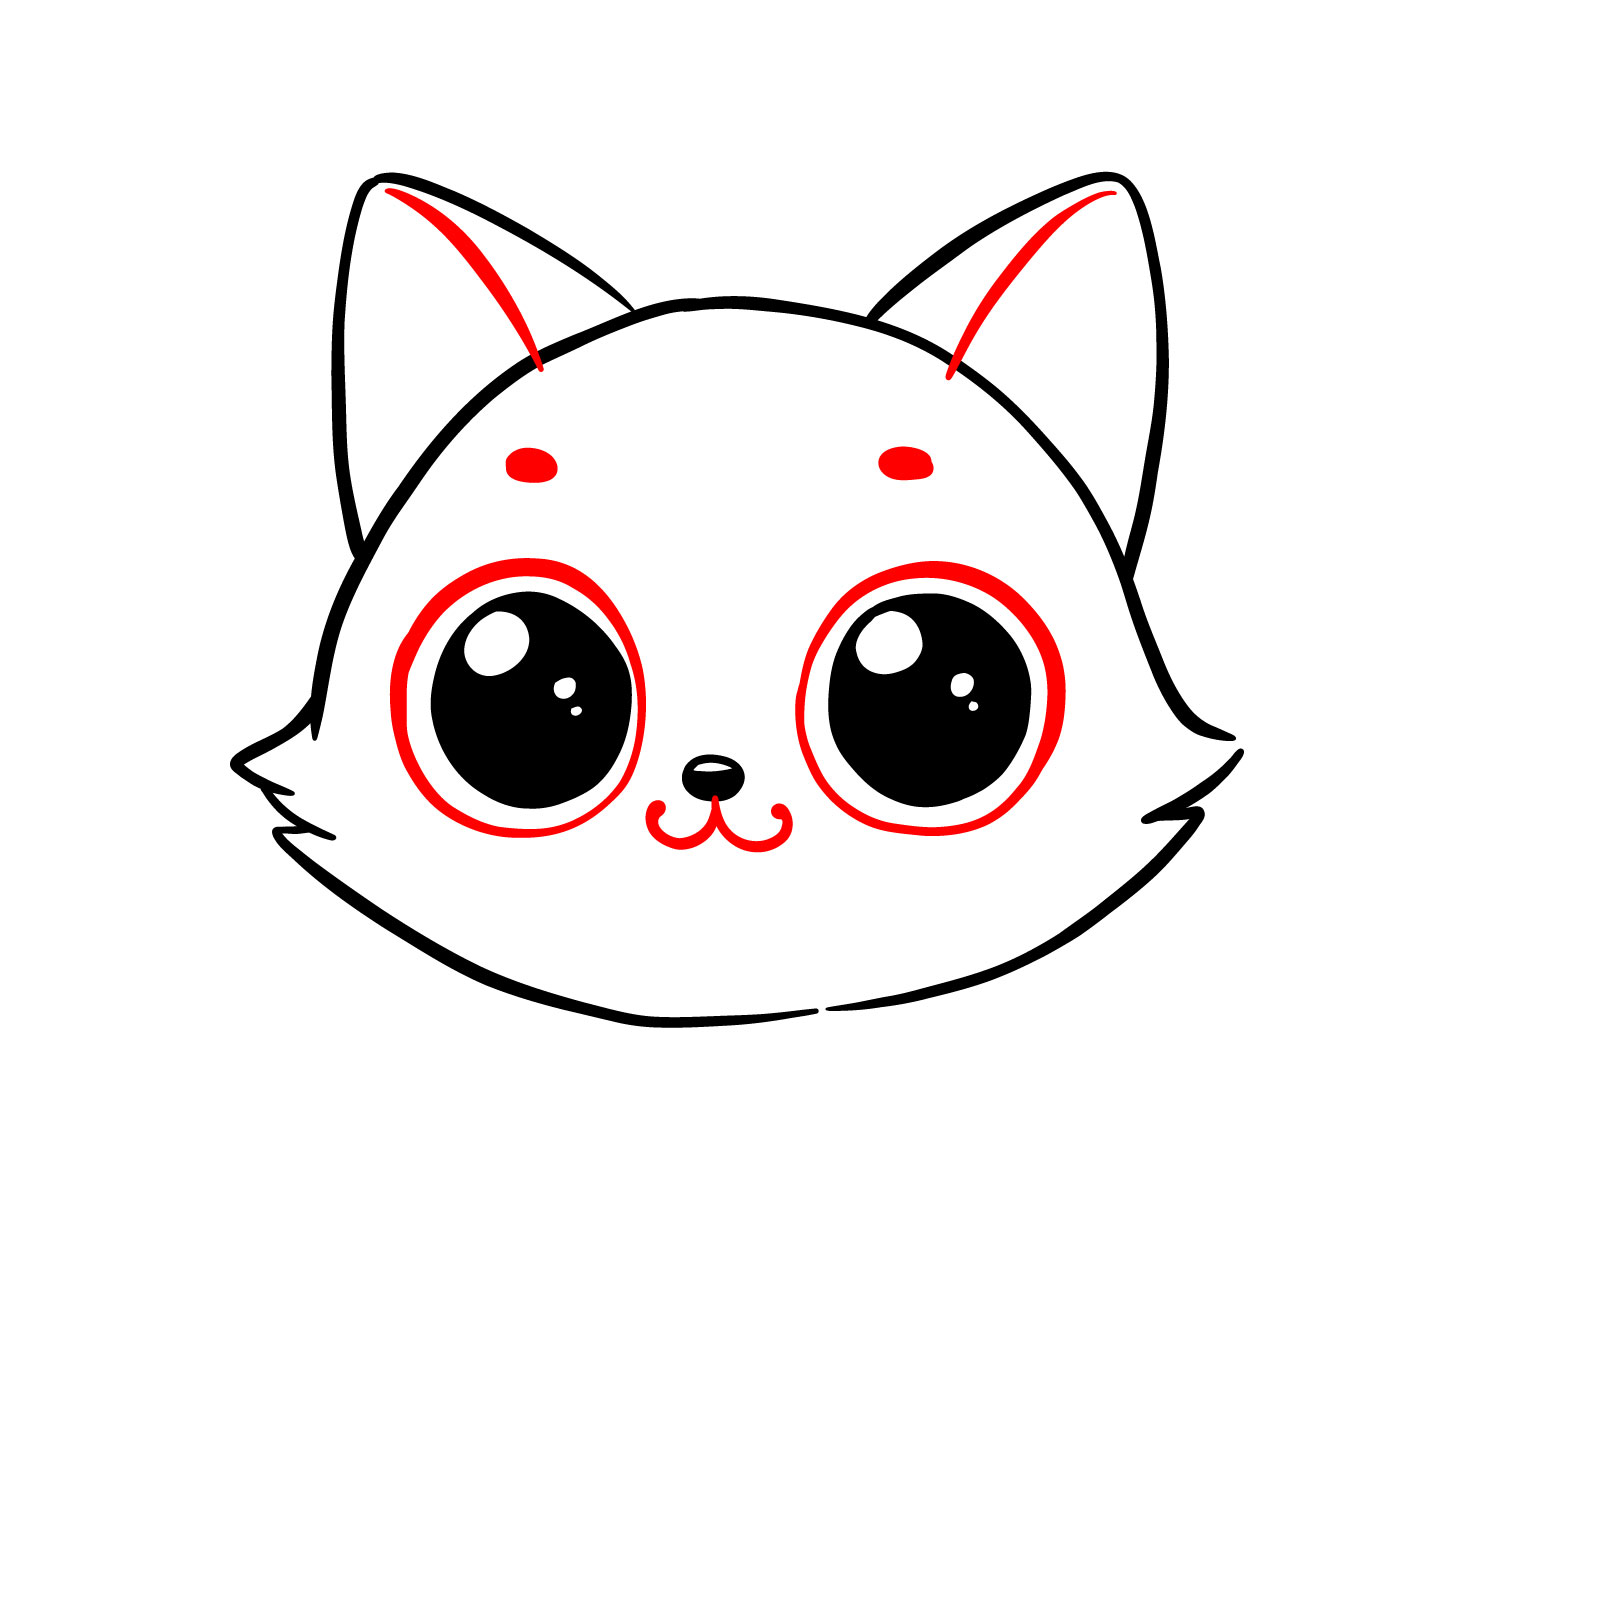
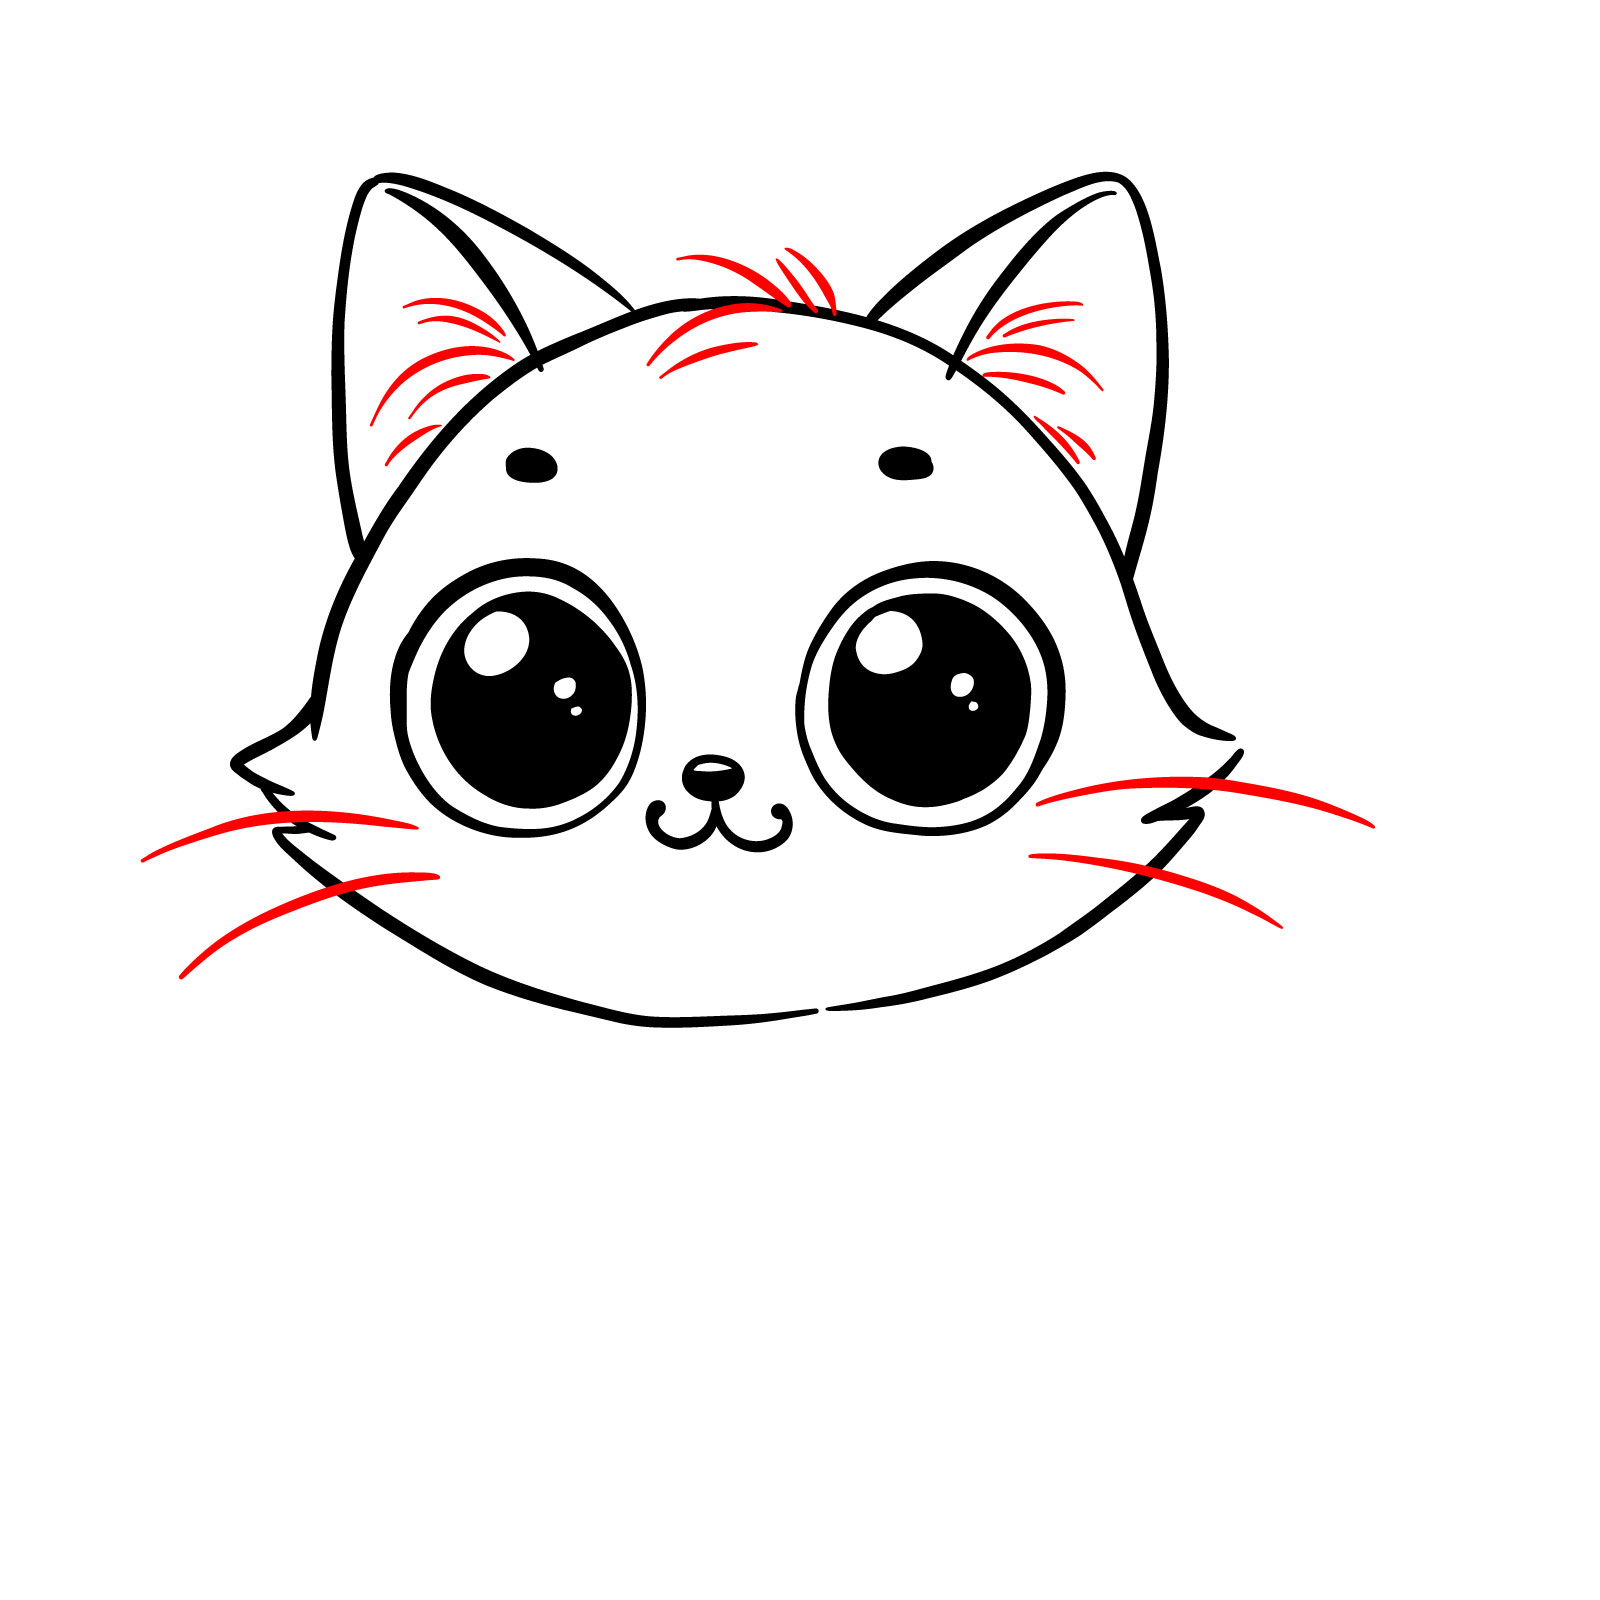
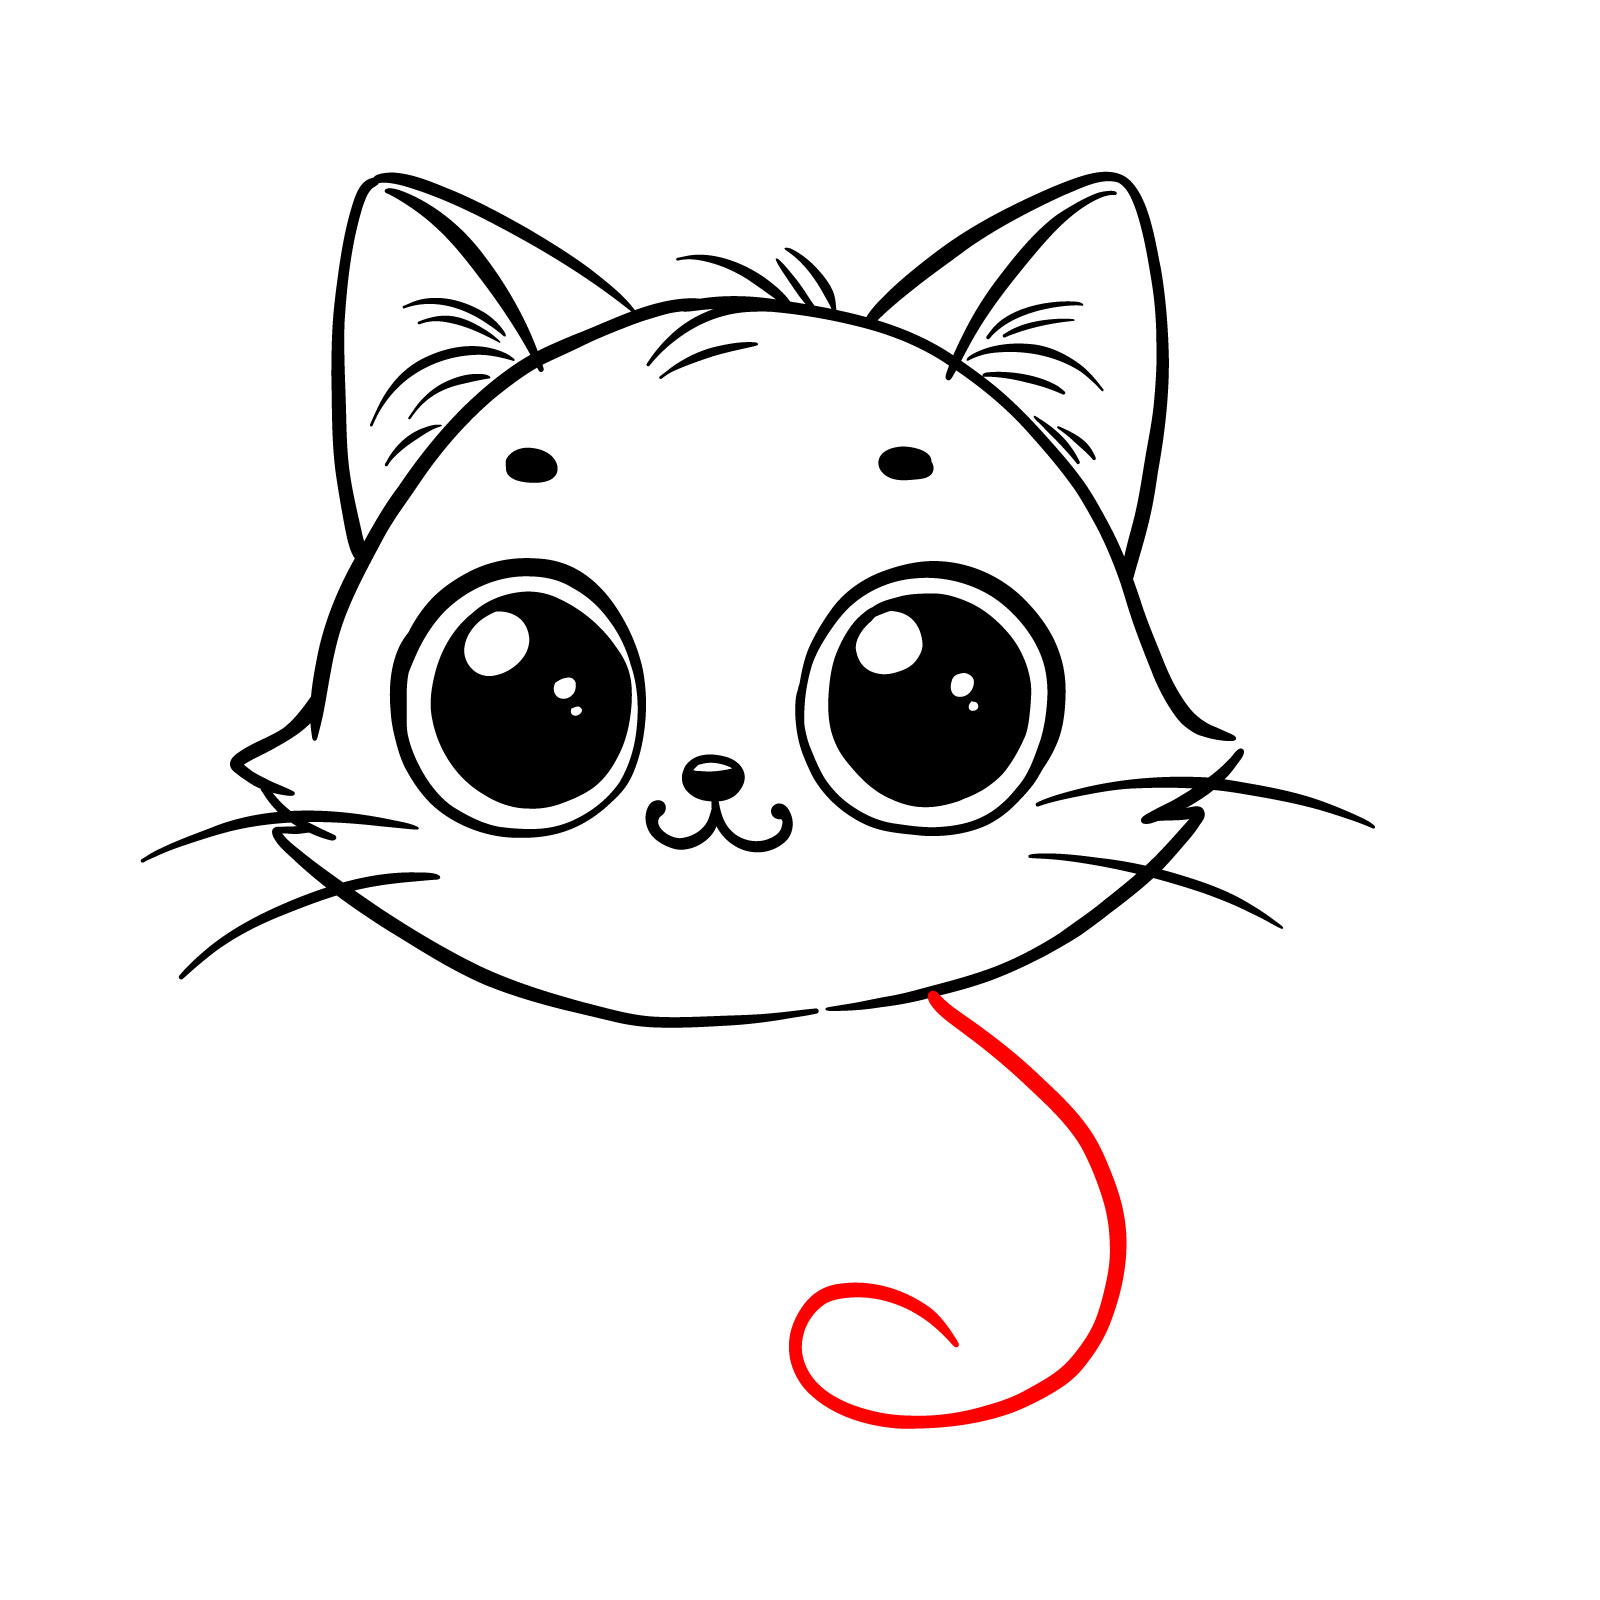
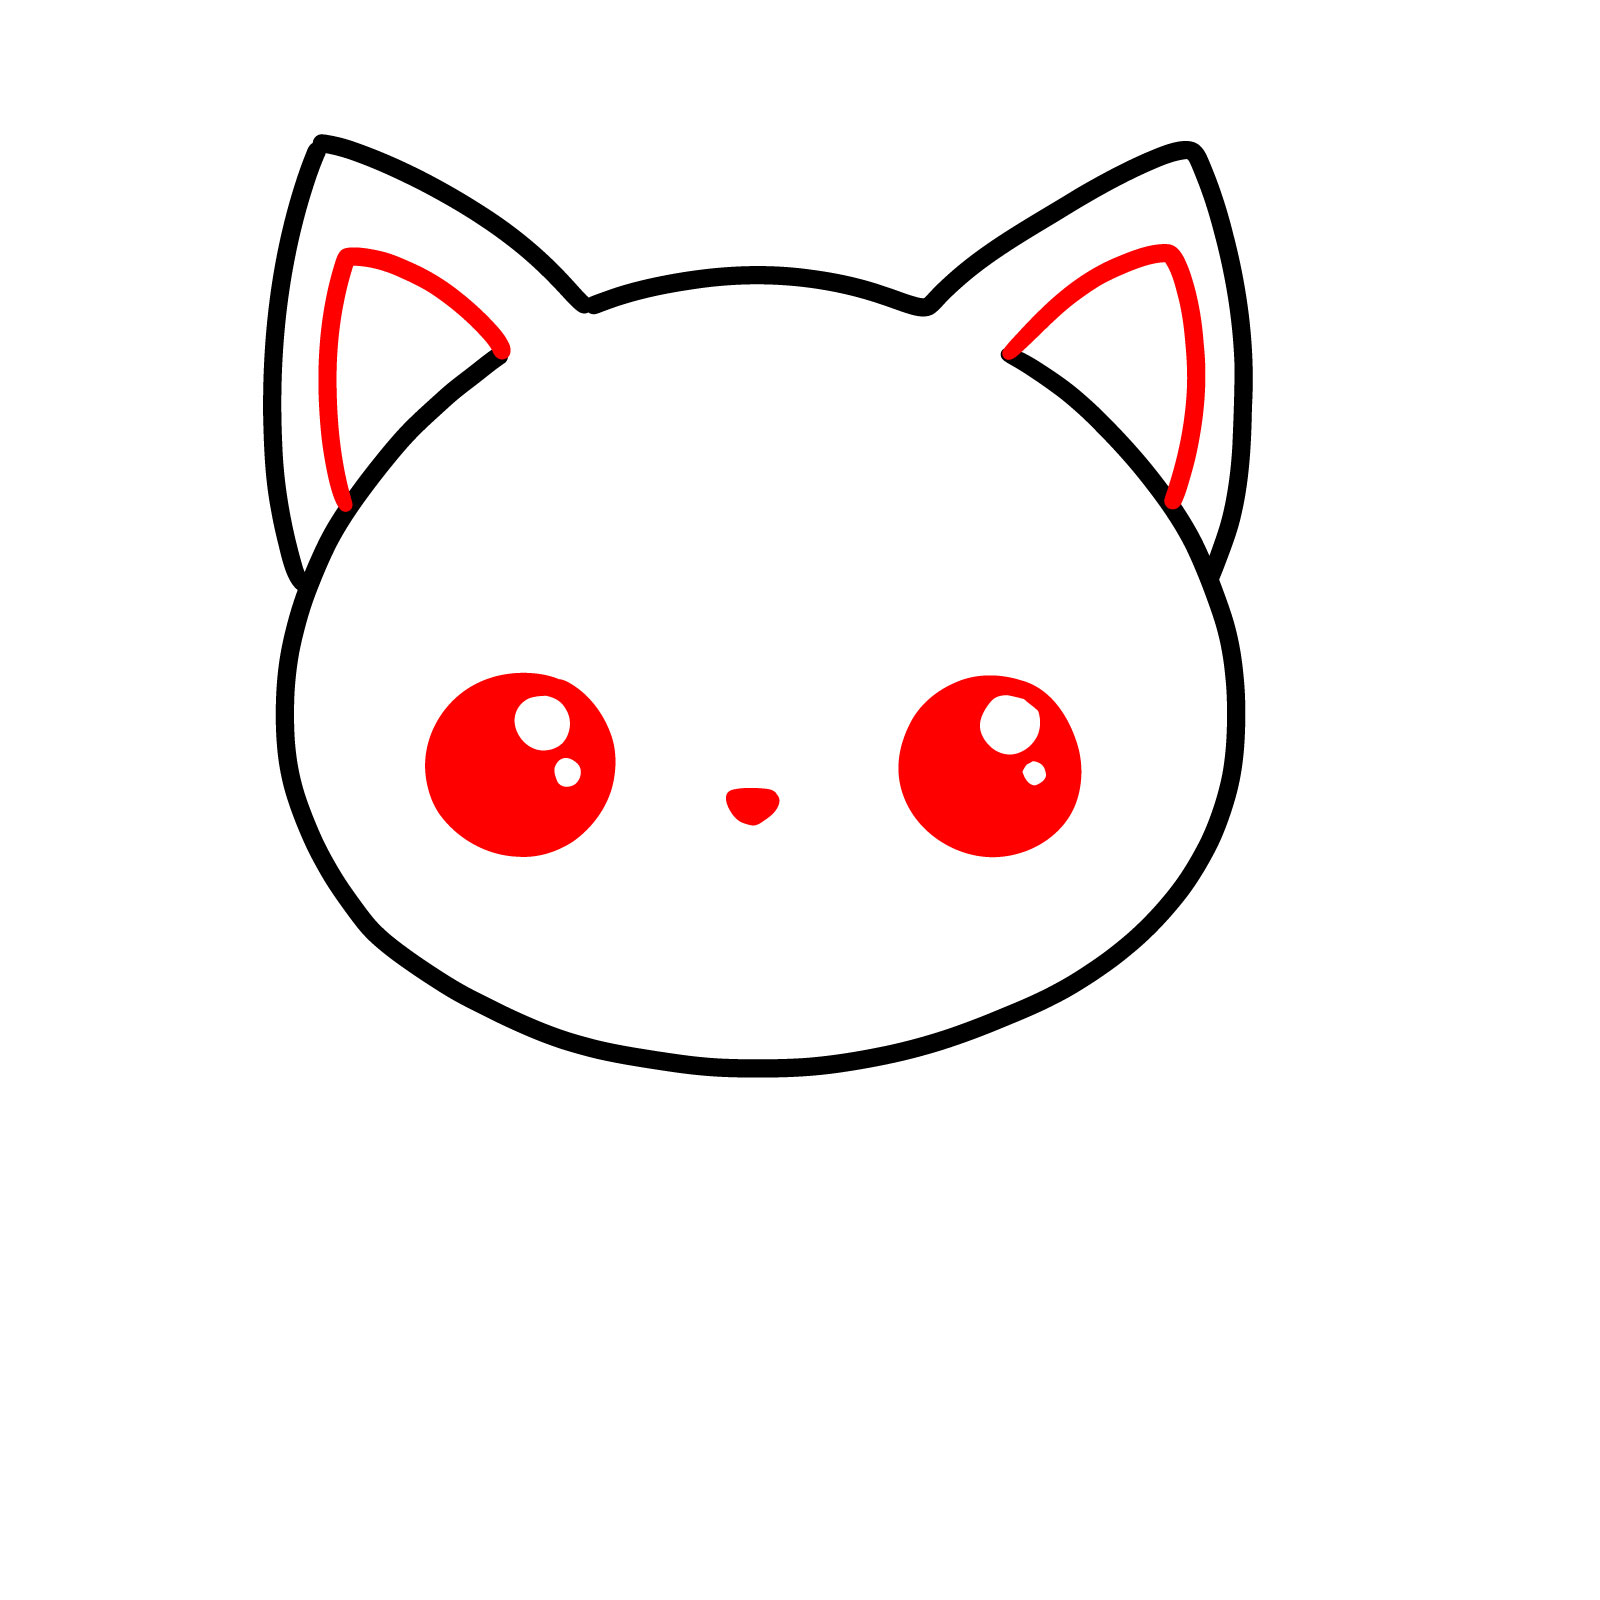
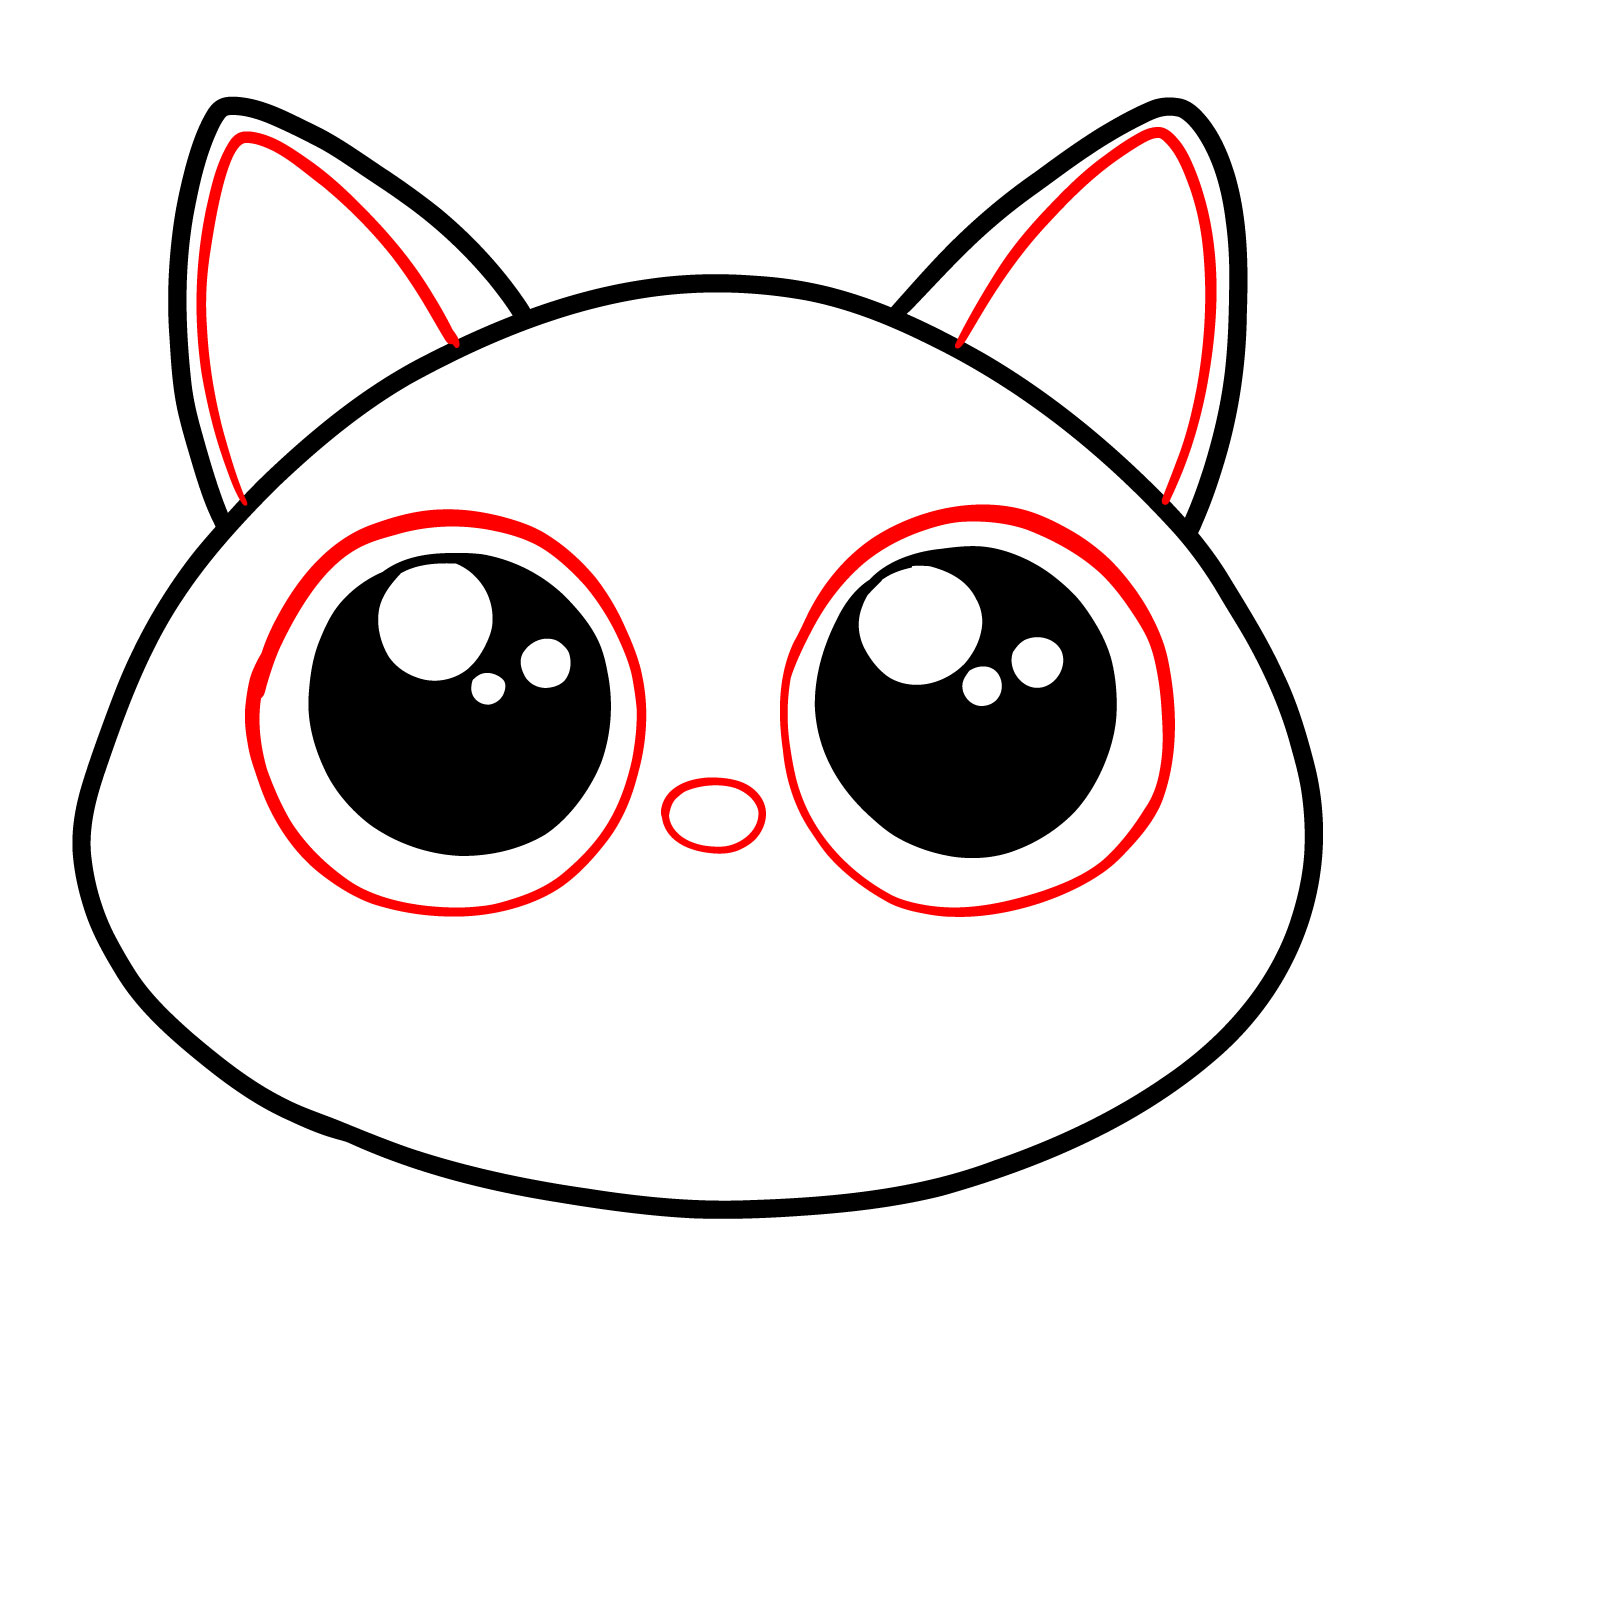
- Guide 6 : Cat ’ s Face – 12 Steps
- Guide 7 : Sitting Cat – Front View – 16 Measure
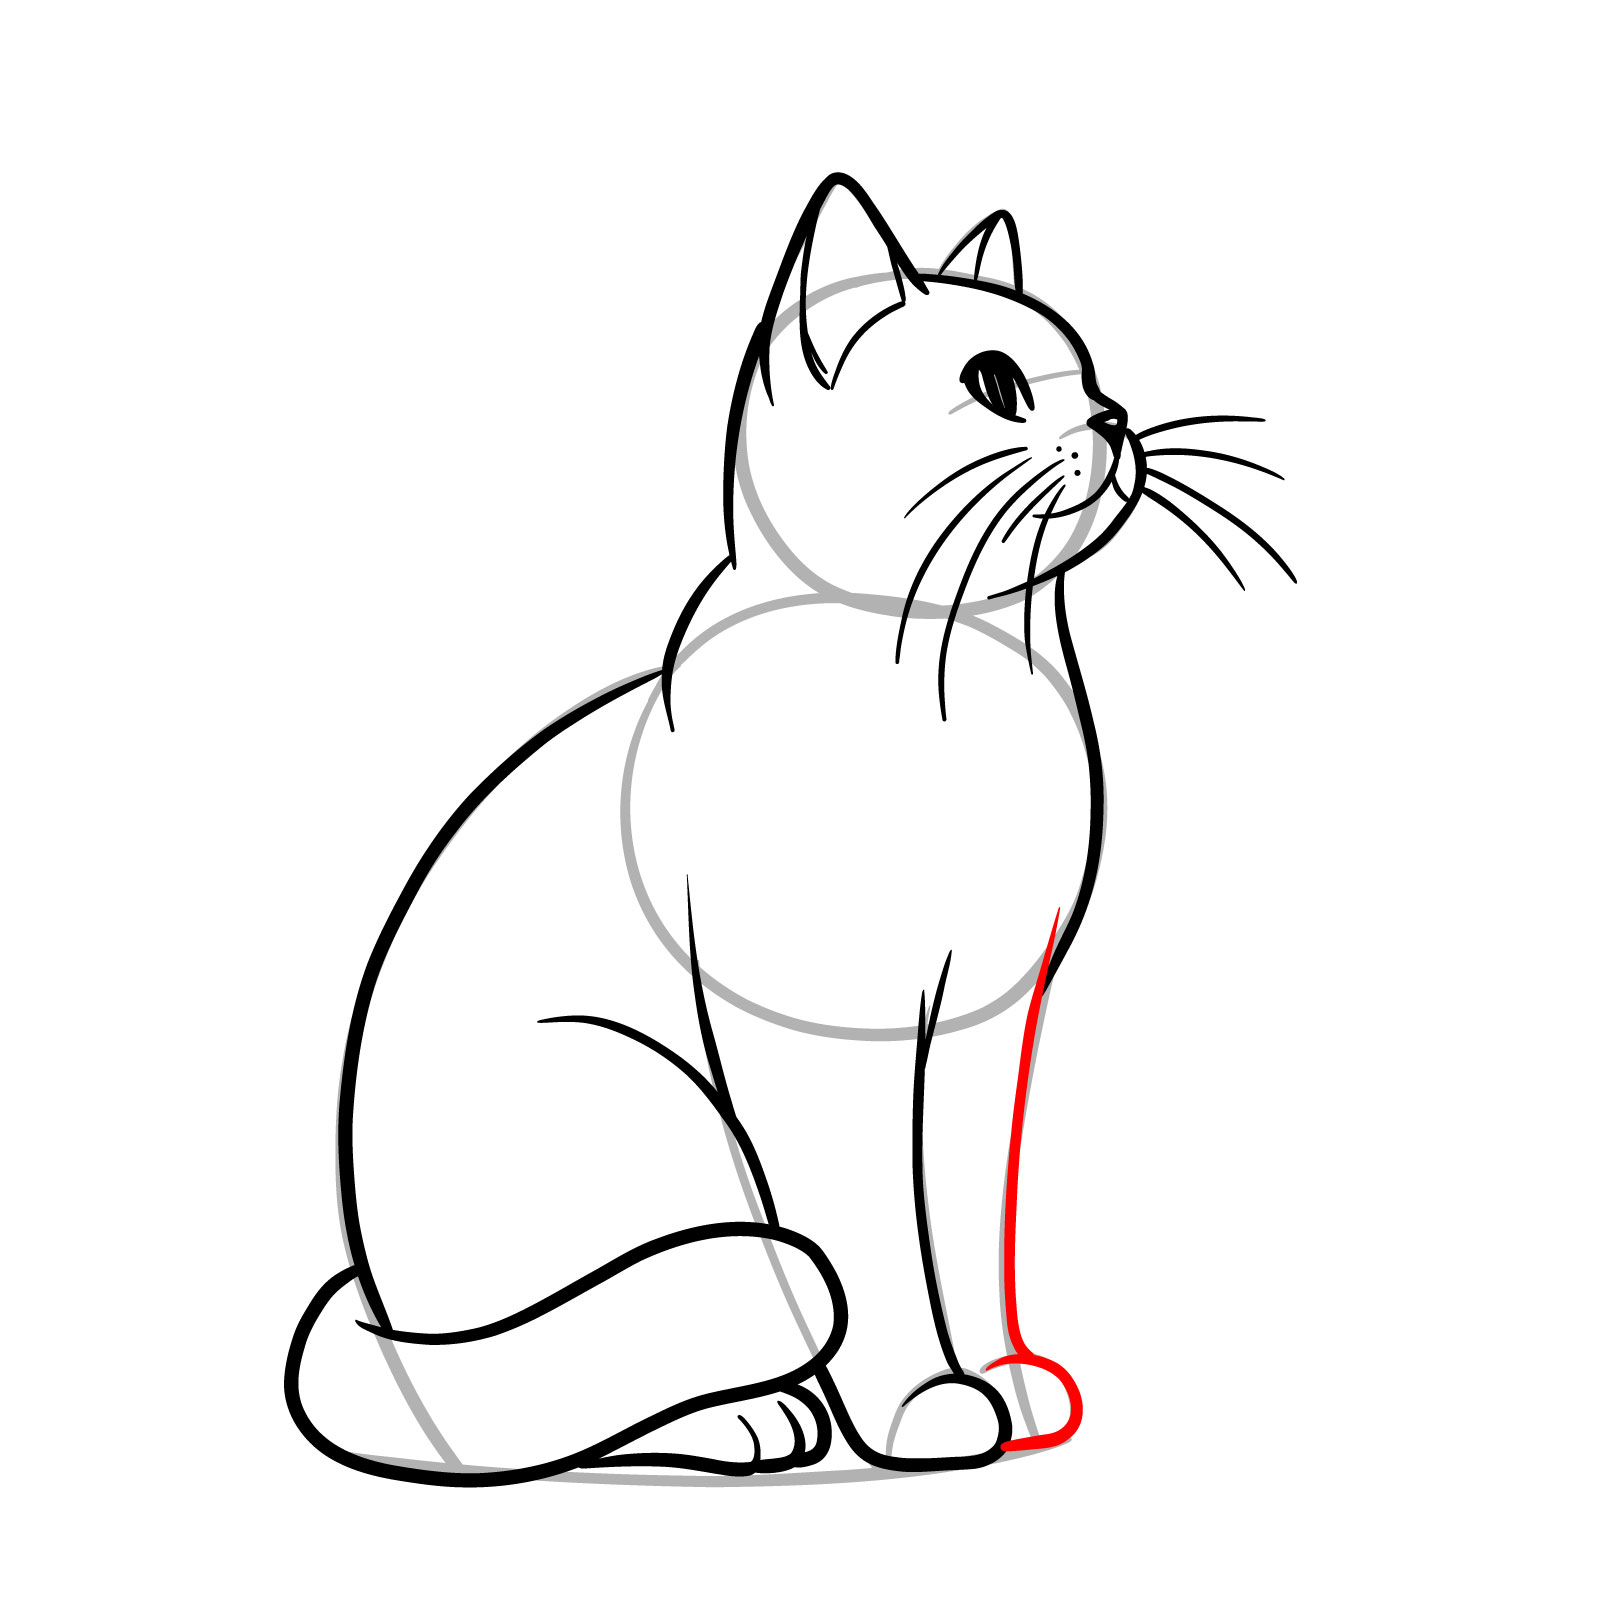
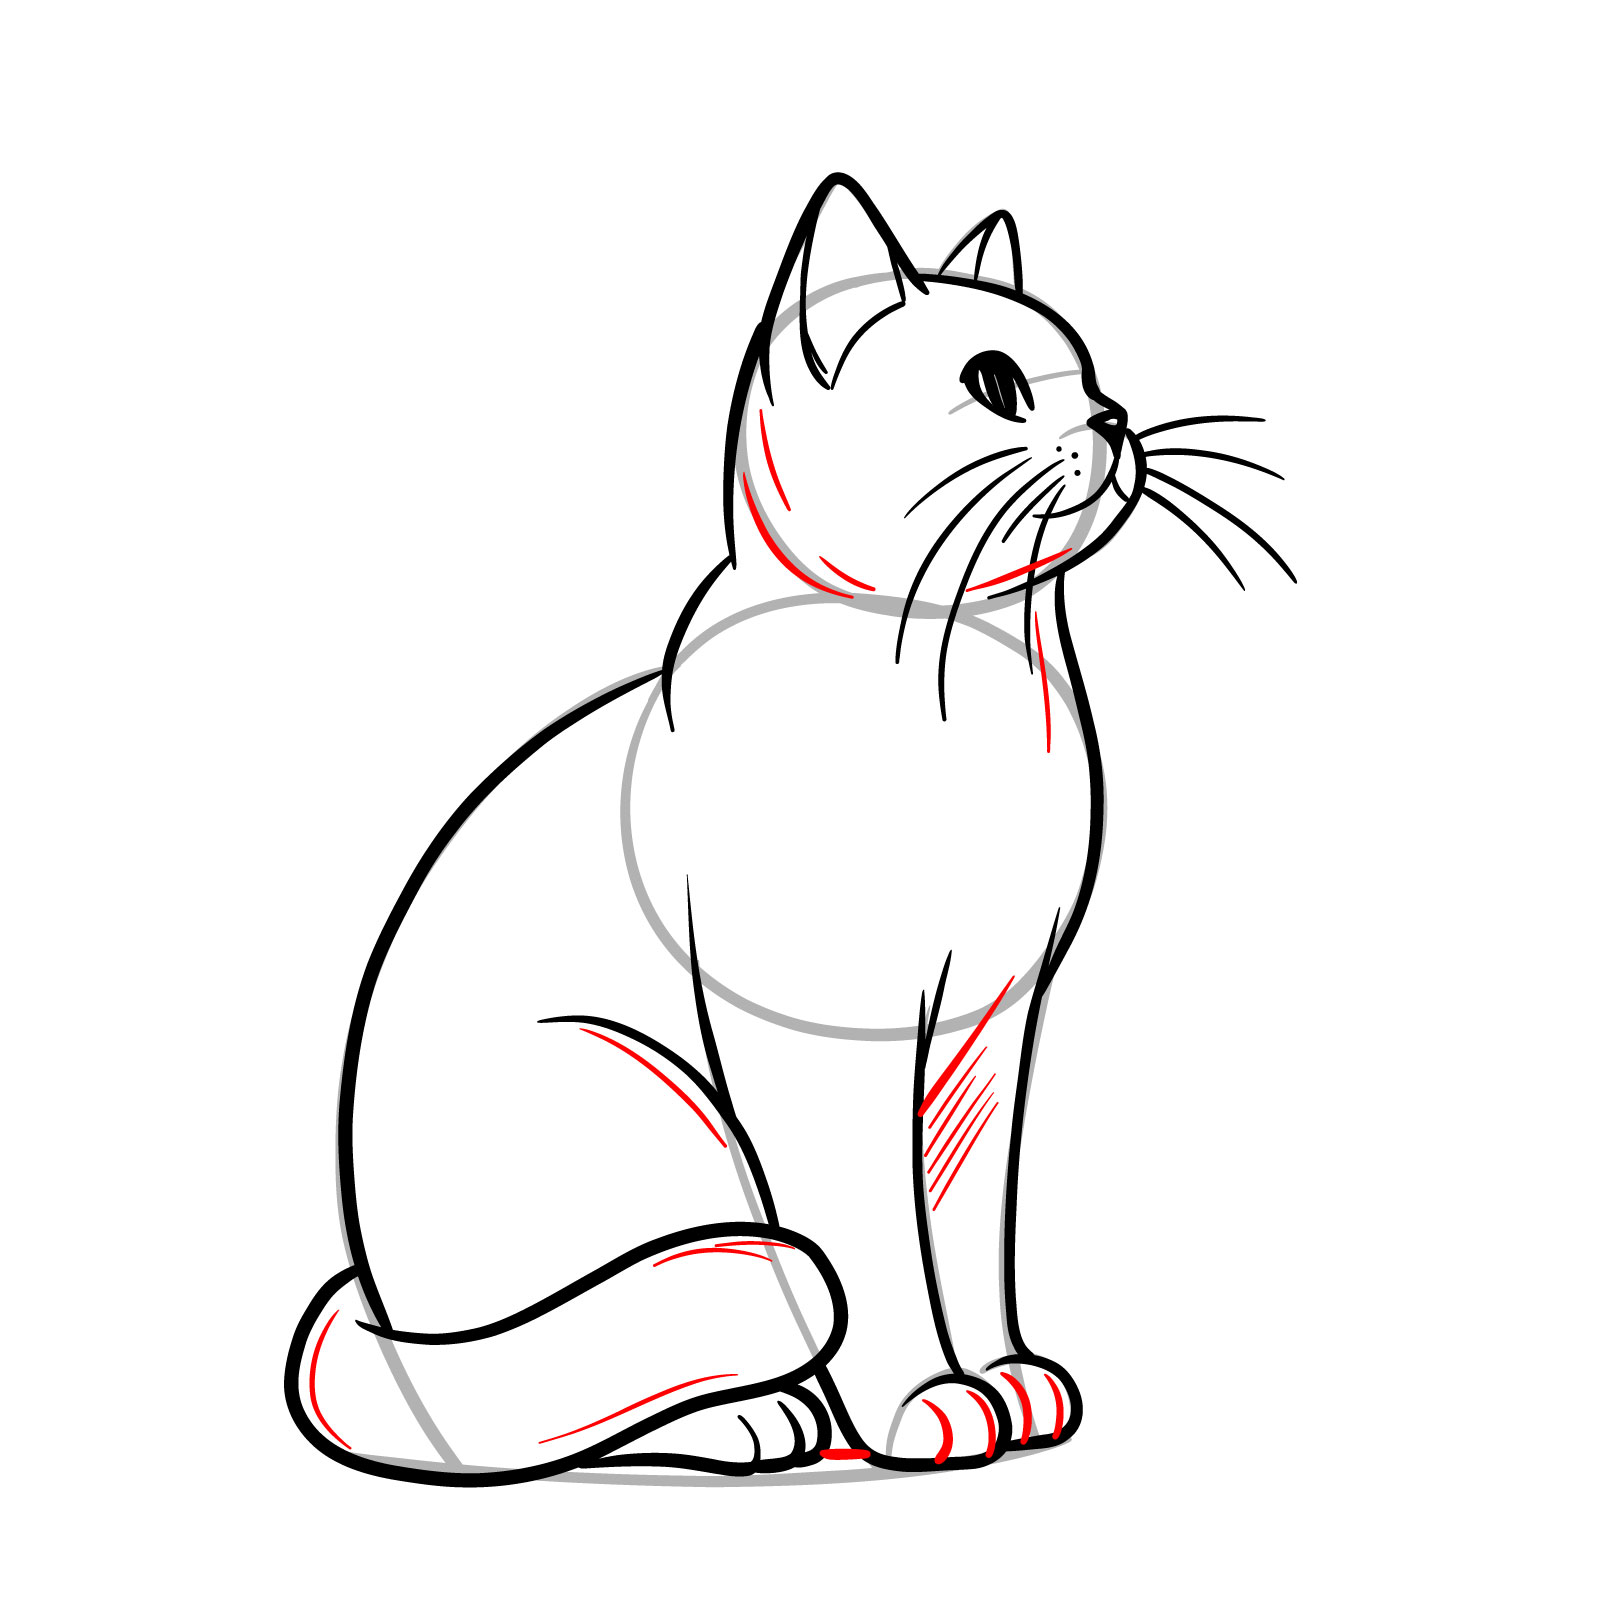
- Guide 8 : Sitting Cat – Left Side View – 13 Footstep
- Guide 9 : Sitting Cat – Right Side View – 13 Stairs
- Guide 10 : Walking Cat – 3/4 View – 15 Footstep
- Guide 11 : Lie down Cat – Side View – 14 Steps
- Guide 12 : Guy in a Jump – 13 Steps
- Guide 13 : Work Cat – 13 Step
- Guide 14 : Cat Stretching – 11 Stairs
- Guide 15 : Cat Lying on Its Back – 10 Steps
- Bonus Guides
- Guide 16 : Chubby Cheeks Cat
- Guide 17 : Kawaii Cat
- Guide 18 : Pudgy Paws Cat
- Guide 19 : Anime Cat
- Guide 16 : Chubby Cheeks Cat
- Guide 17 : Kawaii Cat
- Guide 18 : Pudgy Paws Cat
- Guide 19 : Anime Cat
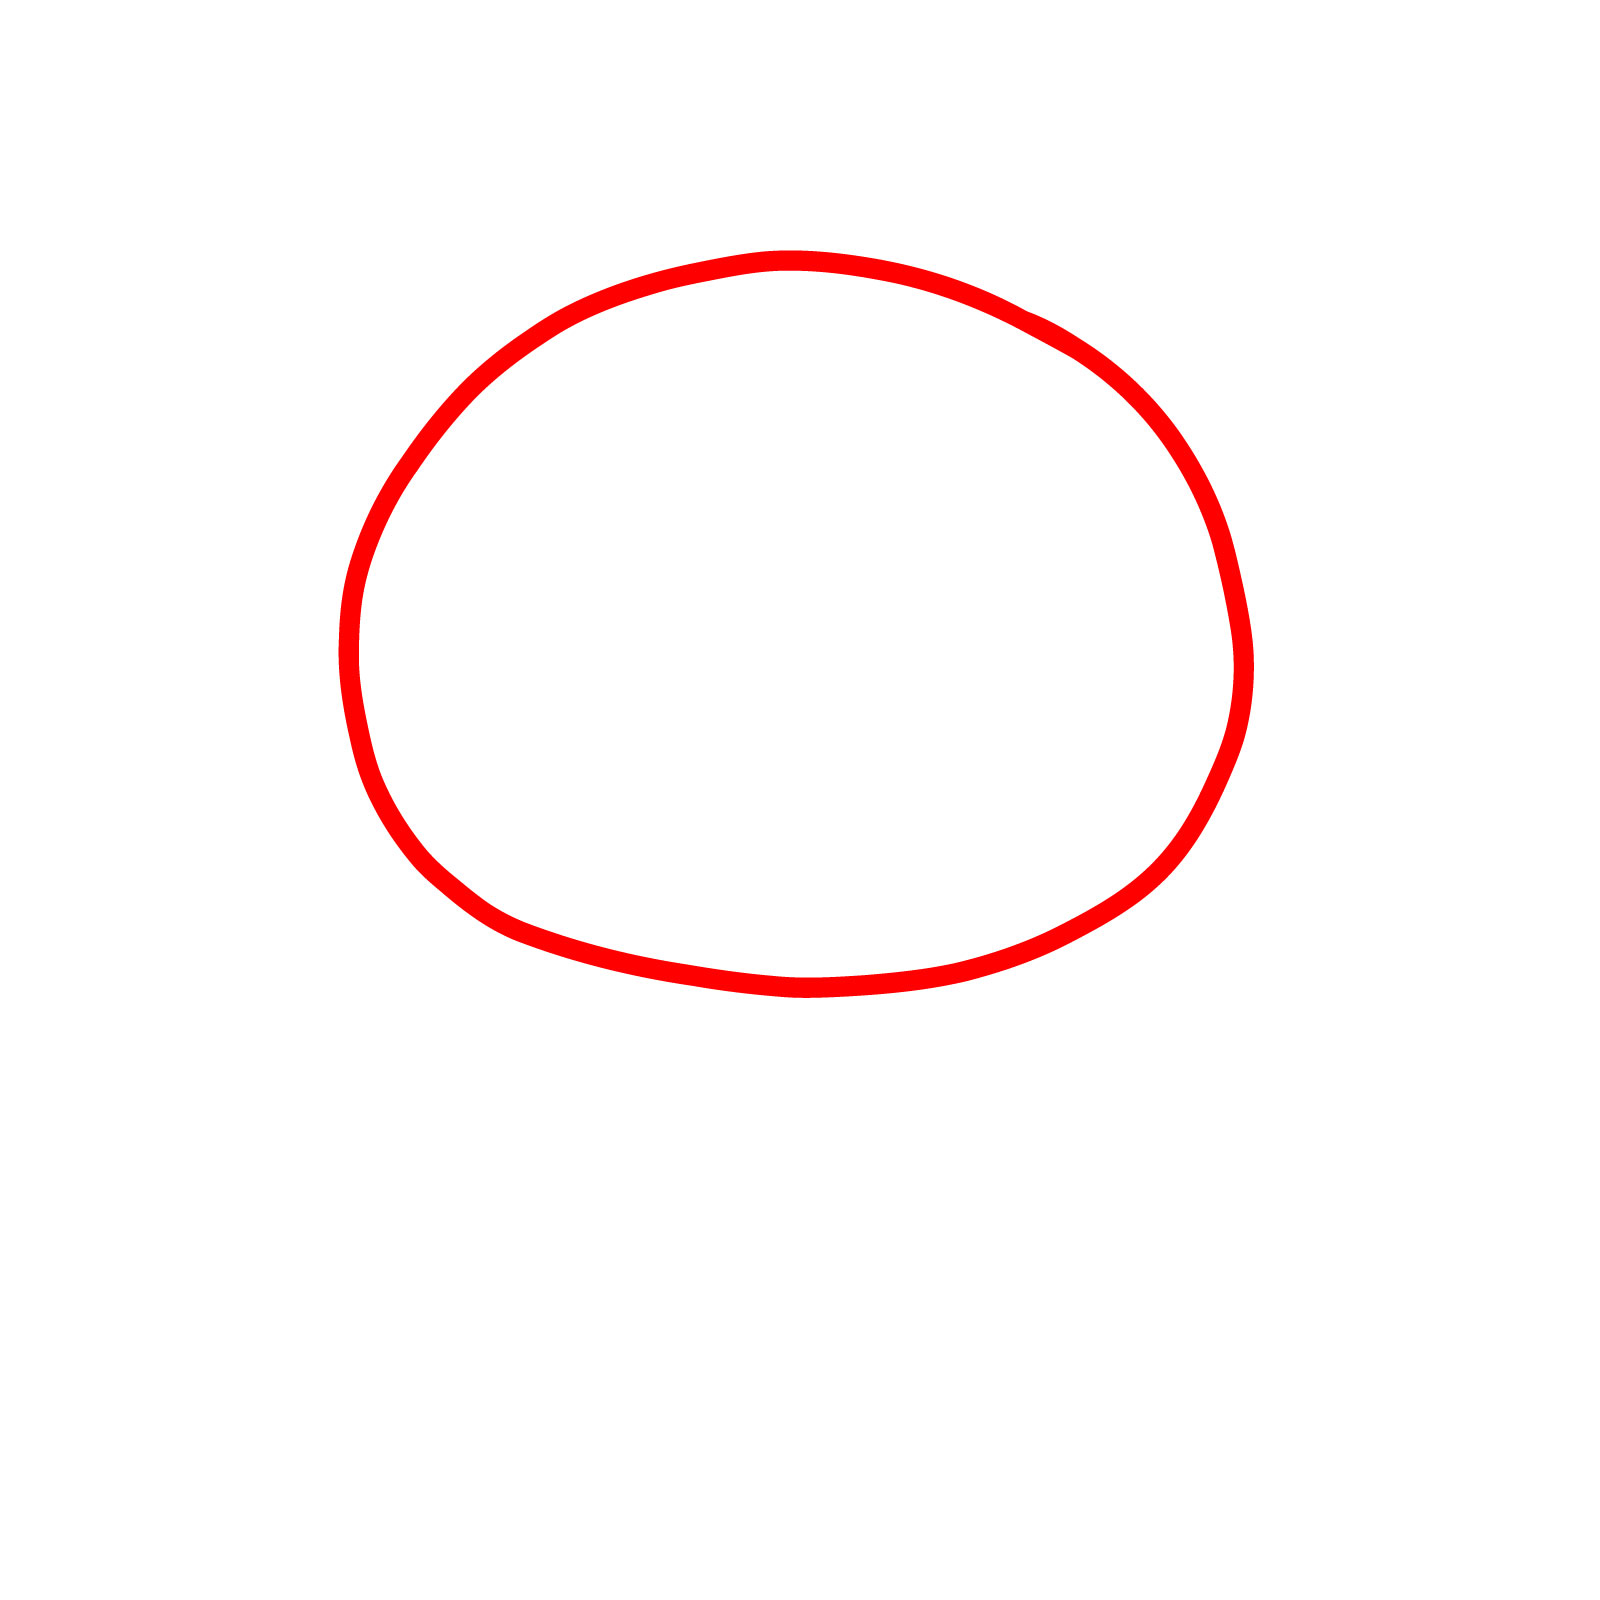
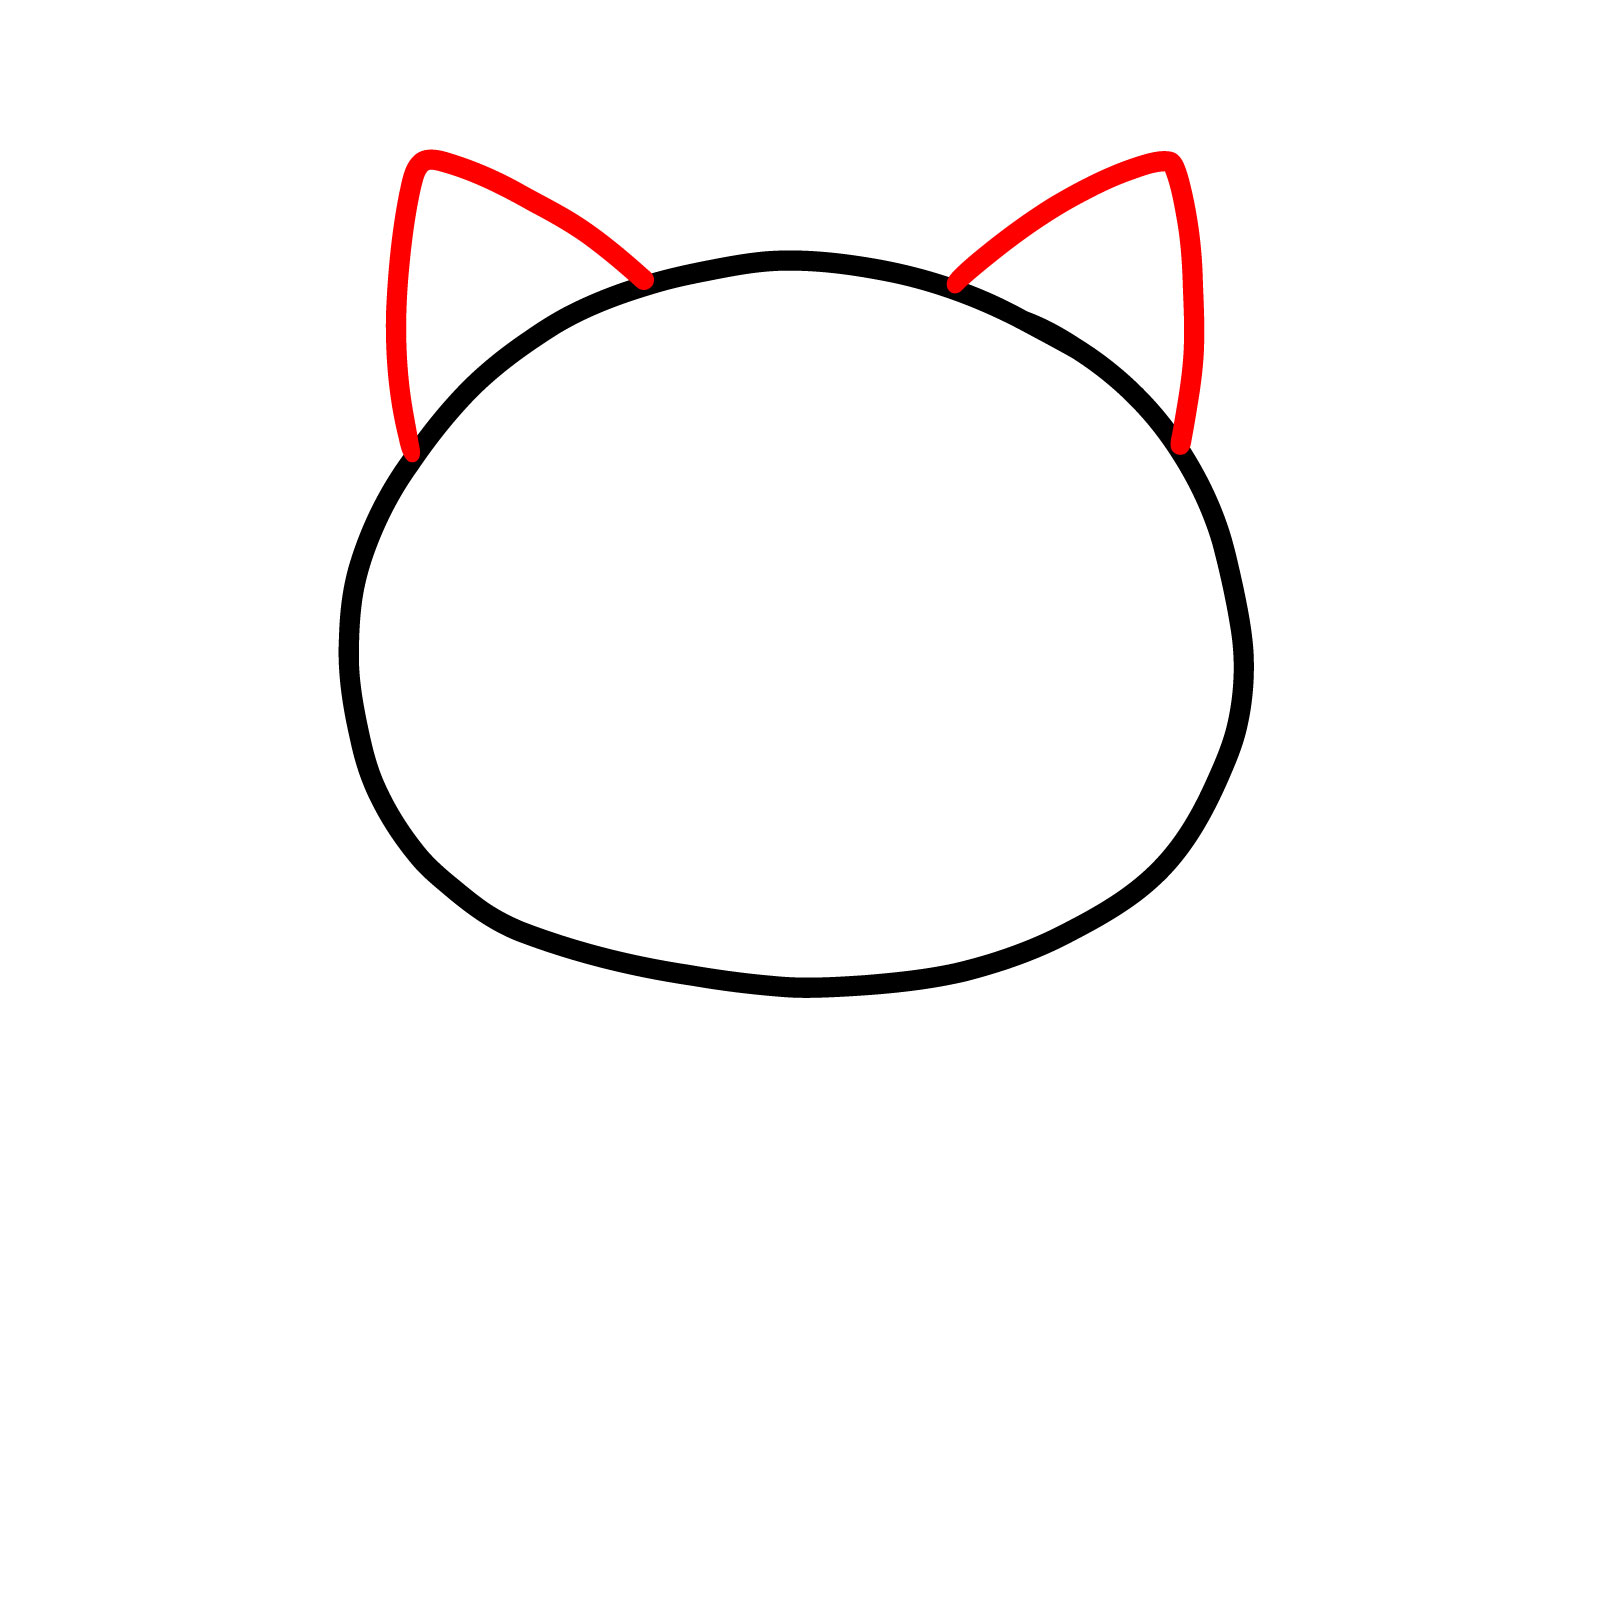
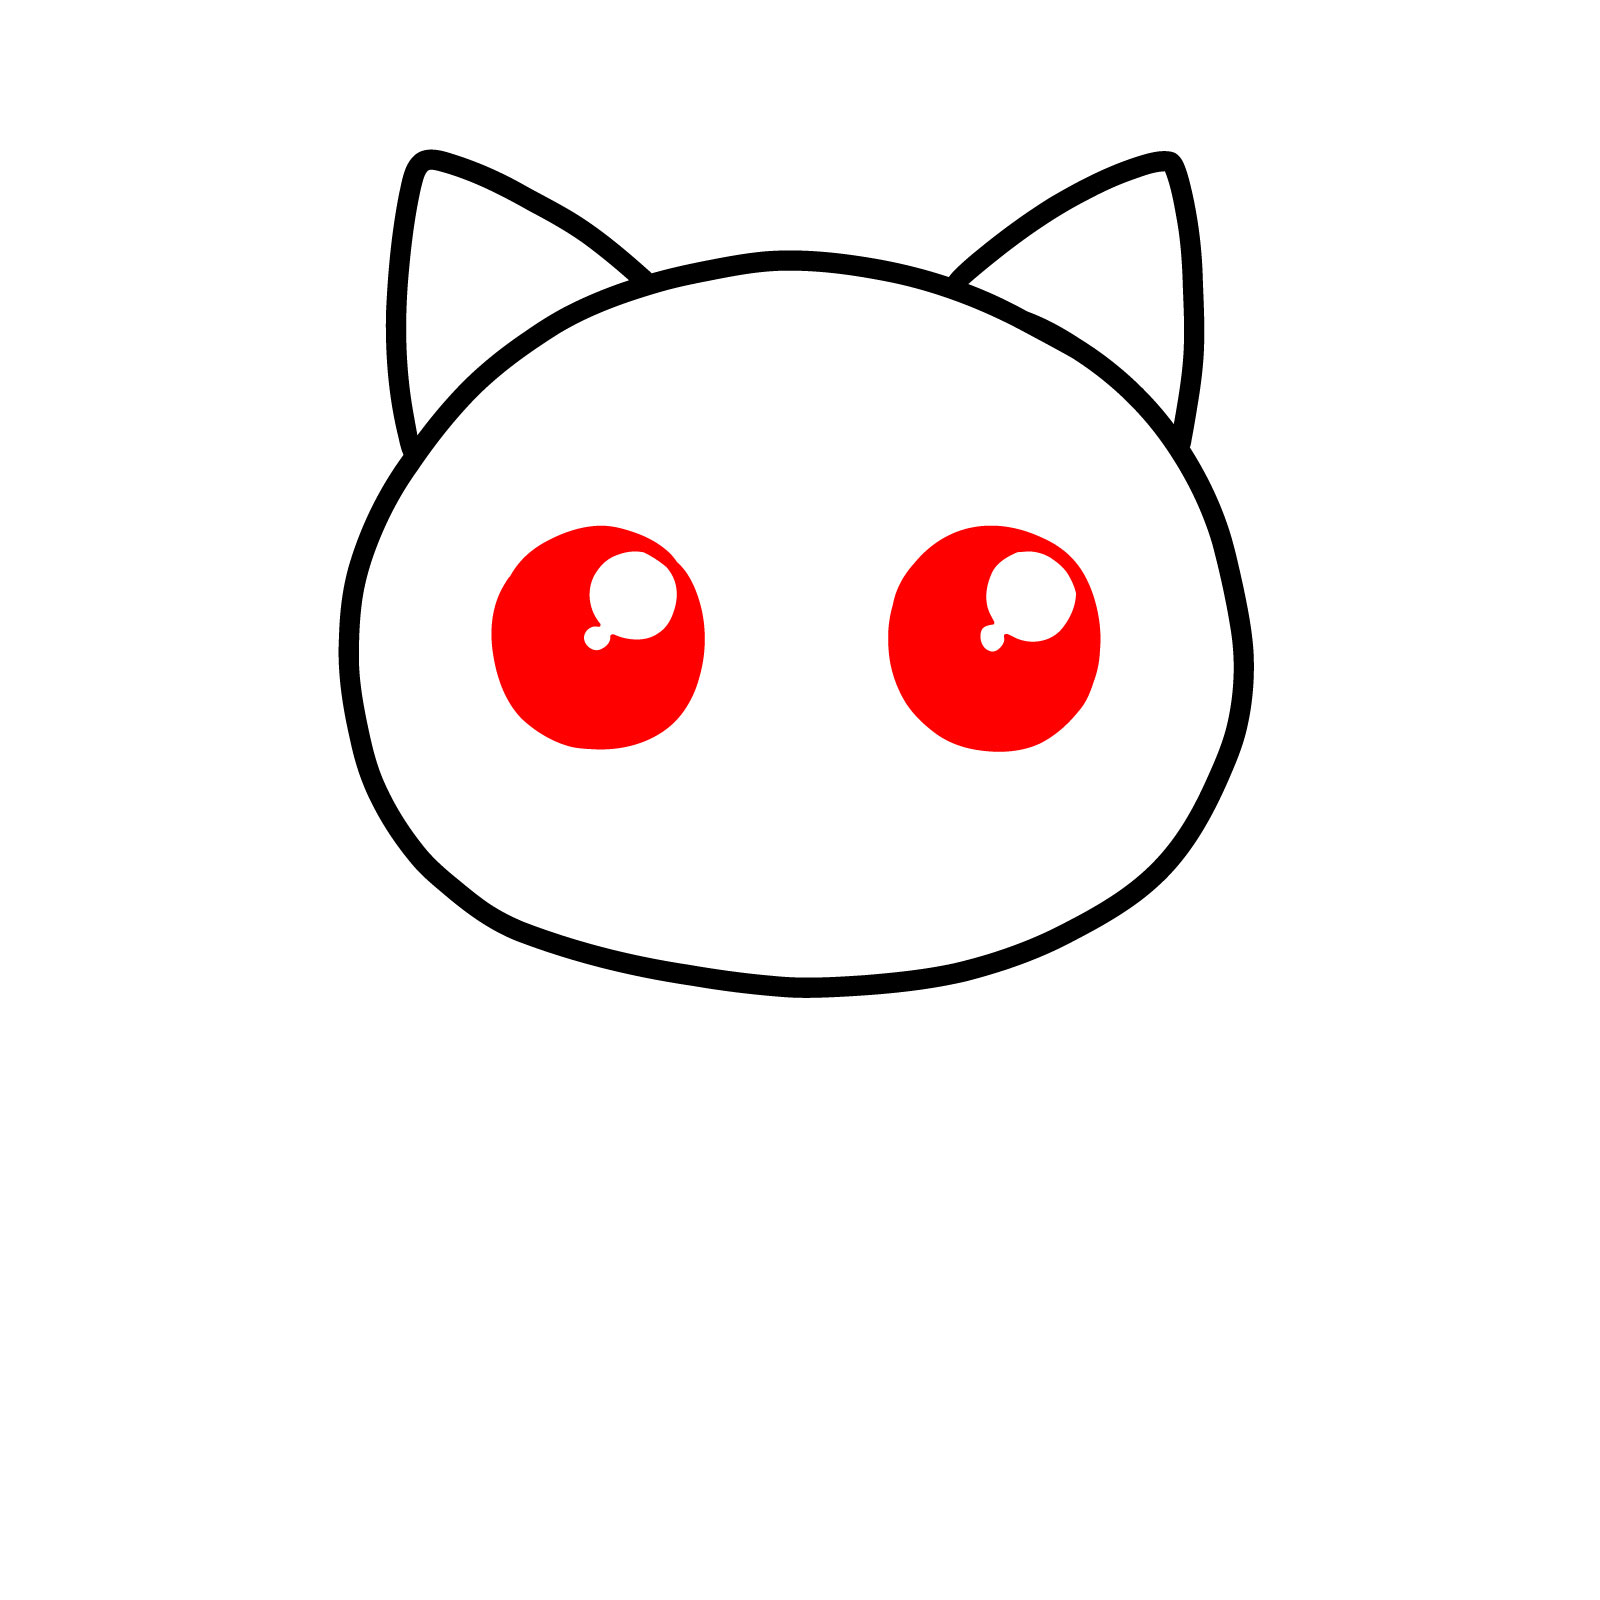
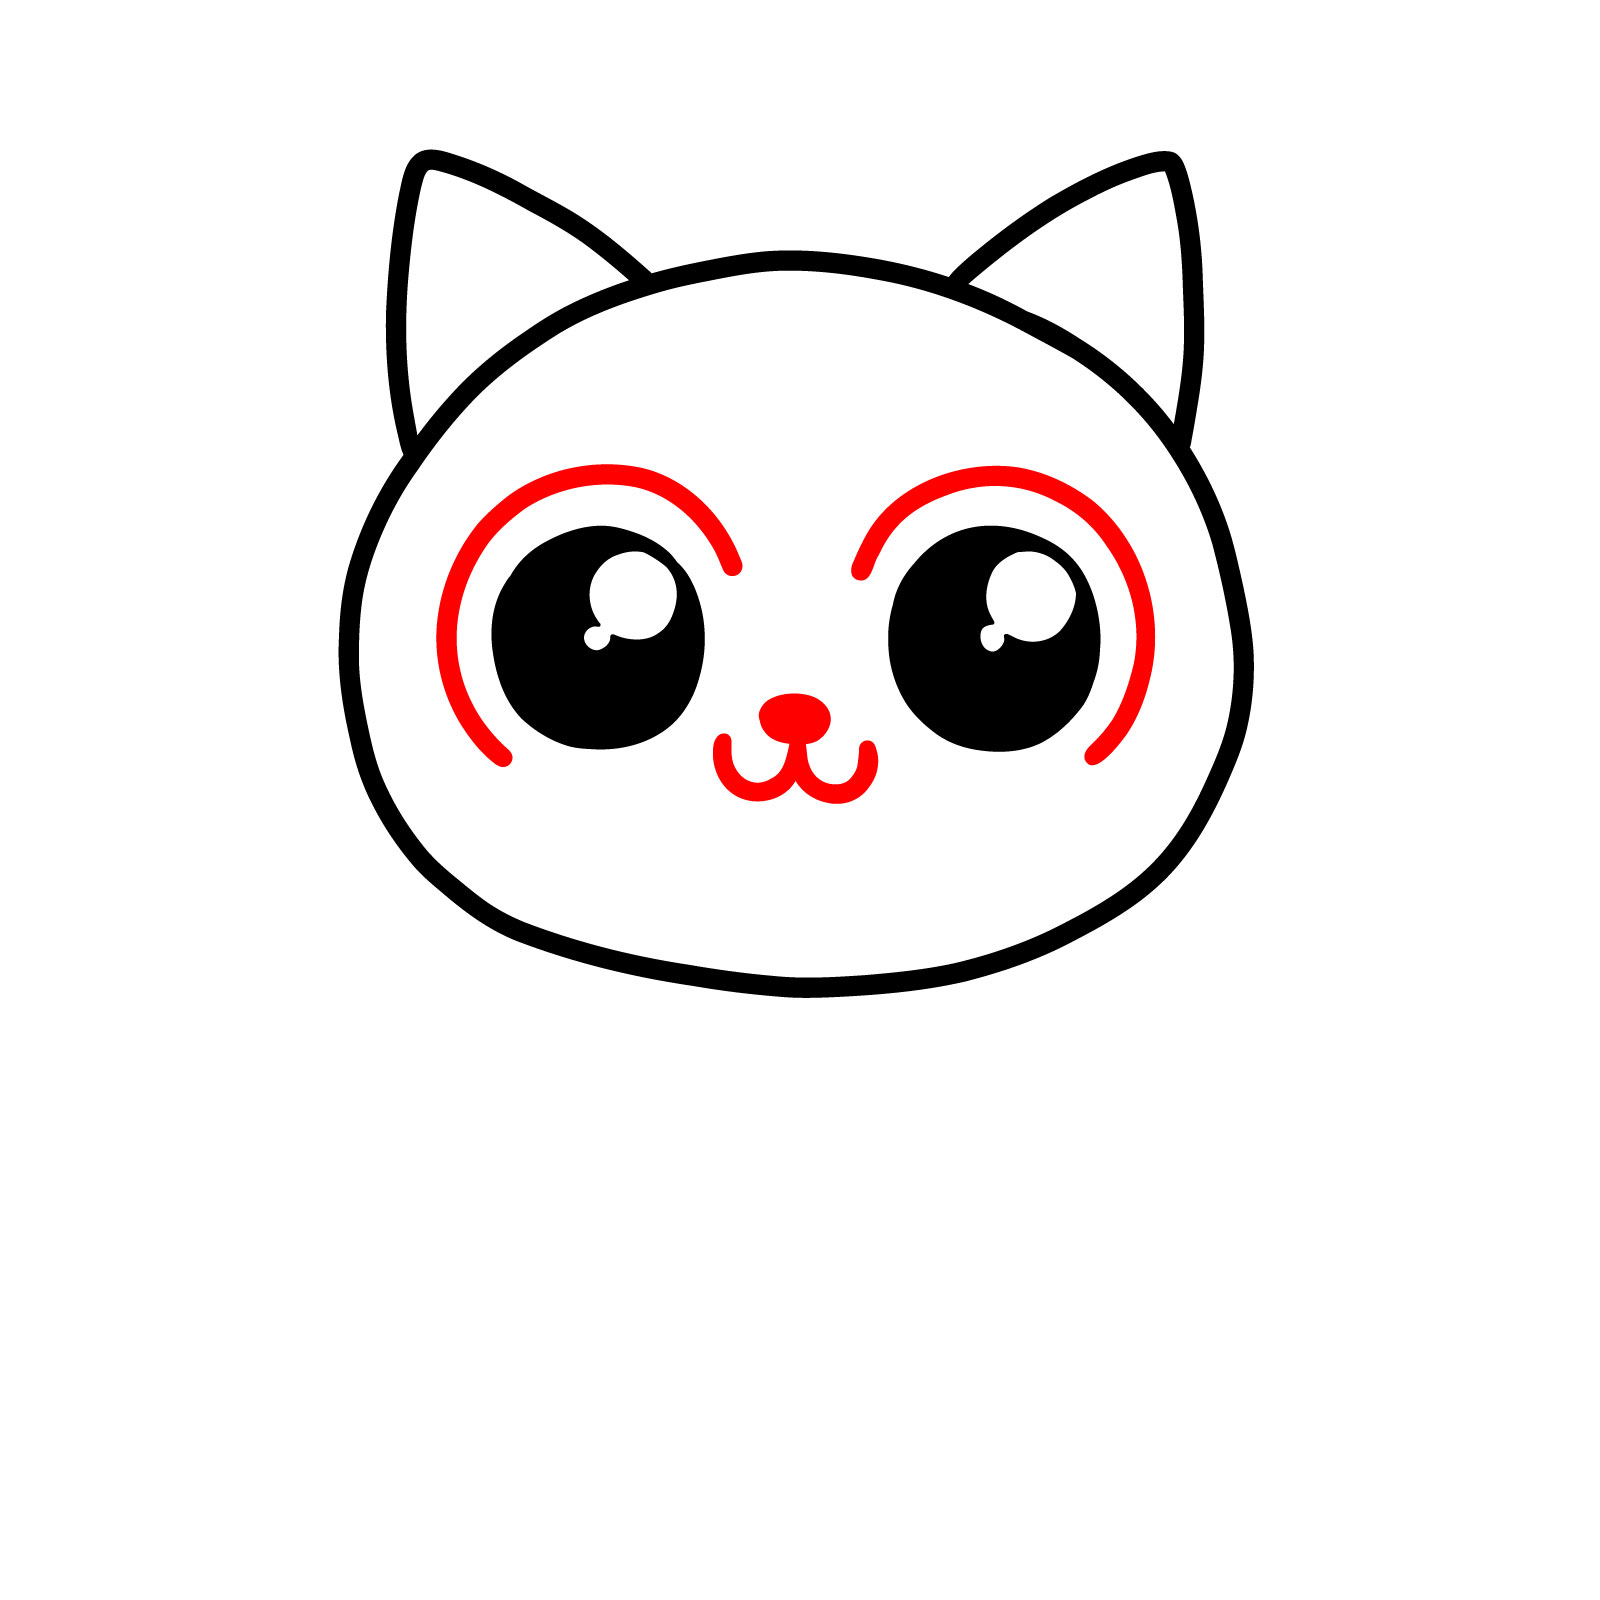
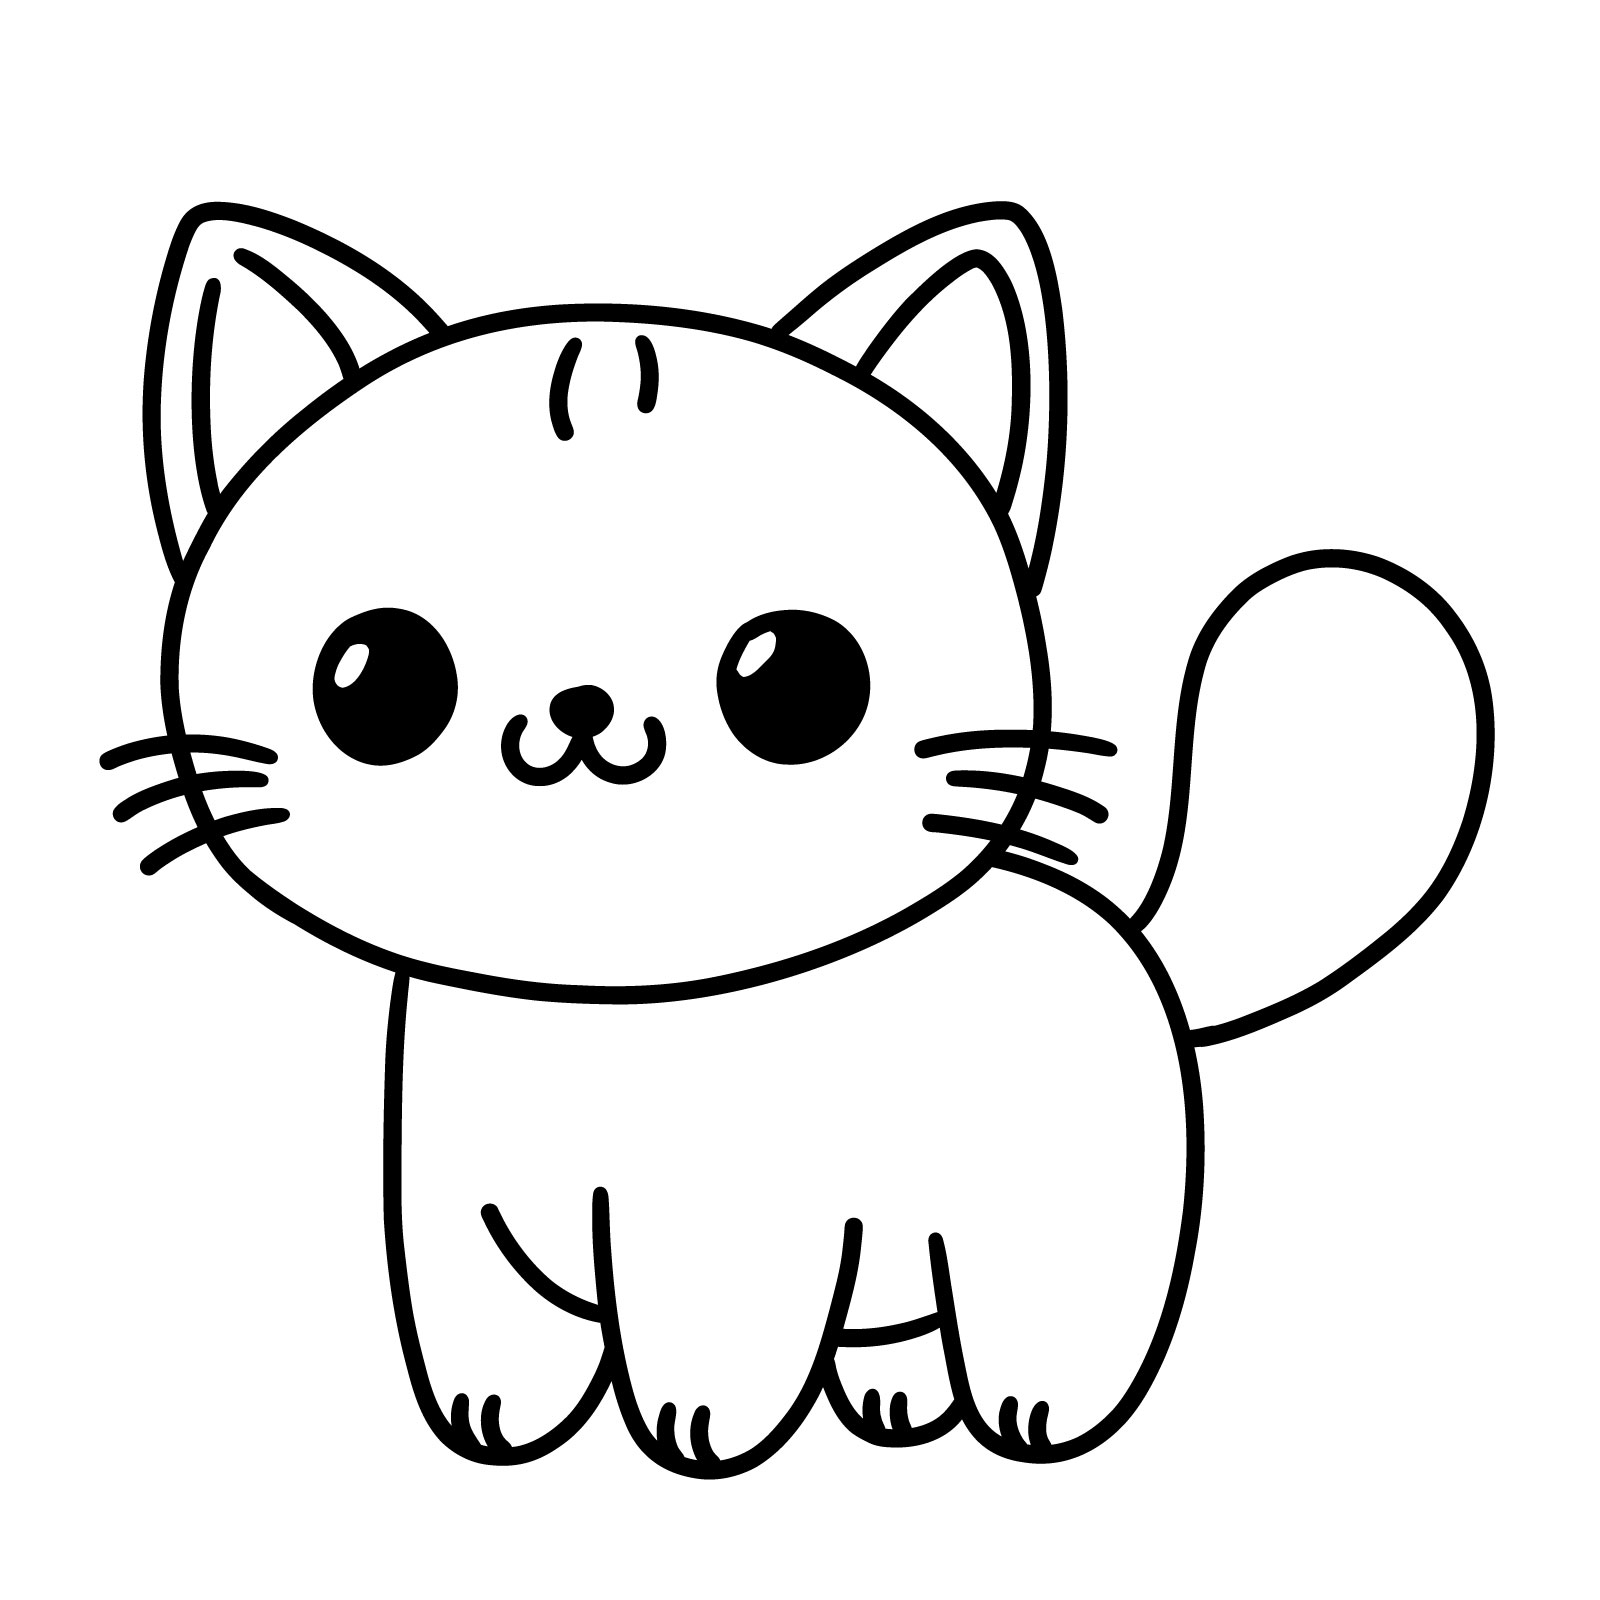
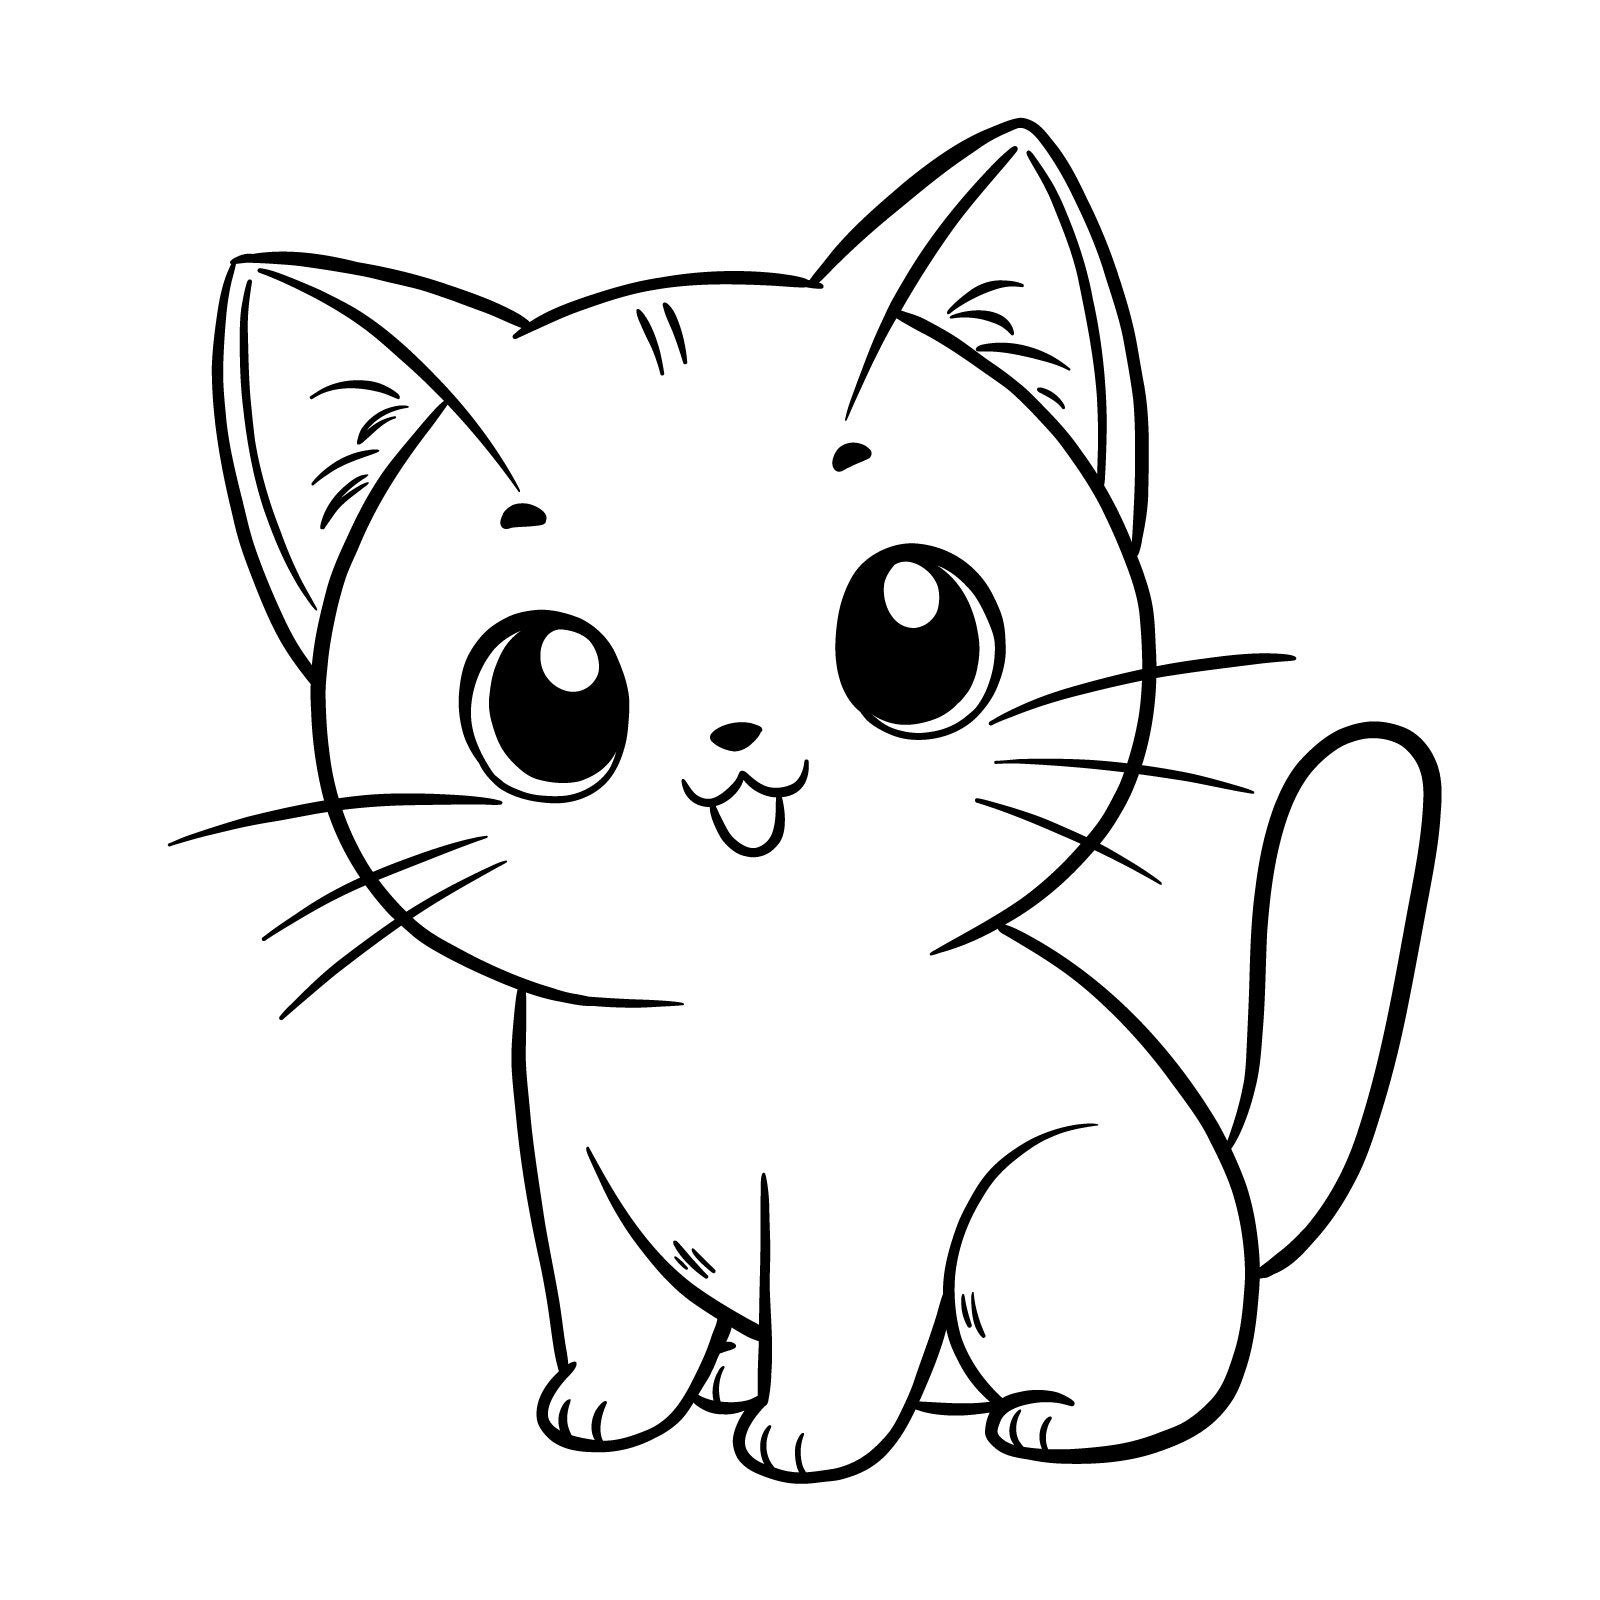
Guide 1 : Drawing a Simple Cat in 5 Easy Steps

Let ’ s start our attract adventure with an adorable and straightforward cartoon guy . This cute short feline fun a cycle side , large expressive eyes , and a tiny , playful grin . Its torso exist picture with simple shapes , make it the perfect initiate level for beginners . With only five easy steps , you ’ ll discover how to bring this charming cartoon cat to living . It ’ s a great manner to get familiar with basics without getting too technical . Catch your pencil , and let ’ s create some cute with ease !
Pace 01 – Start with mere shapes to form the basic outline of the cat ’ s head and torso , ensuring the correct proportion and placement for a balanced structure

Step 02 – Draw two large circle for the center on the head oval , fulfill them in while leaving little white dot to constitute the light reflecting in the guy ’ s heart

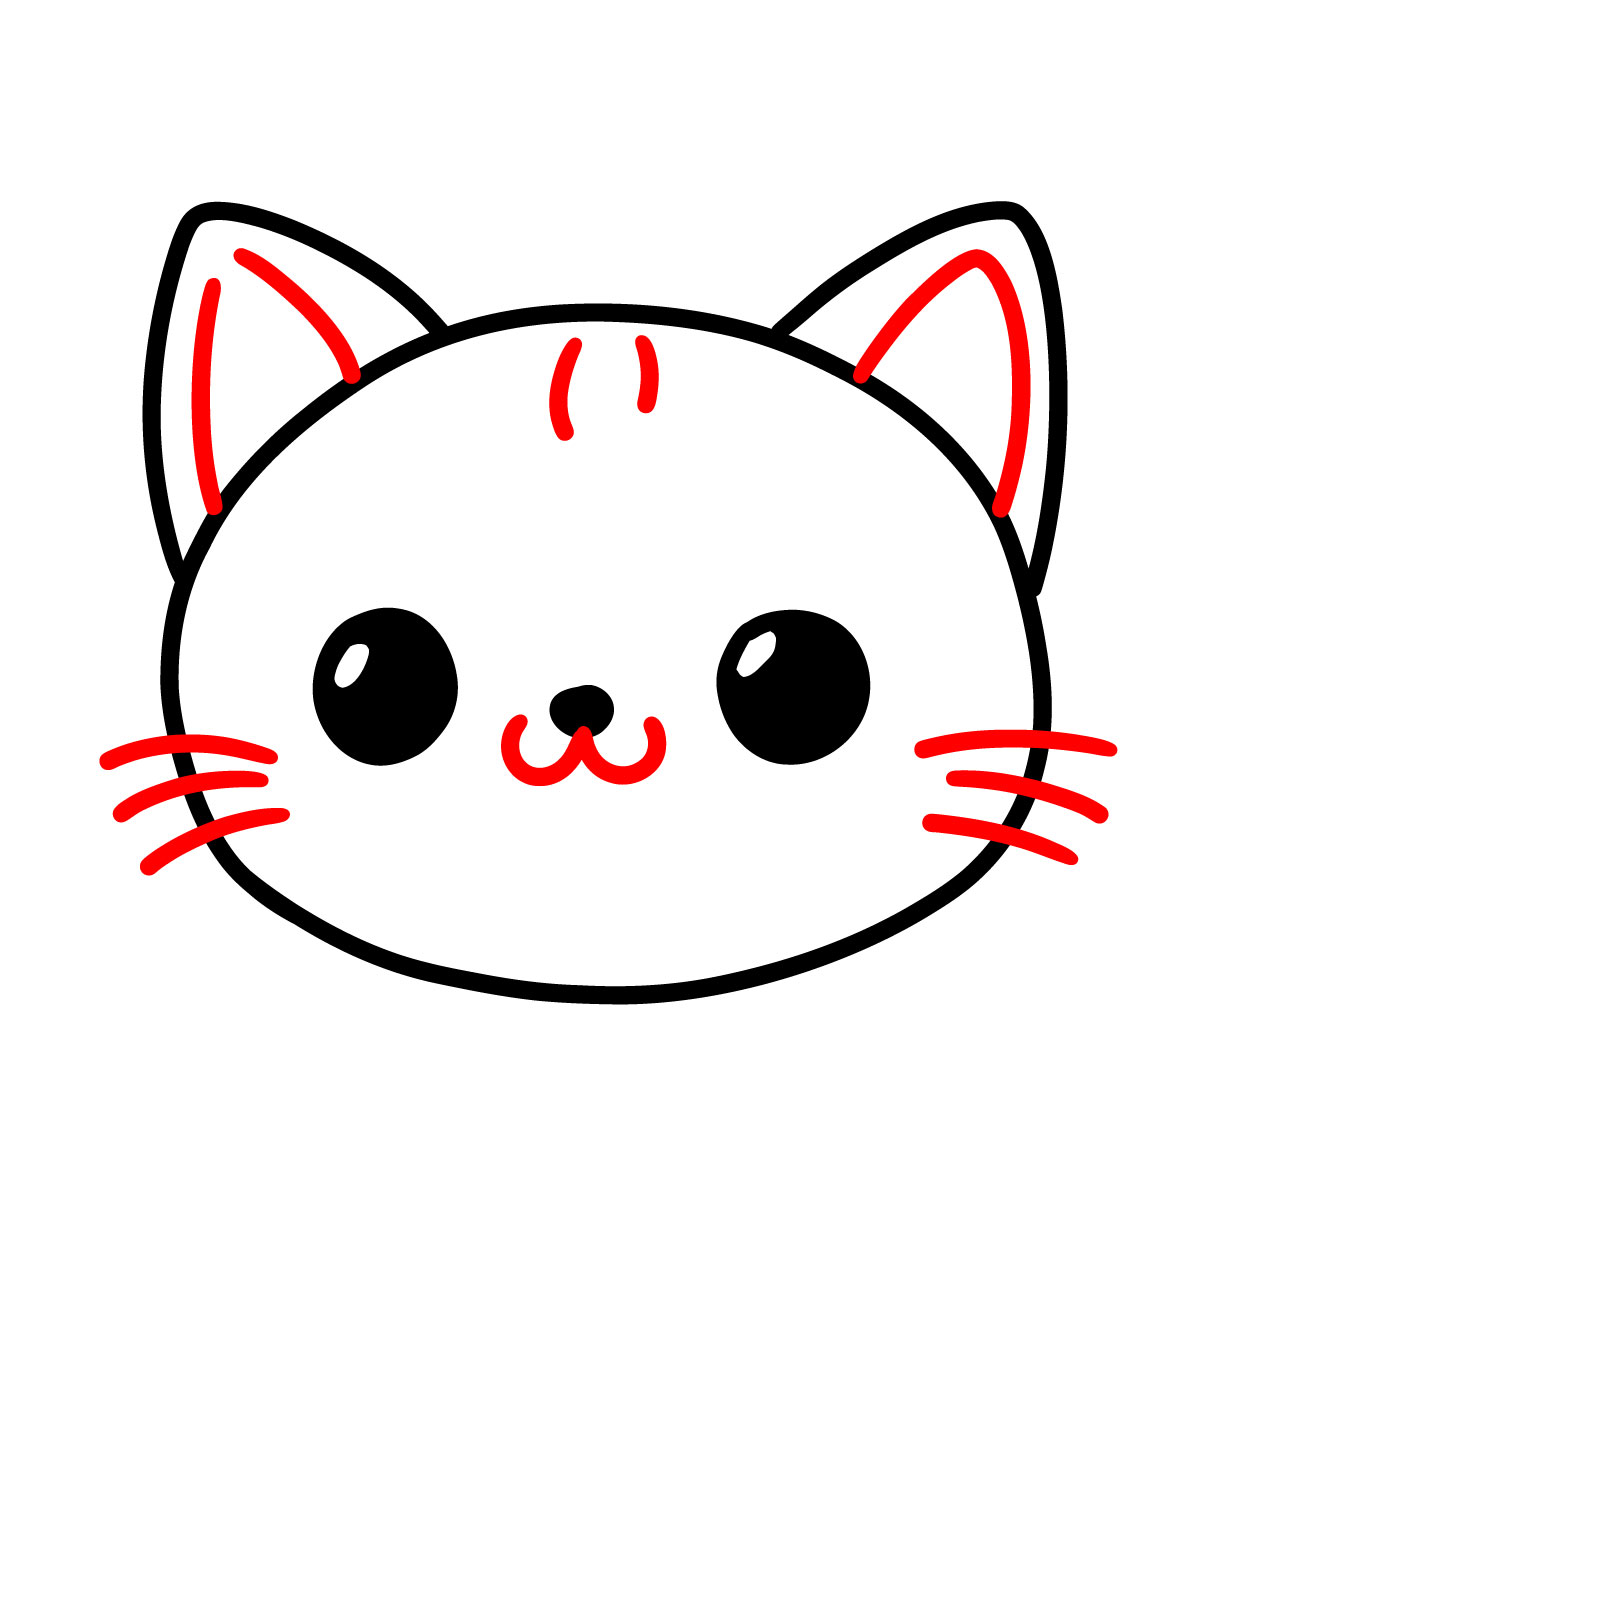
Pace 03 – Define the guy ’ s face by add triangular shapes for ear at the crest of the head , a little nose , curved lines for the mouth , and several straight business for beard , detailing your cat ’ s look

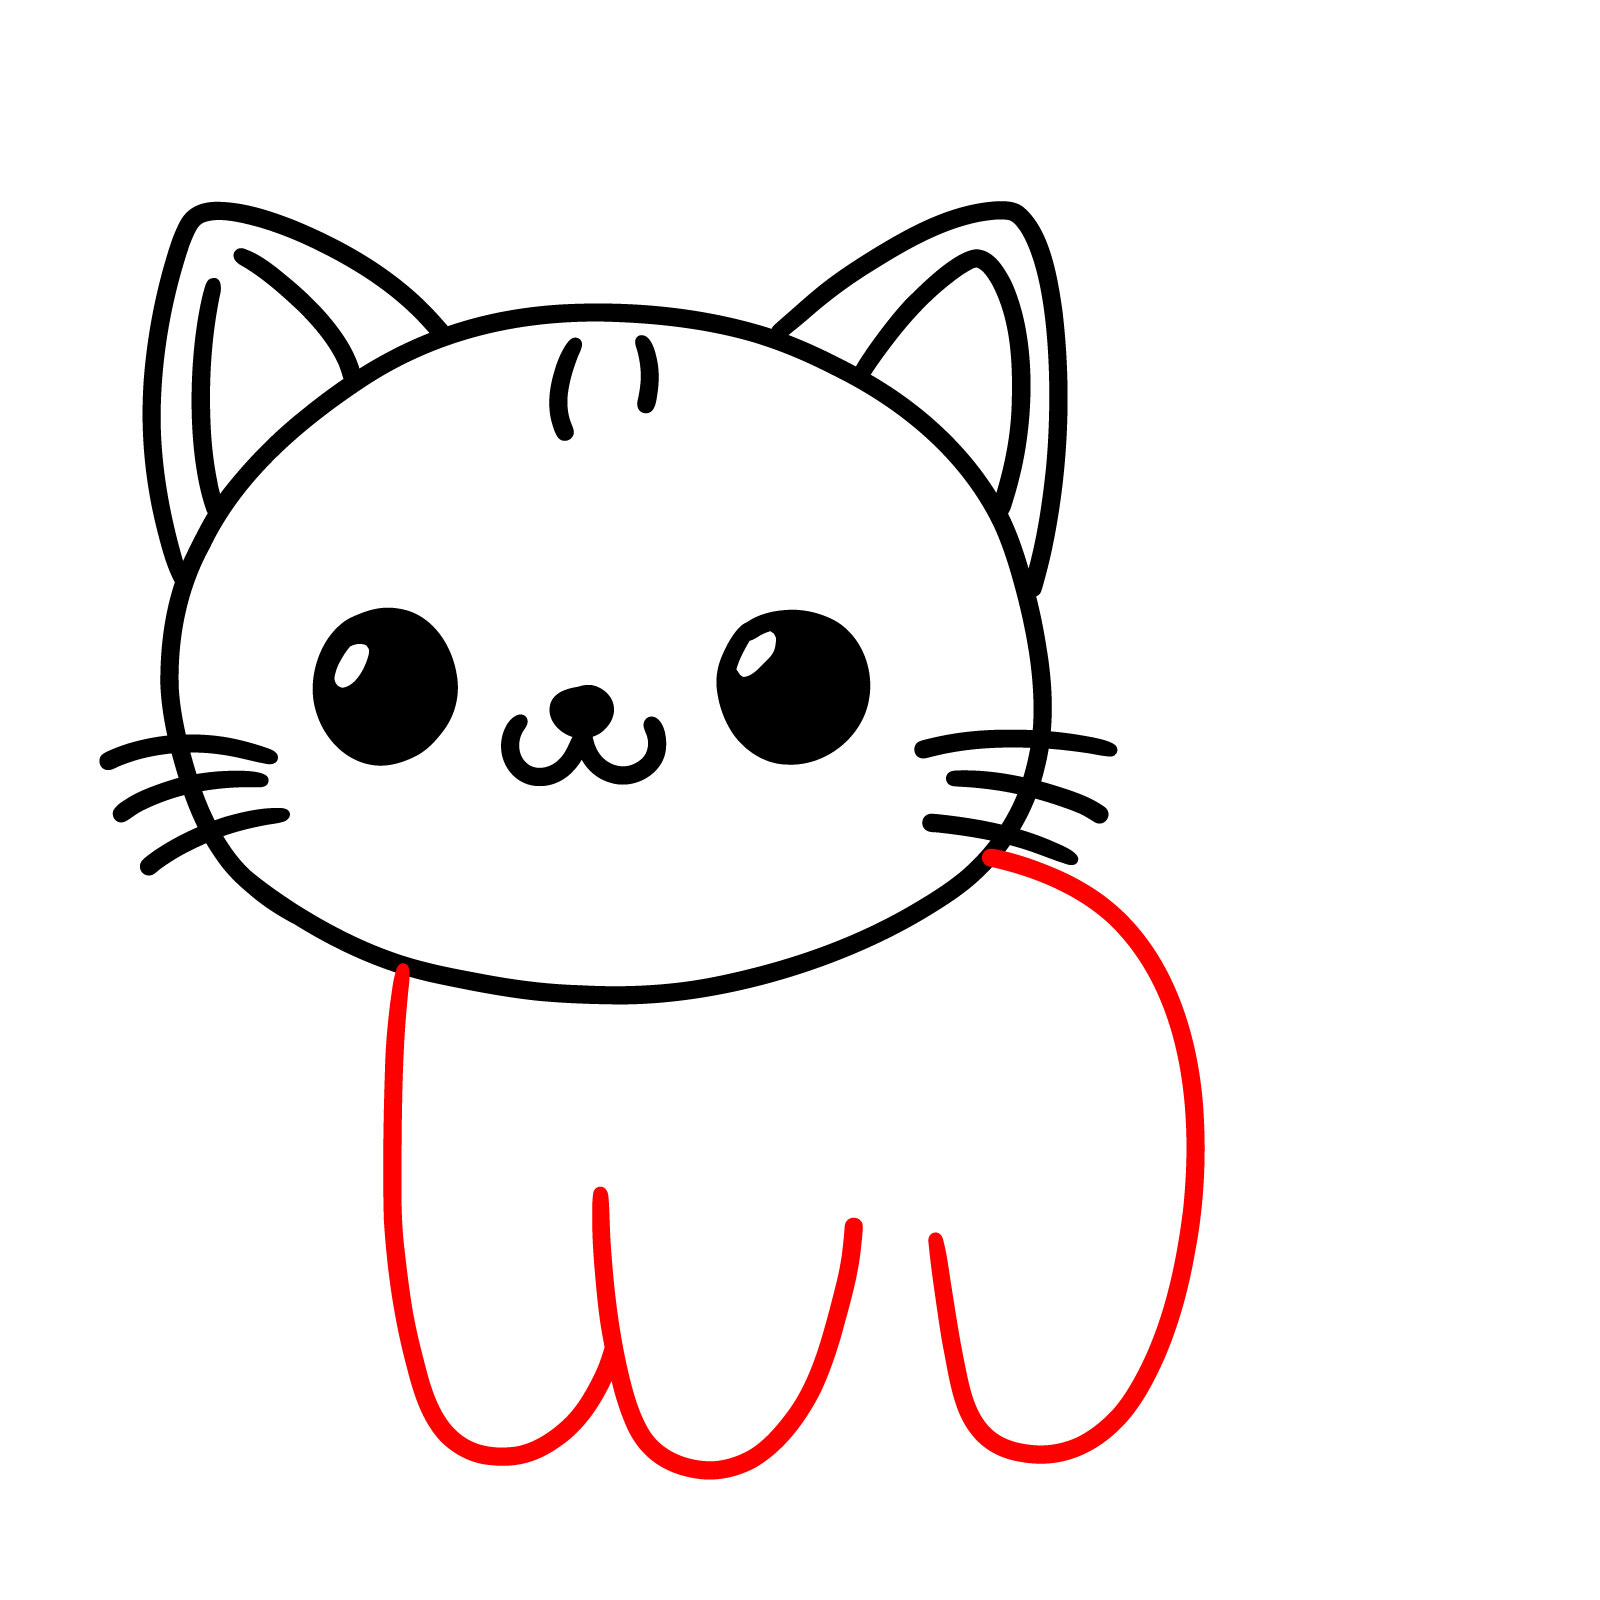
Step 04 – Draw mere vertical job under the body to hint leg and a curled line for the tail , give your cat drawing a sense of completeness and posture

Step 05 – Finish your easy cat drawing by outline all feature clearly . You now have a all over drawing that captures the essence of a playful and charming feline
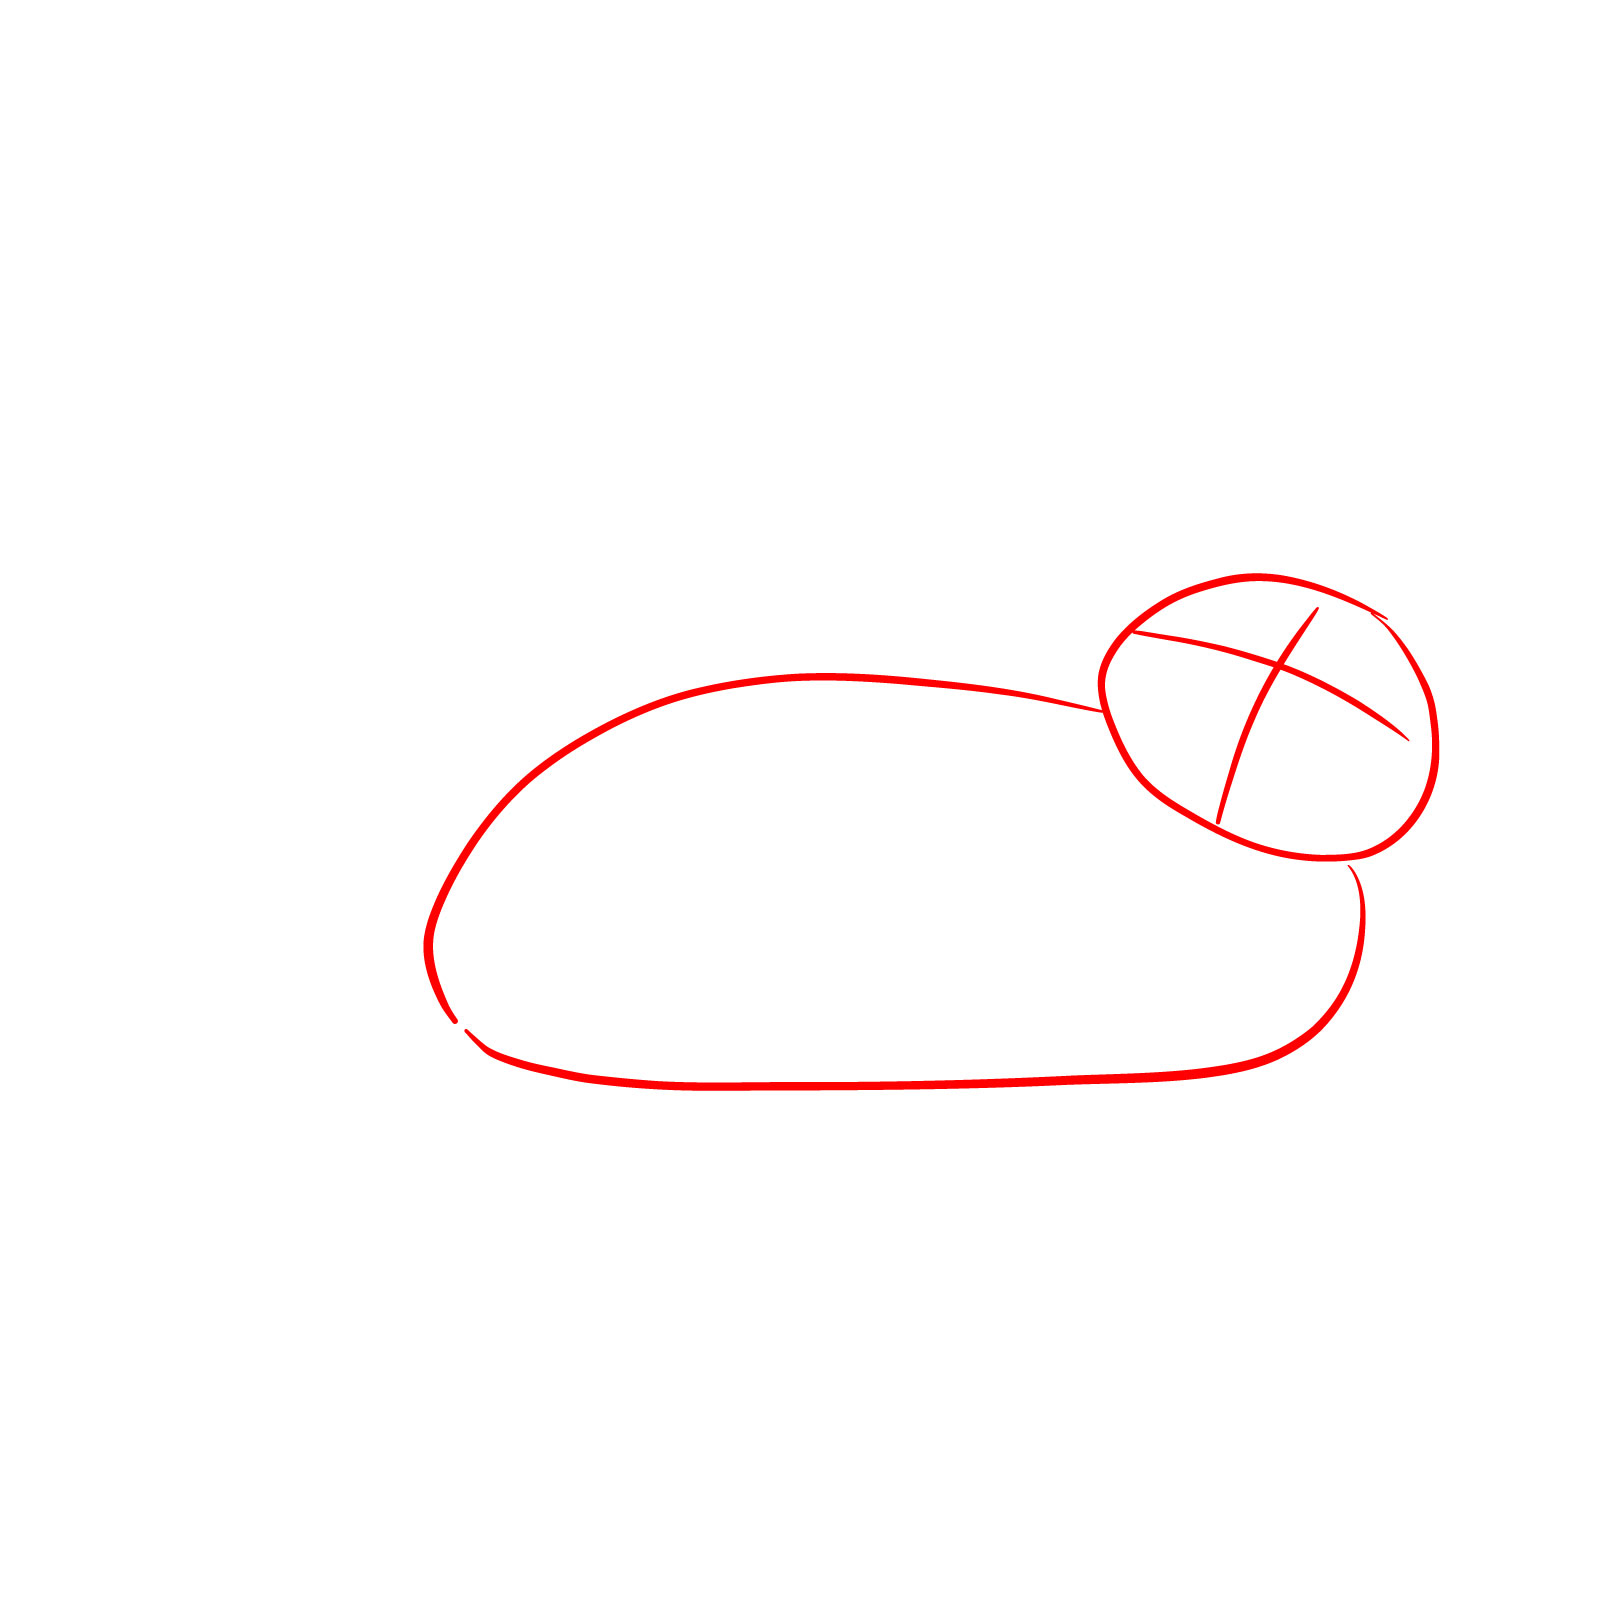
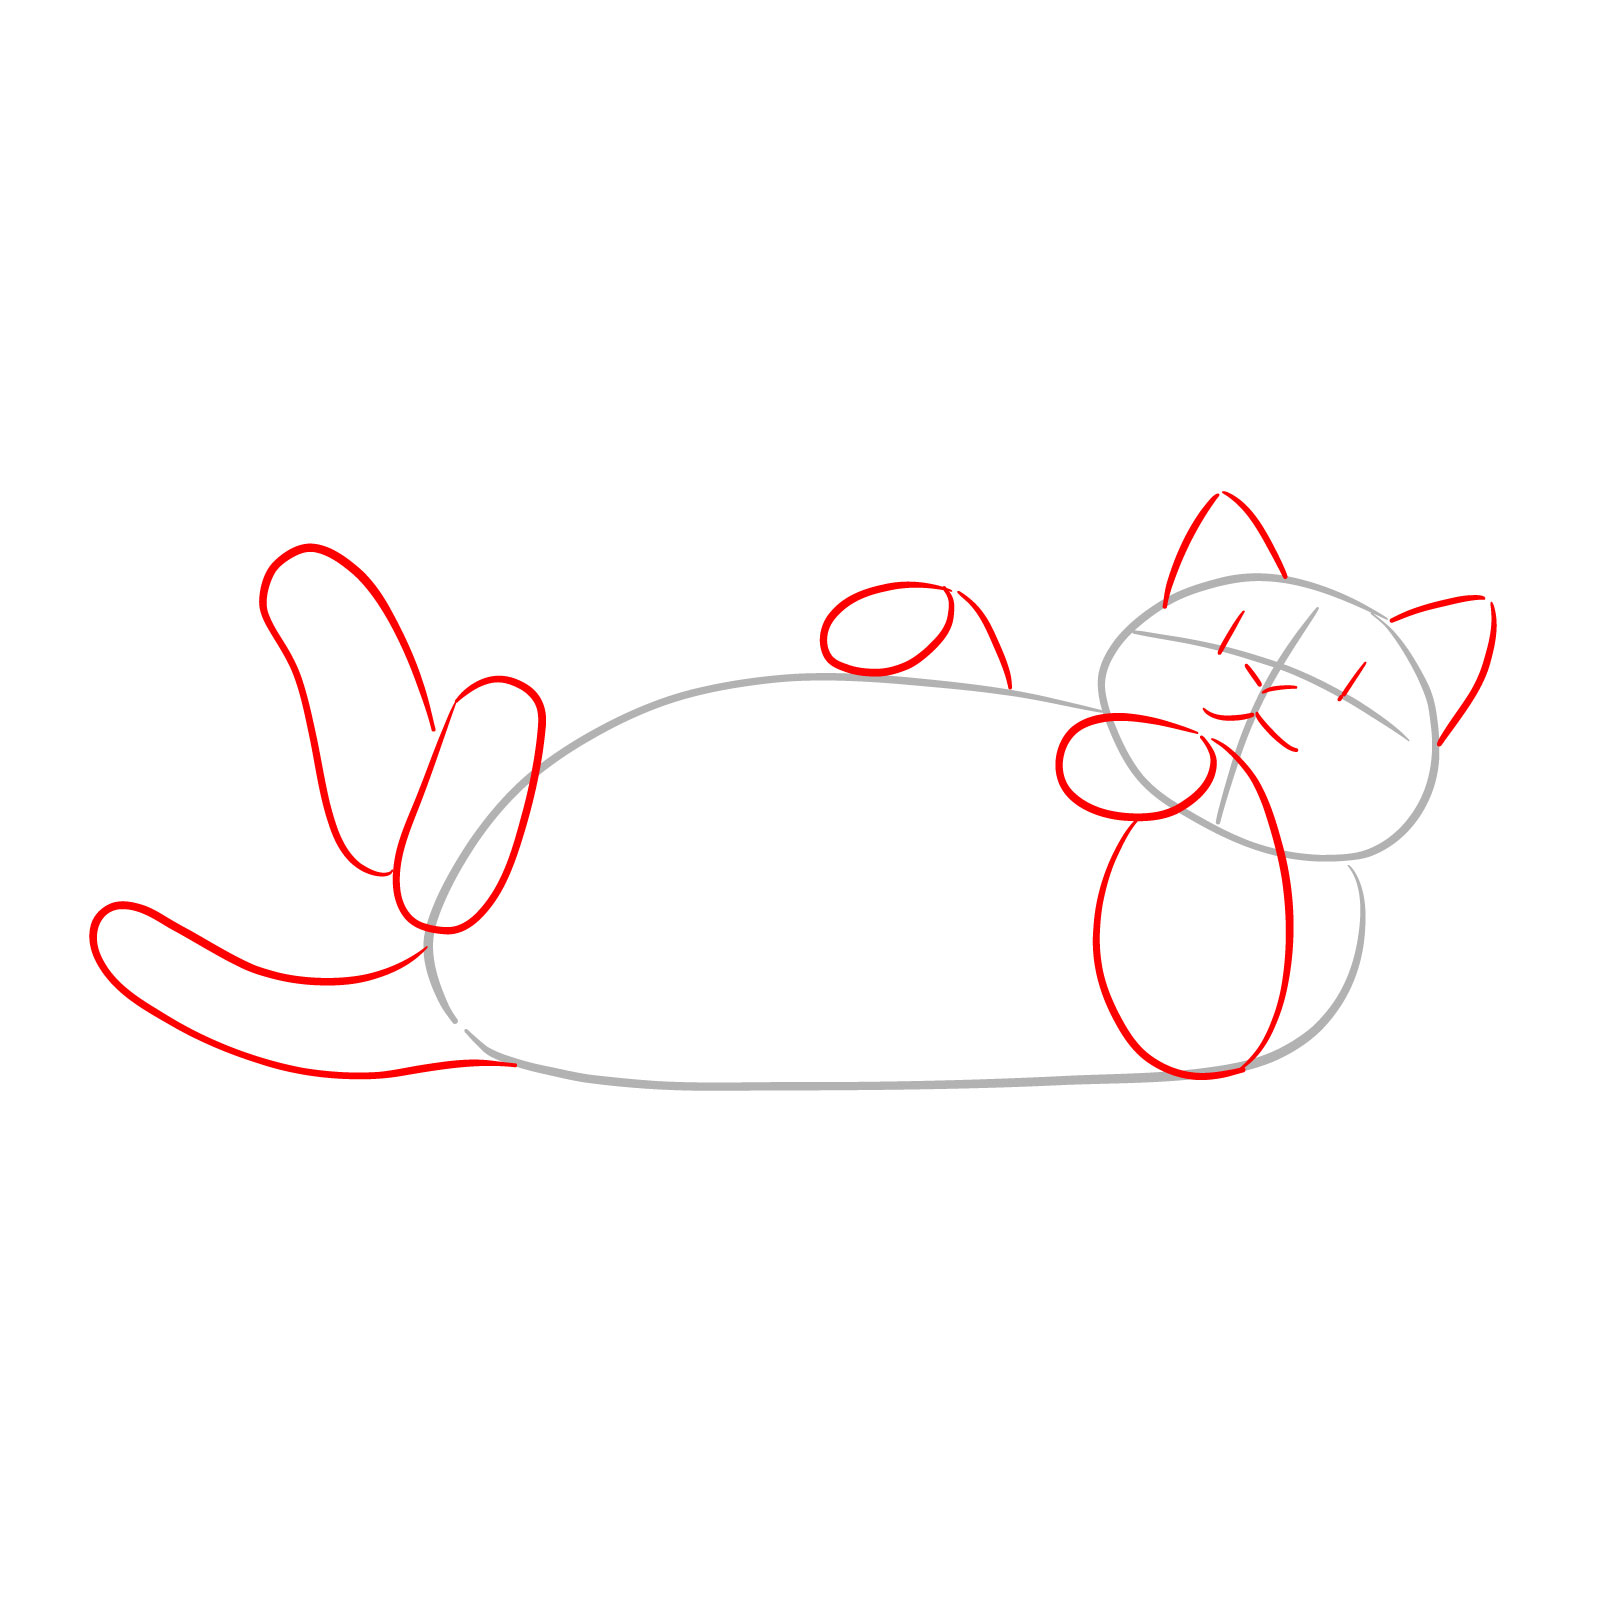
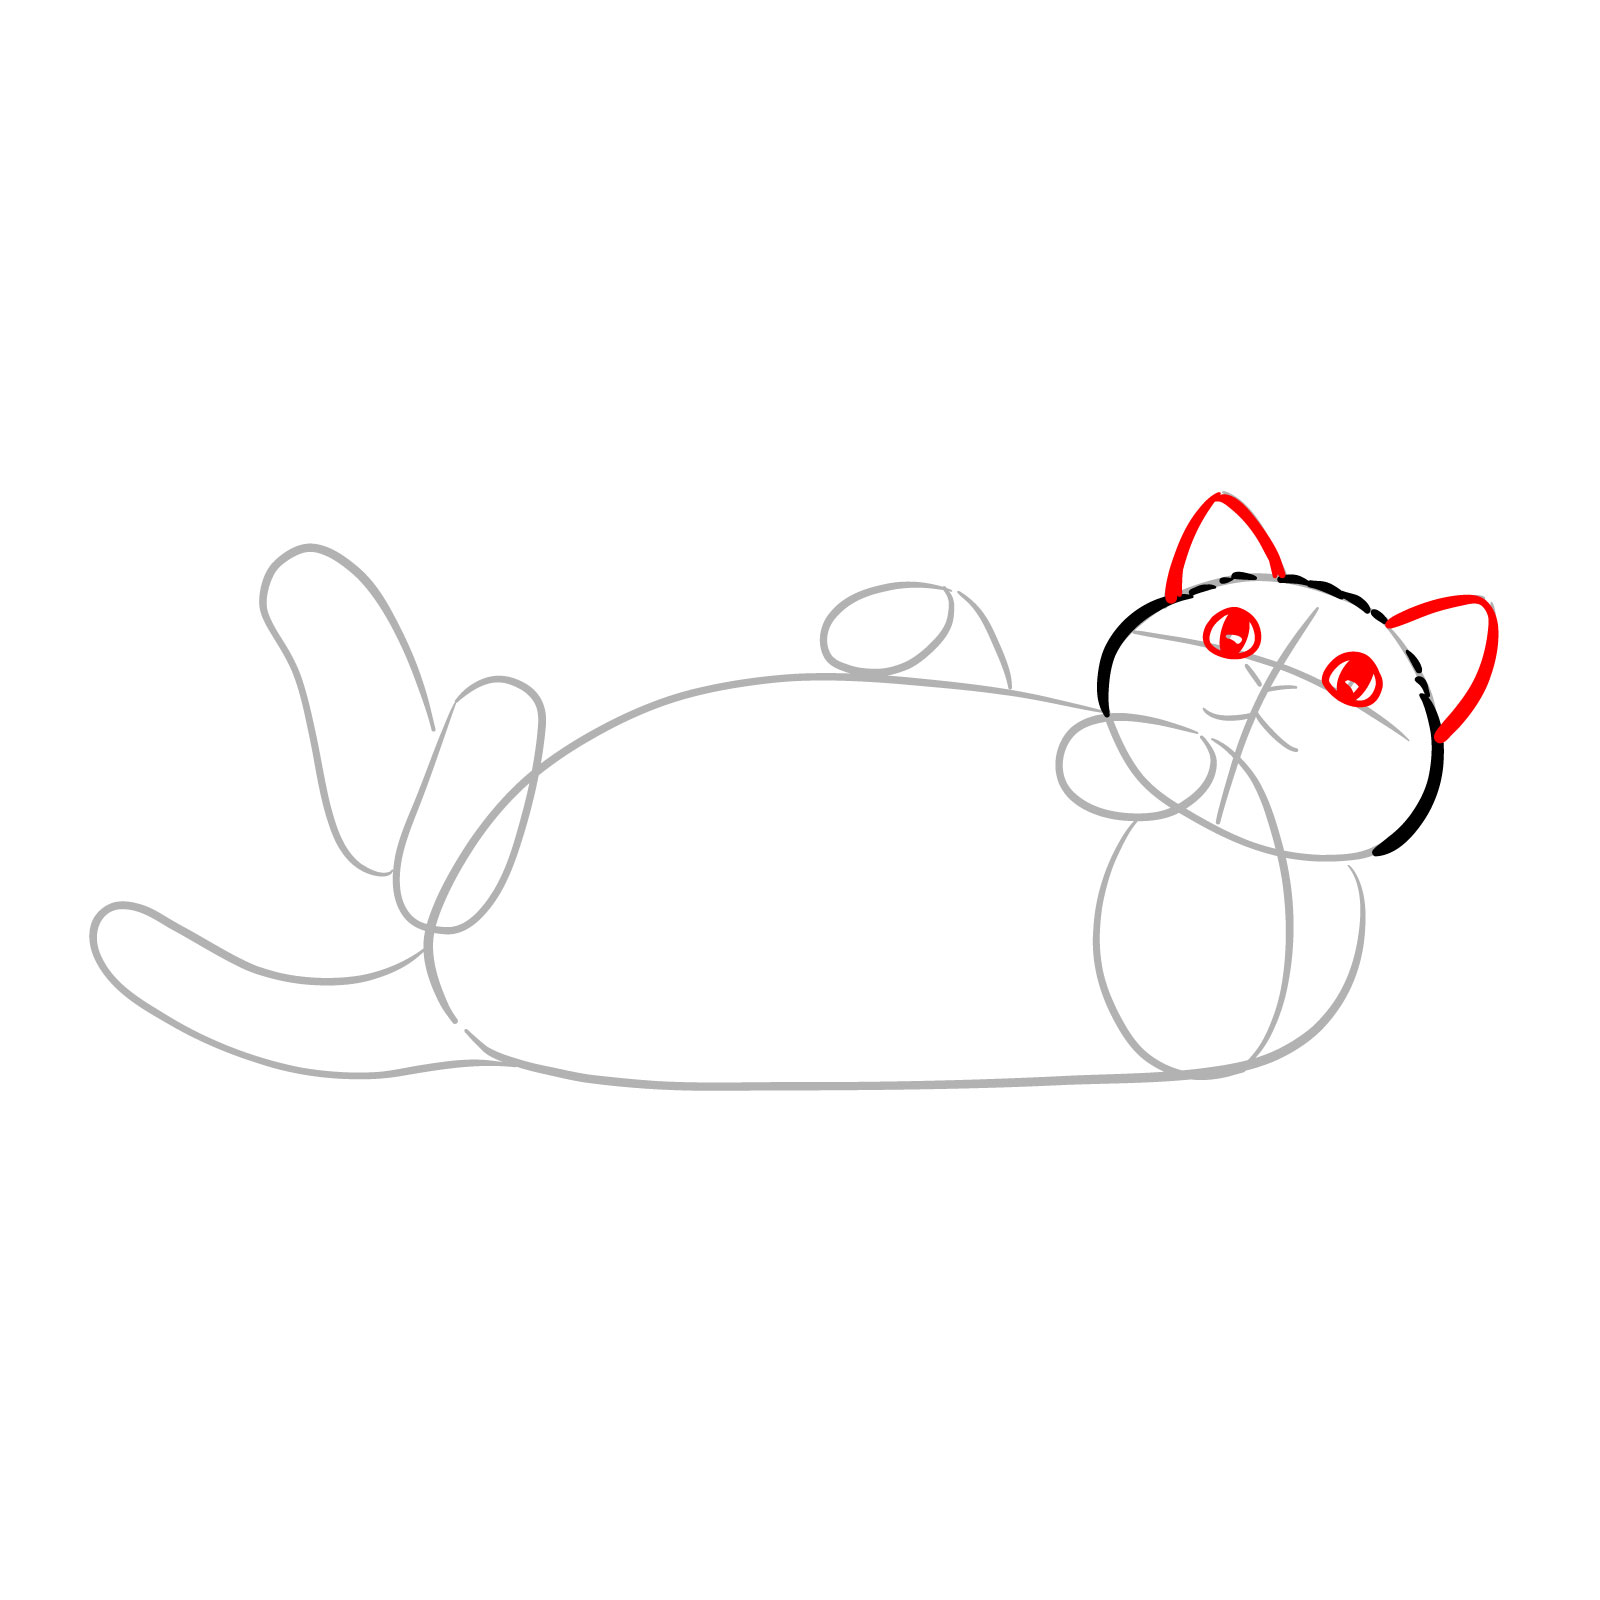
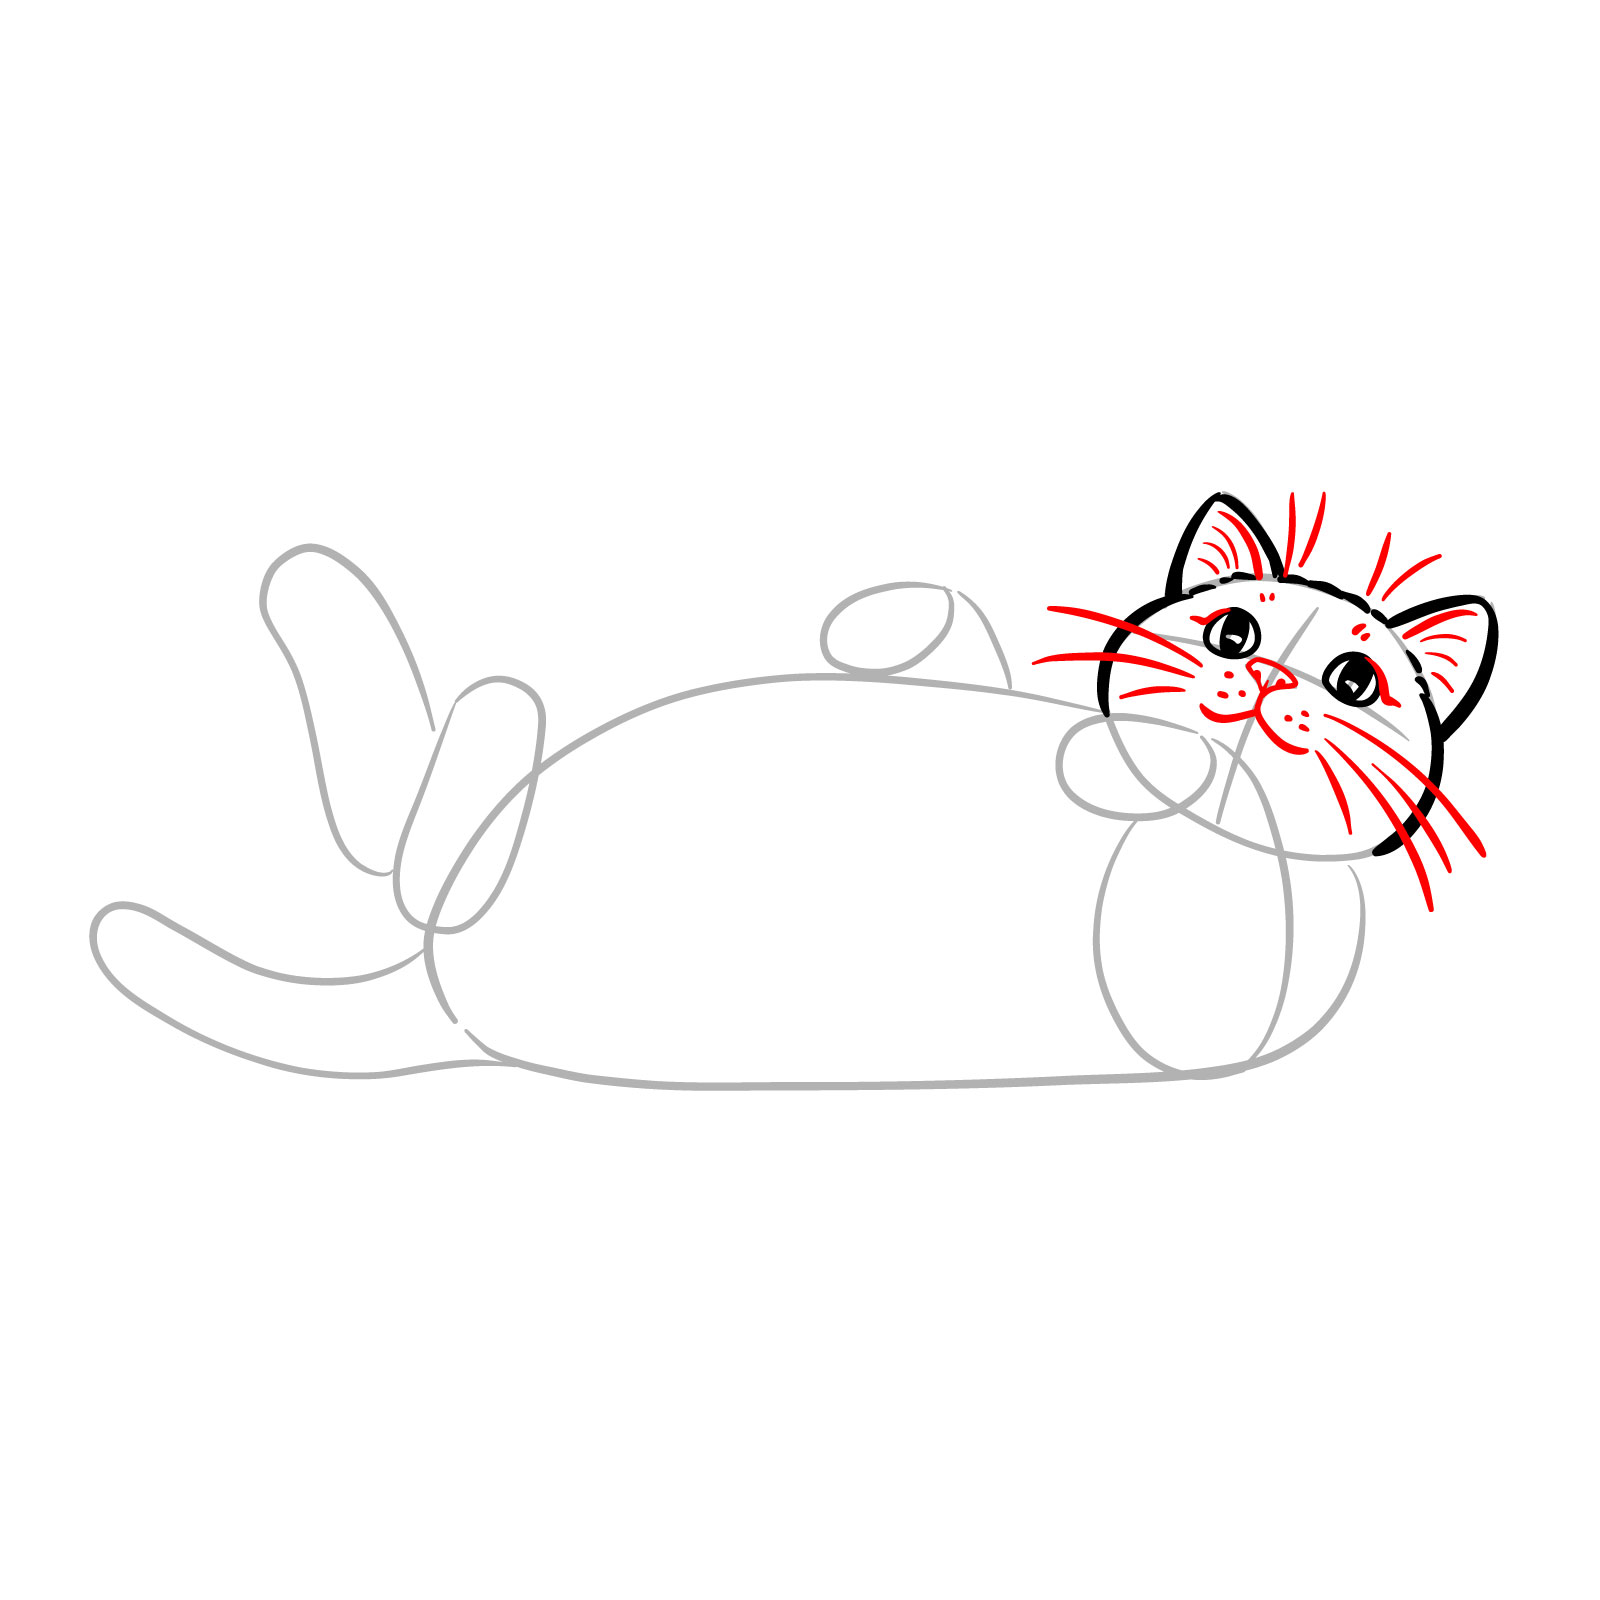
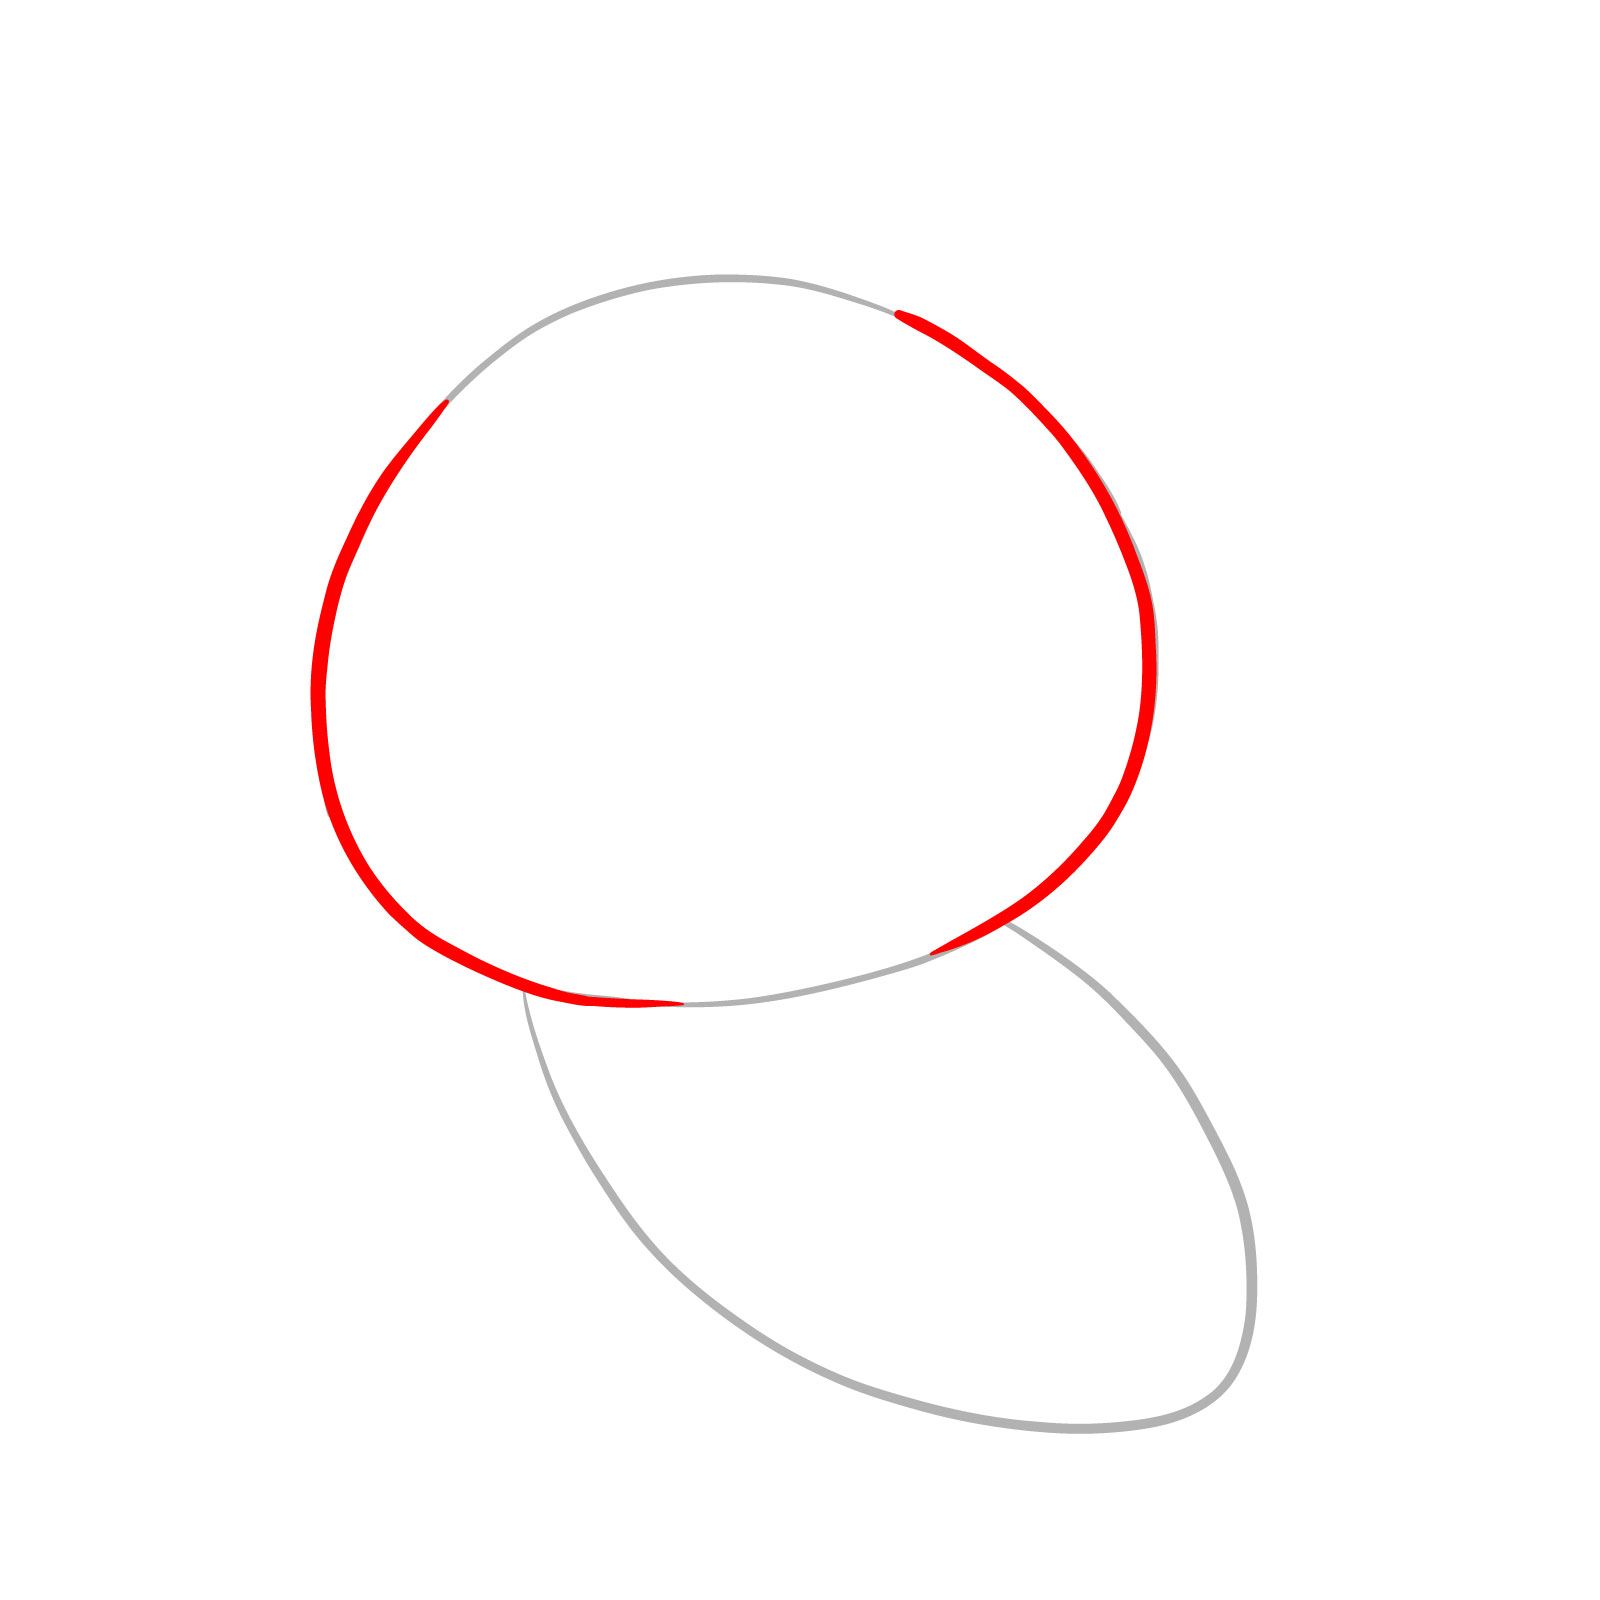
Guide 2 : Drawing a Cat Lying on Its Belly – 8 Step
Welcome to the second step of our cat drawing series , where we ’ ll tackle a slightly more complex subject : a cat lying on its belly . This endearing pose has a bit more point and demand eight steps to fill out . This cat ’ s appearance equal marked by its relaxed position , with its paws neatly tucked under its torso and a content expression on its face . Though more intricate than our first guide , this drawing remain within reach for those who are fresh to the art . With each pace , you ’ ll see how simple shapes total together to spring a cozy feline , ready to be lend to life by your hand .
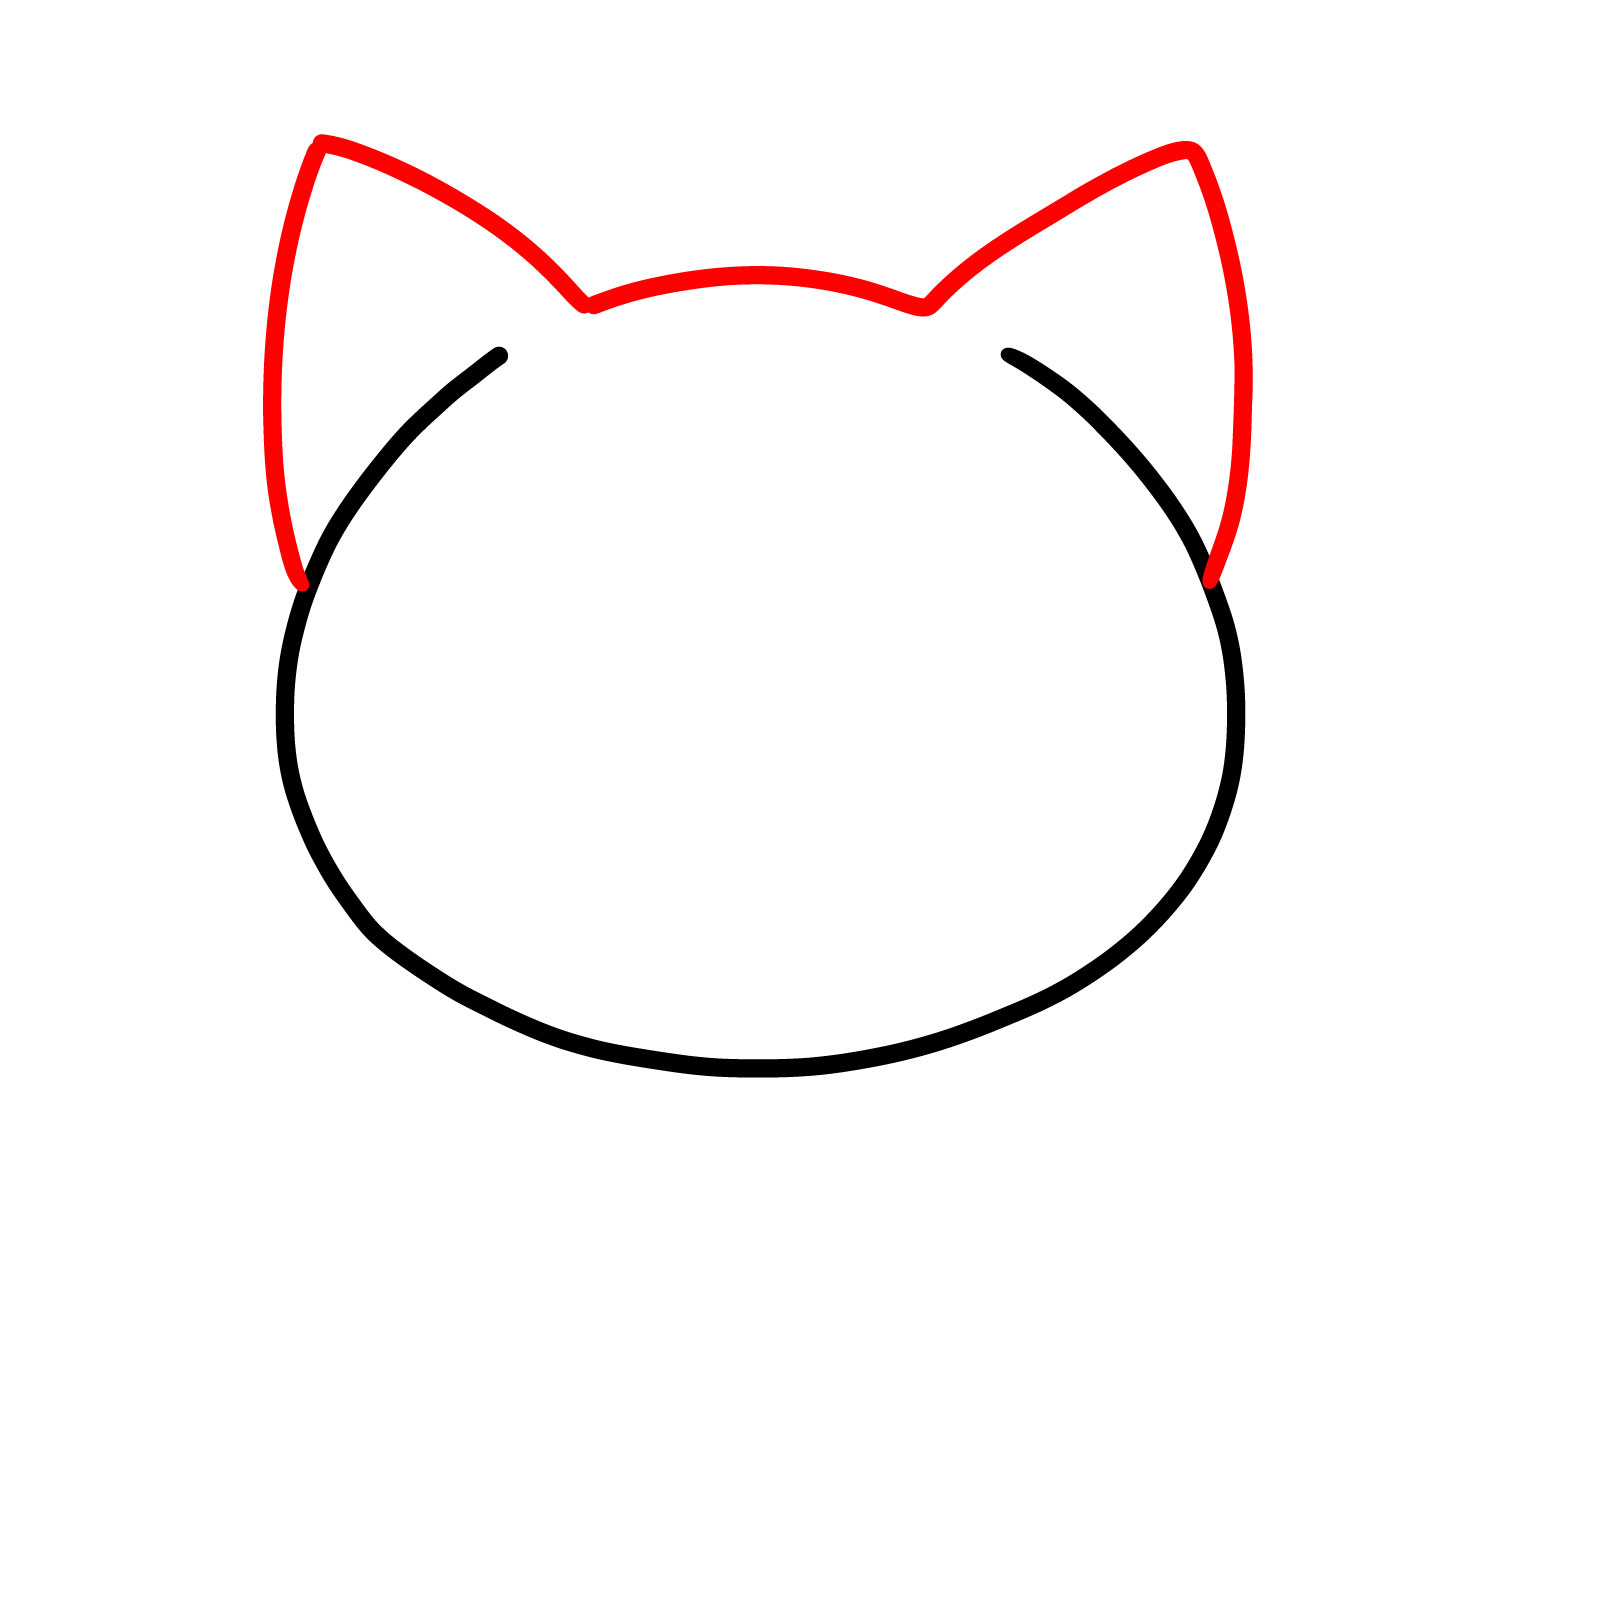
Measure 01 – Begin with an oval frame for the head , result space at the crest where the ears will cost positioned

Step 02 – Add two band for the center and a small oval for the nose . Sketch triangles on height of the head to stand for the ears
Pace 03 – Draw the inner business of the ears for depth and add the mouth and whiskers to bring the guy ’ s formula to life
Step 04 – Sketch the two front leg of the guy , showing it consist comfortably on its belly
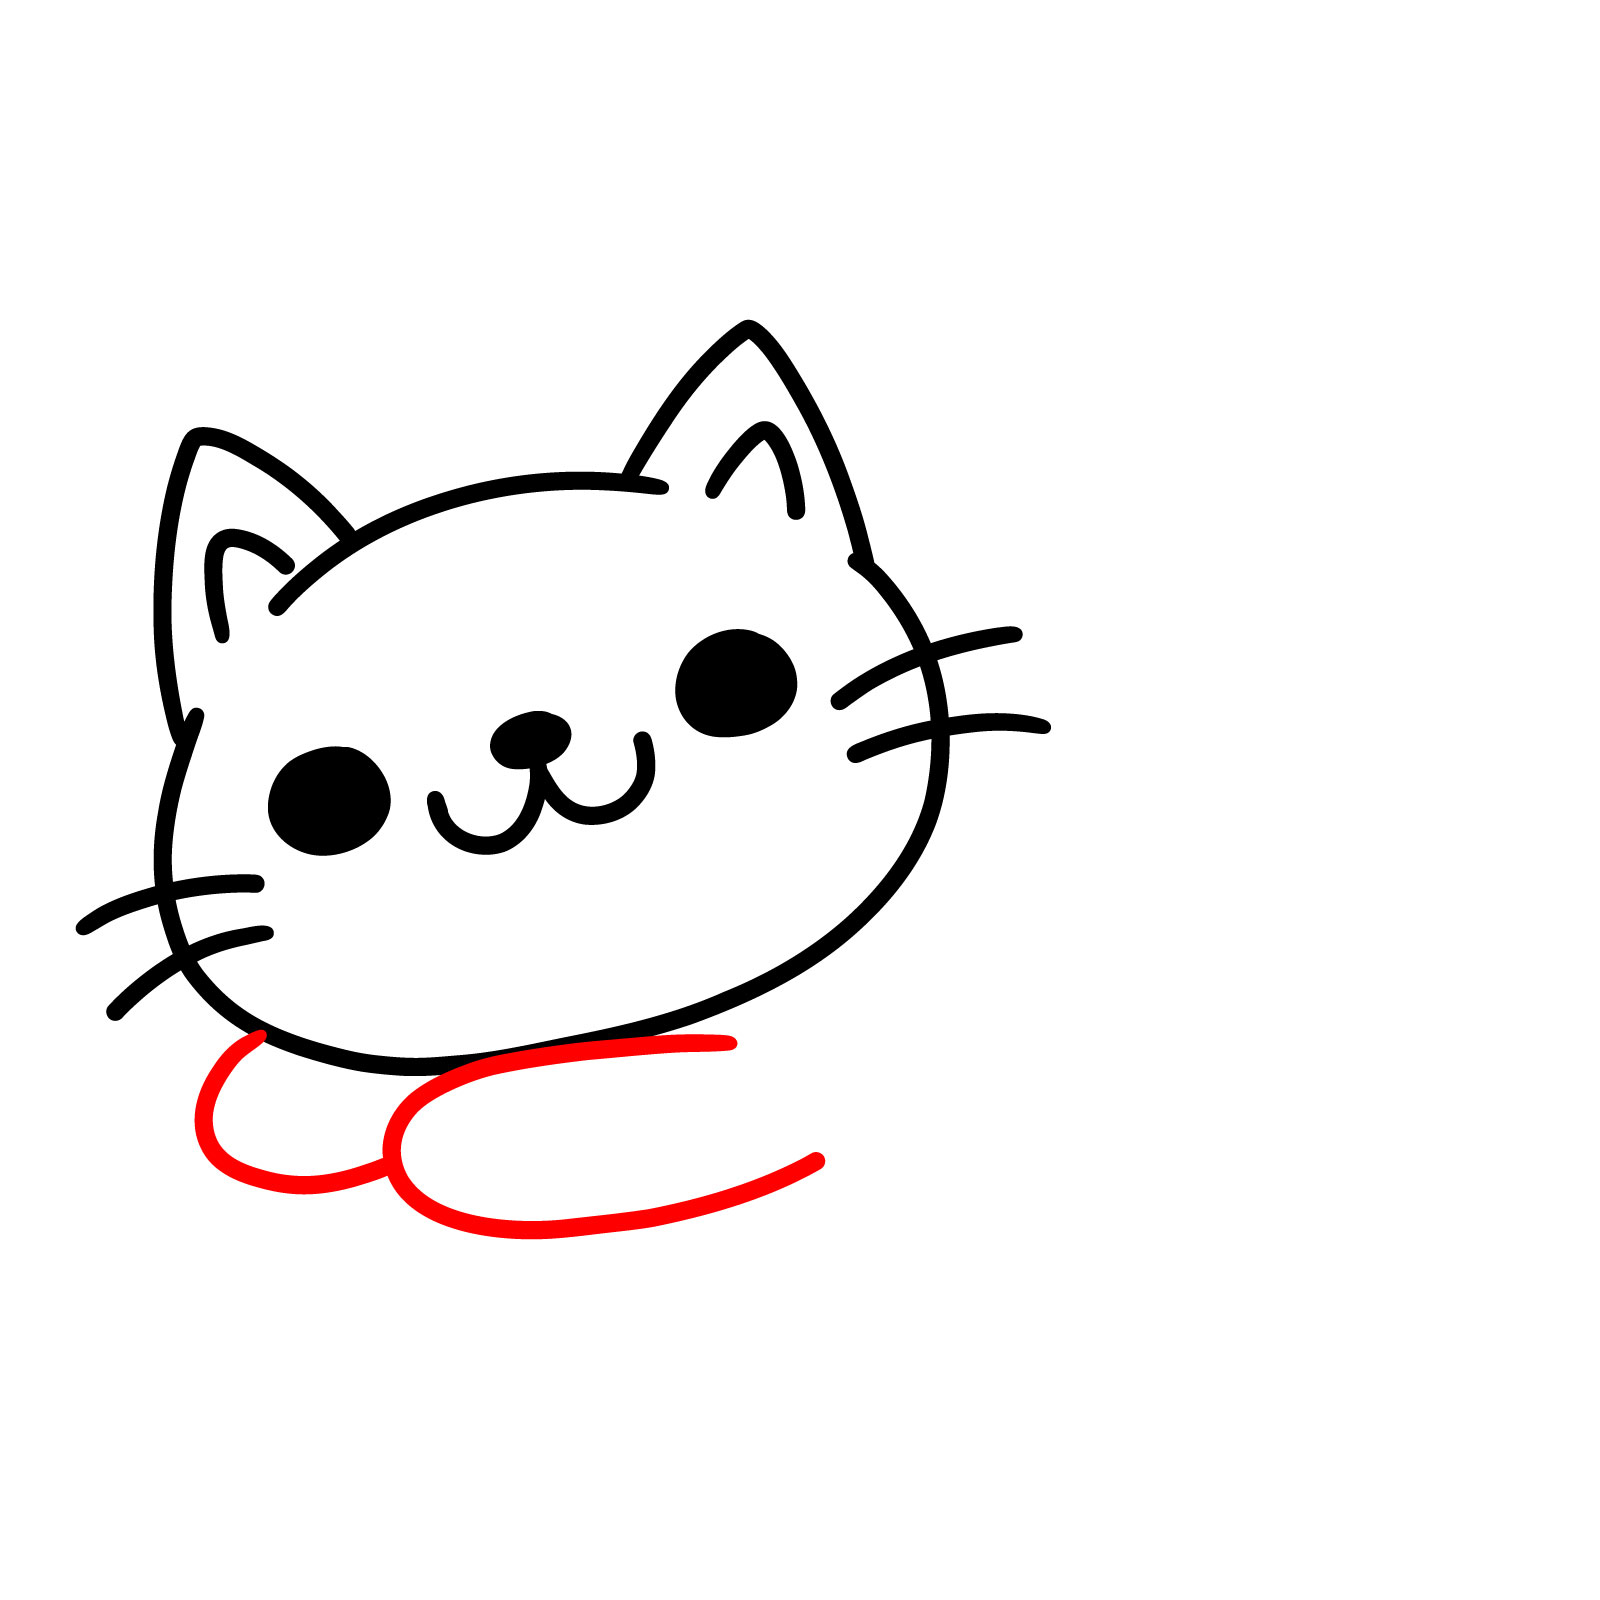
Step 05 – Draw the outline of the cat ’ s back arch smoothly into one visible hind branch
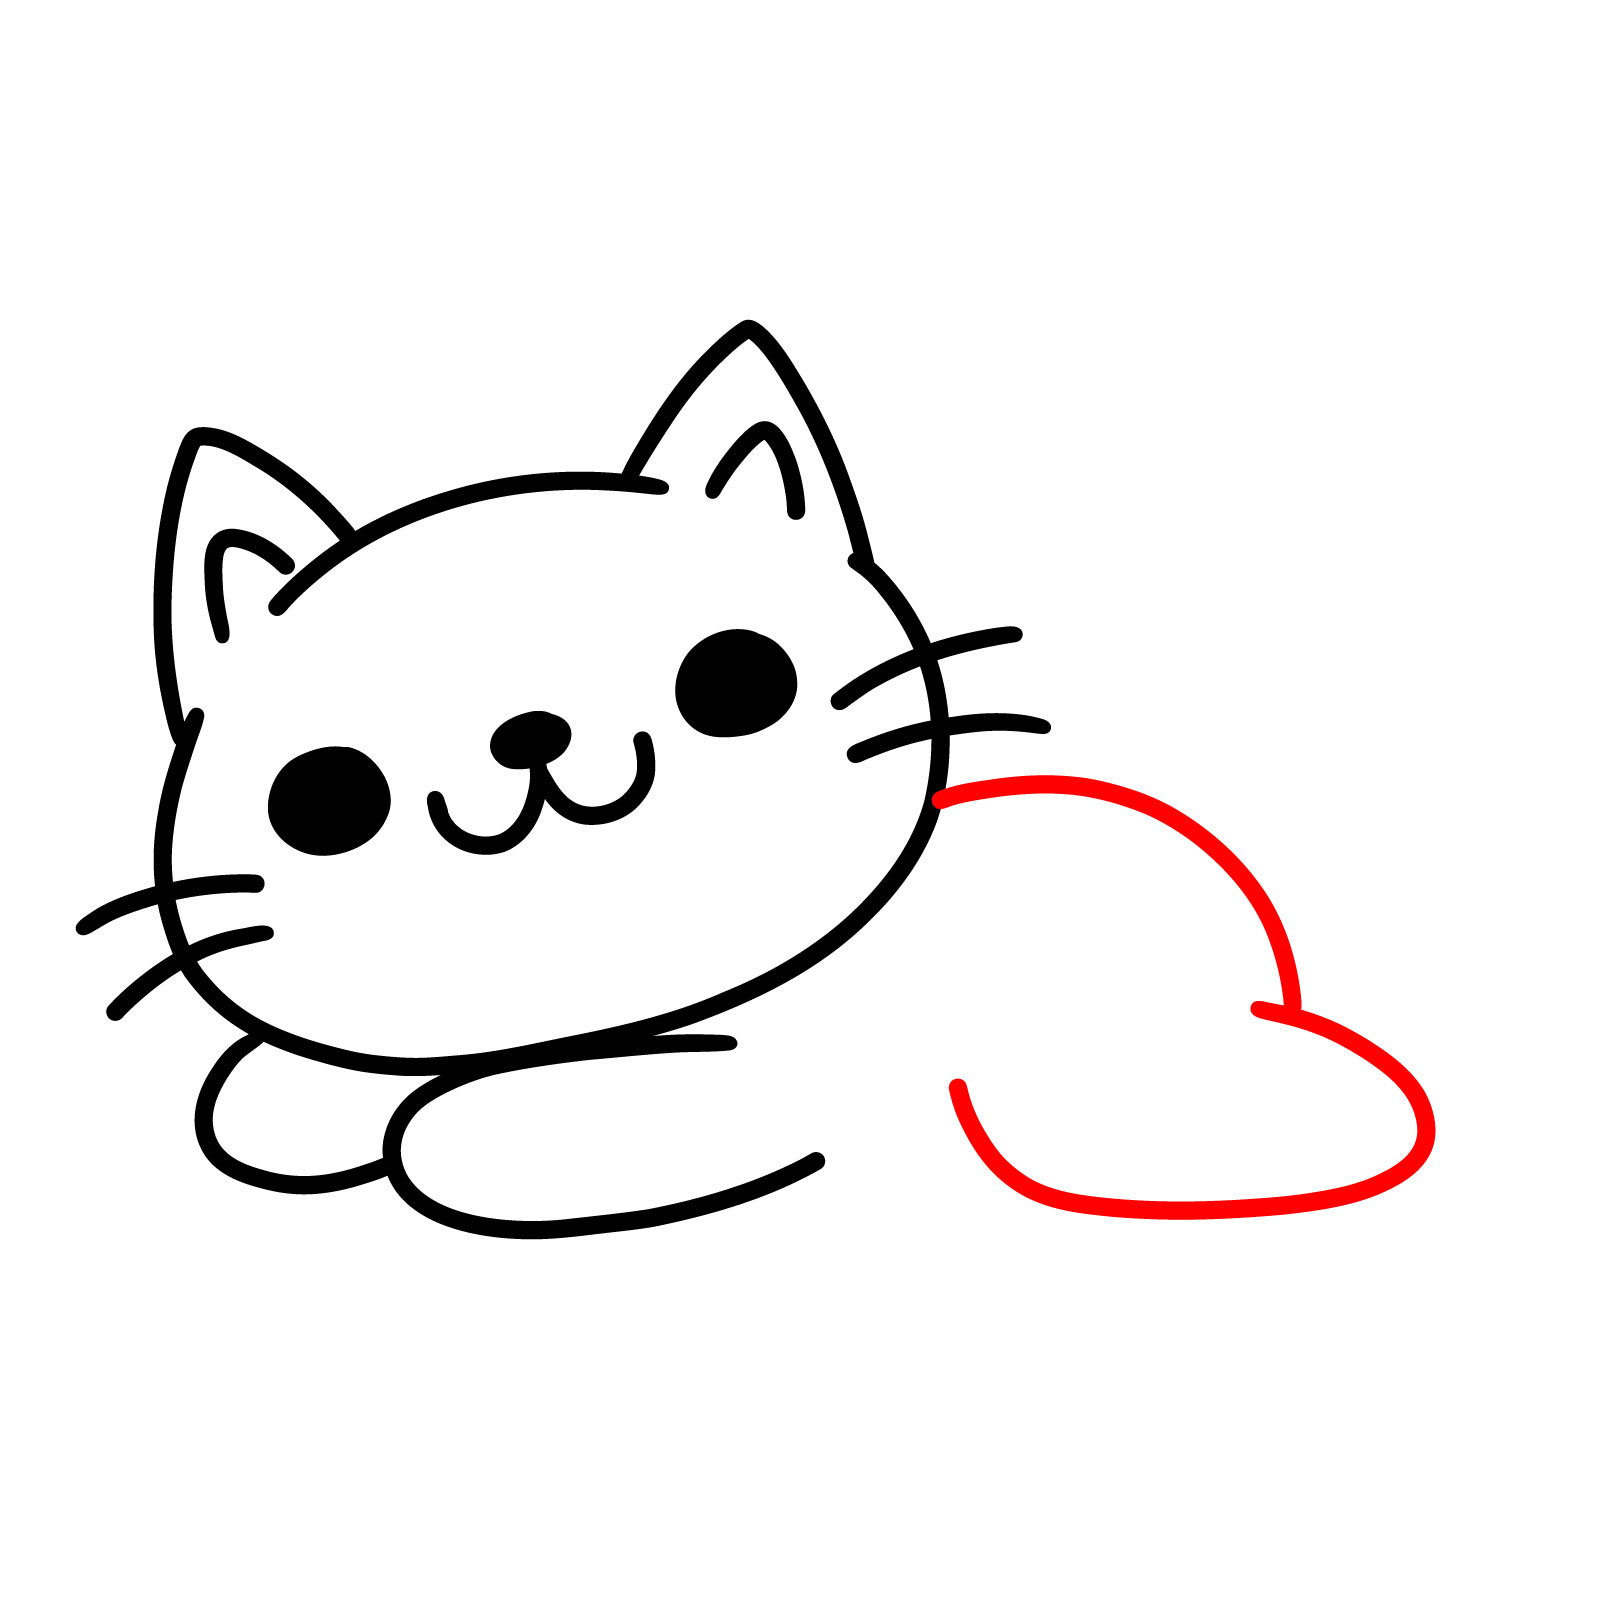
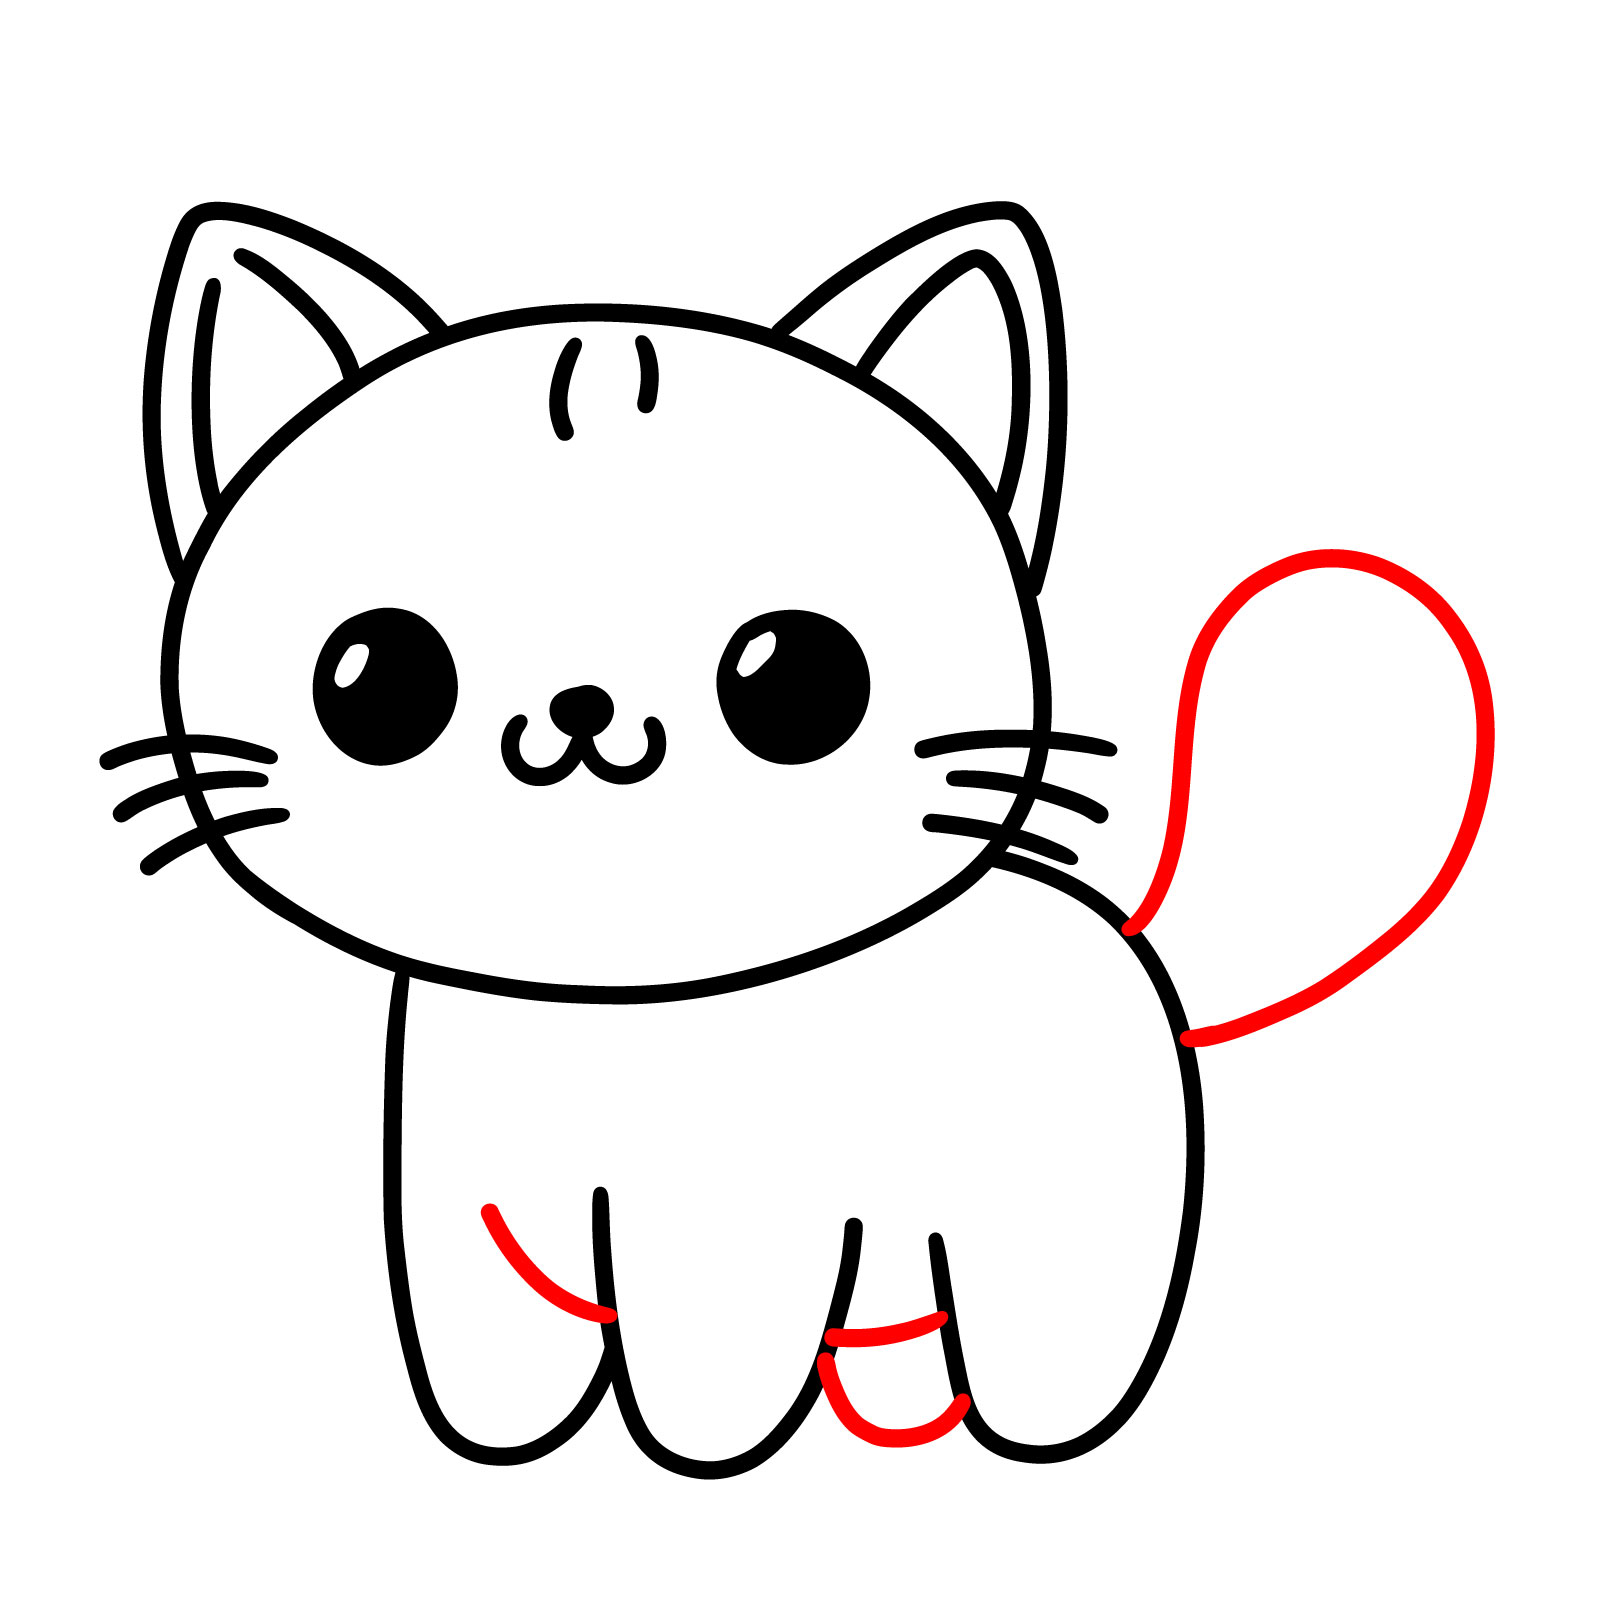
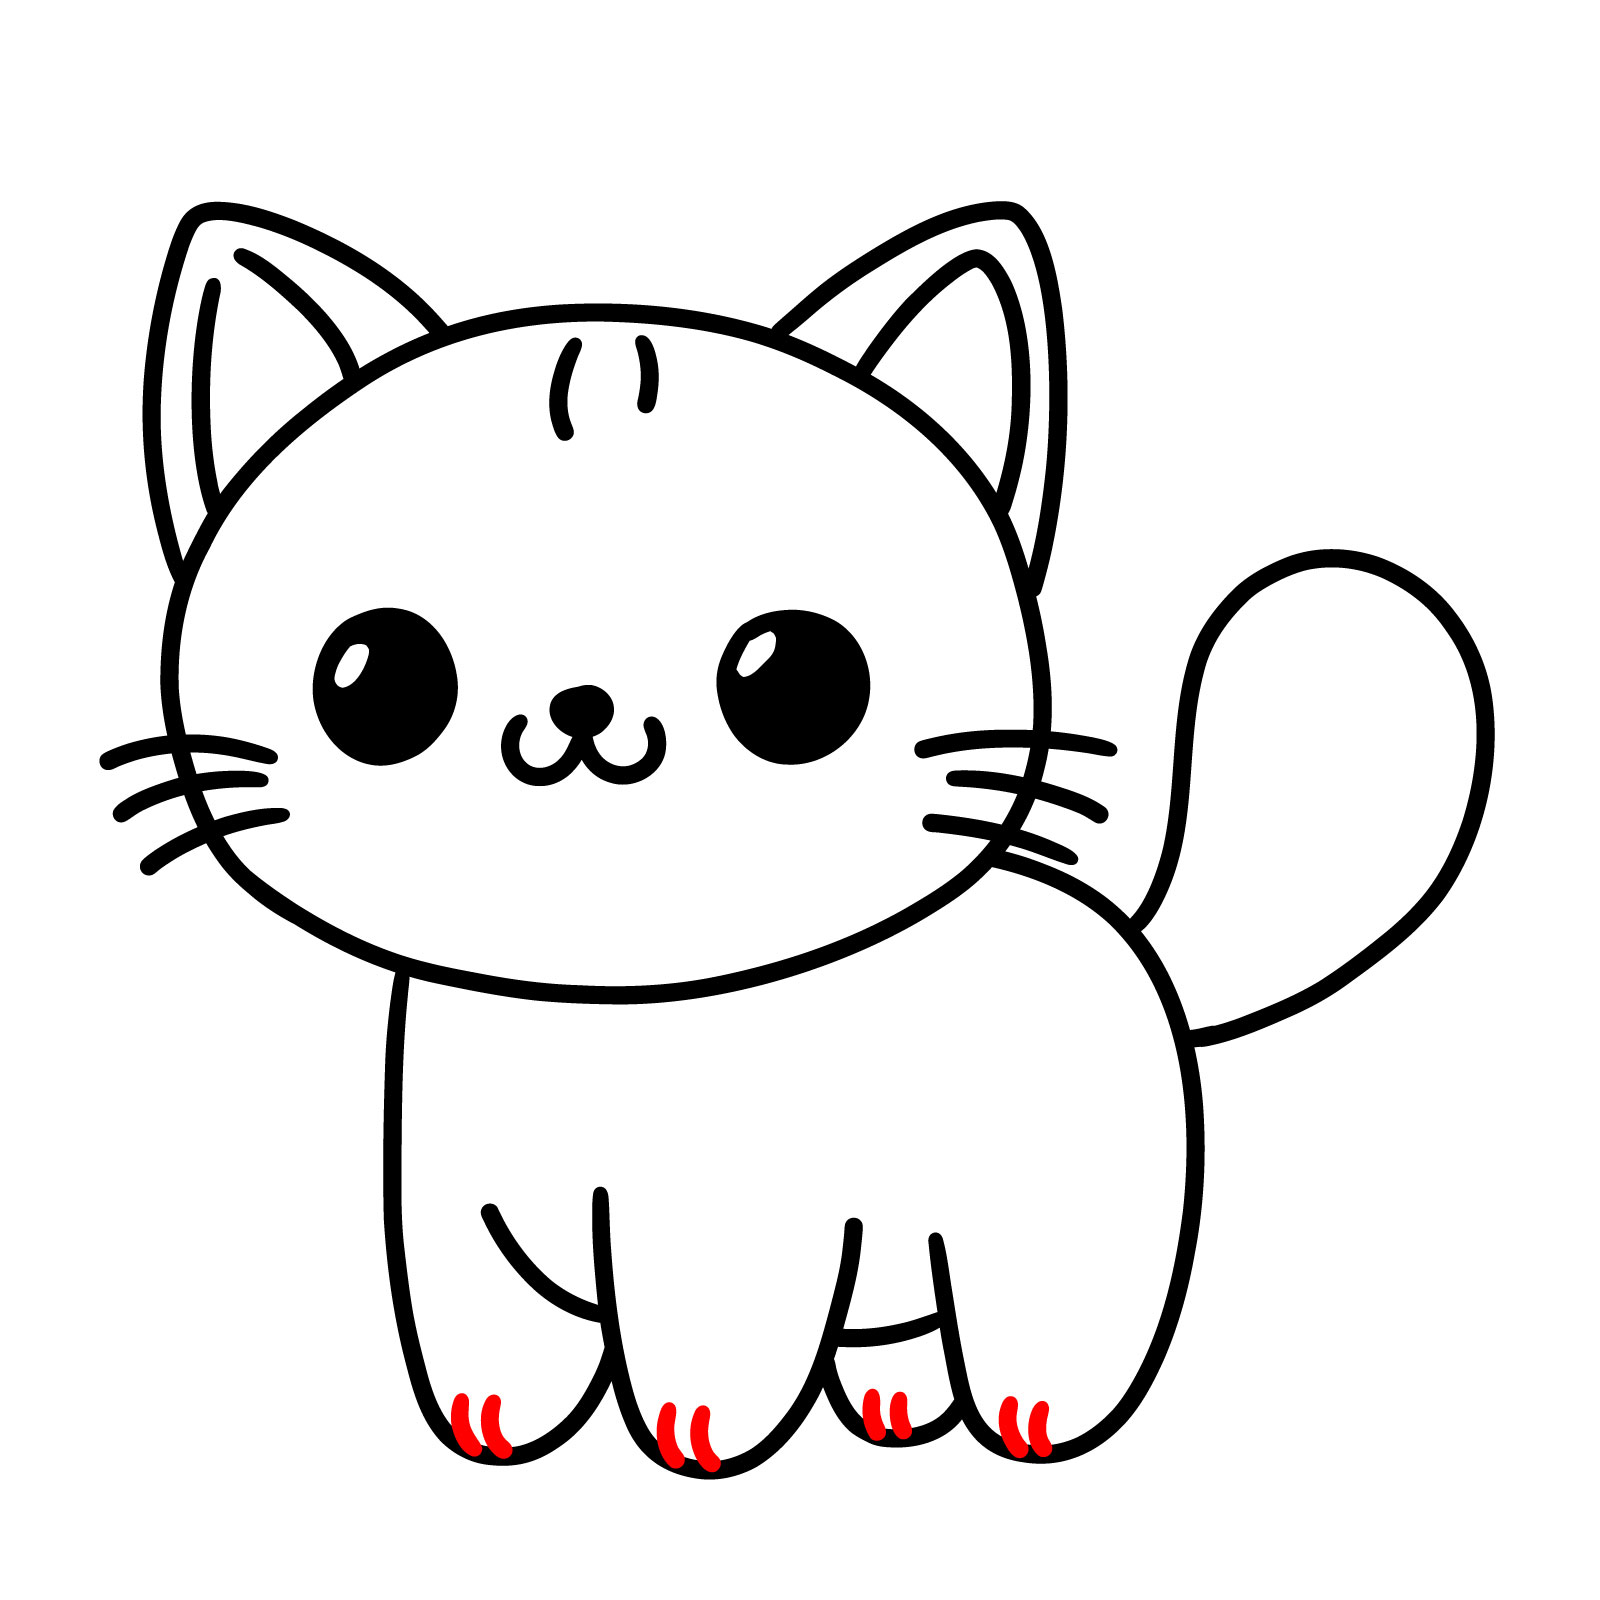
Step 06 – Add the second hind leg and the cat ’ sec belly , finishing with the tail curling alongside the torso , put up a sense of relaxed strength
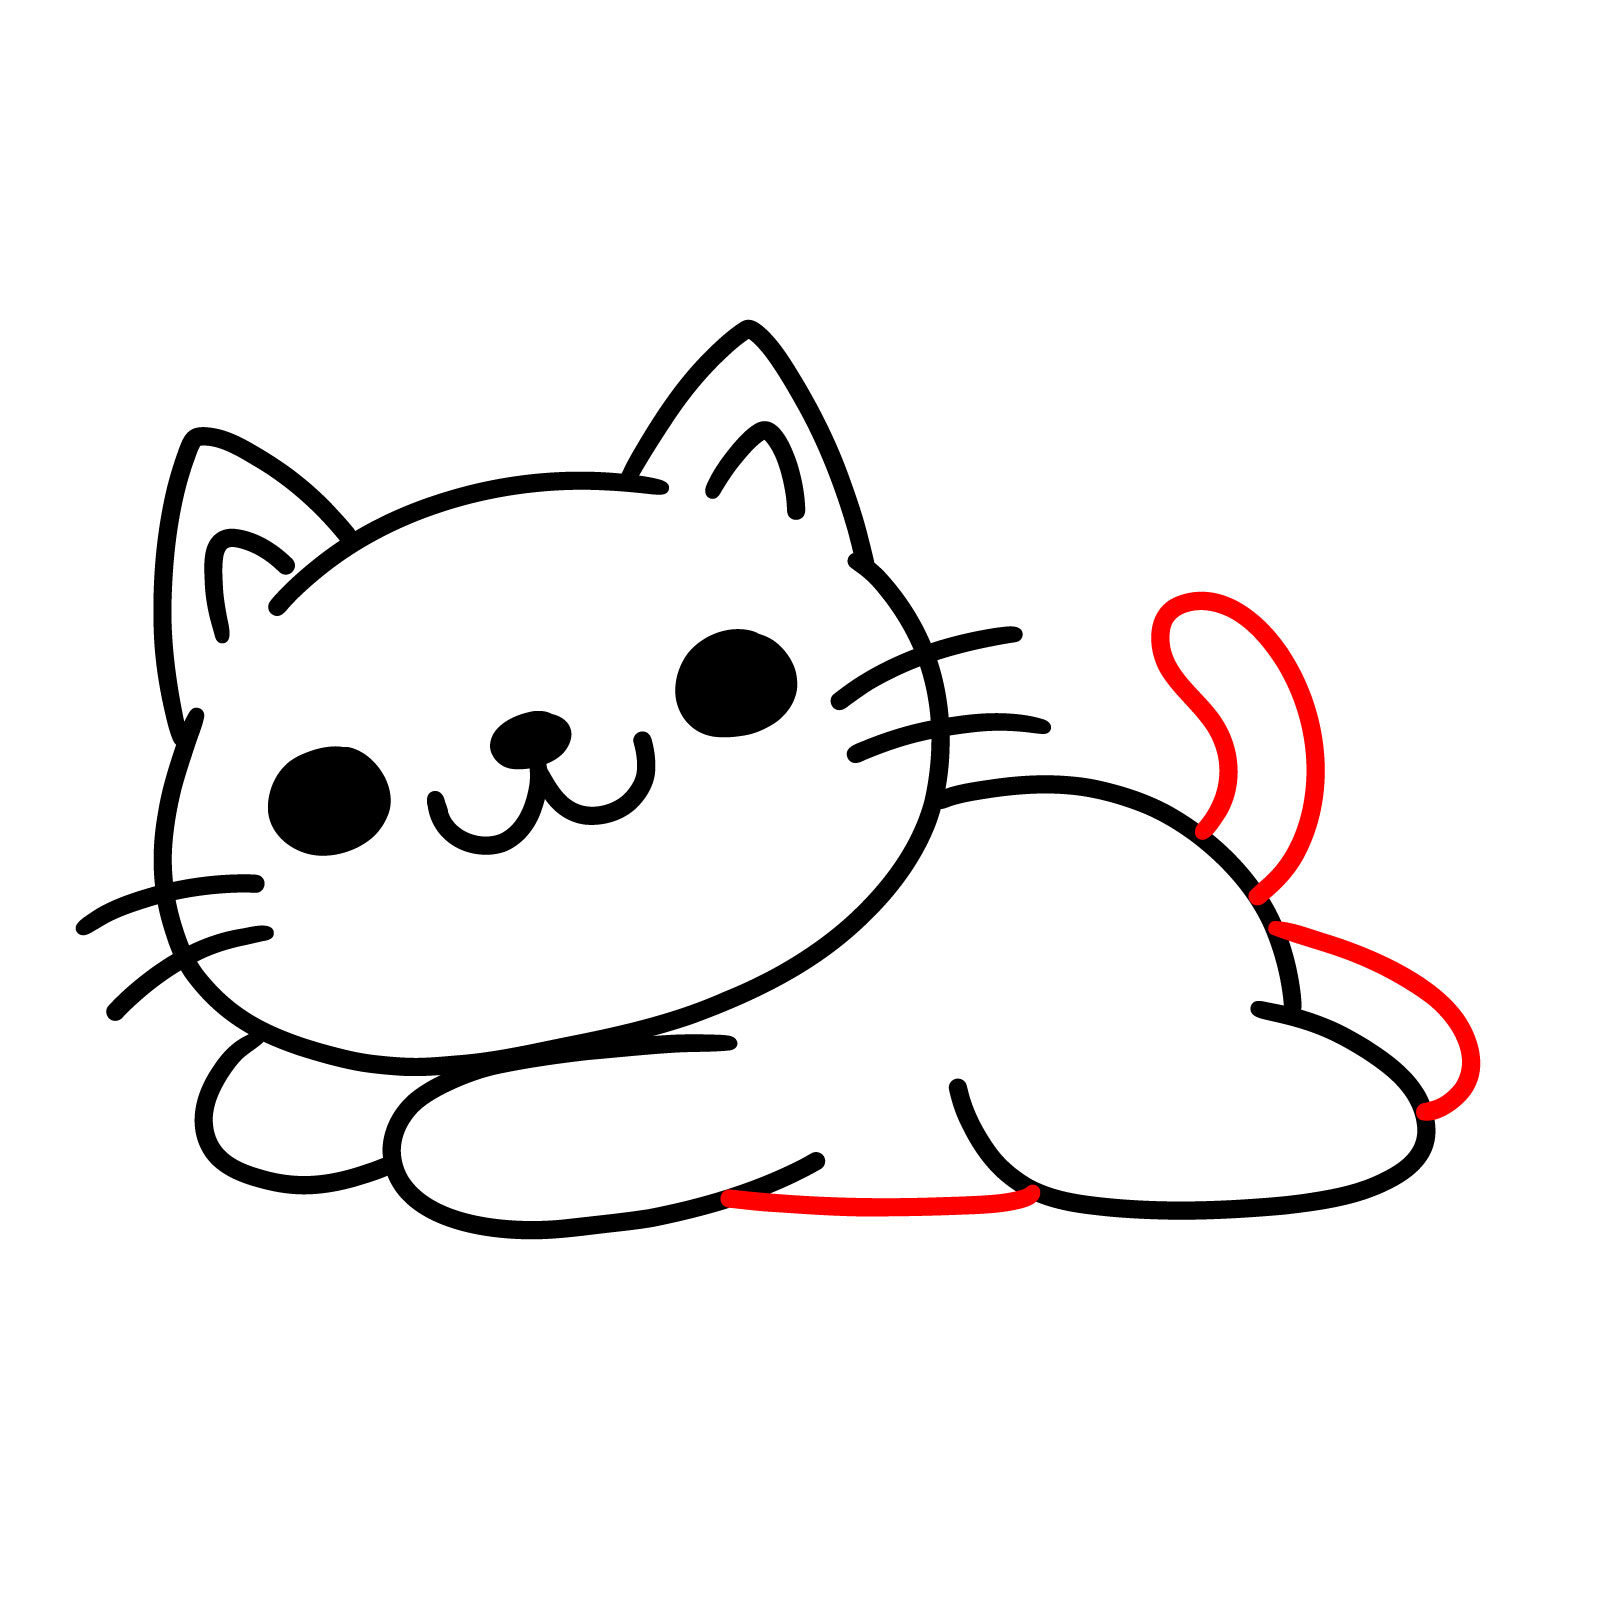
Measure 07 – Insert business to divide the paws , detailing the individual department
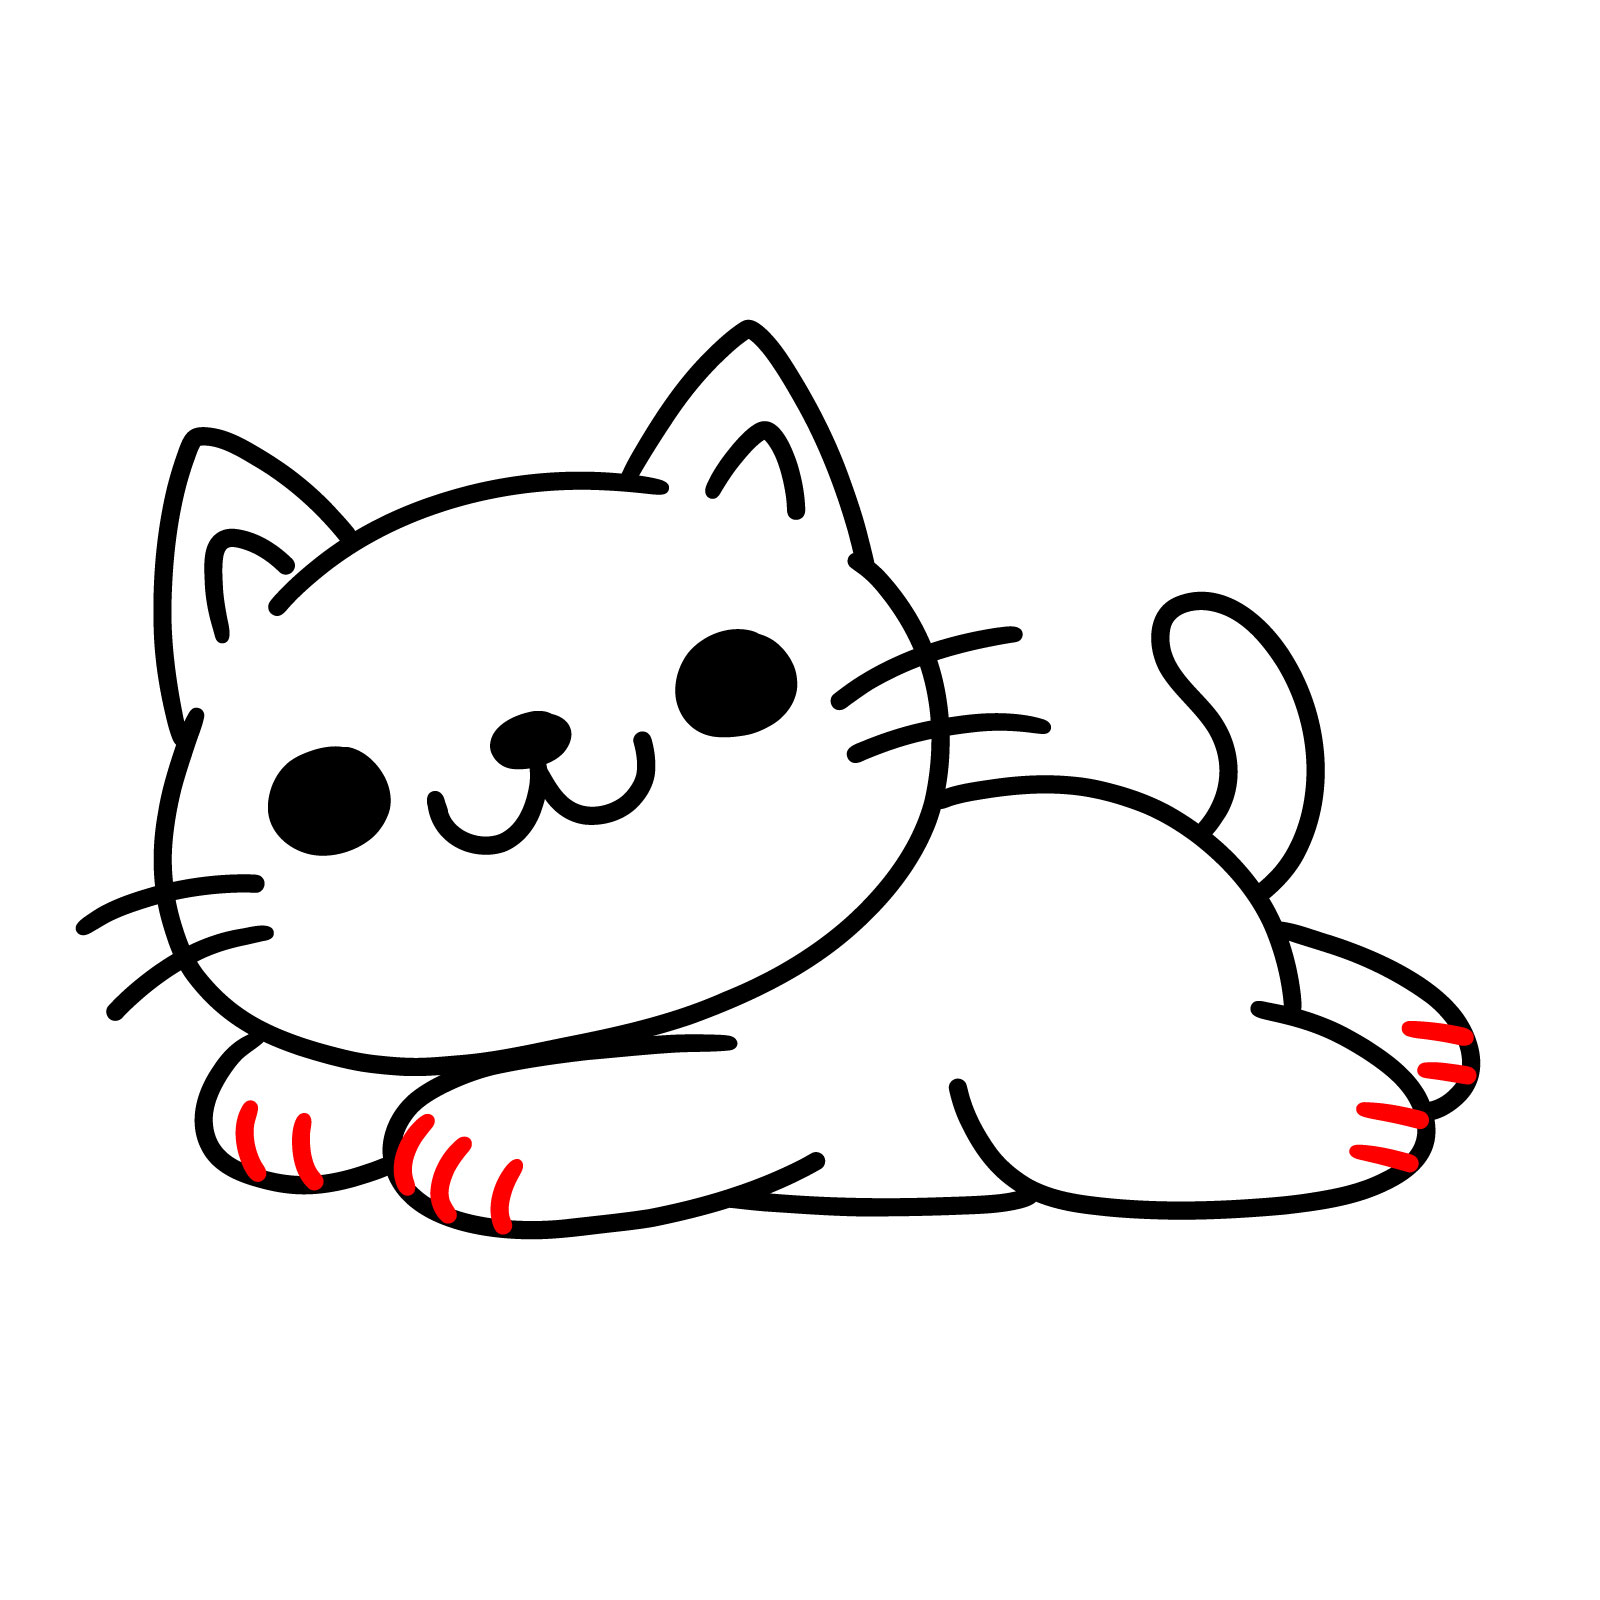
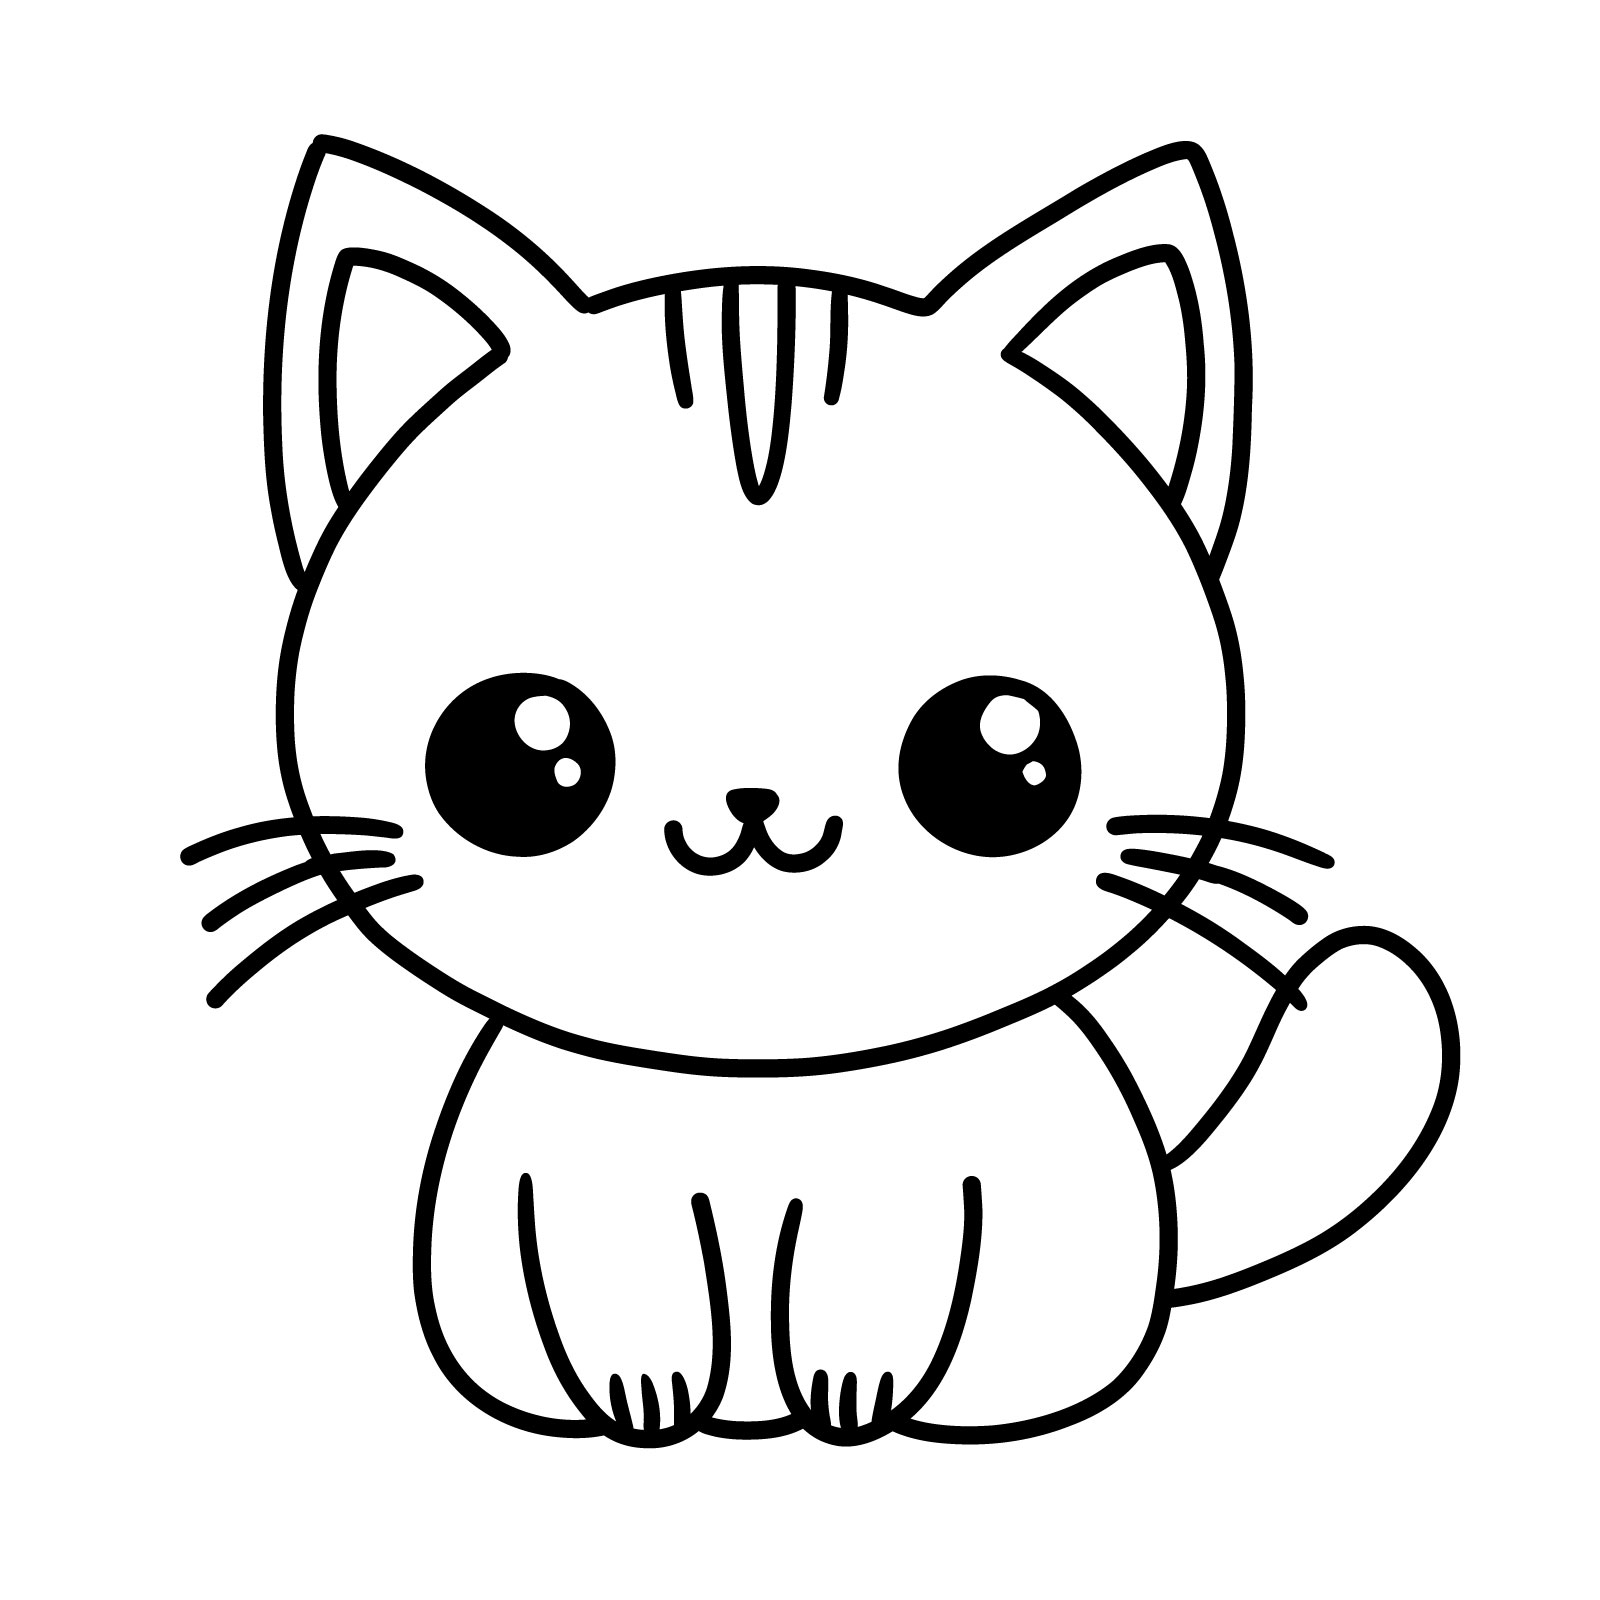
Measure 08 – Finalize the drawing , reviewing all outlines for clearness , and solidify any detail necessary for the all over image of a guy lie contentedly on its stomach
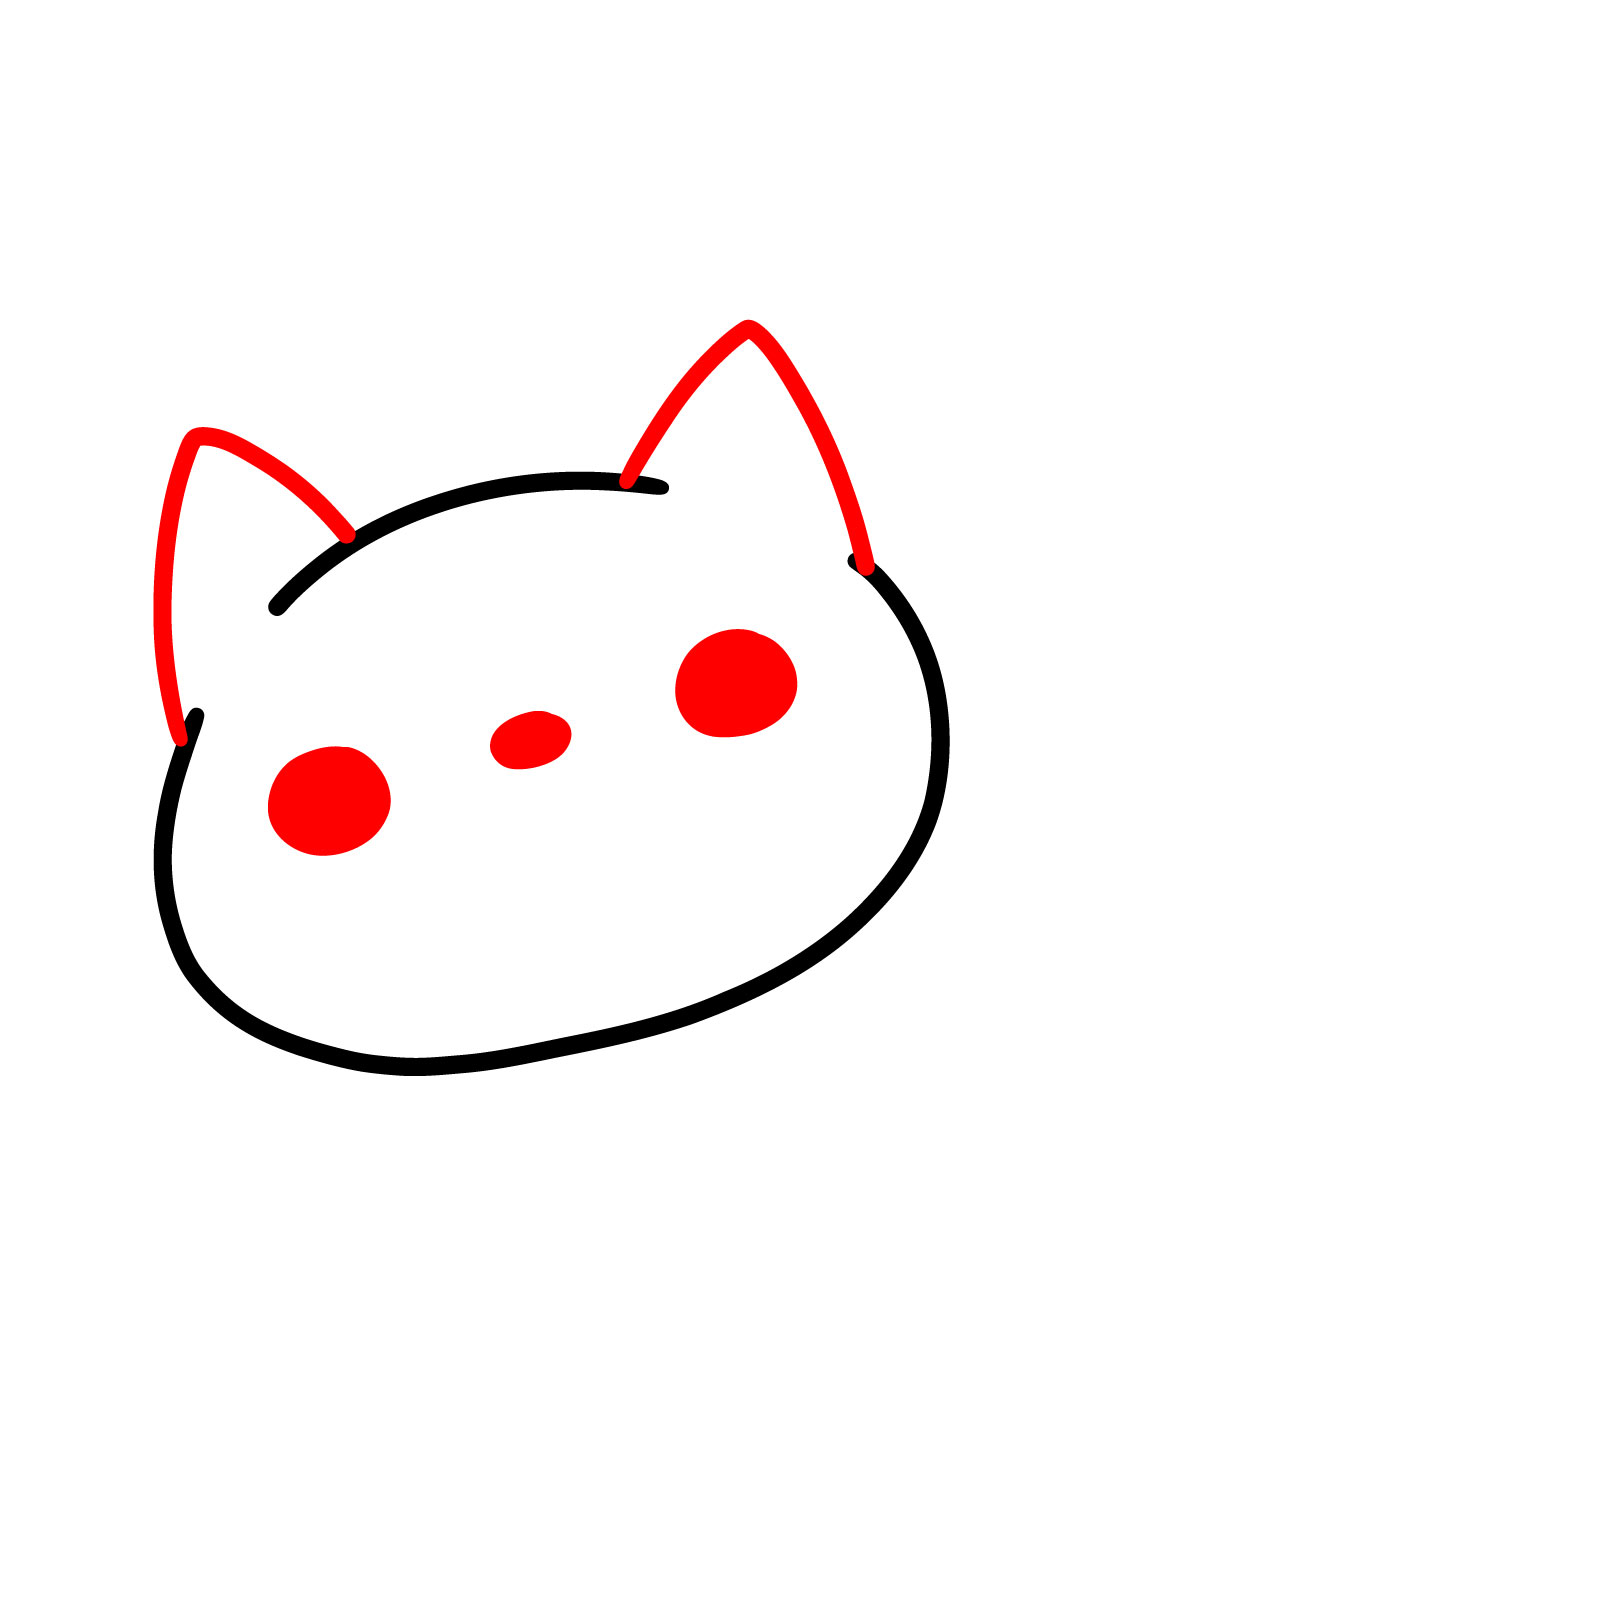
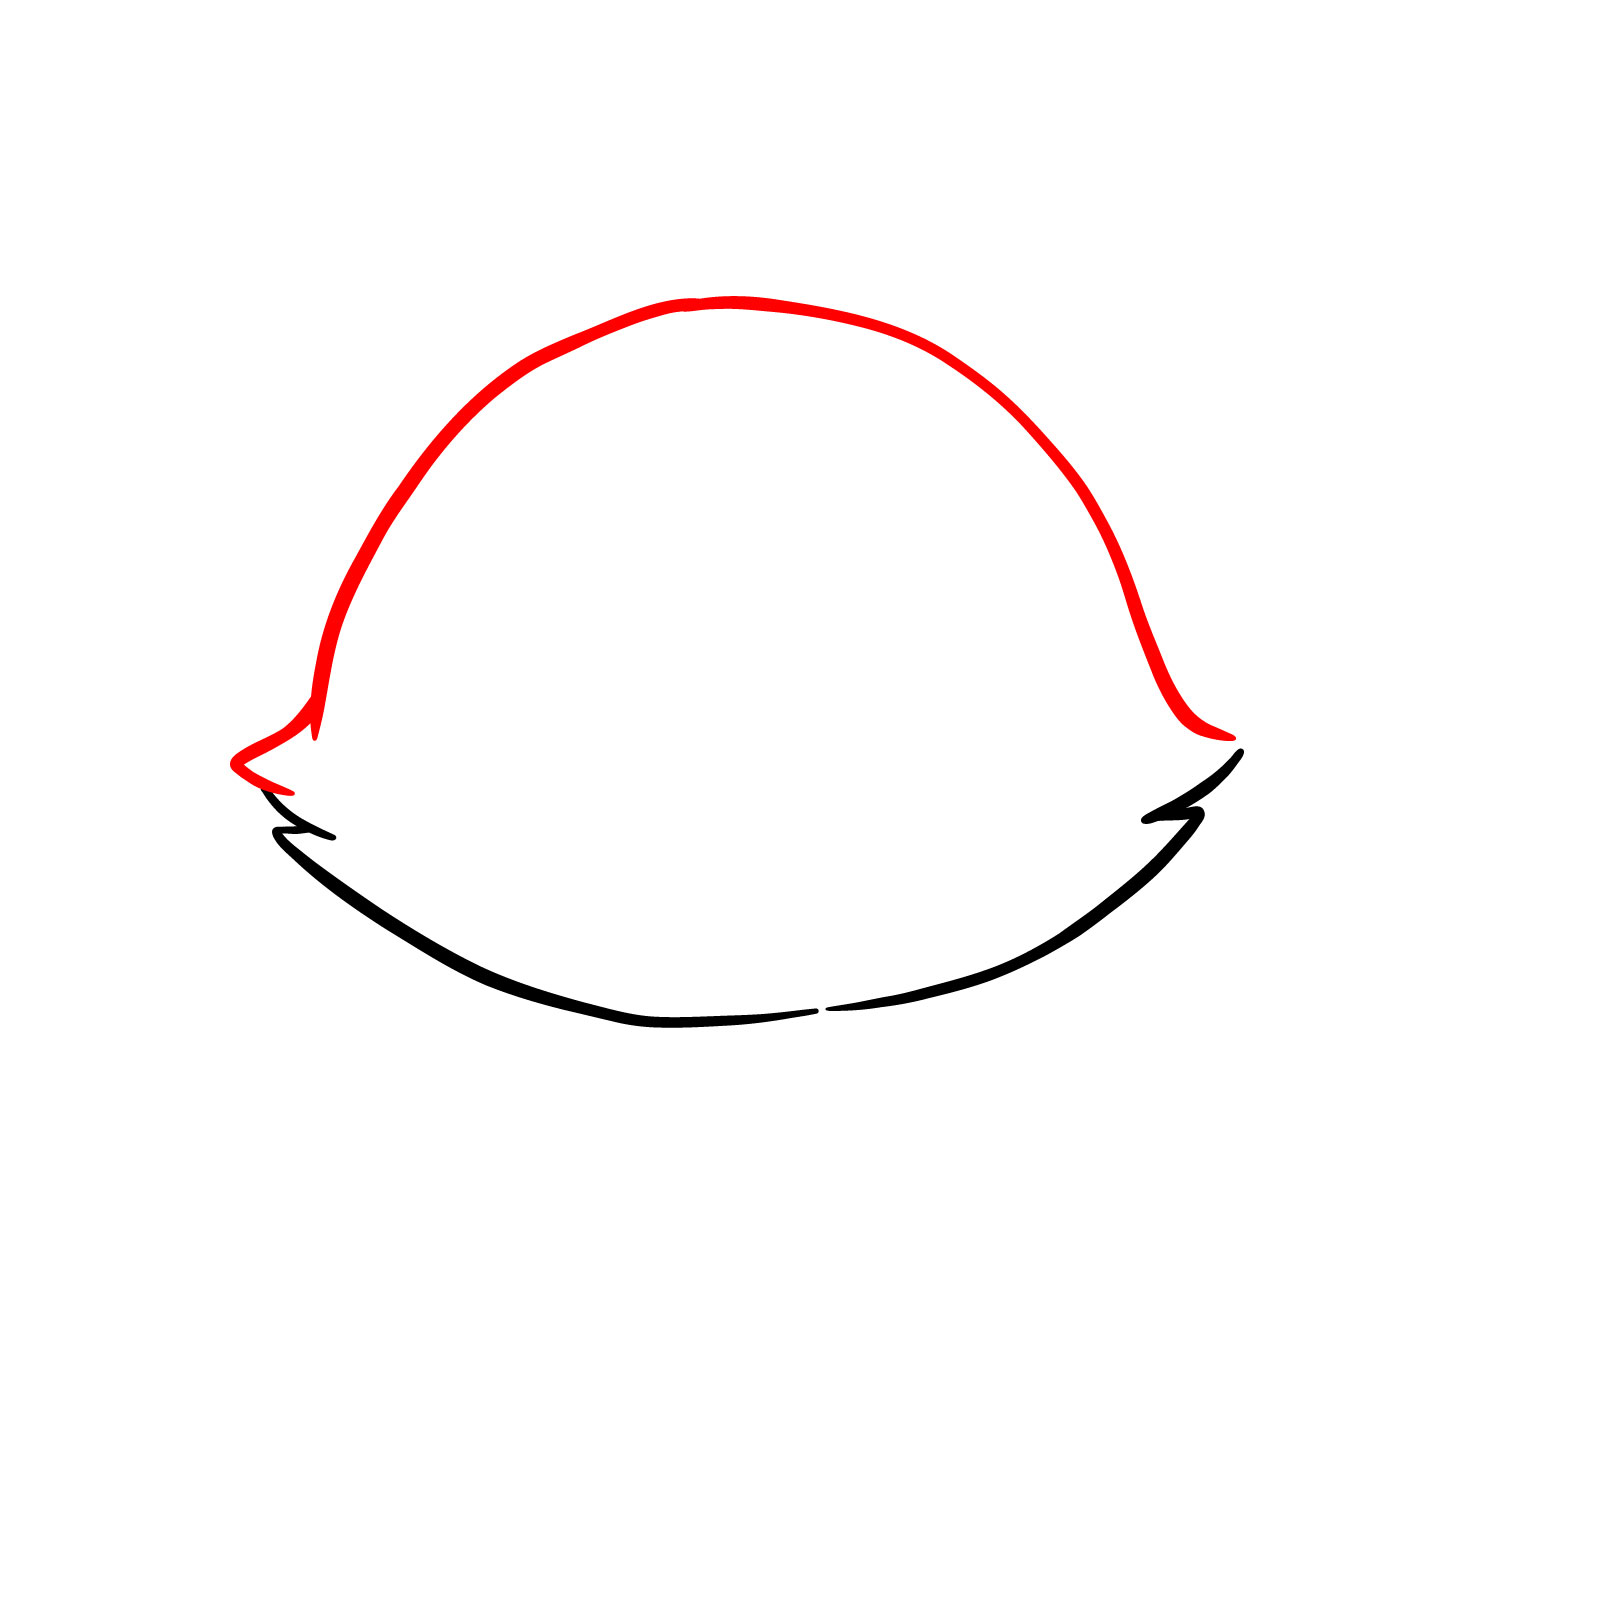
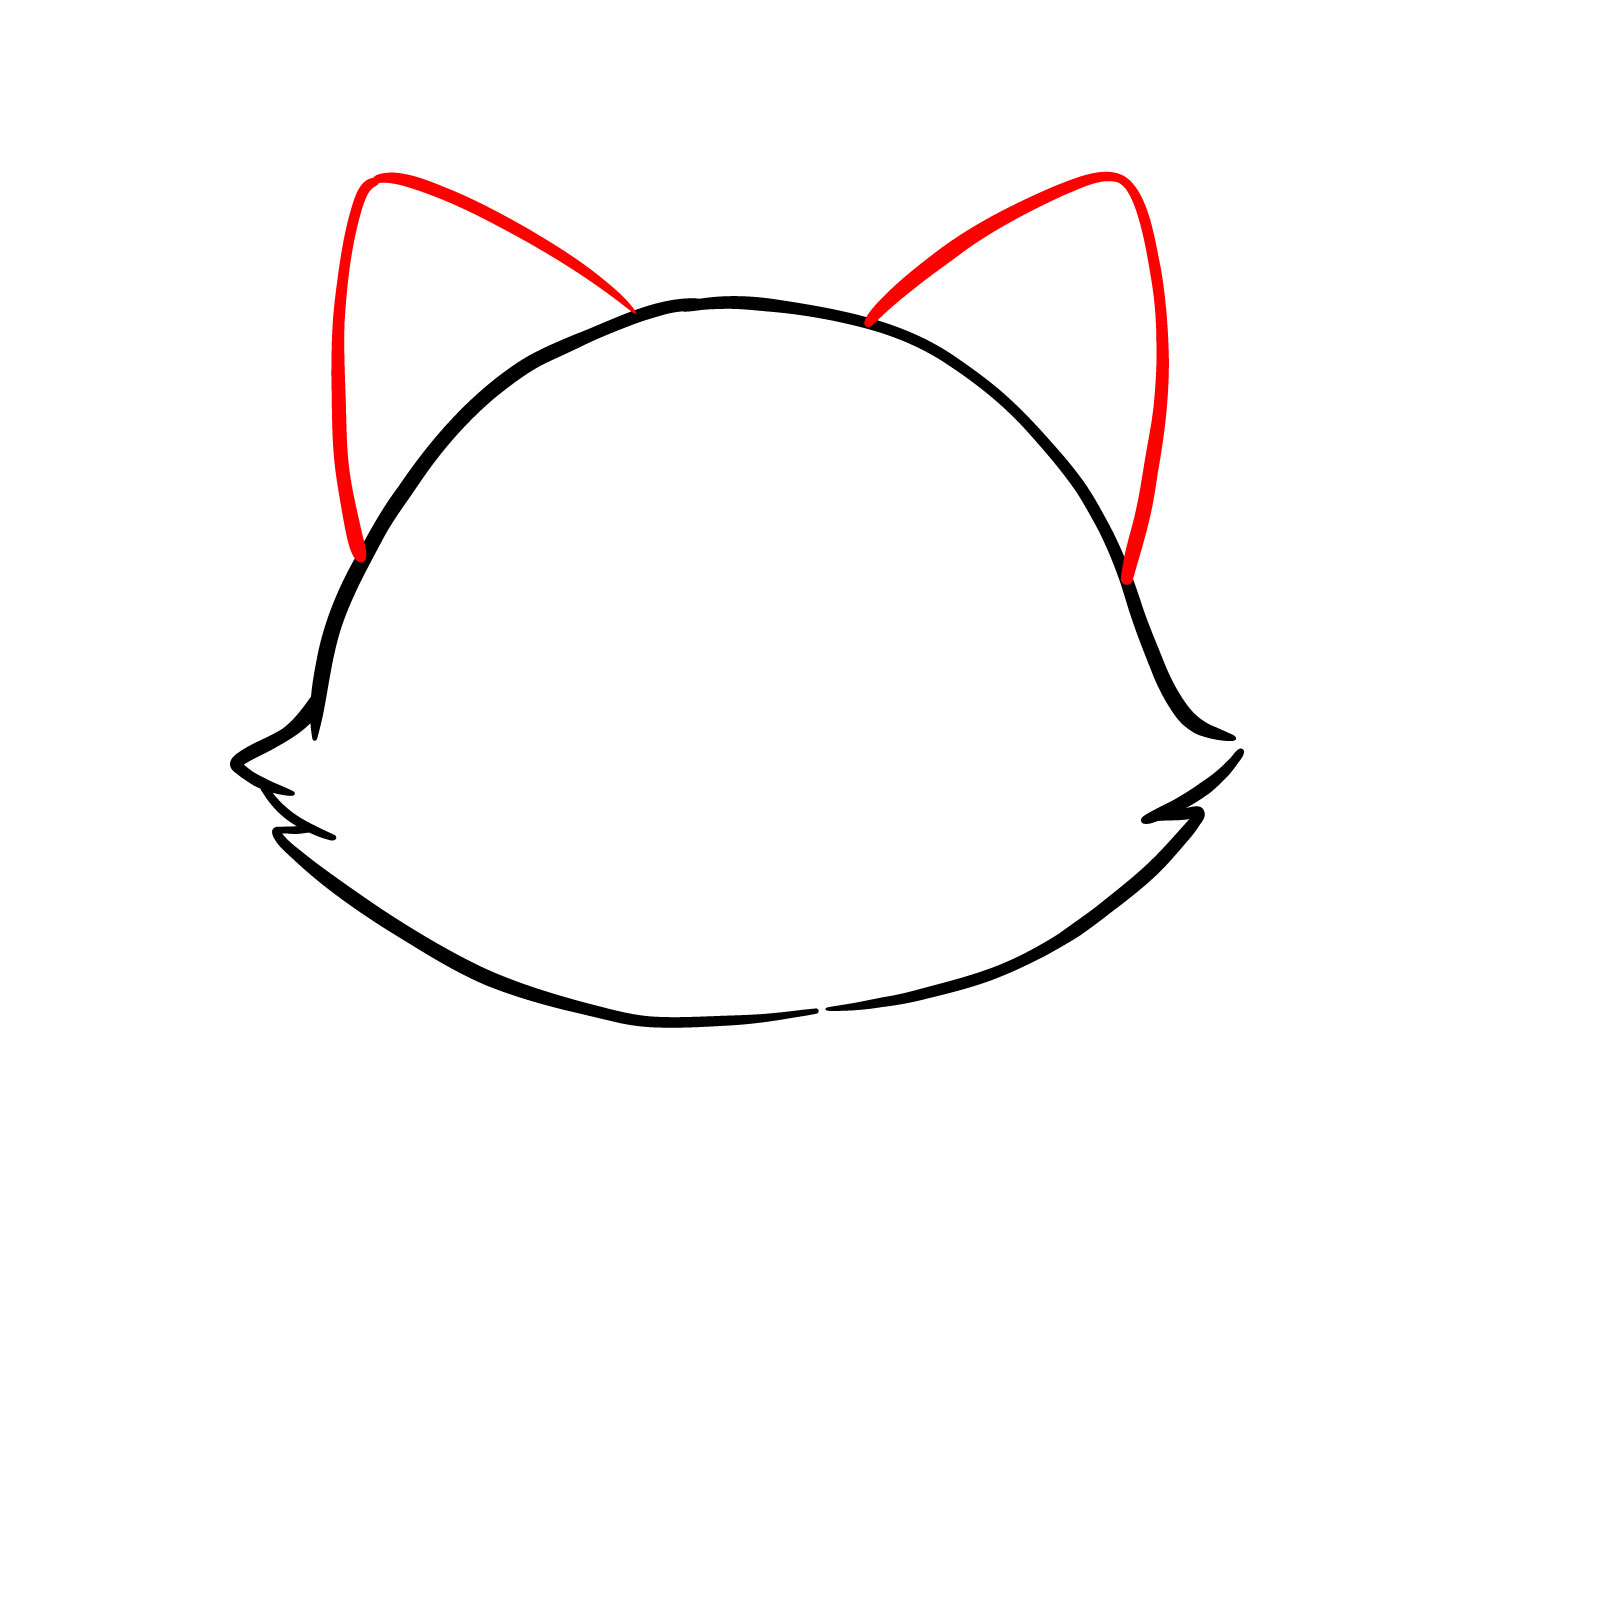
Guide 3 : Describe a Bipedal Cartoon Cat – 8 Steps
Ready for another fun challenge ? The third guide feature a whimsical bipedal cartoon cat that stands on its two feet . This drawing , composed of eight steps , is similar in complexity to the second guide but introduce the delightful turn of anthropomorphism . Your sketch will occur to life with this character ’ sec oversized center and an endearing good stance . This trivial feline is good of personality , from its perky ears down to its tiny hand . Whether you ’ re a beginner or looking to add some playful characters to your portfolio , this guide be sure to inspire your creativity .
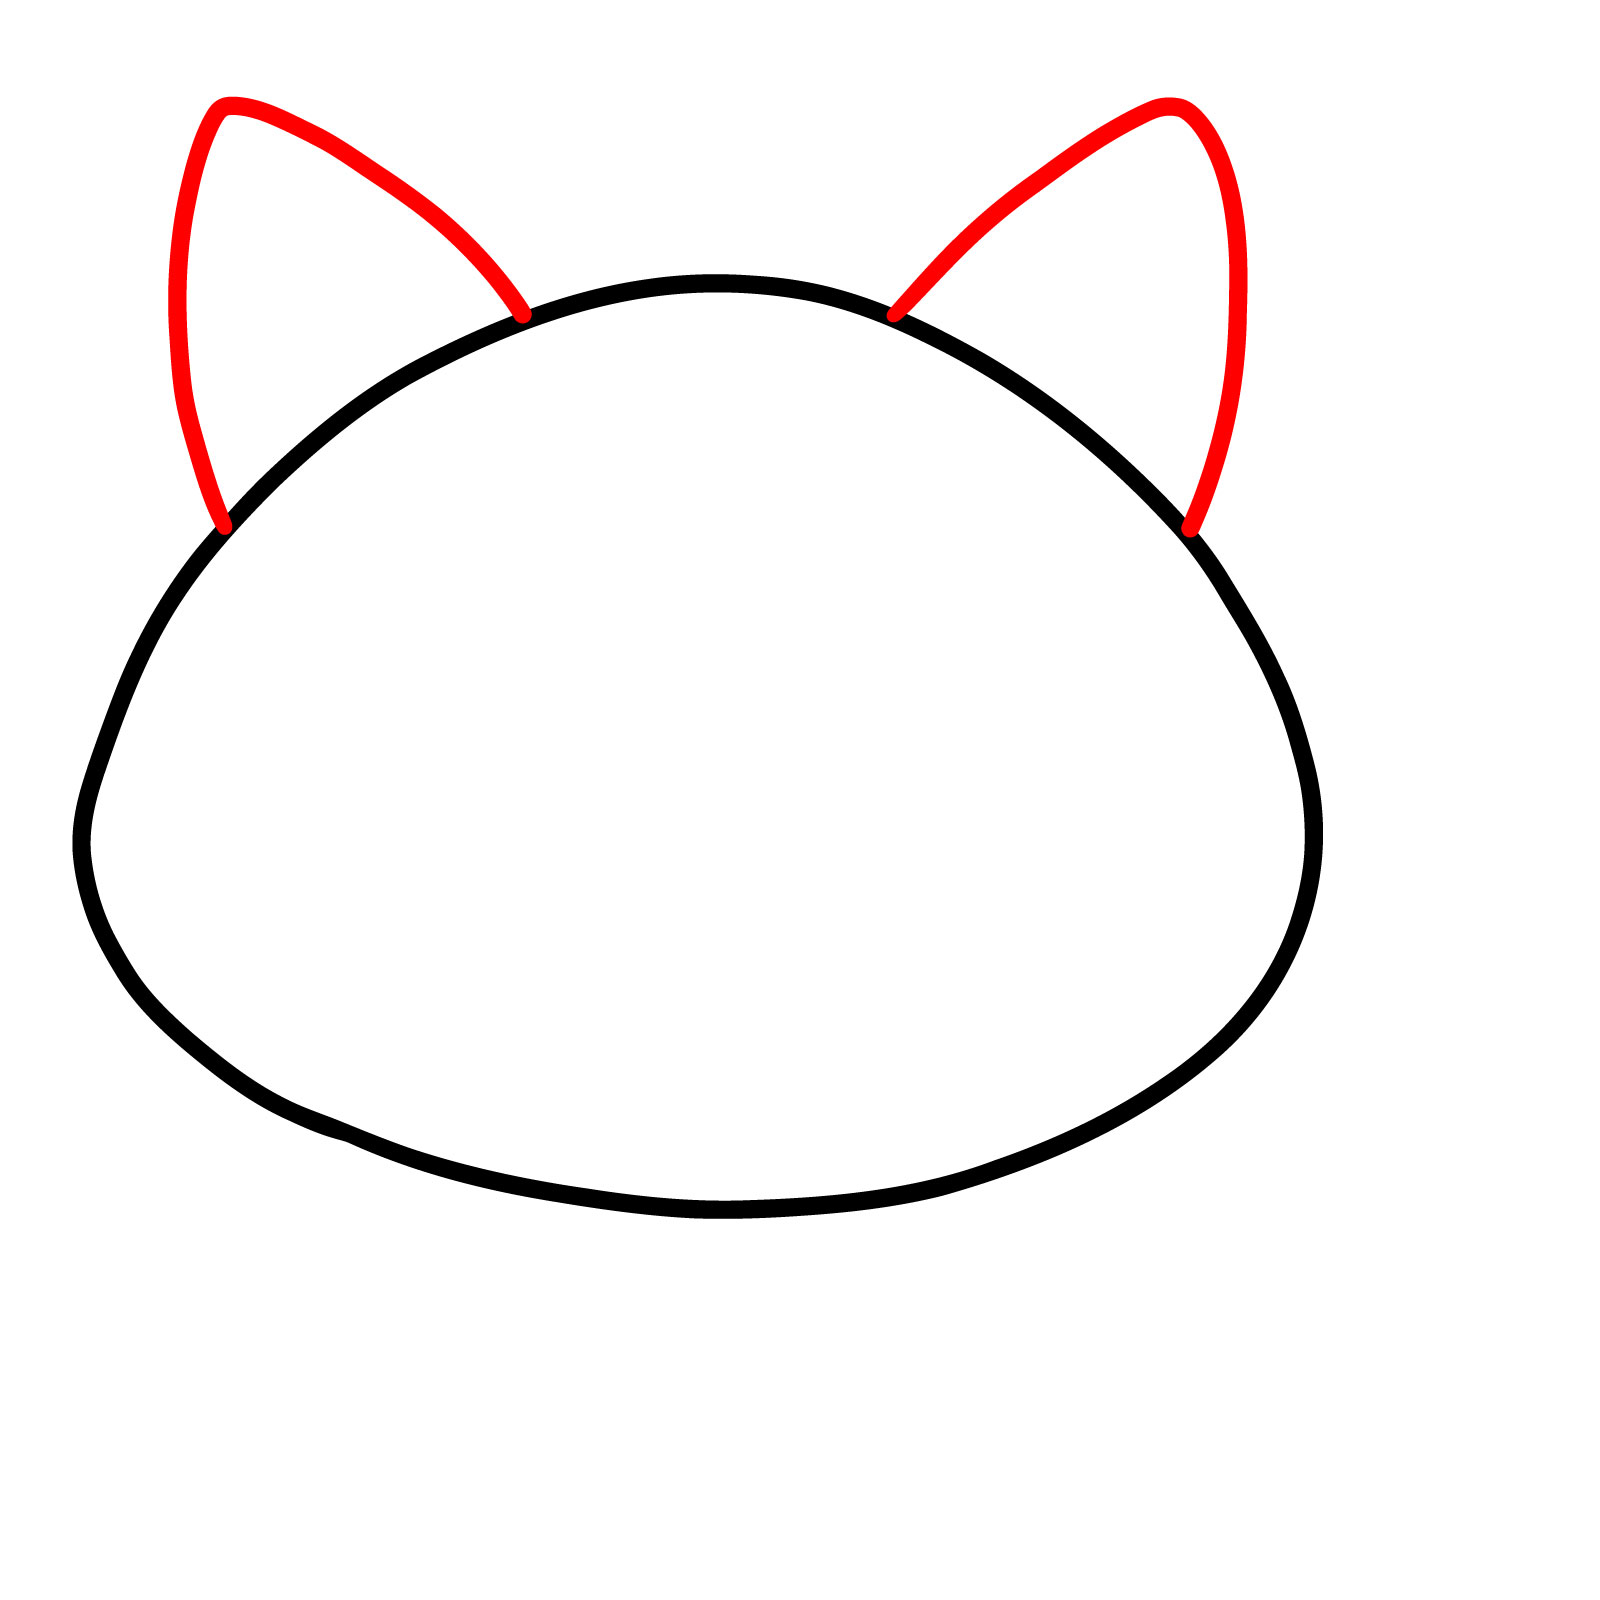
Step 01 – Begin with an oval shape to spring the head of the cartoon guy , which will serve as the foundation for facial feature
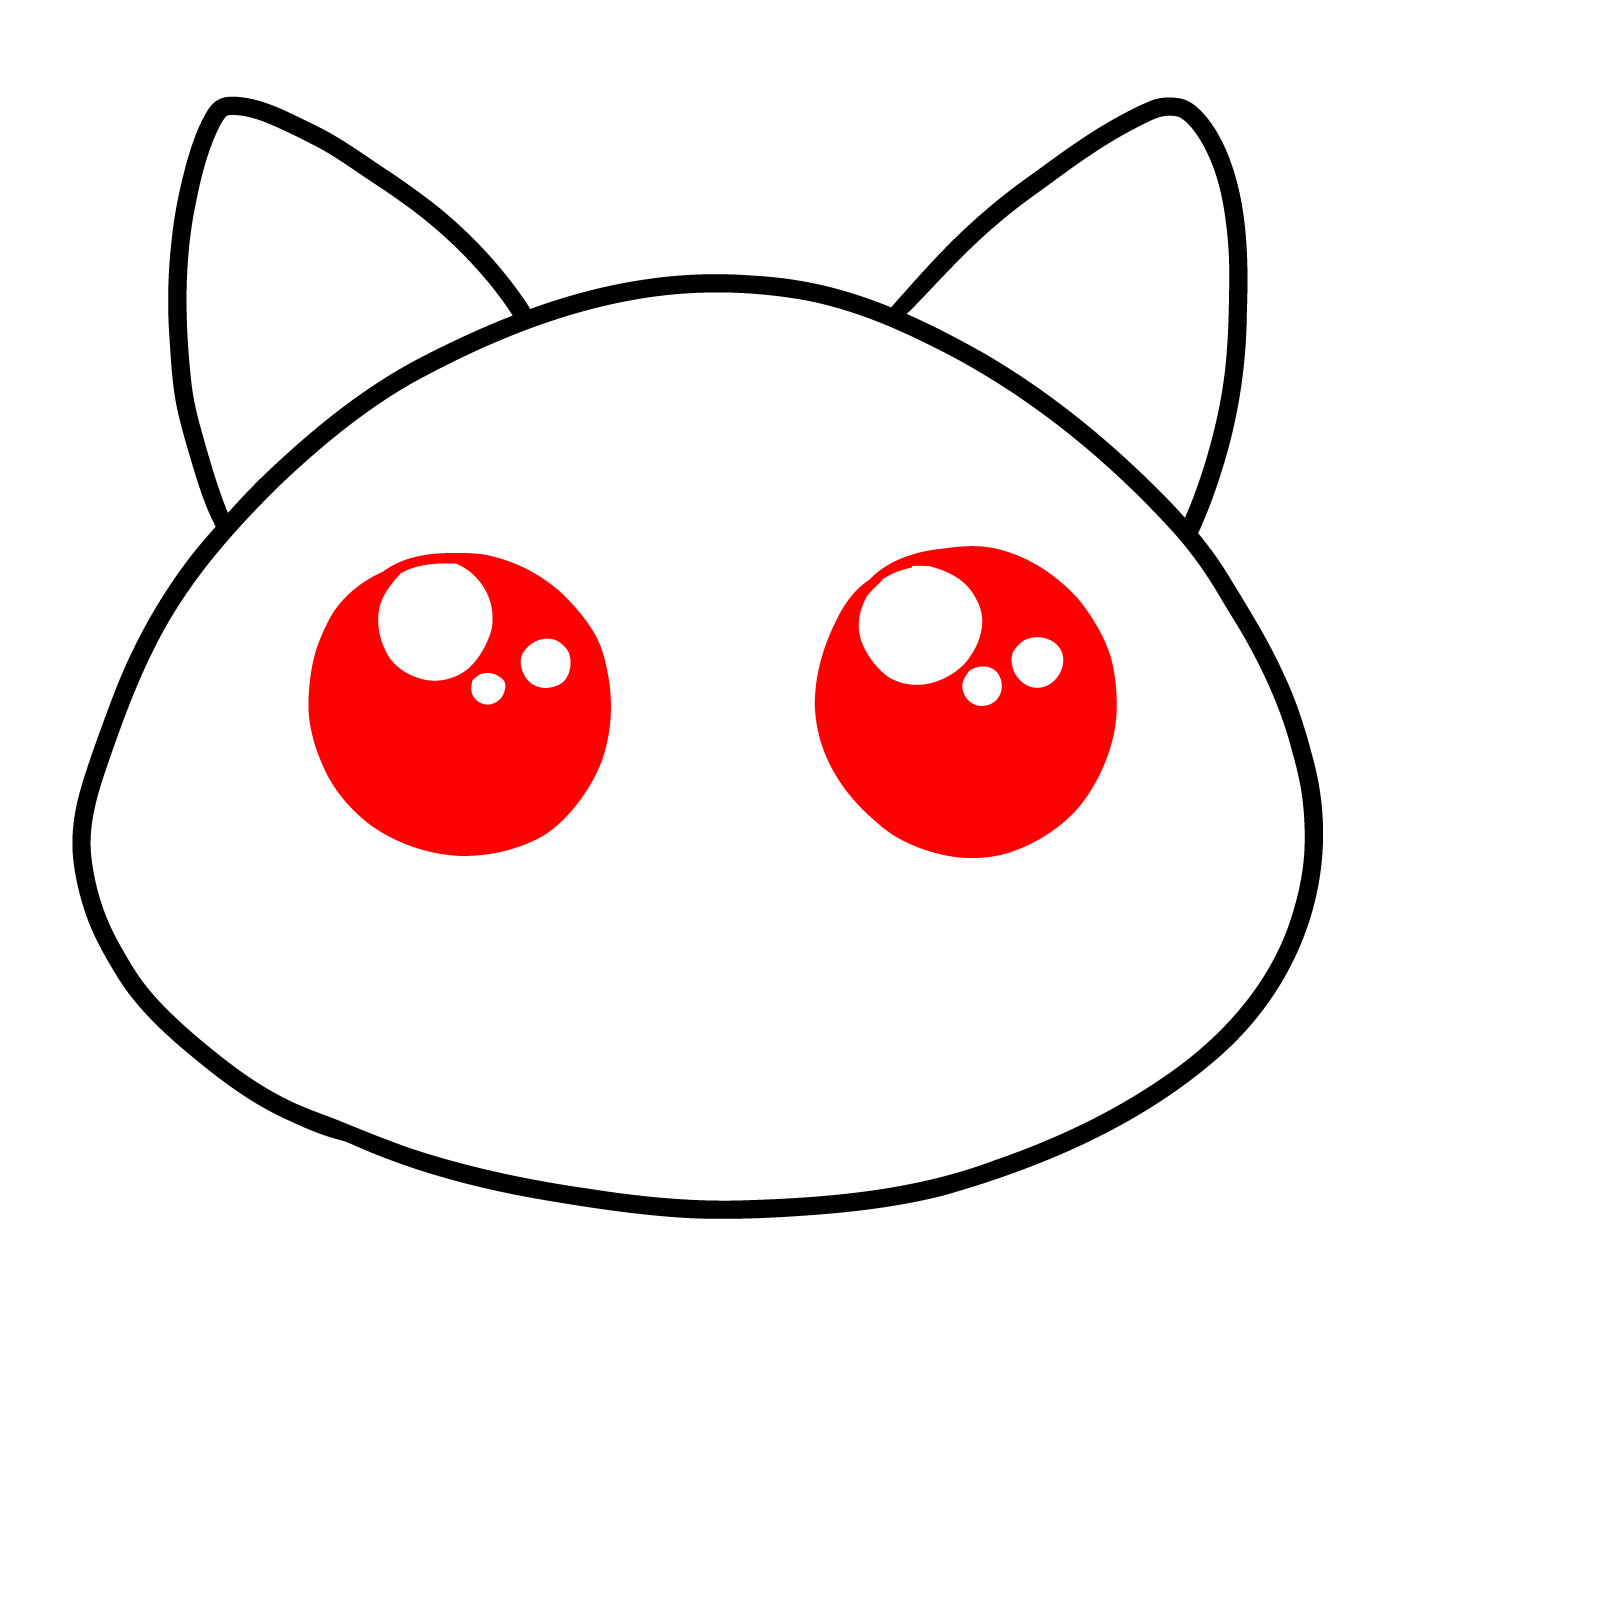
Measure 02 – Add two triangular shapes to the height of the oval for the cat ’ sec ear , ensuring they are symmetrical and proportional to the top dog
Pace 03 – Draw two big band for the middle and fill them with color , get out two dots—one larger and one smaller in the center—for the highlights that give the middle a lively expression
Measure 04 – Outline the eye with thick lines to constitute lashes or eyelid , then outline a small nose and a mouth to discharge the cartoon guy ’ s side
Pace 05 – Enhance the cat ’ s side with beard and lend mere job near the ears to indicate fur

Step 06 – Draw the torso frame for the bipedal cartoon guy , starting with the body below the head . Outline the legs to establish a standing posture

Measure 07 – Add the arm with rounded end for hands , an oval figure on the body for the belly detail , and finalize the paws to complete the arm
Step 08 – Conclude this easy-to-follow guide by reexamine the outline and detail , ensuring your bipedal cartoon cat have a cohesive and friendly appearance . This drawing seamlessly combines simple pattern and note to make an engaging character that ’ s perfect for beginner artists look to expand their repertoire
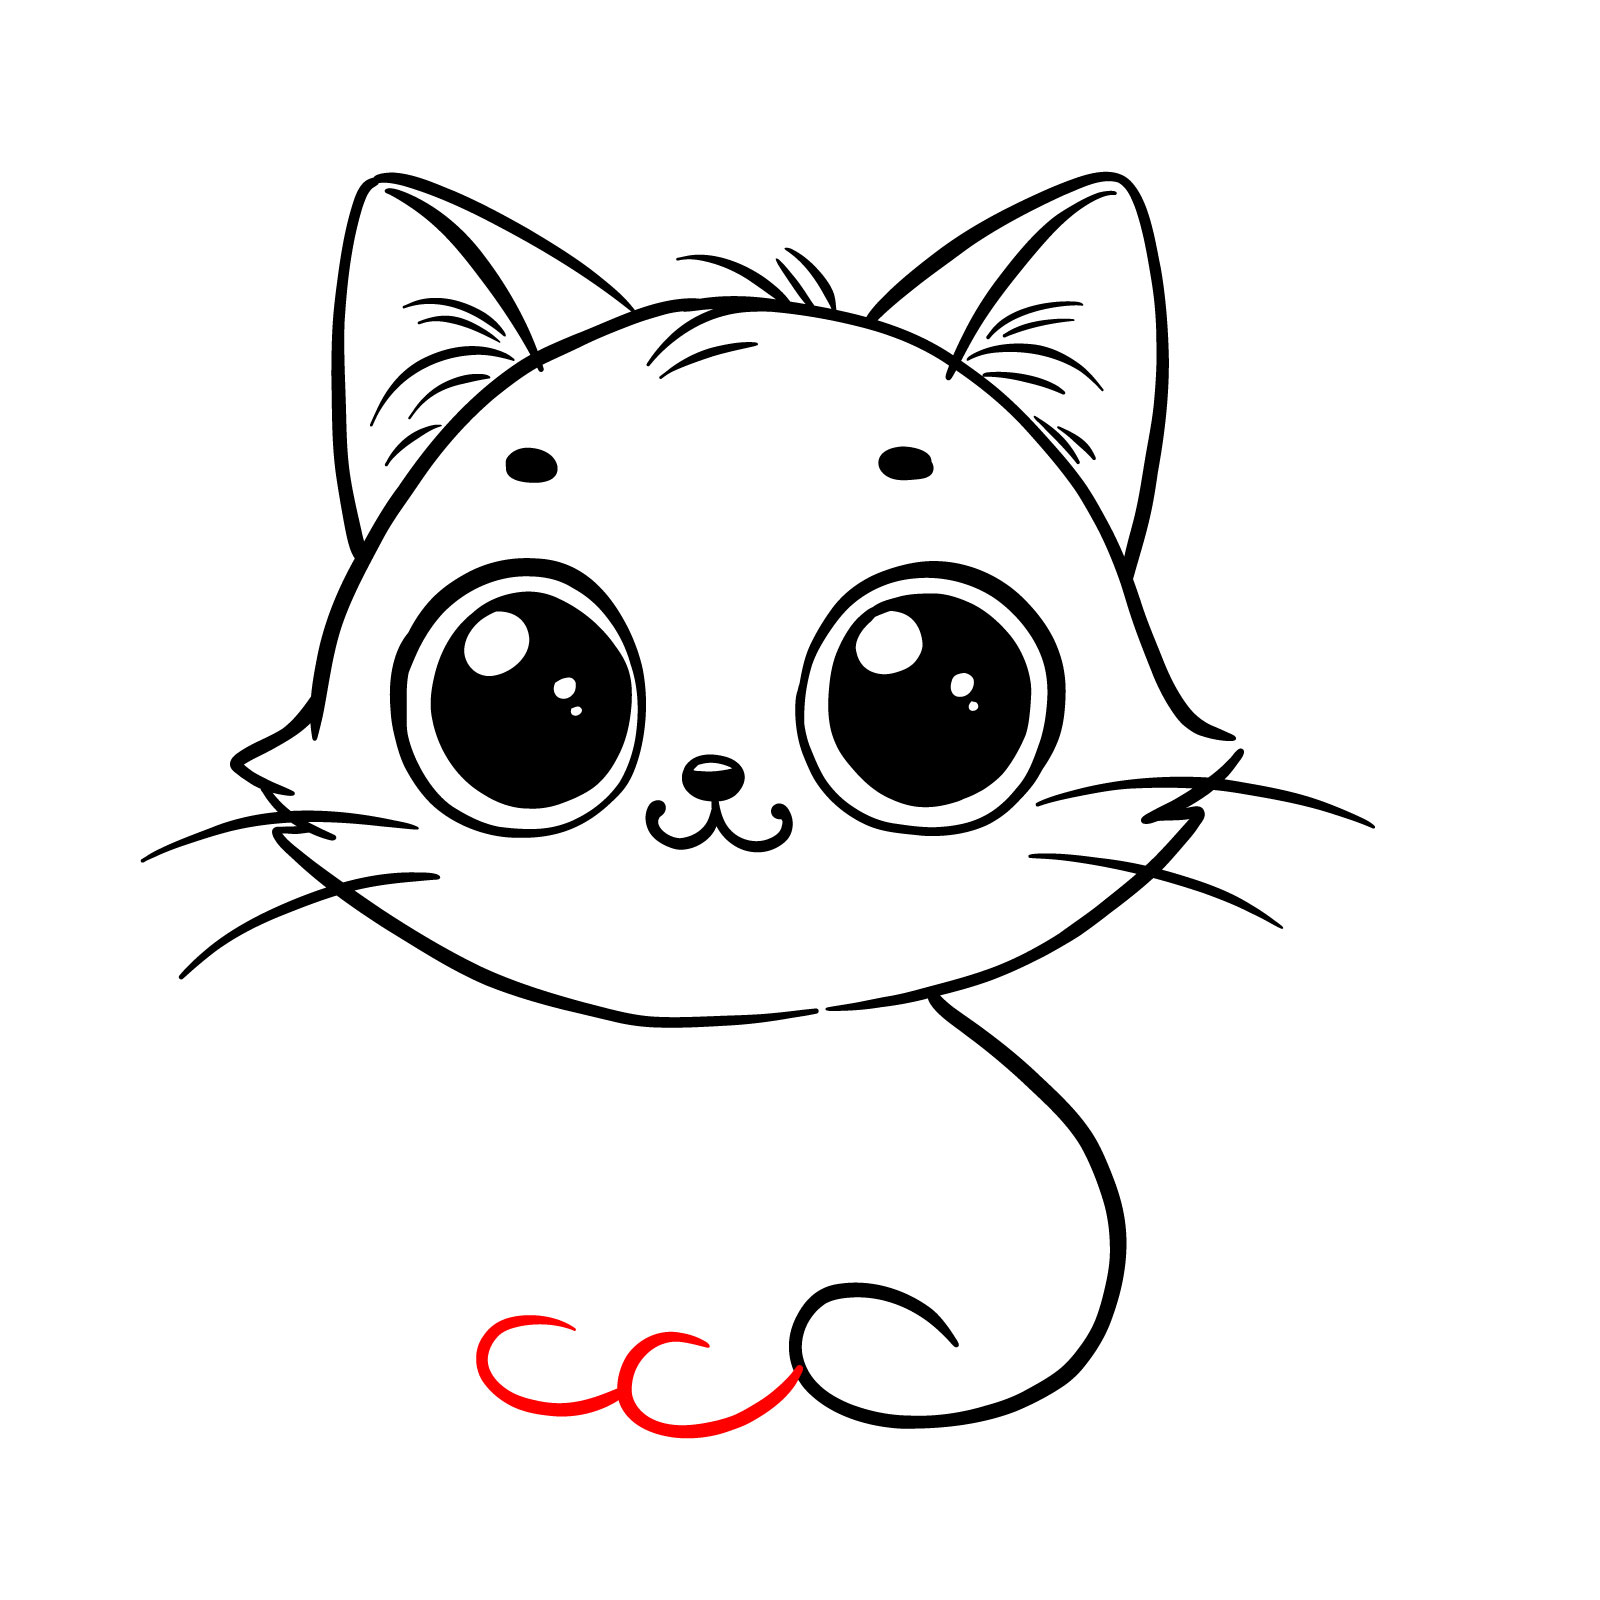
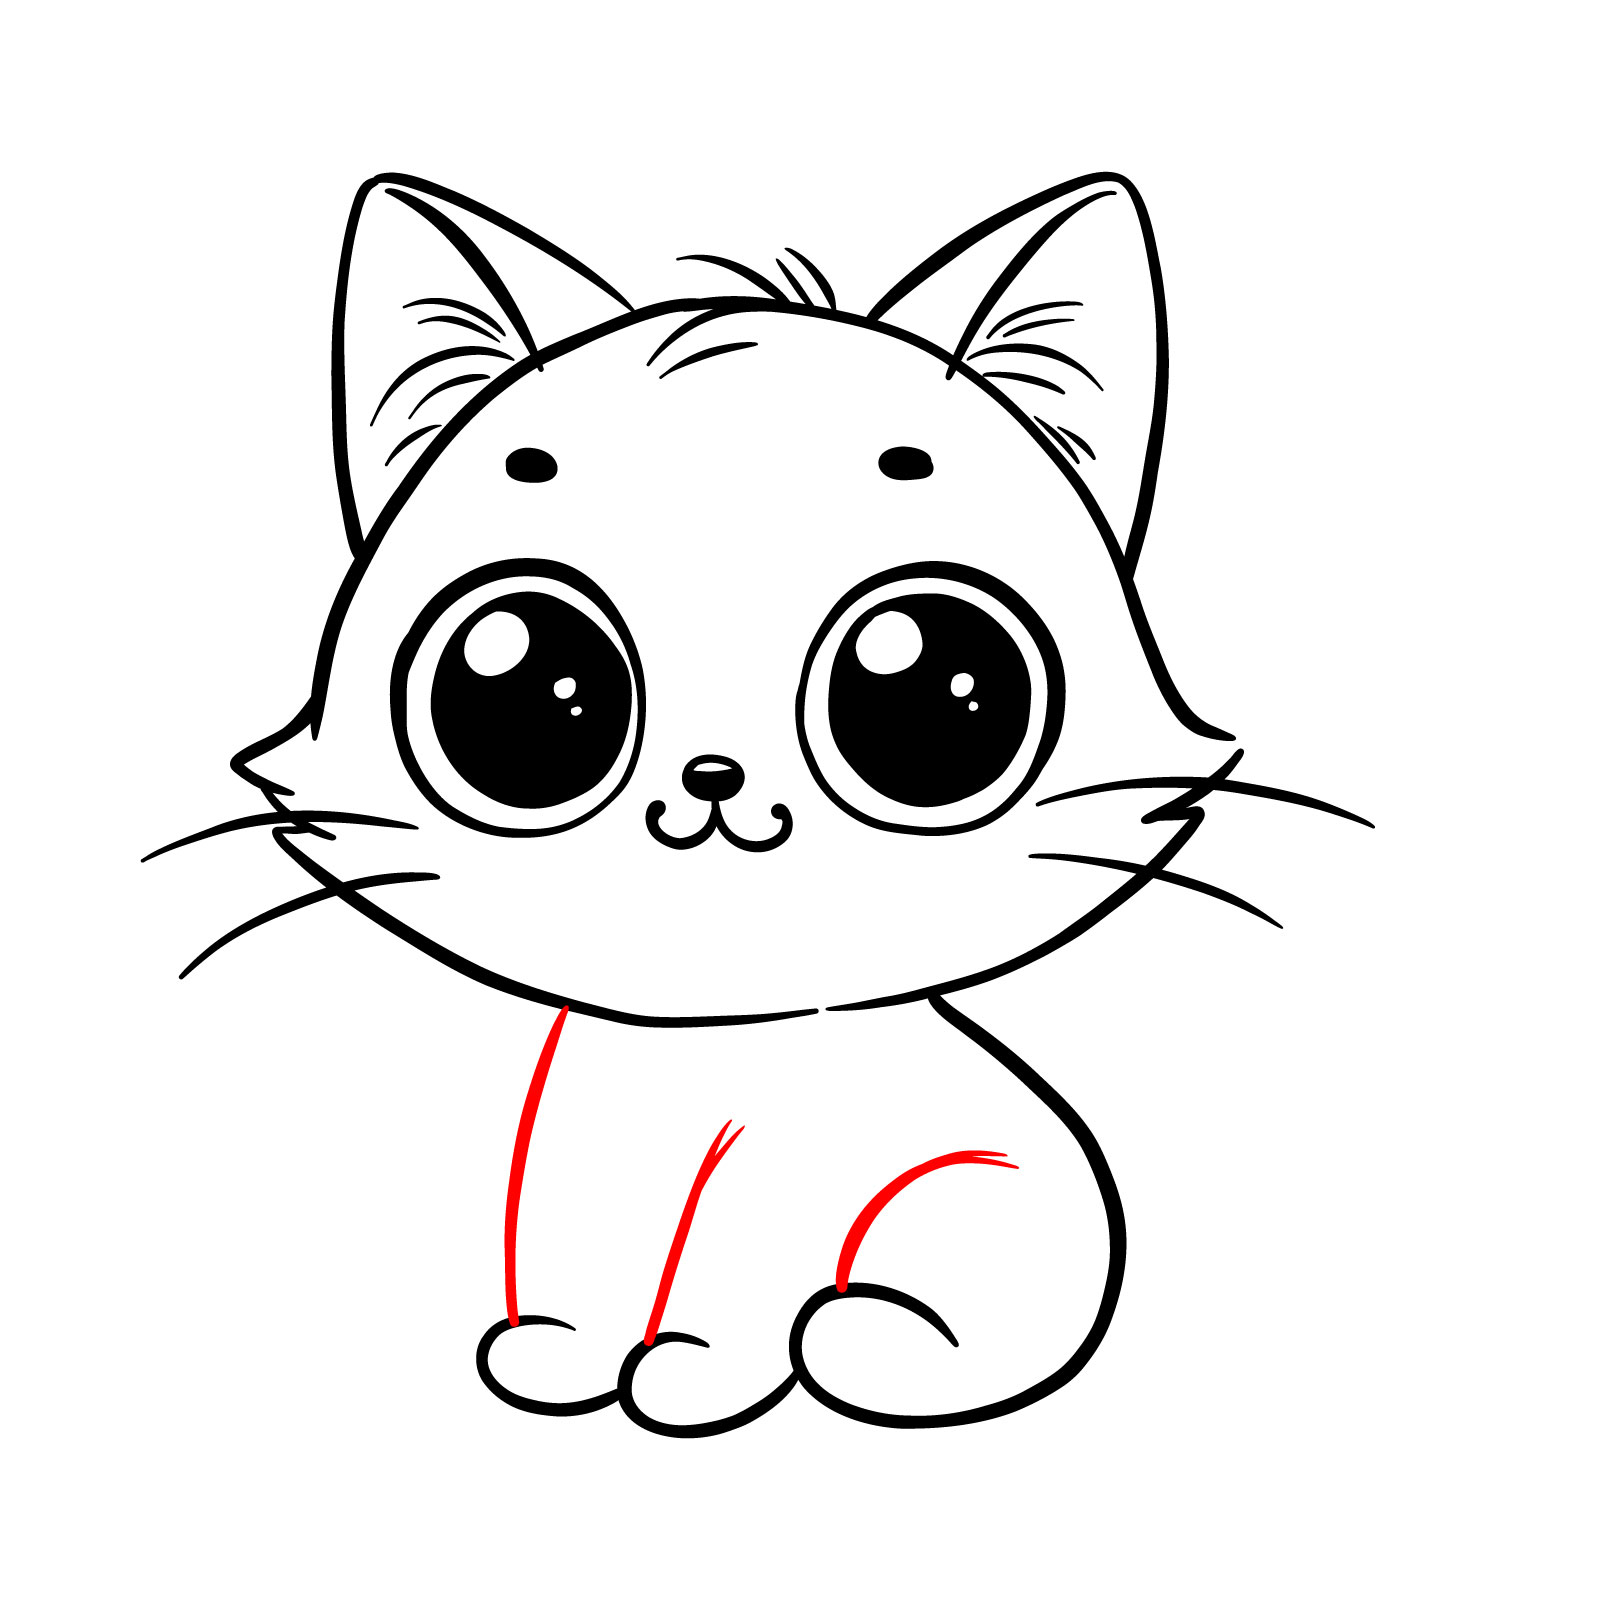
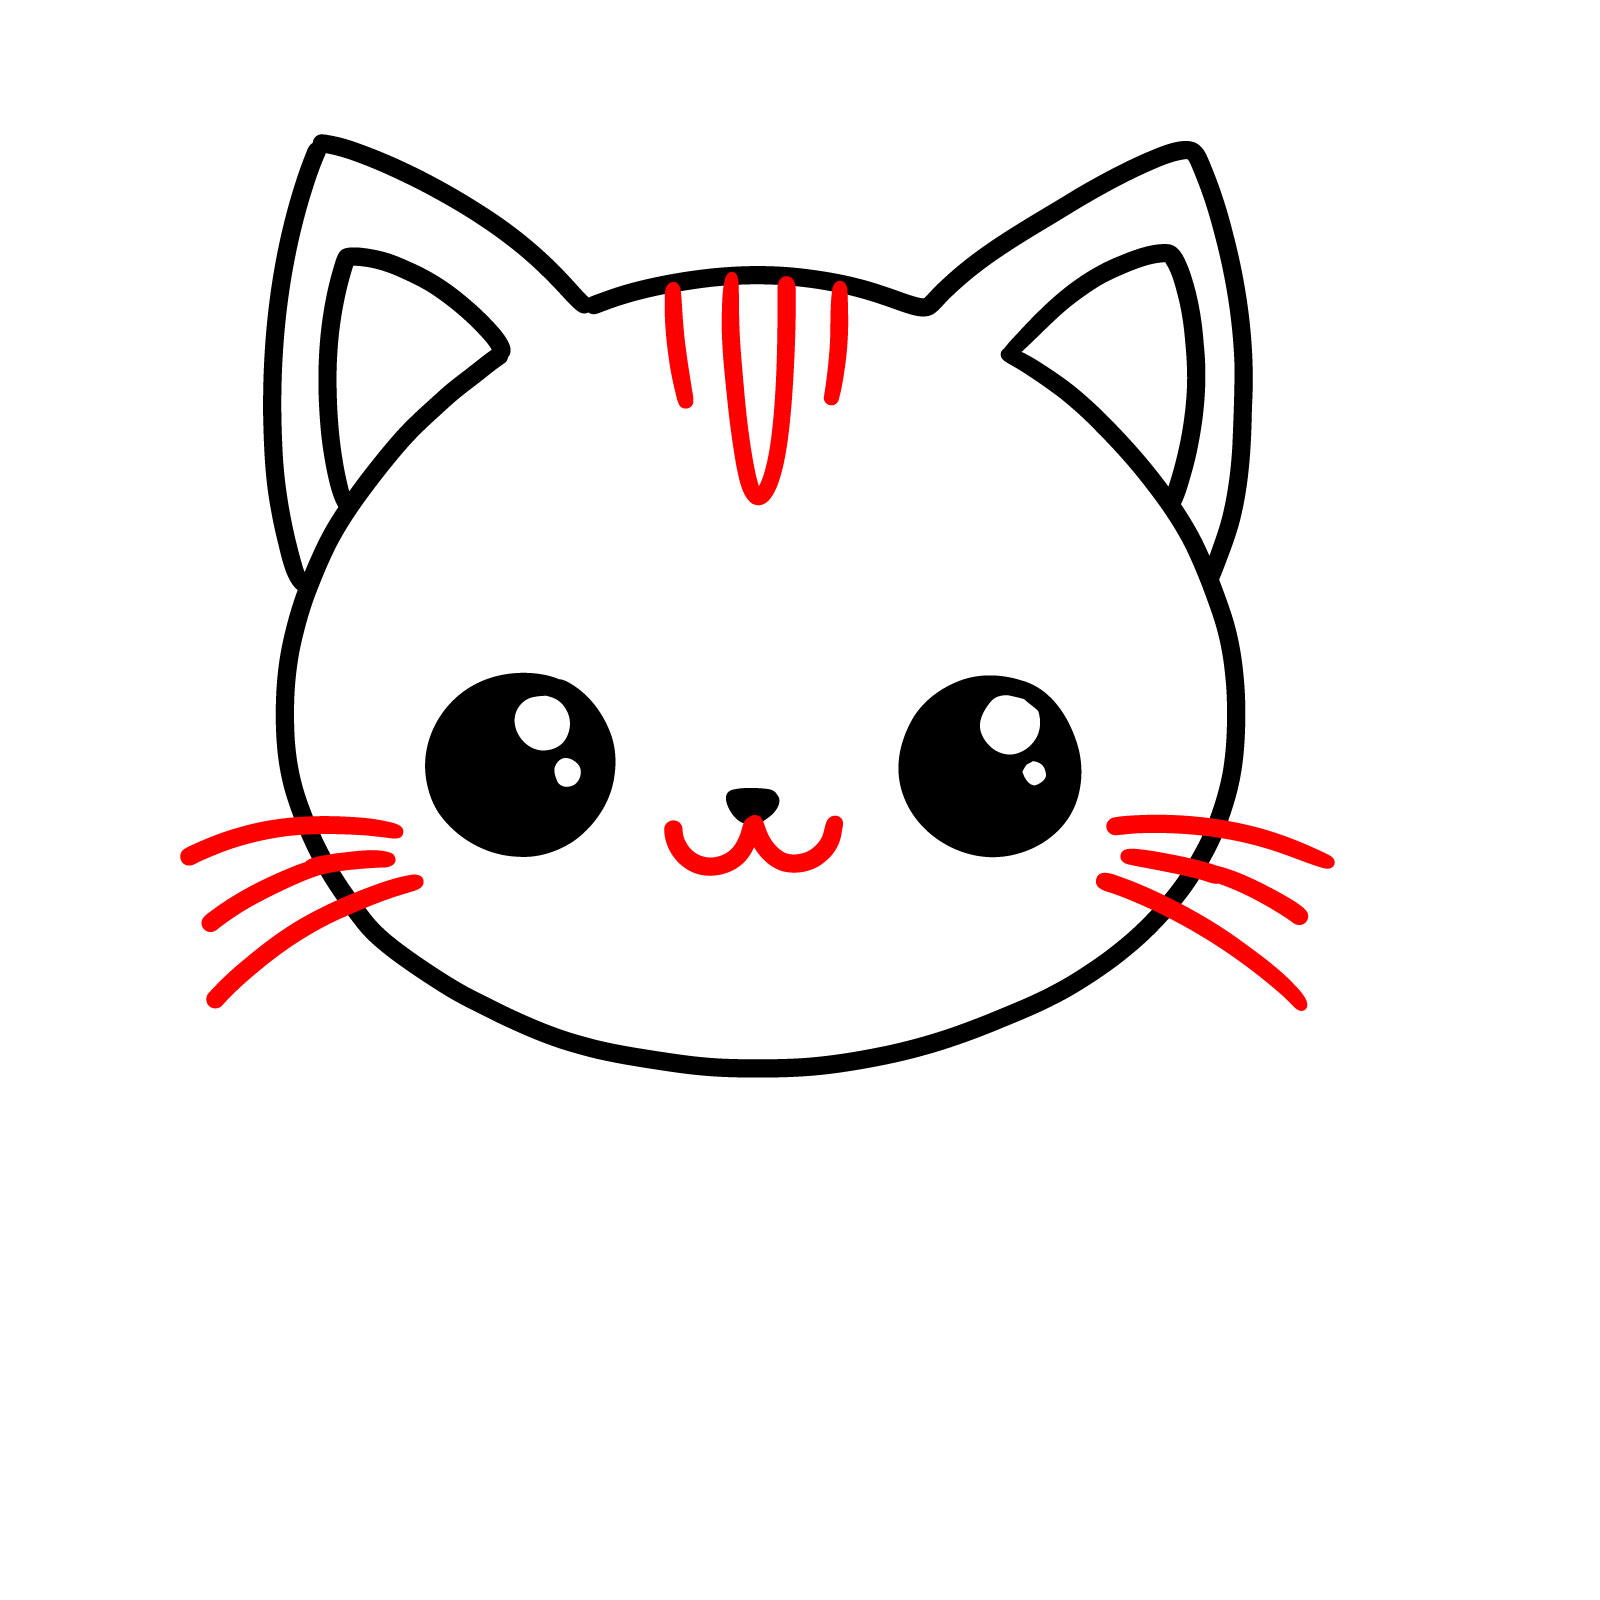
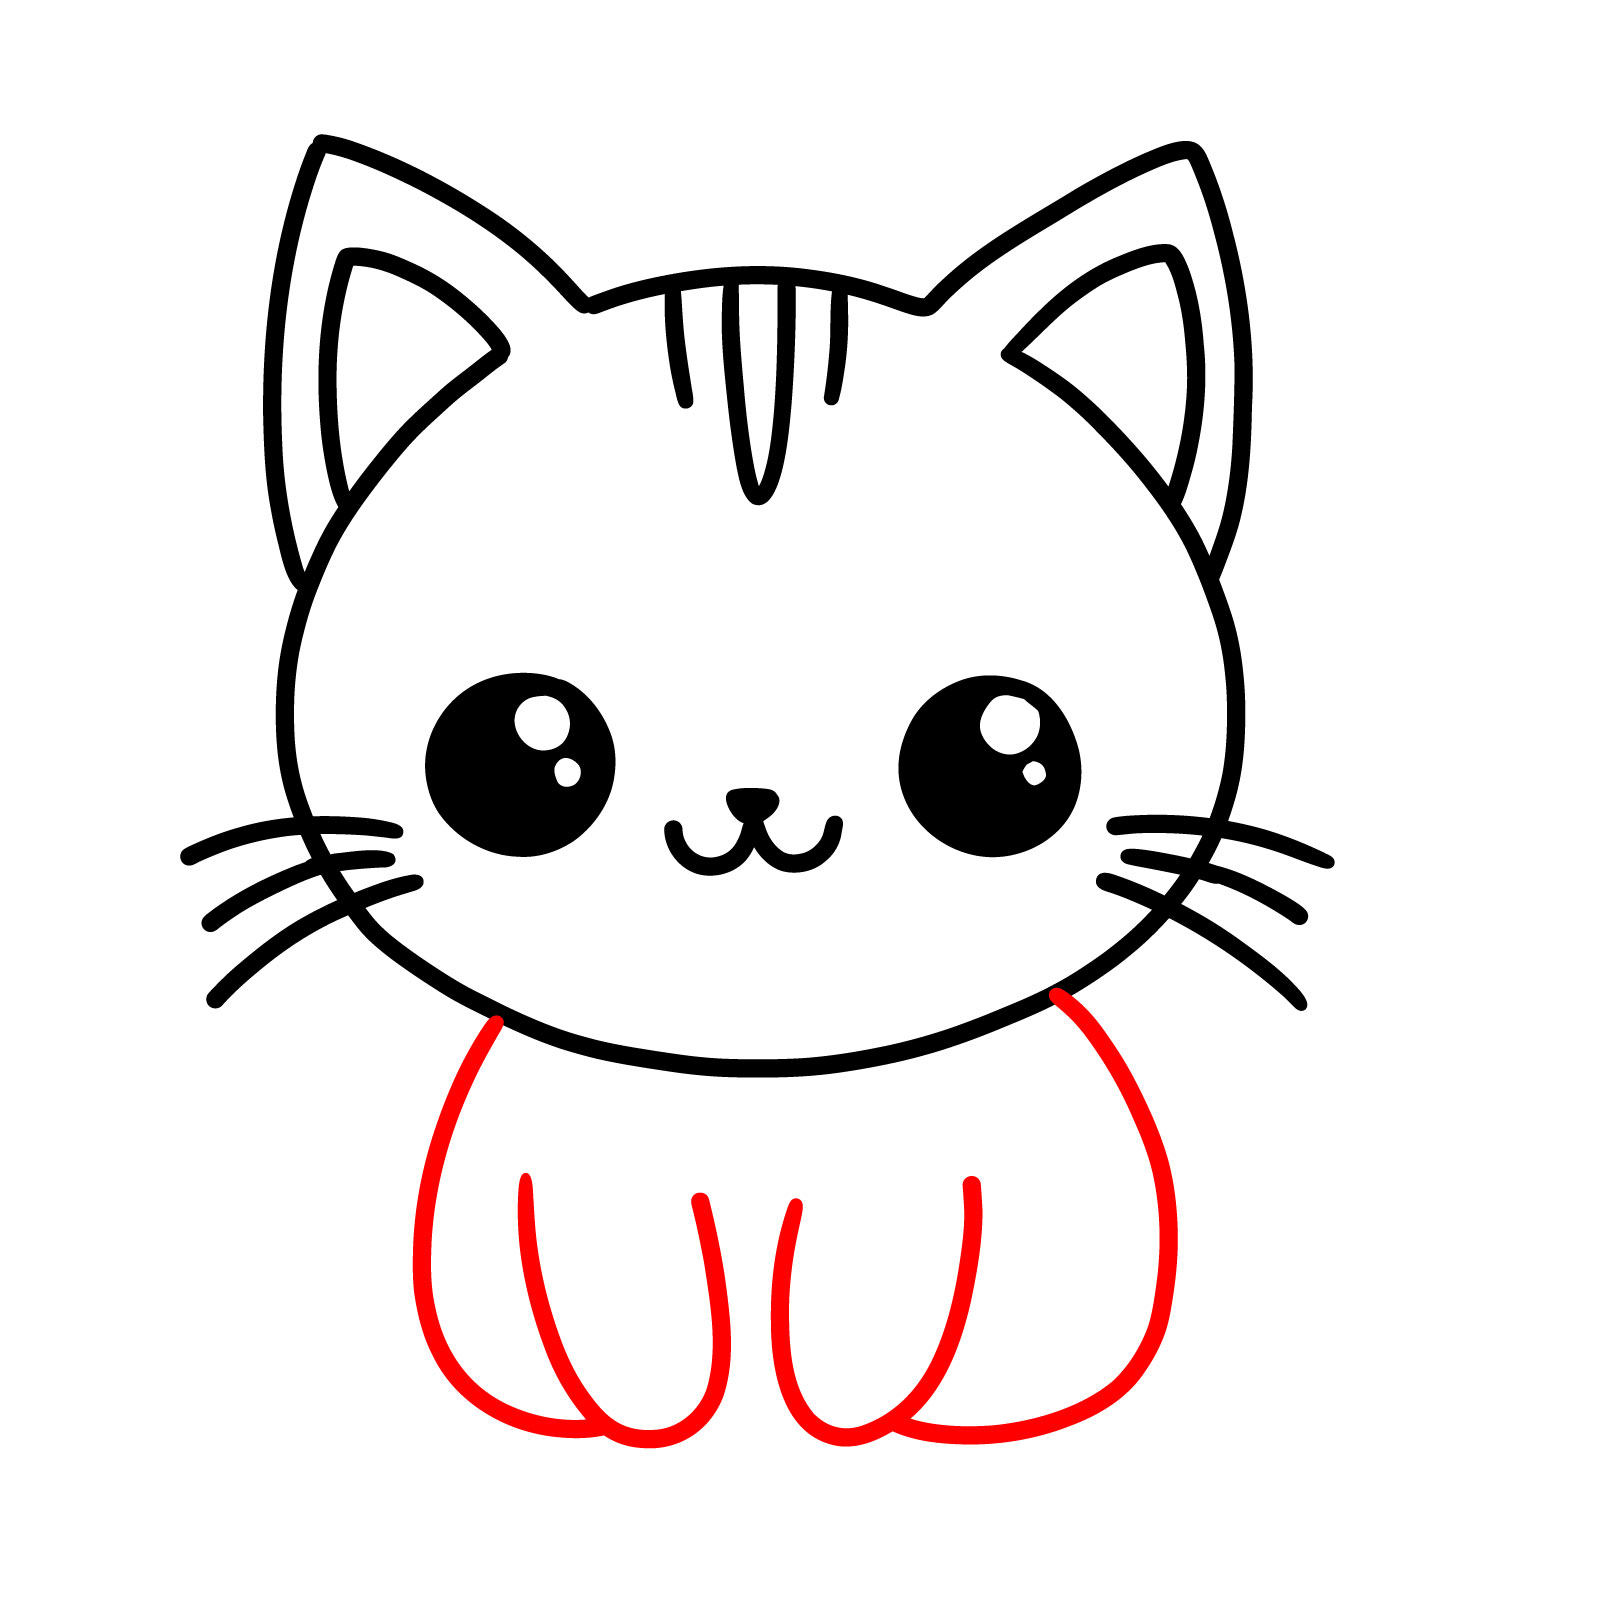
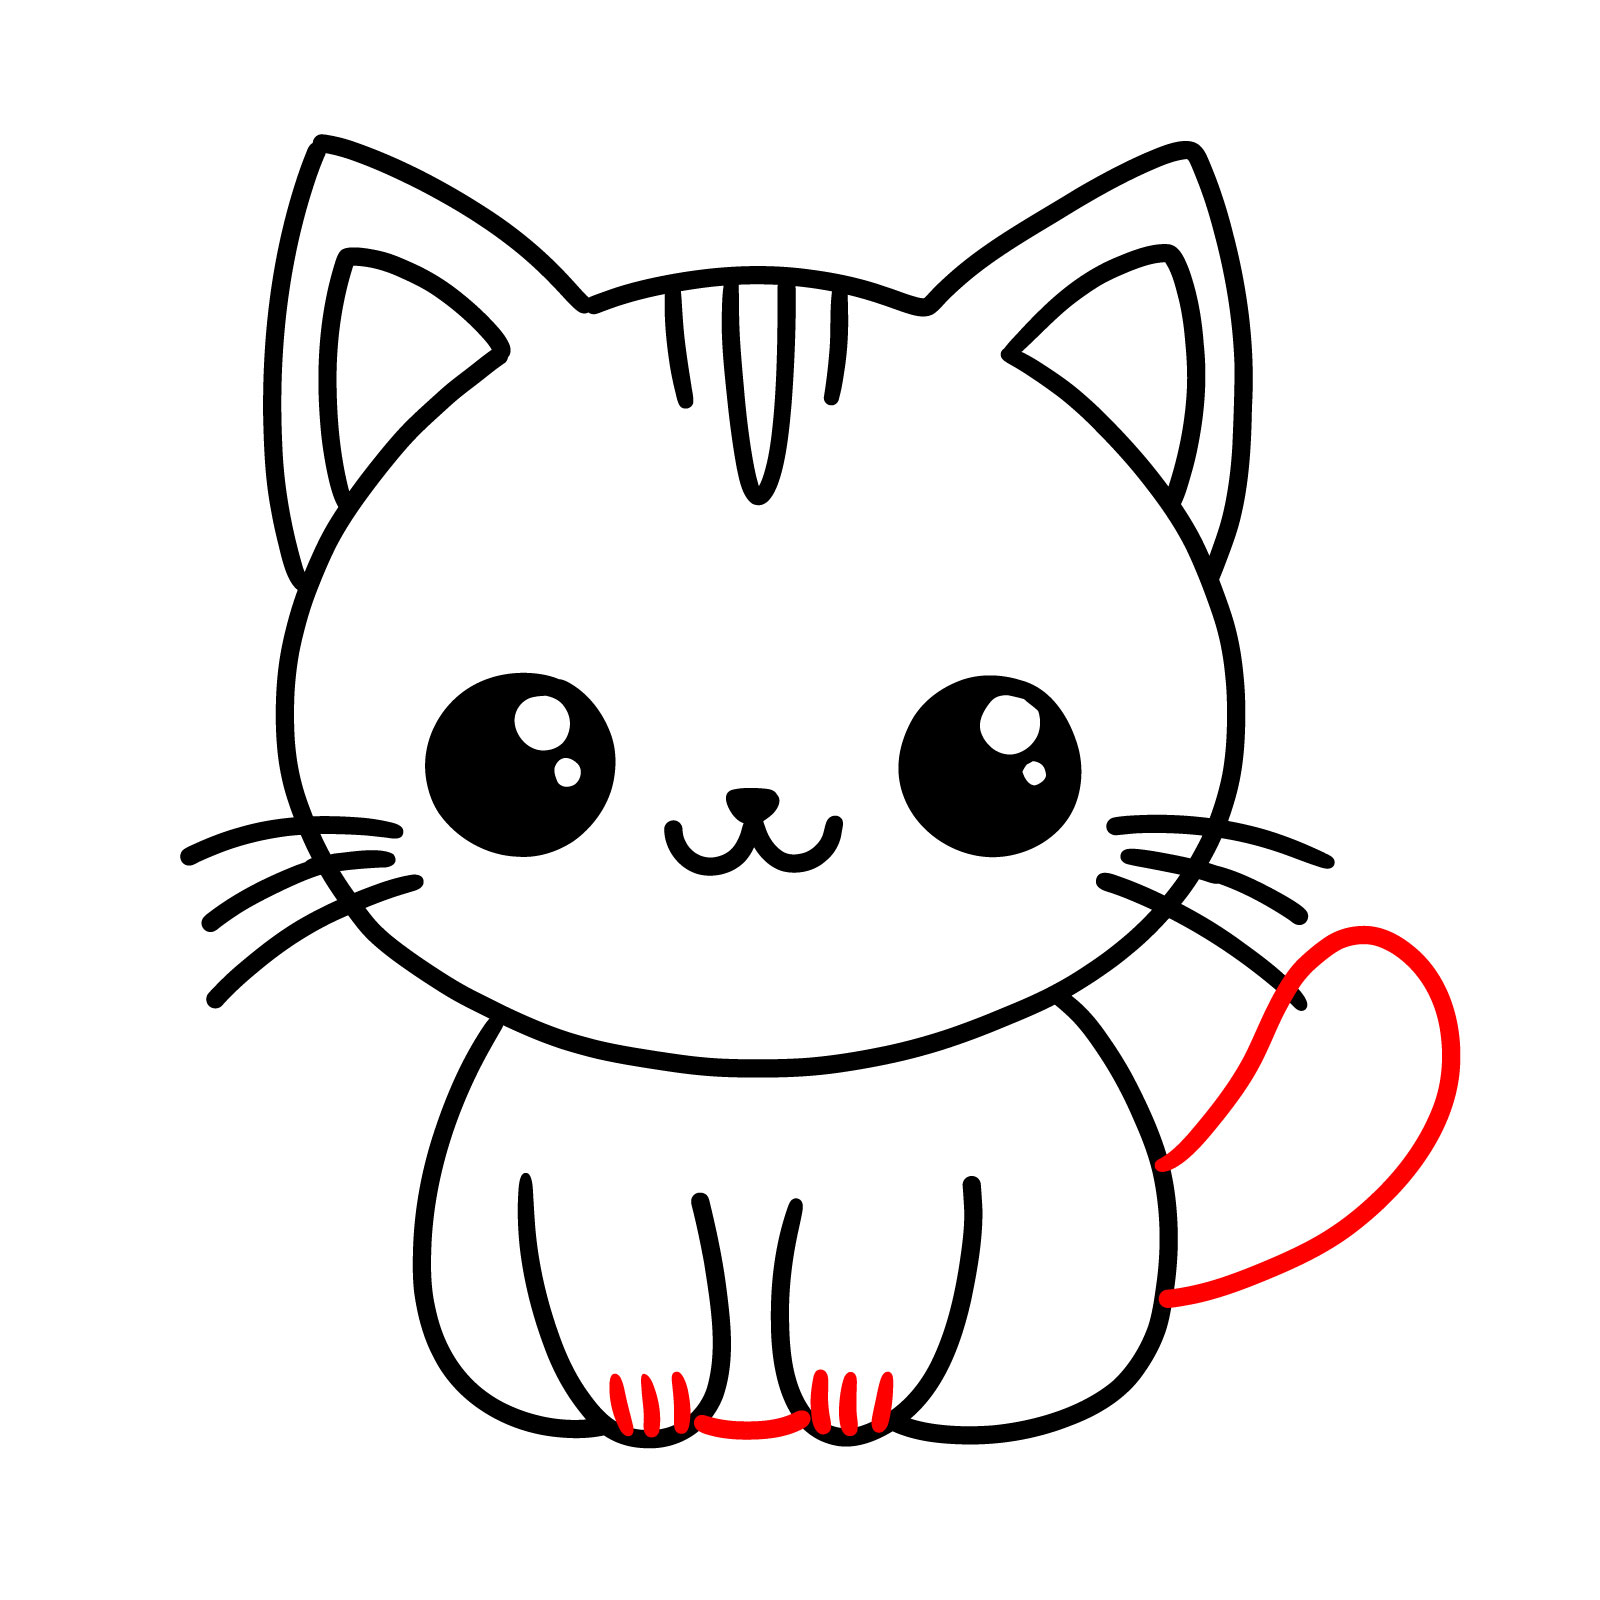
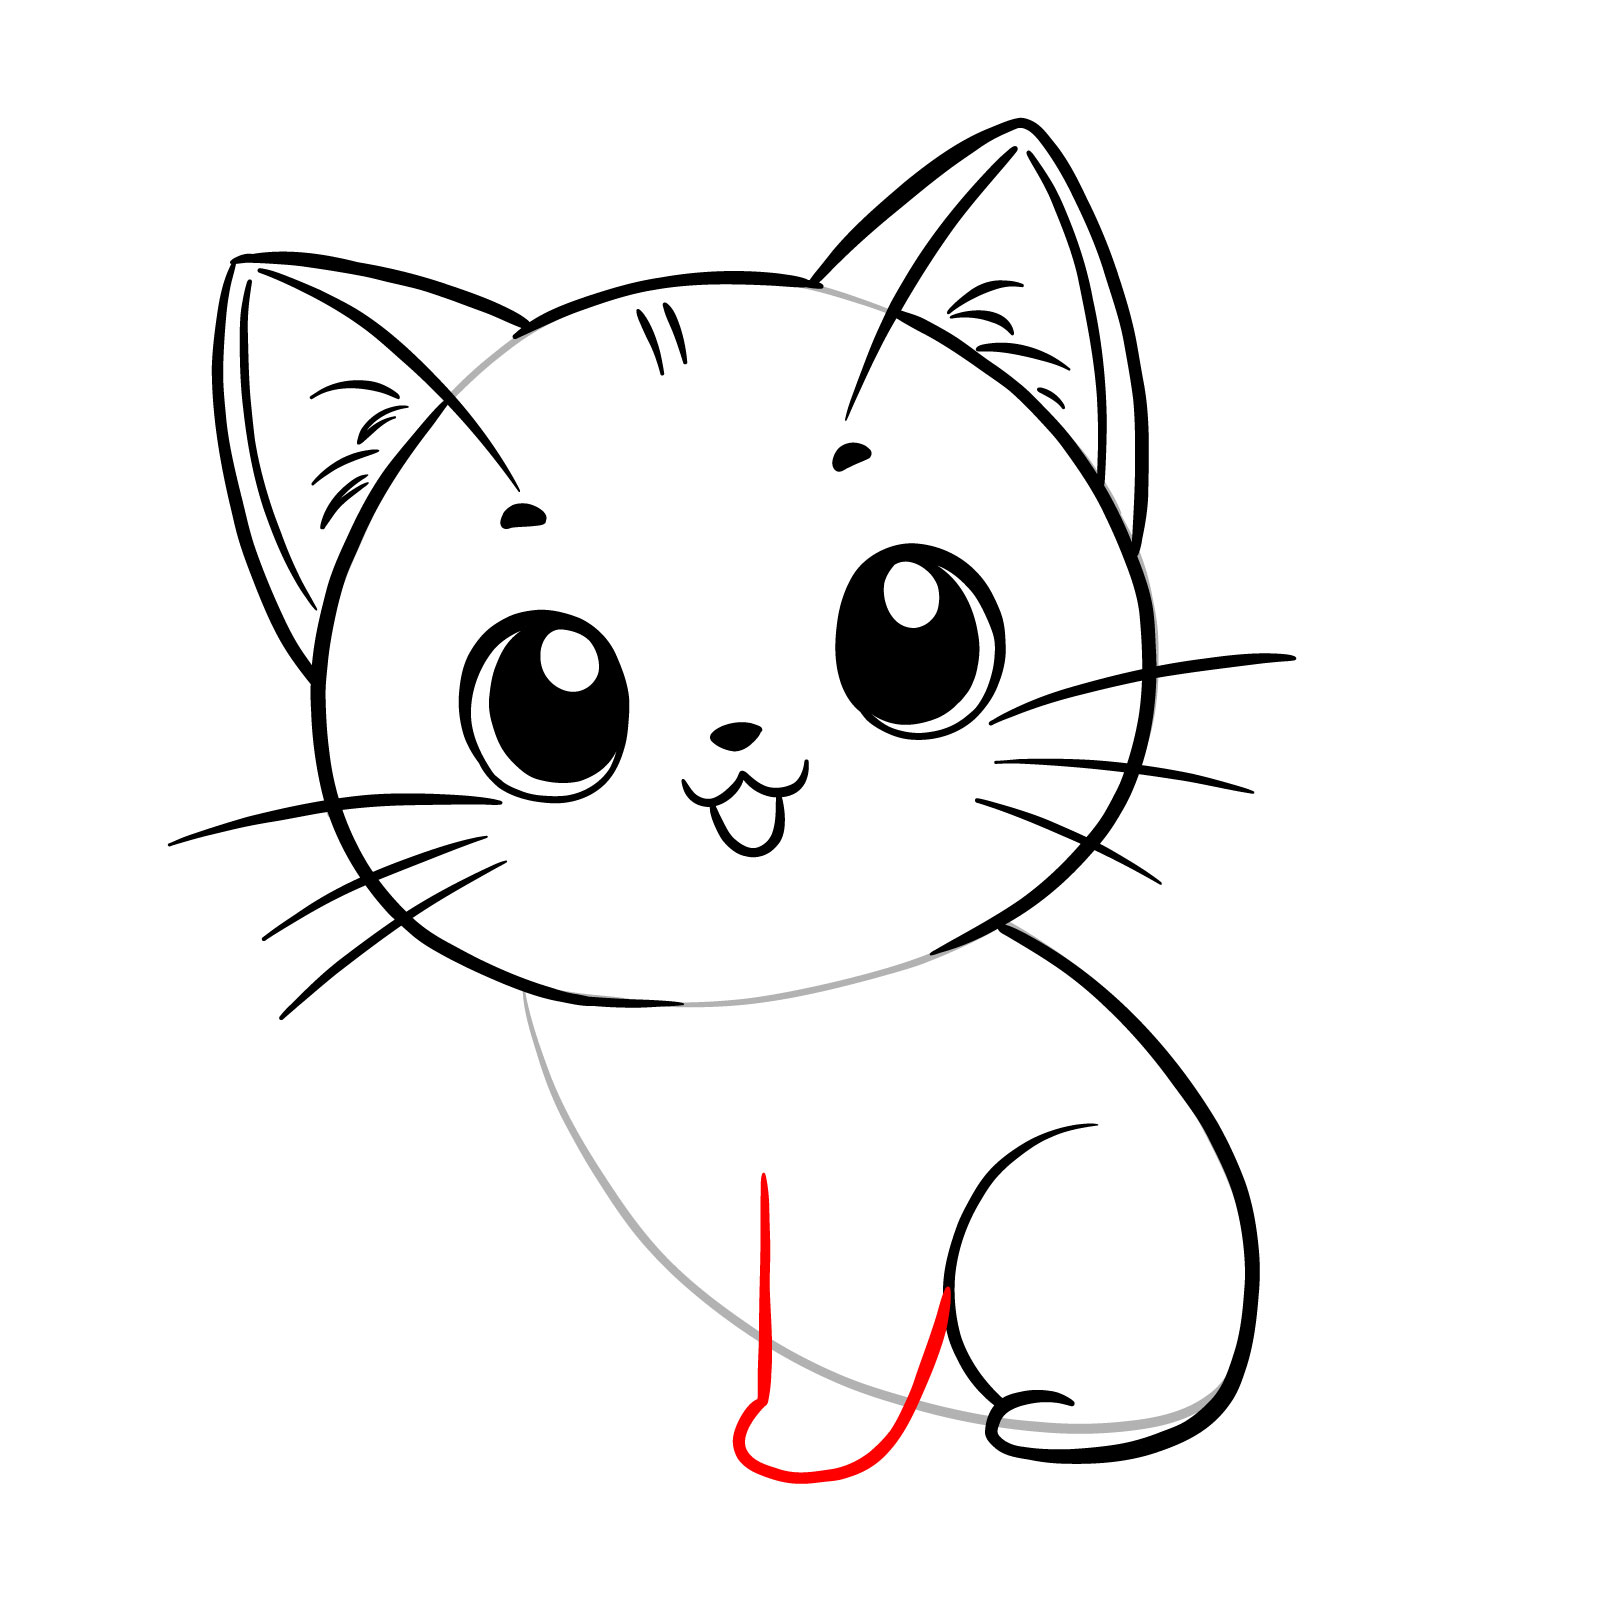
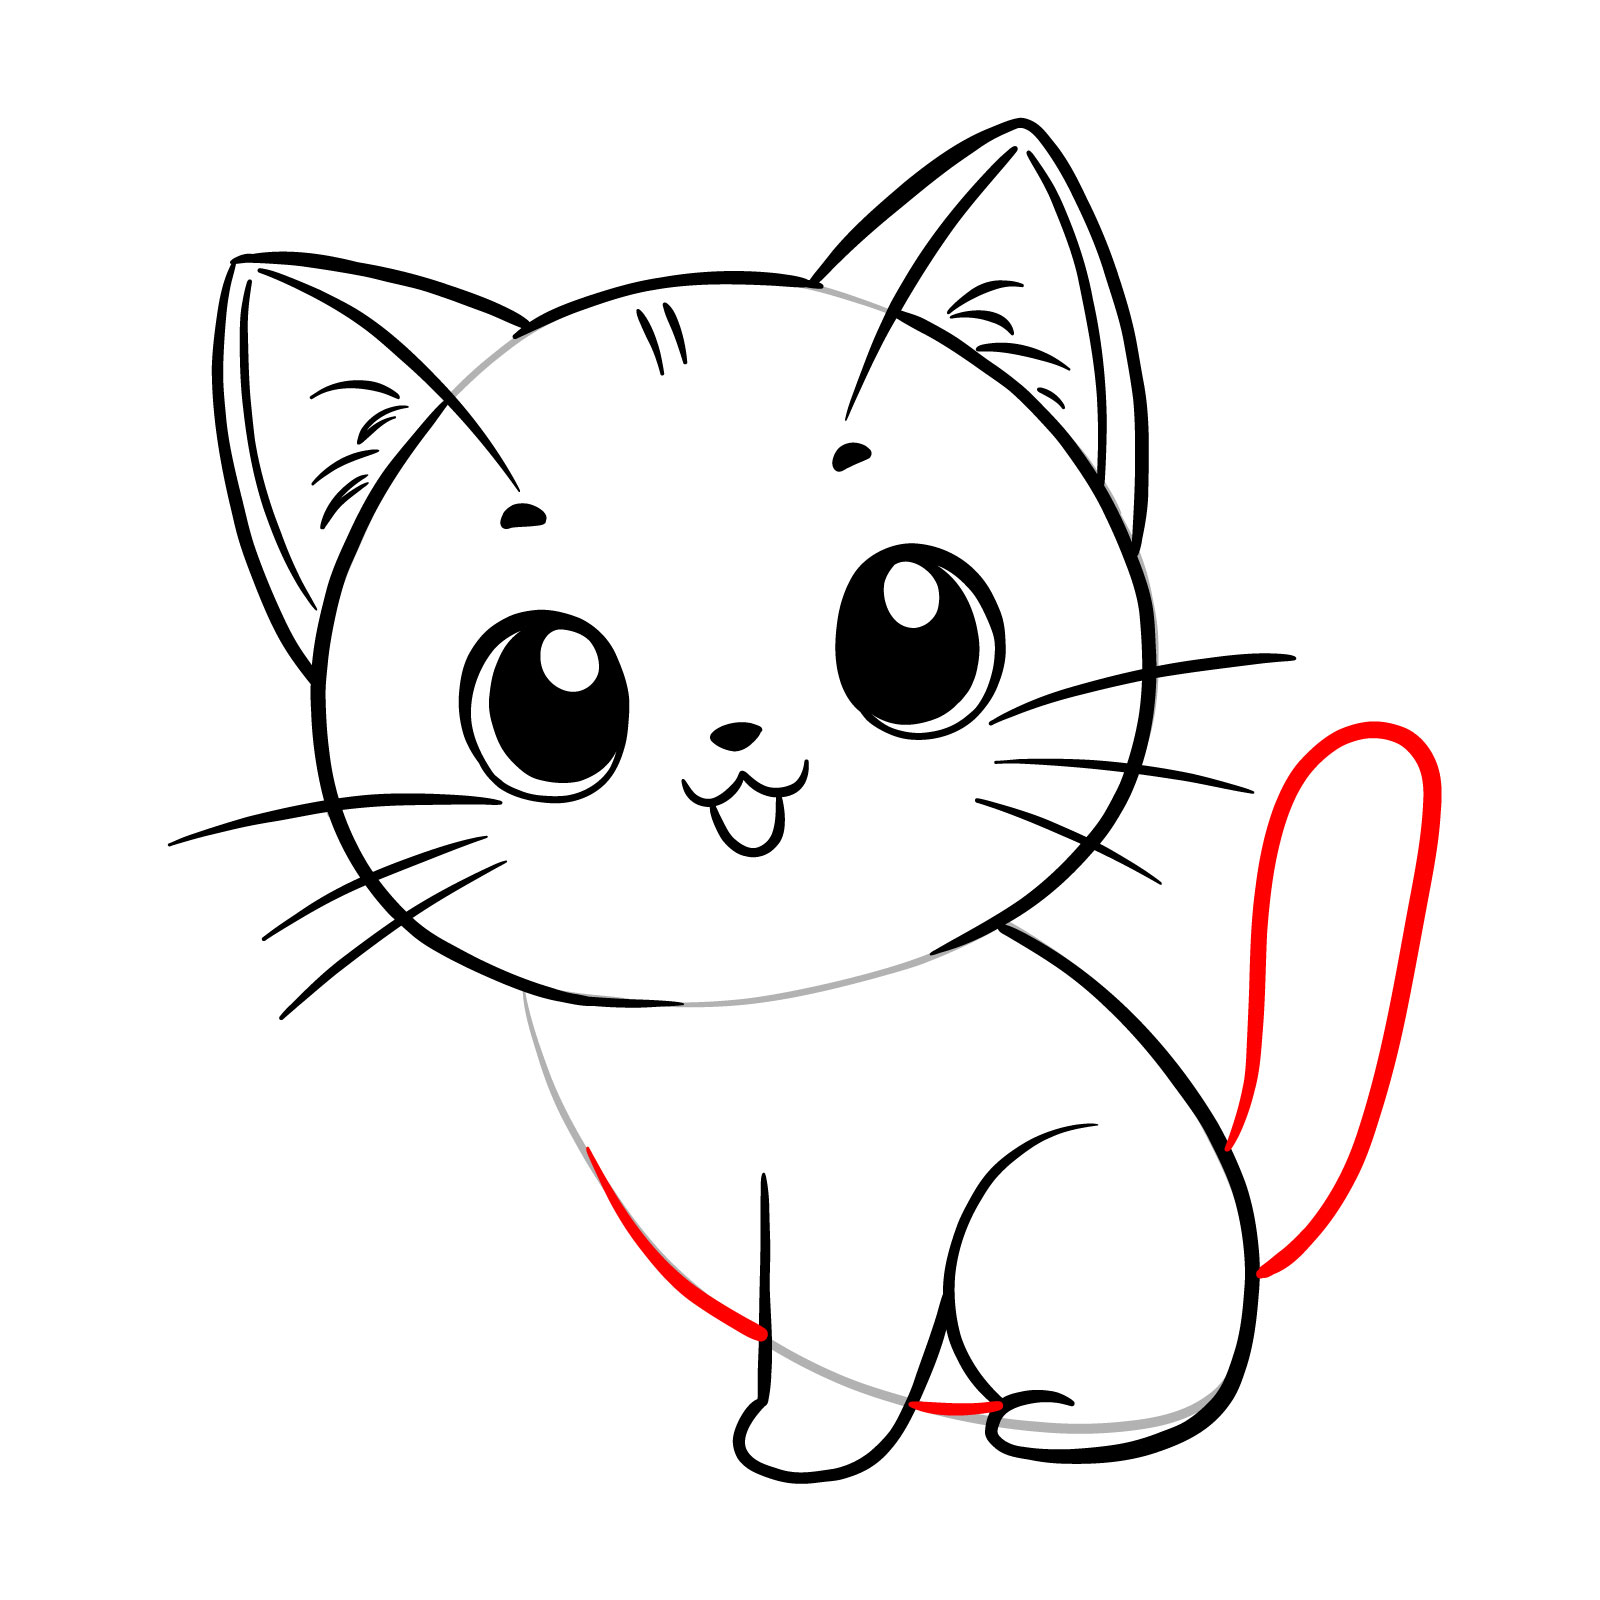
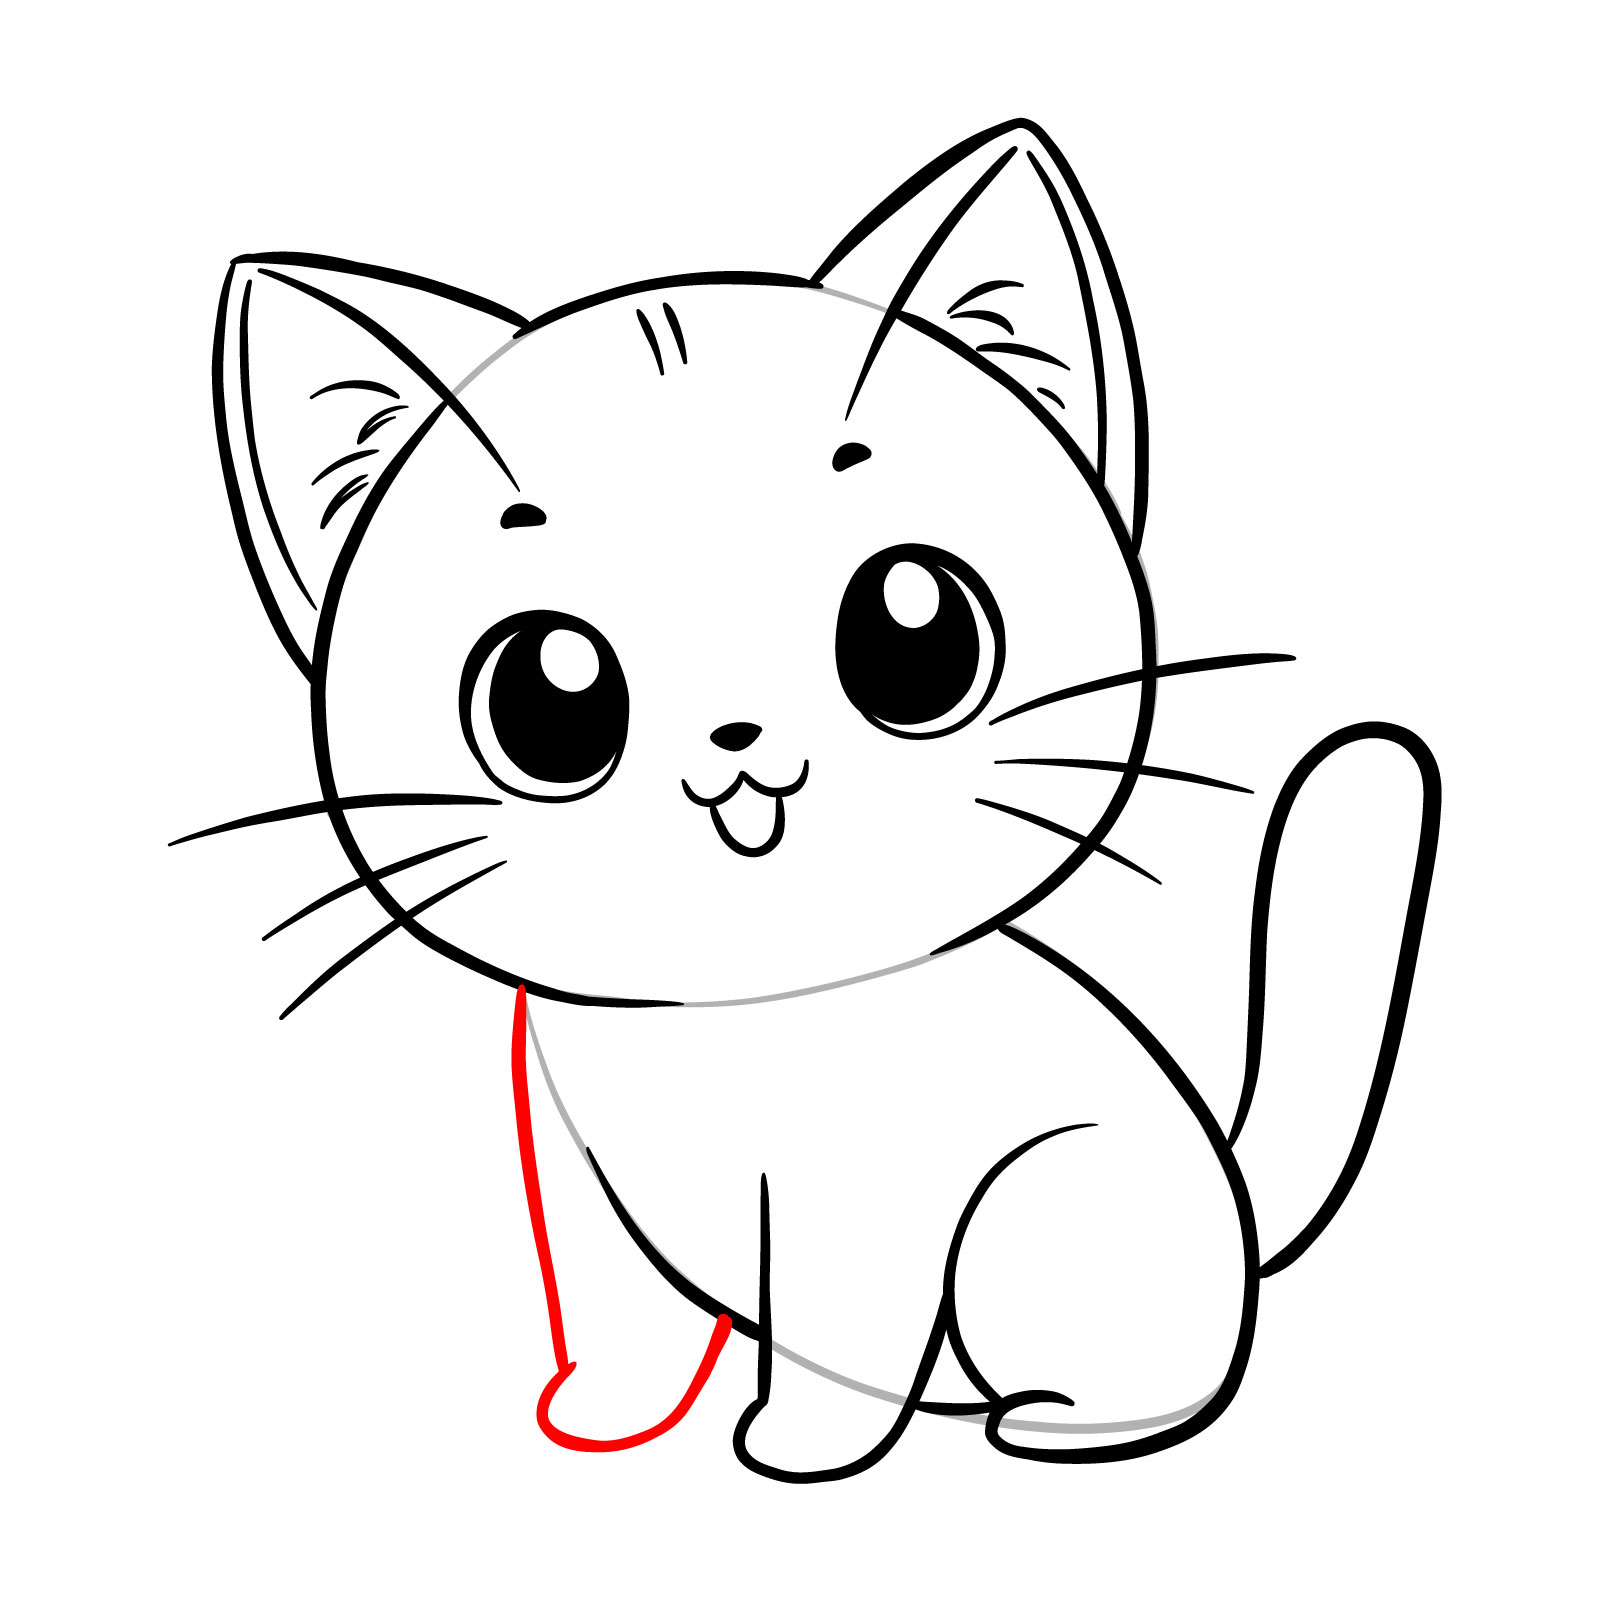
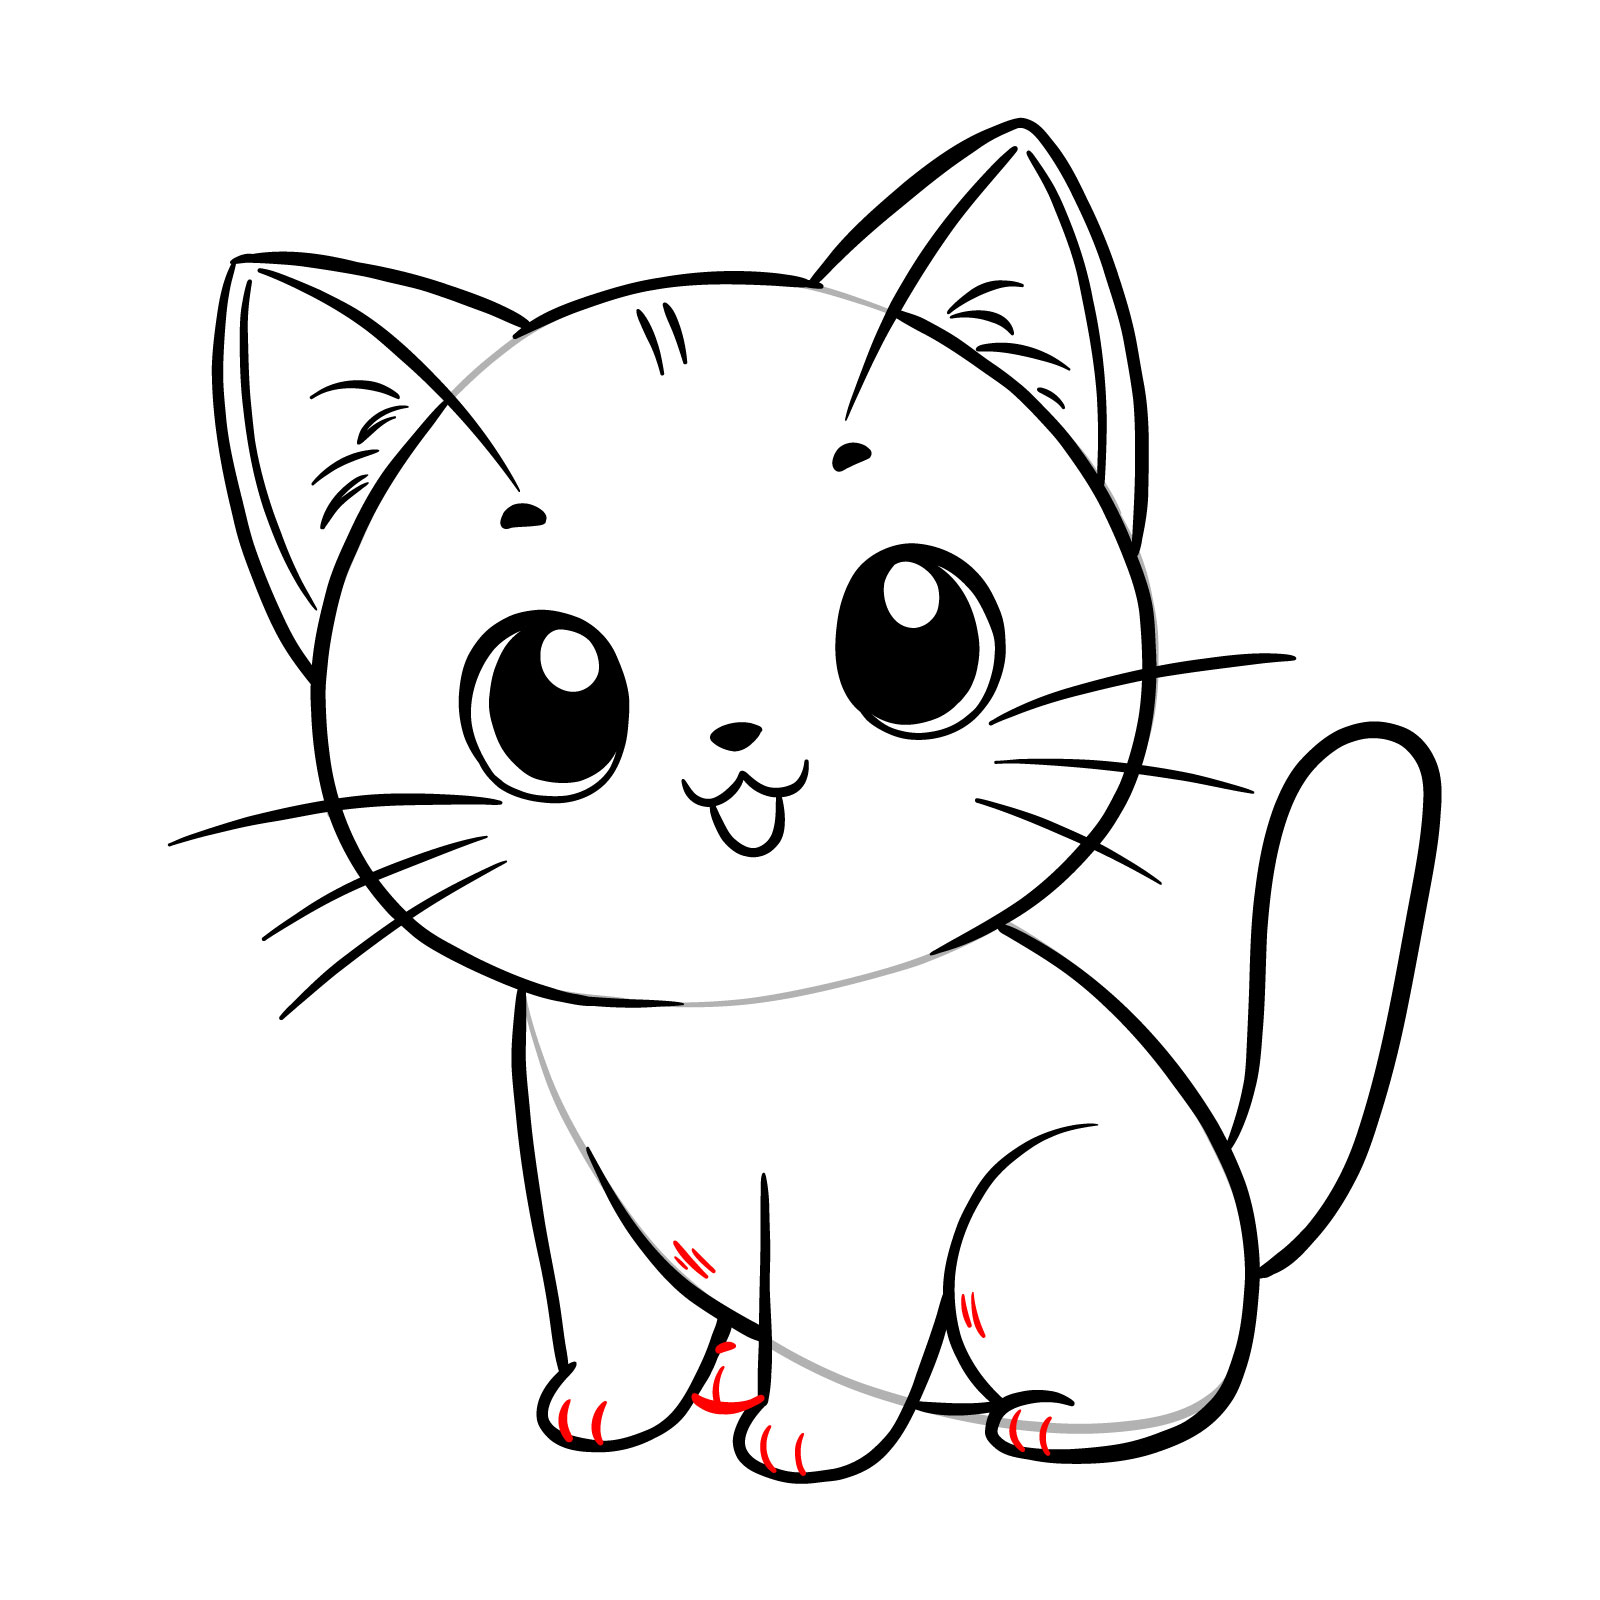
Guide 4 : Drawing a Detailed Cartoon Kitten Sitting – 12 Step
As we progress , let ’ s lend a bit more intricacy to our drawings with this adorable cartoon kitten in a sitting pose . Spanning 12 steps , this guide is design to bring in a more dynamic pose with a great floor of item , yet it remain accessible and enjoyable . This kitten captures the center of curiosity , with large , gleaming heart and a fluffy tail , creating a sense of spirit and drive . While it ’ s a pace up in complexity , the clear education will make it easy to follow on . This guide live perfect for those who ’ ve overcome simpler figure and be ready to try something with a touch more detail .
Step 01 – Start the survey with the bottom part of the kitten ’ sec head , create a floor for the facial features

Pace 02 – Finish the chief outline by drawing the upper part , round it off to form the entire brain frame
Pace 03 – Sketch two triangular flesh on the crest of the chief for the ears , give attention to their symmetry and angle
Step 04 – Draw two large circle for the eyes and fill them with color , leaving small blank band for highlights to make a sparkling effect . Lend a small highlighted nose to make for the kitten ’ s look to life
Measure 05 – Outline the eyes to enhance their shape , lend a little mouth for expression , and refine the ears to give them a more realistic appearance
Step 06 – Sketch the whiskers extending from the face and add fur details inside the ear and at the top of the head for texture
Step 07 – Draw the curve of the kitten ’ s back and the outline of a back branch , positioning it to propose a sitting position
Step 08 – Illustrate the two front legs , insure they exist proportionate to the body and aligned with the ride pose
Step 09 – Sketch the initial pattern for the front leg and the outline of the back leg , see to it they bear the sit down position of the kitten
Step 10 – Draw the second back leg and a fluffy tail , completing the abject body of the pose kitten

Pace 11 – Add the pads to the back paws , separate the movement paws , and include fur details on the body and tail to lend texture and depth to the resume
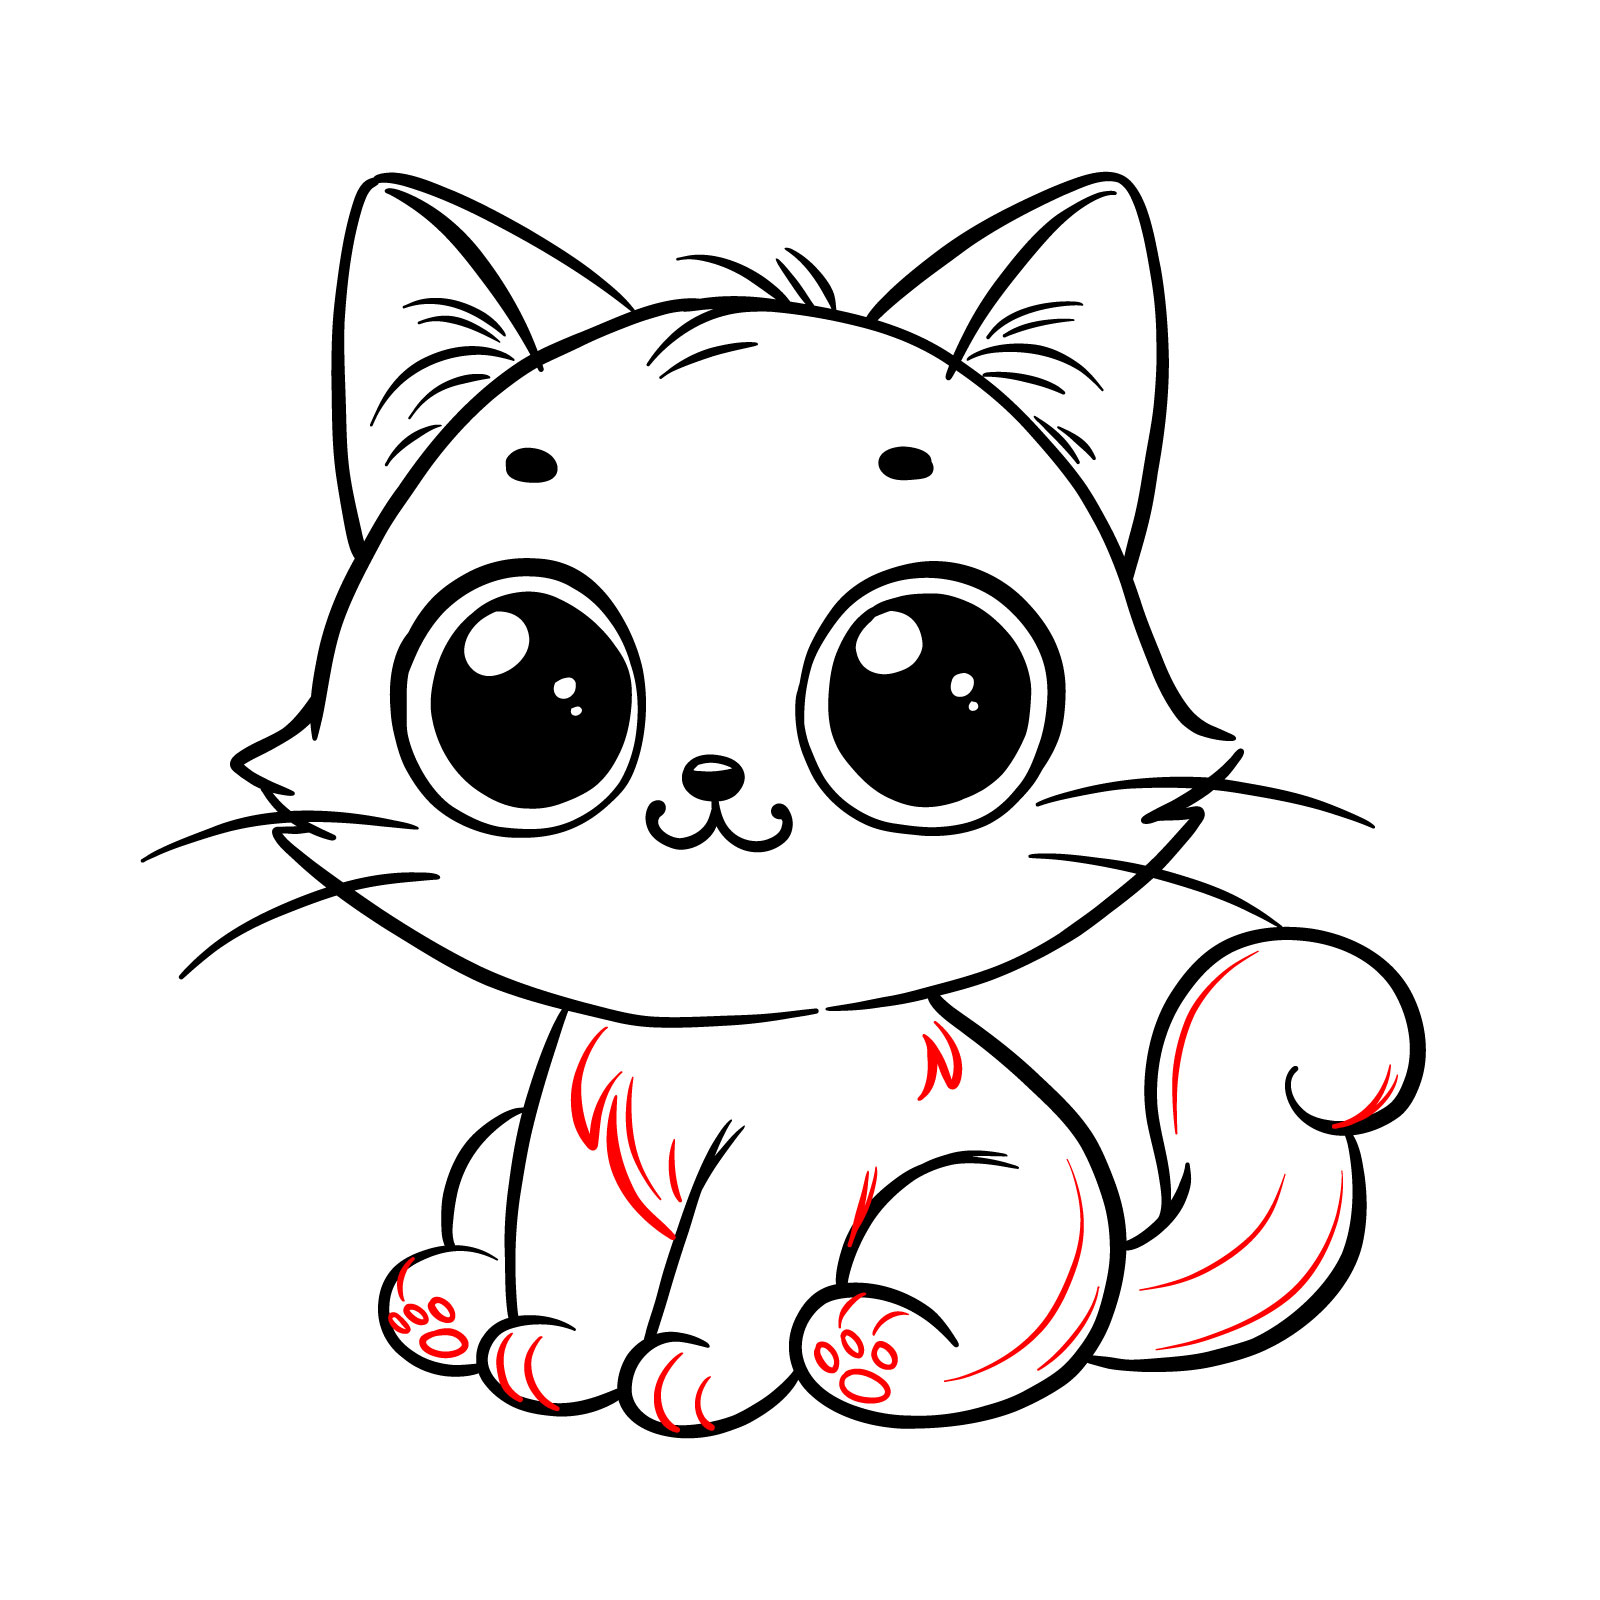
Step 12 – Finalize your drawing , capturing the playful essence of a ride cartoon kitten . This step-by-step guide offers a structured approach to portray a more dynamic and elaborate character , perfect for those find out how to draw cartoon animals
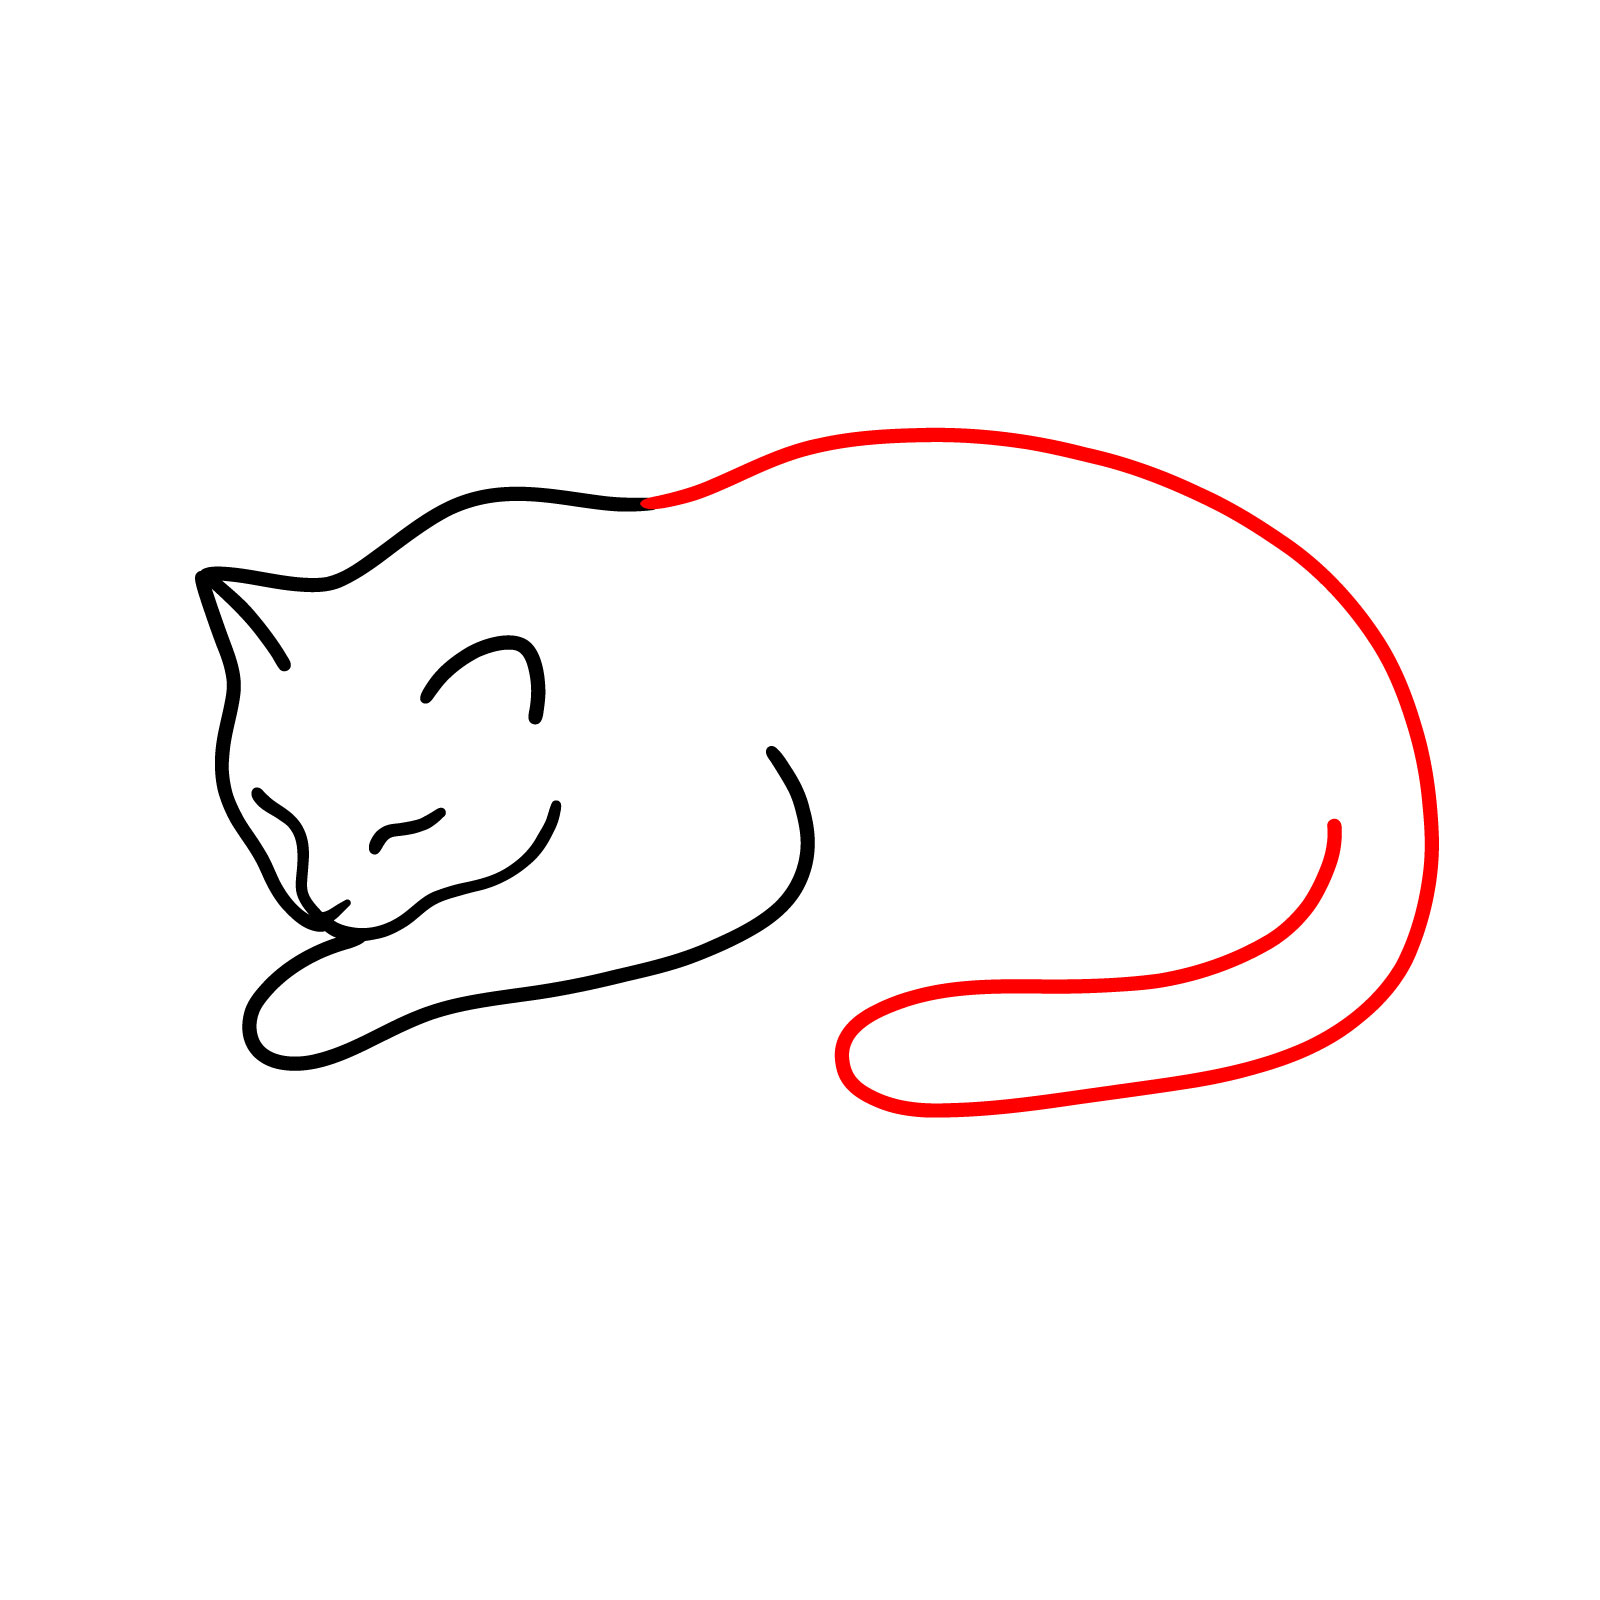
Guide 5 : Describe a Minimalistic Sleeping Cat – 6 Steps
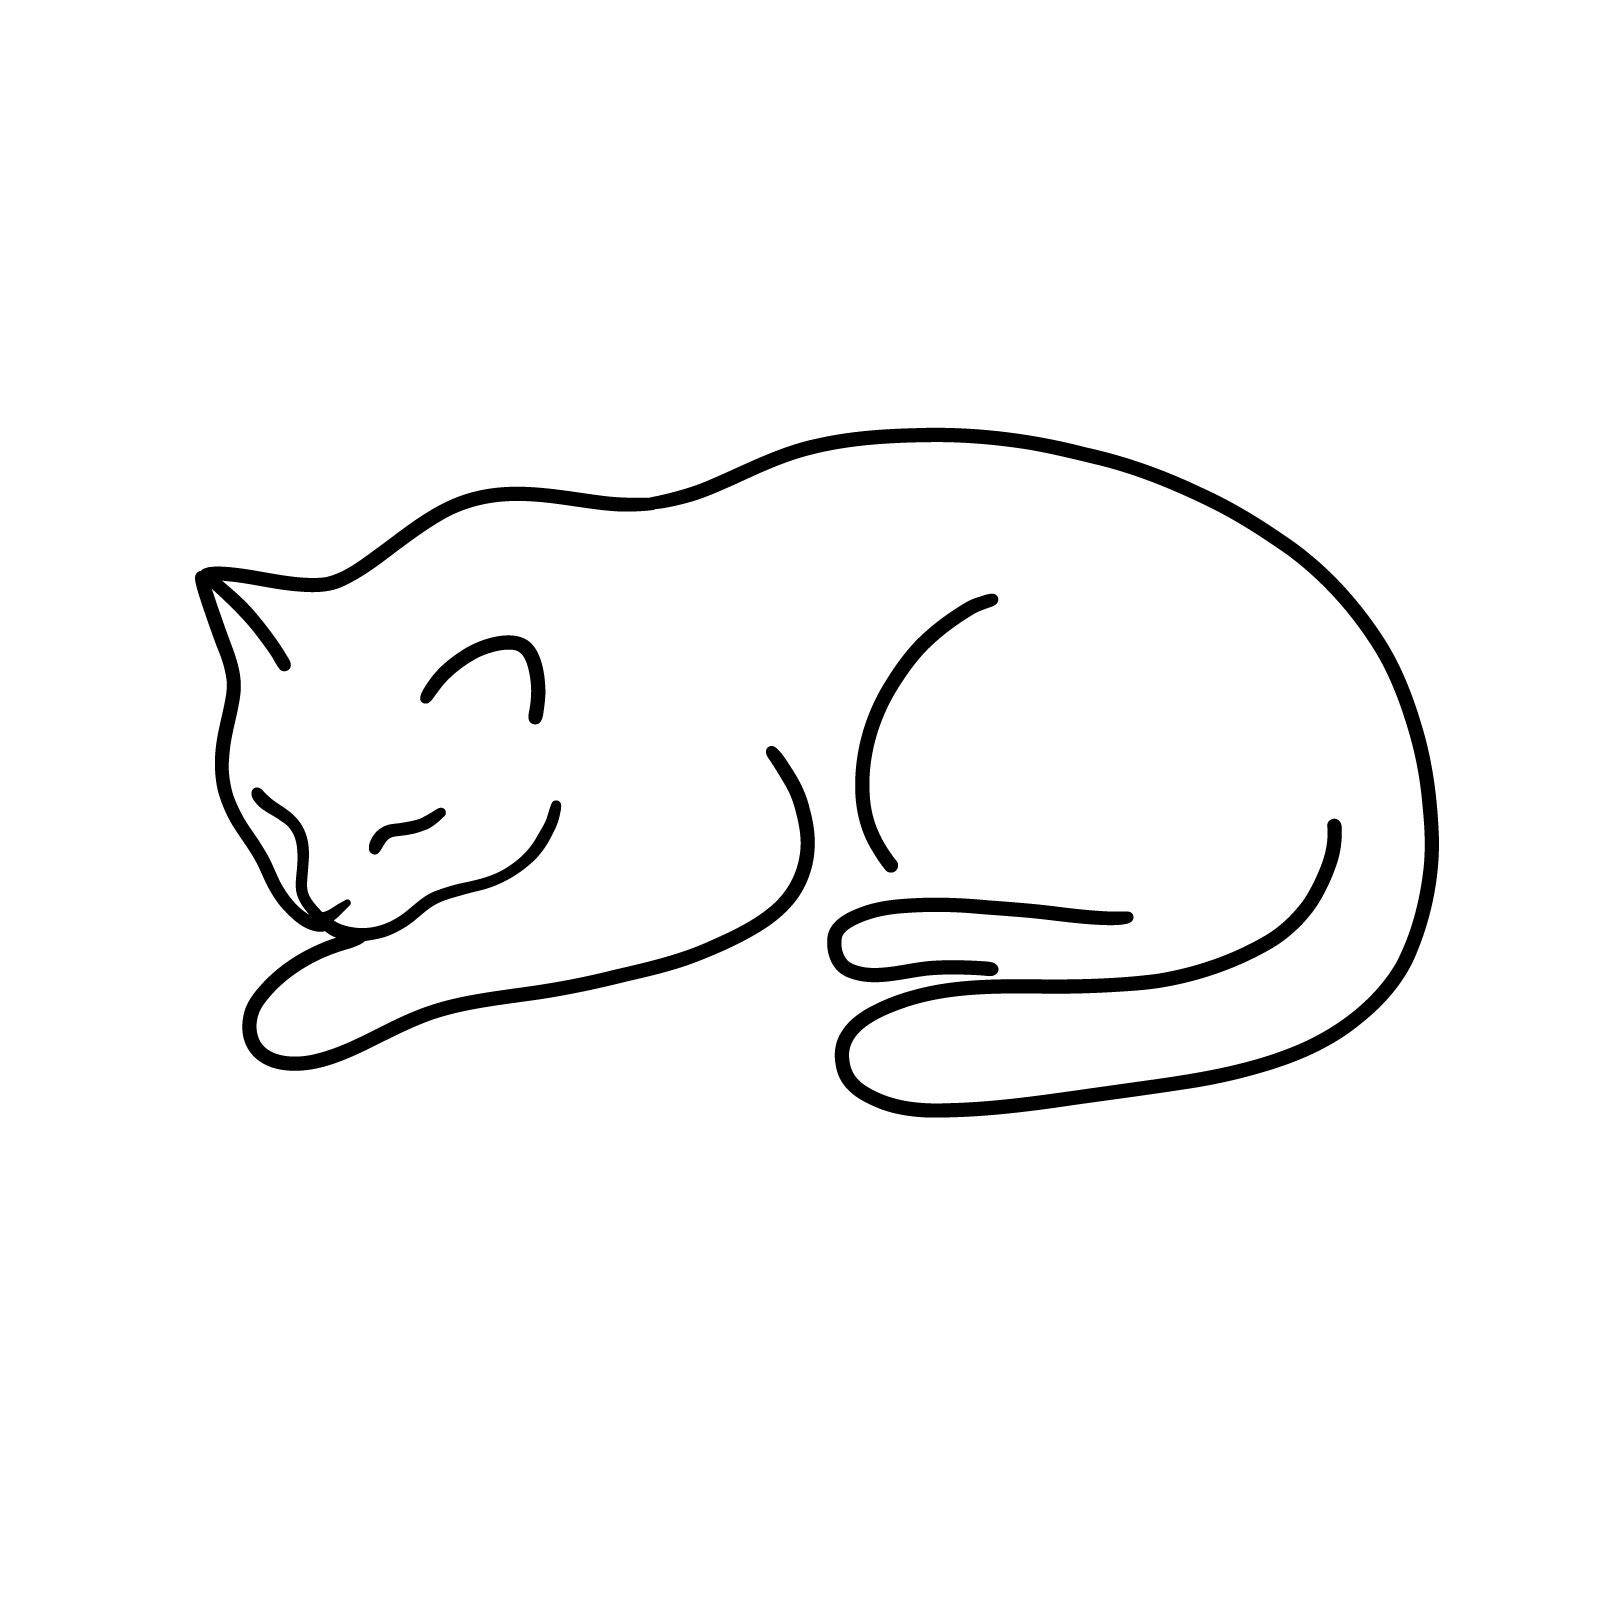
For our fifth pace in the cat-drawing series , we simplify our approach with a minimalistic sleeping guy . This calm creation , discharge in hardly six steps , is one of the easy designs to duplicate , making it a perfect exercise in line art . Although it place fifth , it ’ s not due to complexity but quite its shift towards a more realistic cat form , strike away from the cartoonish style of early guides . This guide will help you capture the center of a cat at rest with clean , flowing line , proving that sometimes simplicity can be strikingly beautiful and tranquil .
Pace 01 – Start with the basics by drawing course for the eyes and nose , setting the phase for the minimalistic style of the sleeping guy

Step 02 – Outline the frame of the top dog and ear , utilize gentle curves to suggest the peacefulness of the cat ’ sec sleep form
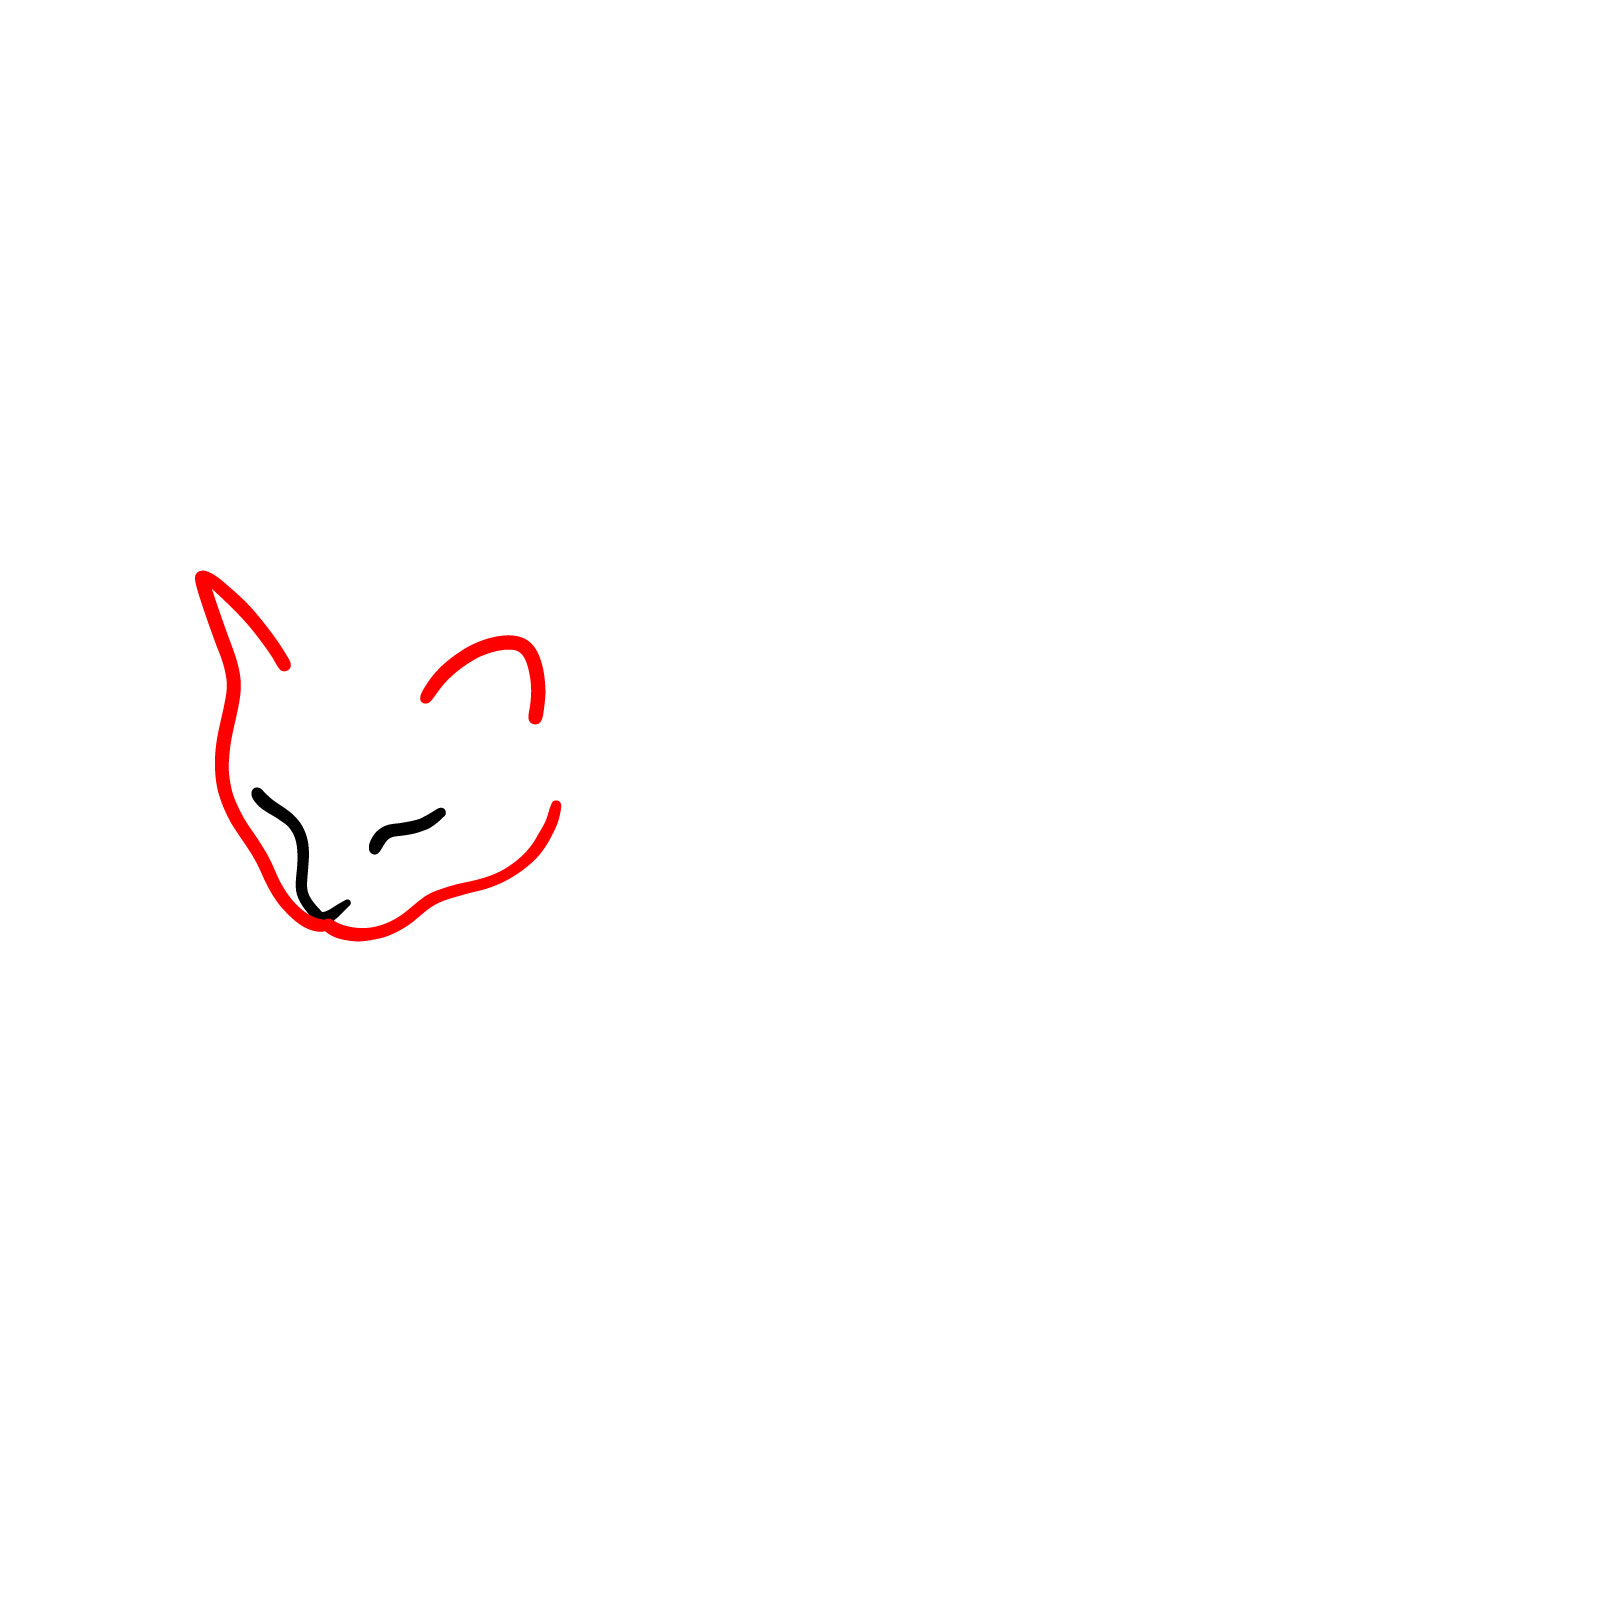
Pace 03 – Draw the upper back melody and the presence leg , create the initial contour of the guy ’ sec relaxed , sleep position
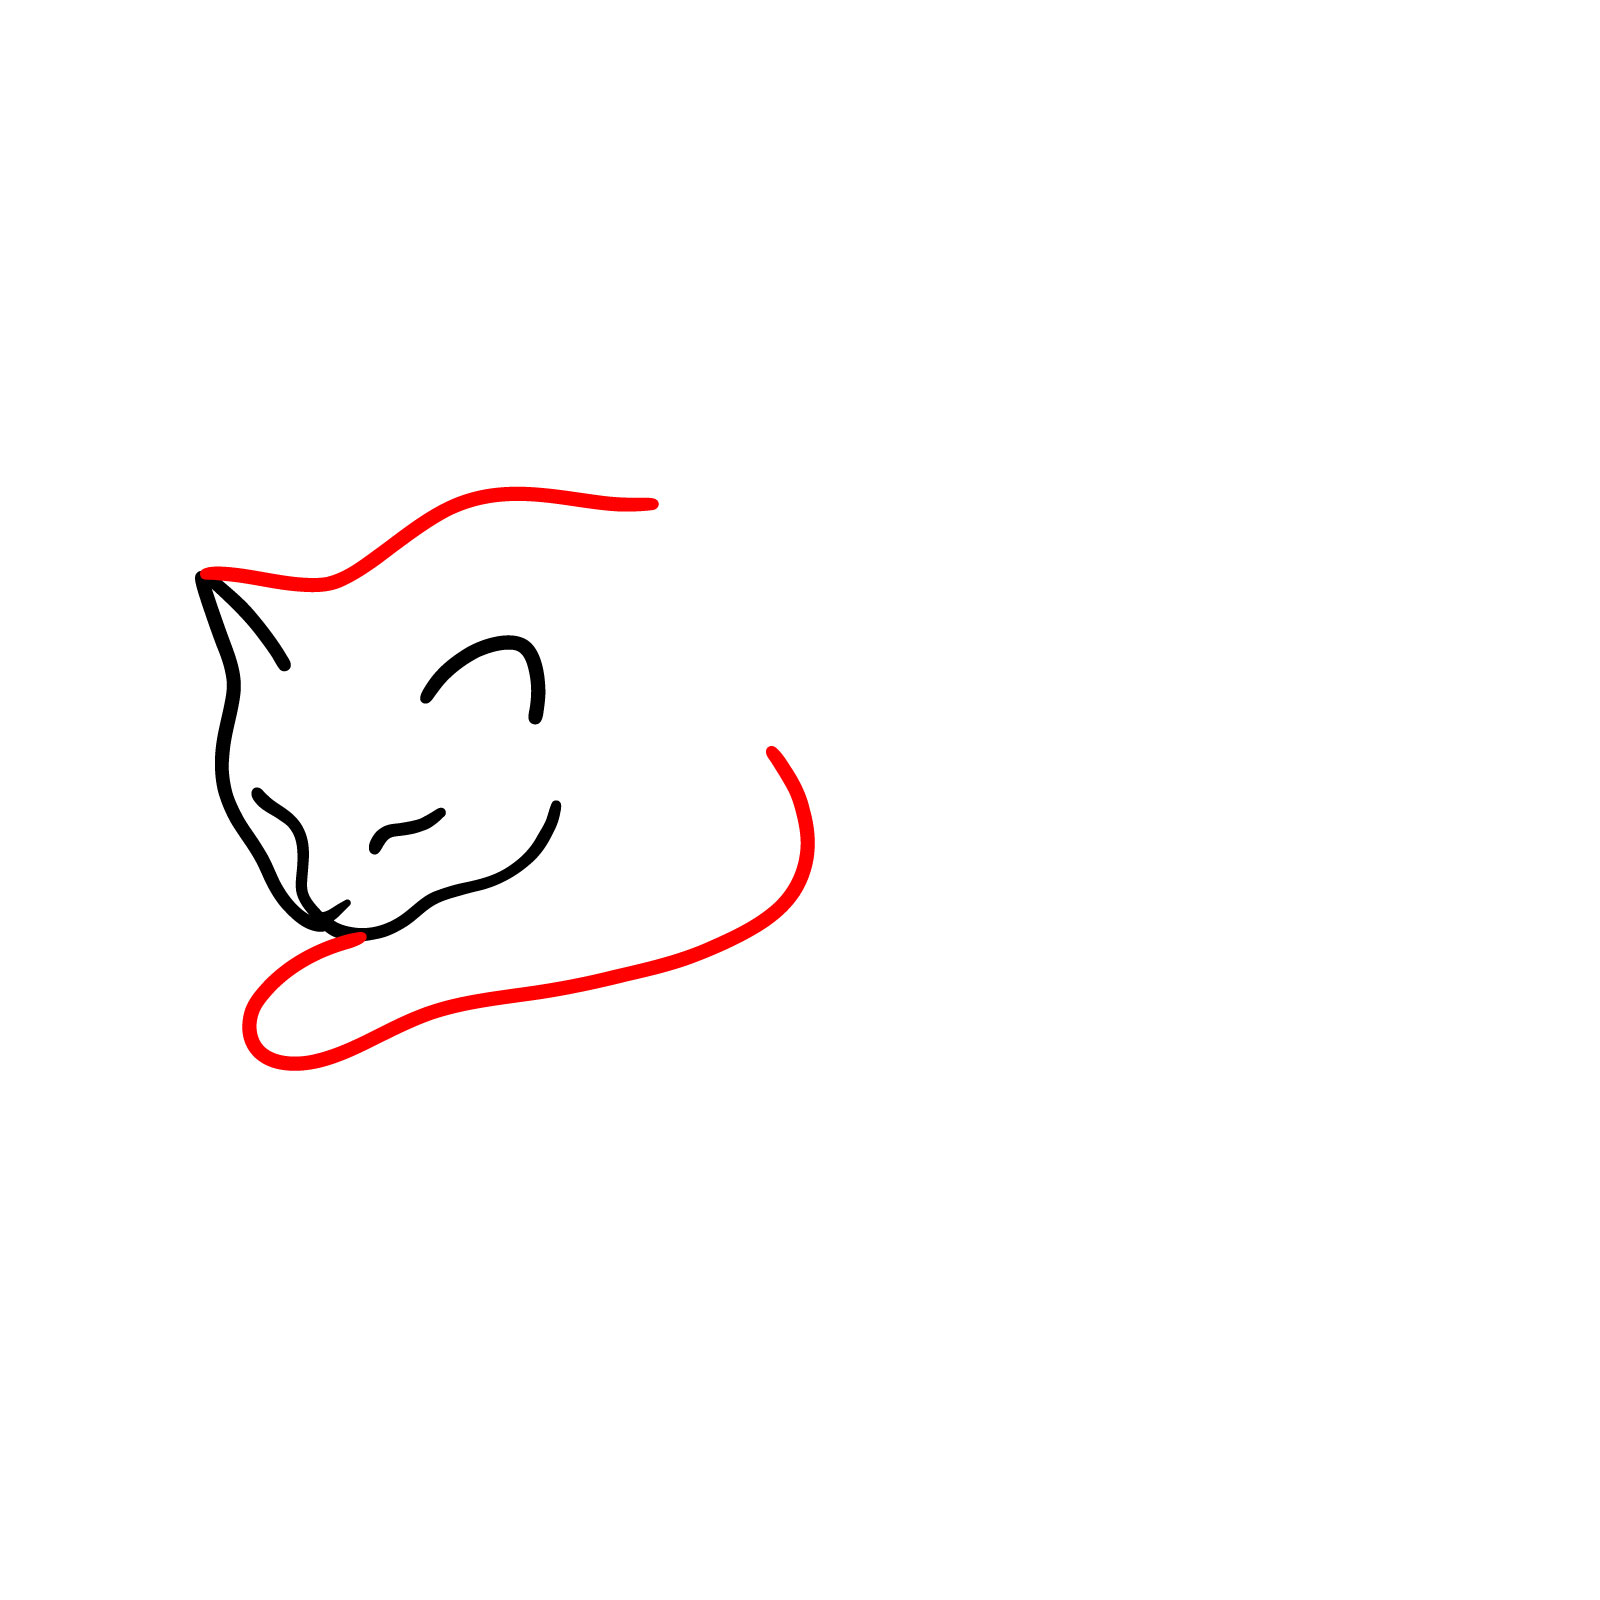
Step 04 – With a fluid melody , shape the back of the guy , extending it to shape the tail
Step 05 – Add the line for the visible back branch , complete the chief torso structure of the minimalistic cat
Step 06 – Now you mastered how to make a minimalistic guy , perfect the simplicity and elegance of the sleep form . Let ’ s move to the next 1
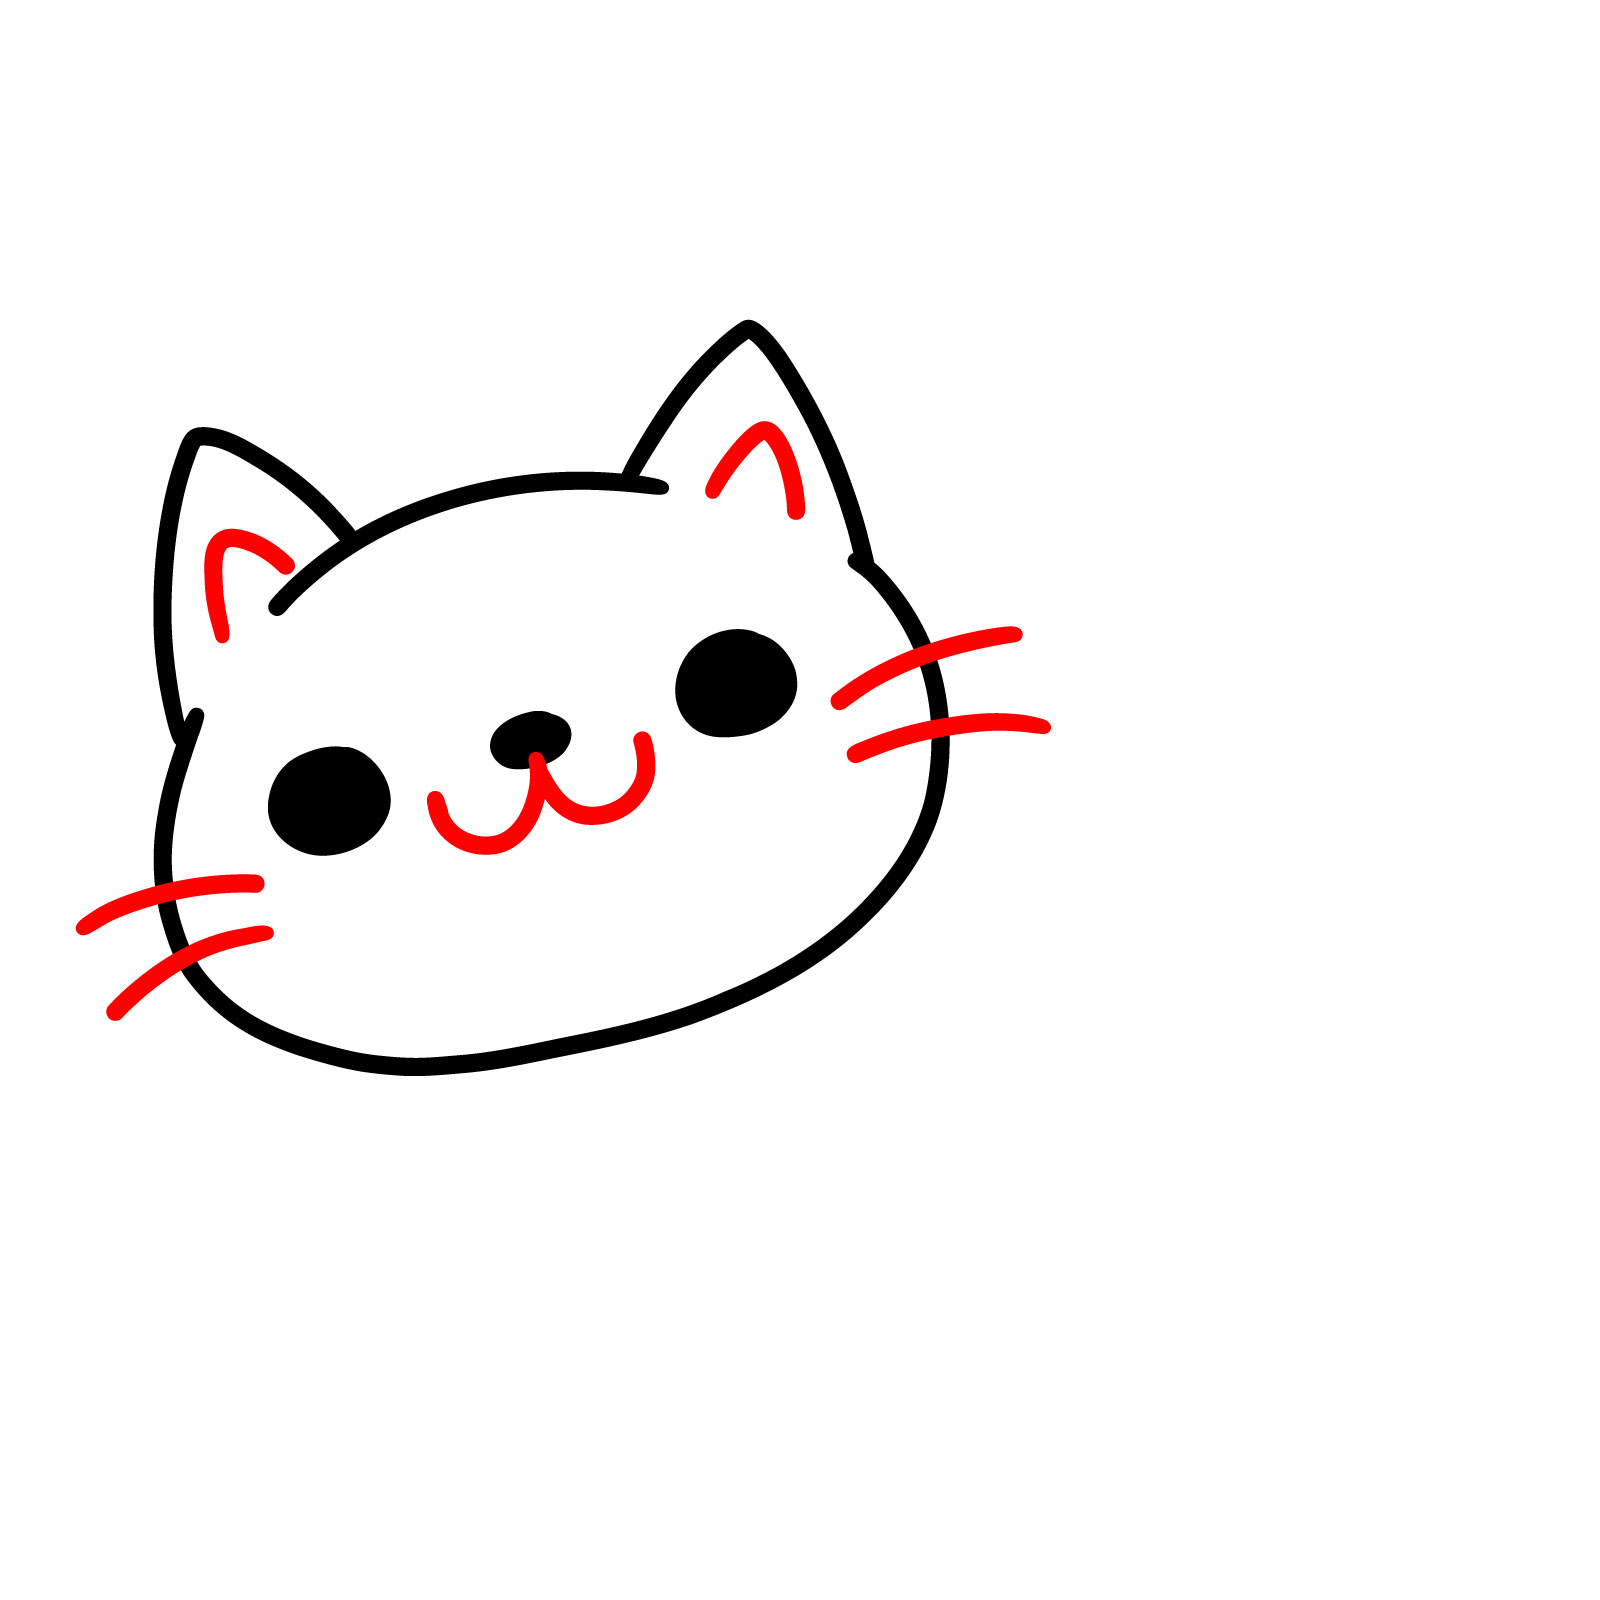
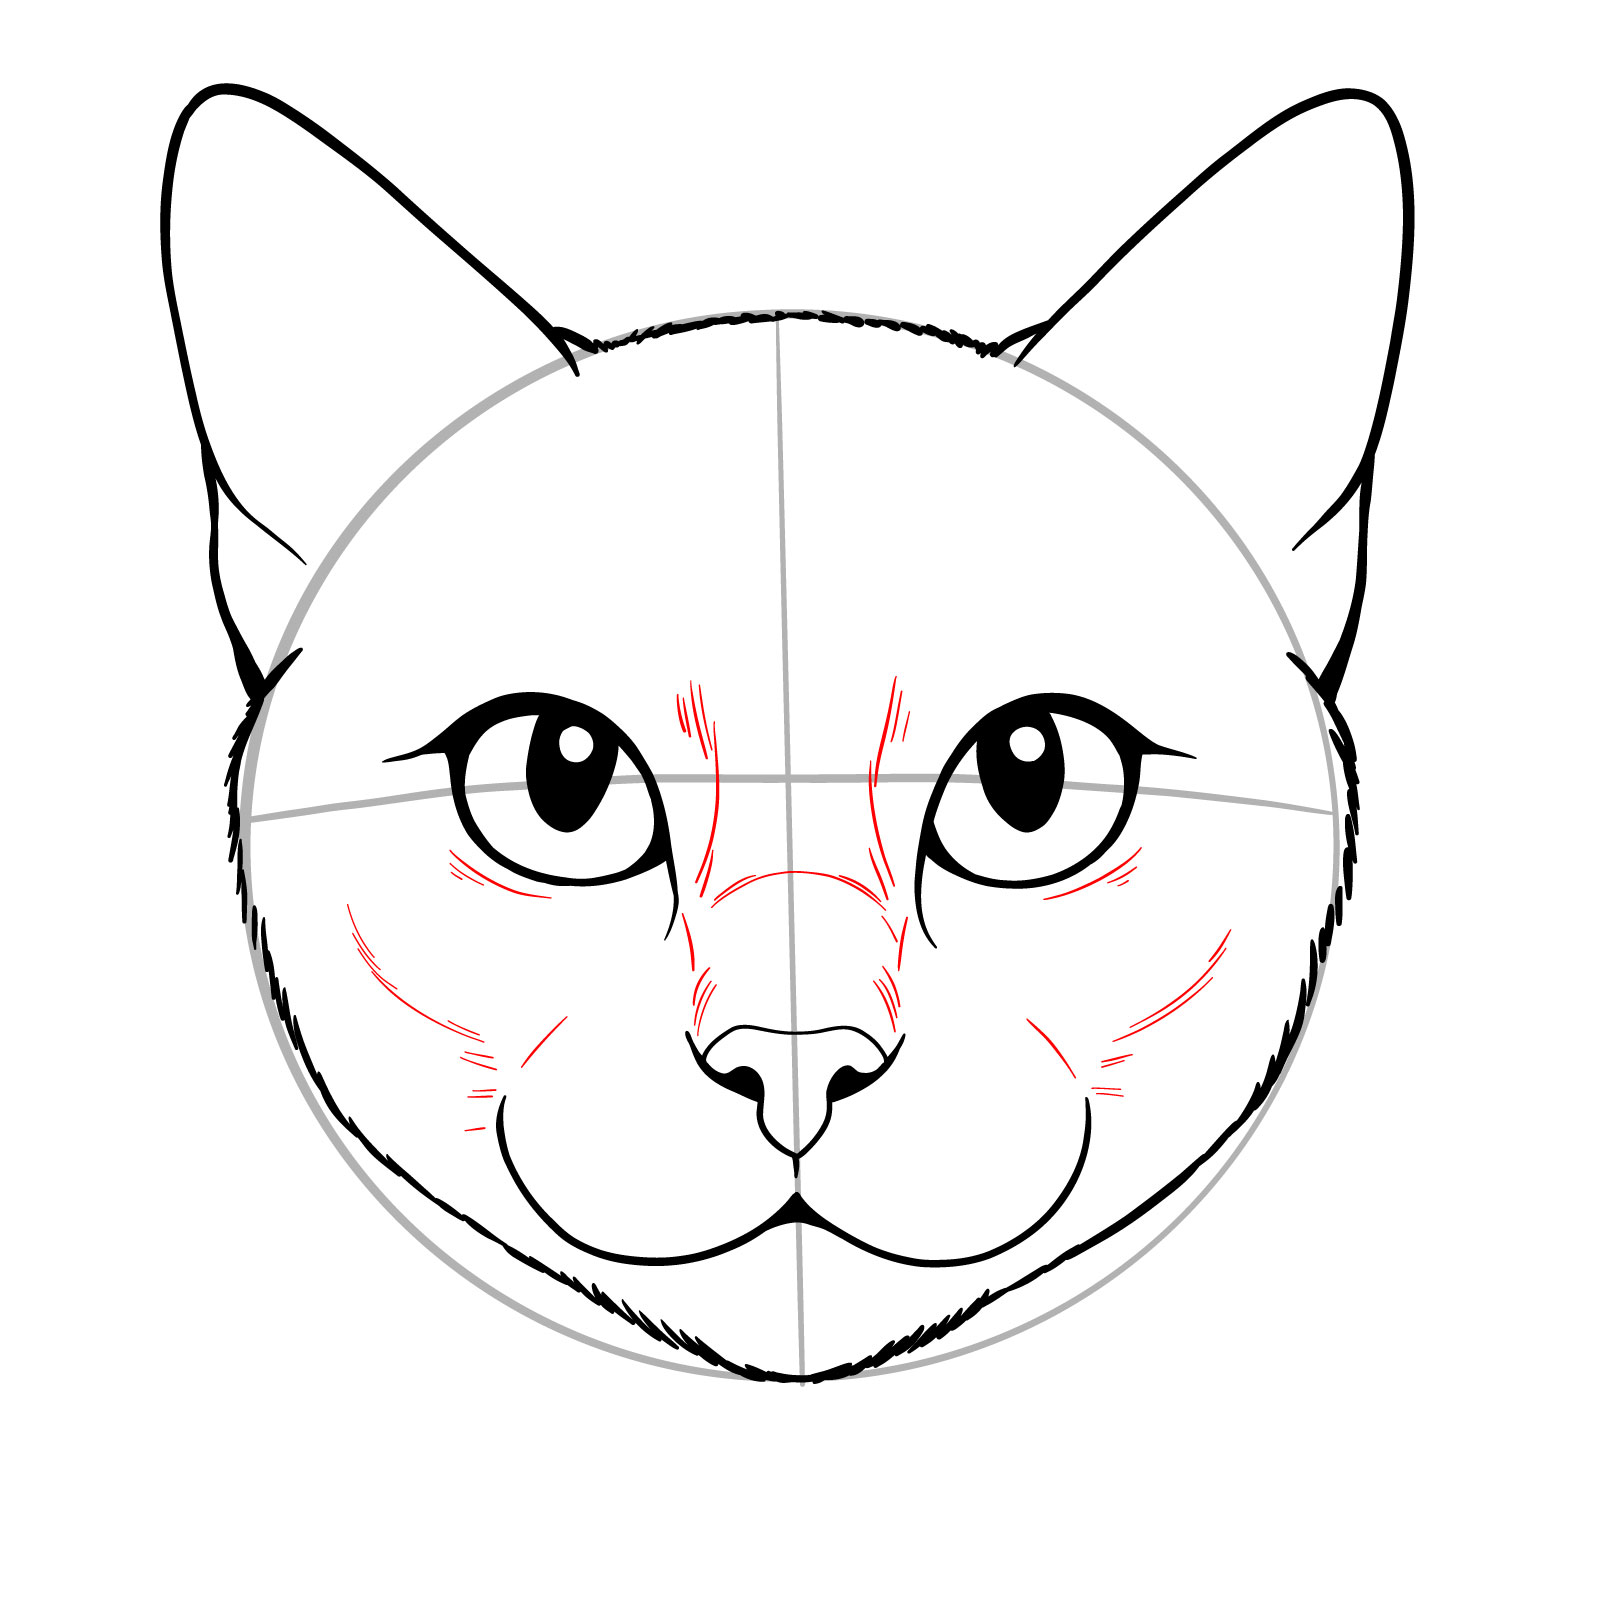
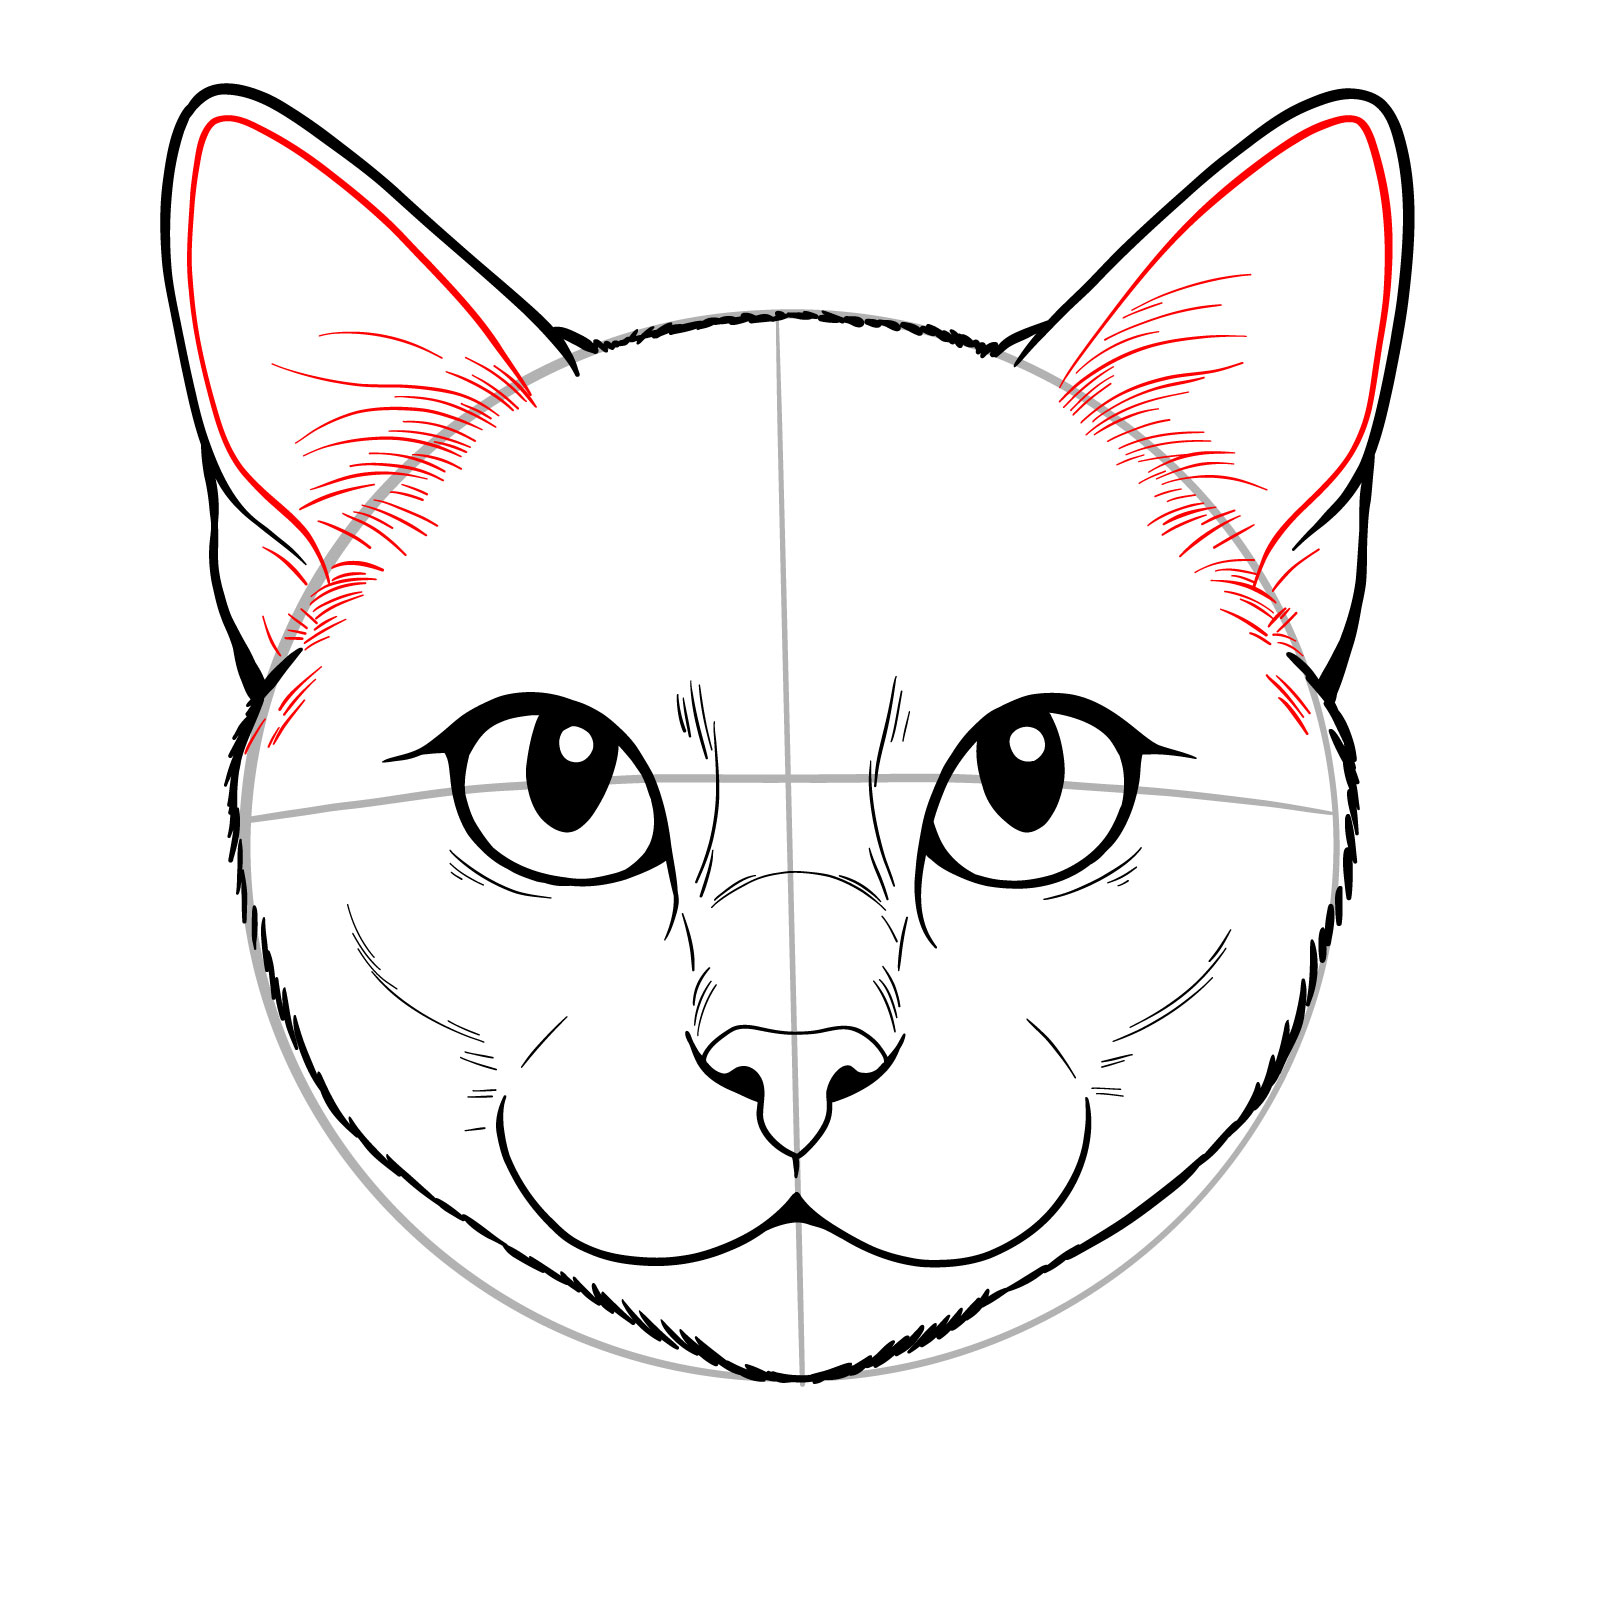
Guide 6 : How to Draw a Cat ’ s Face with Realistic Features – 12 Step
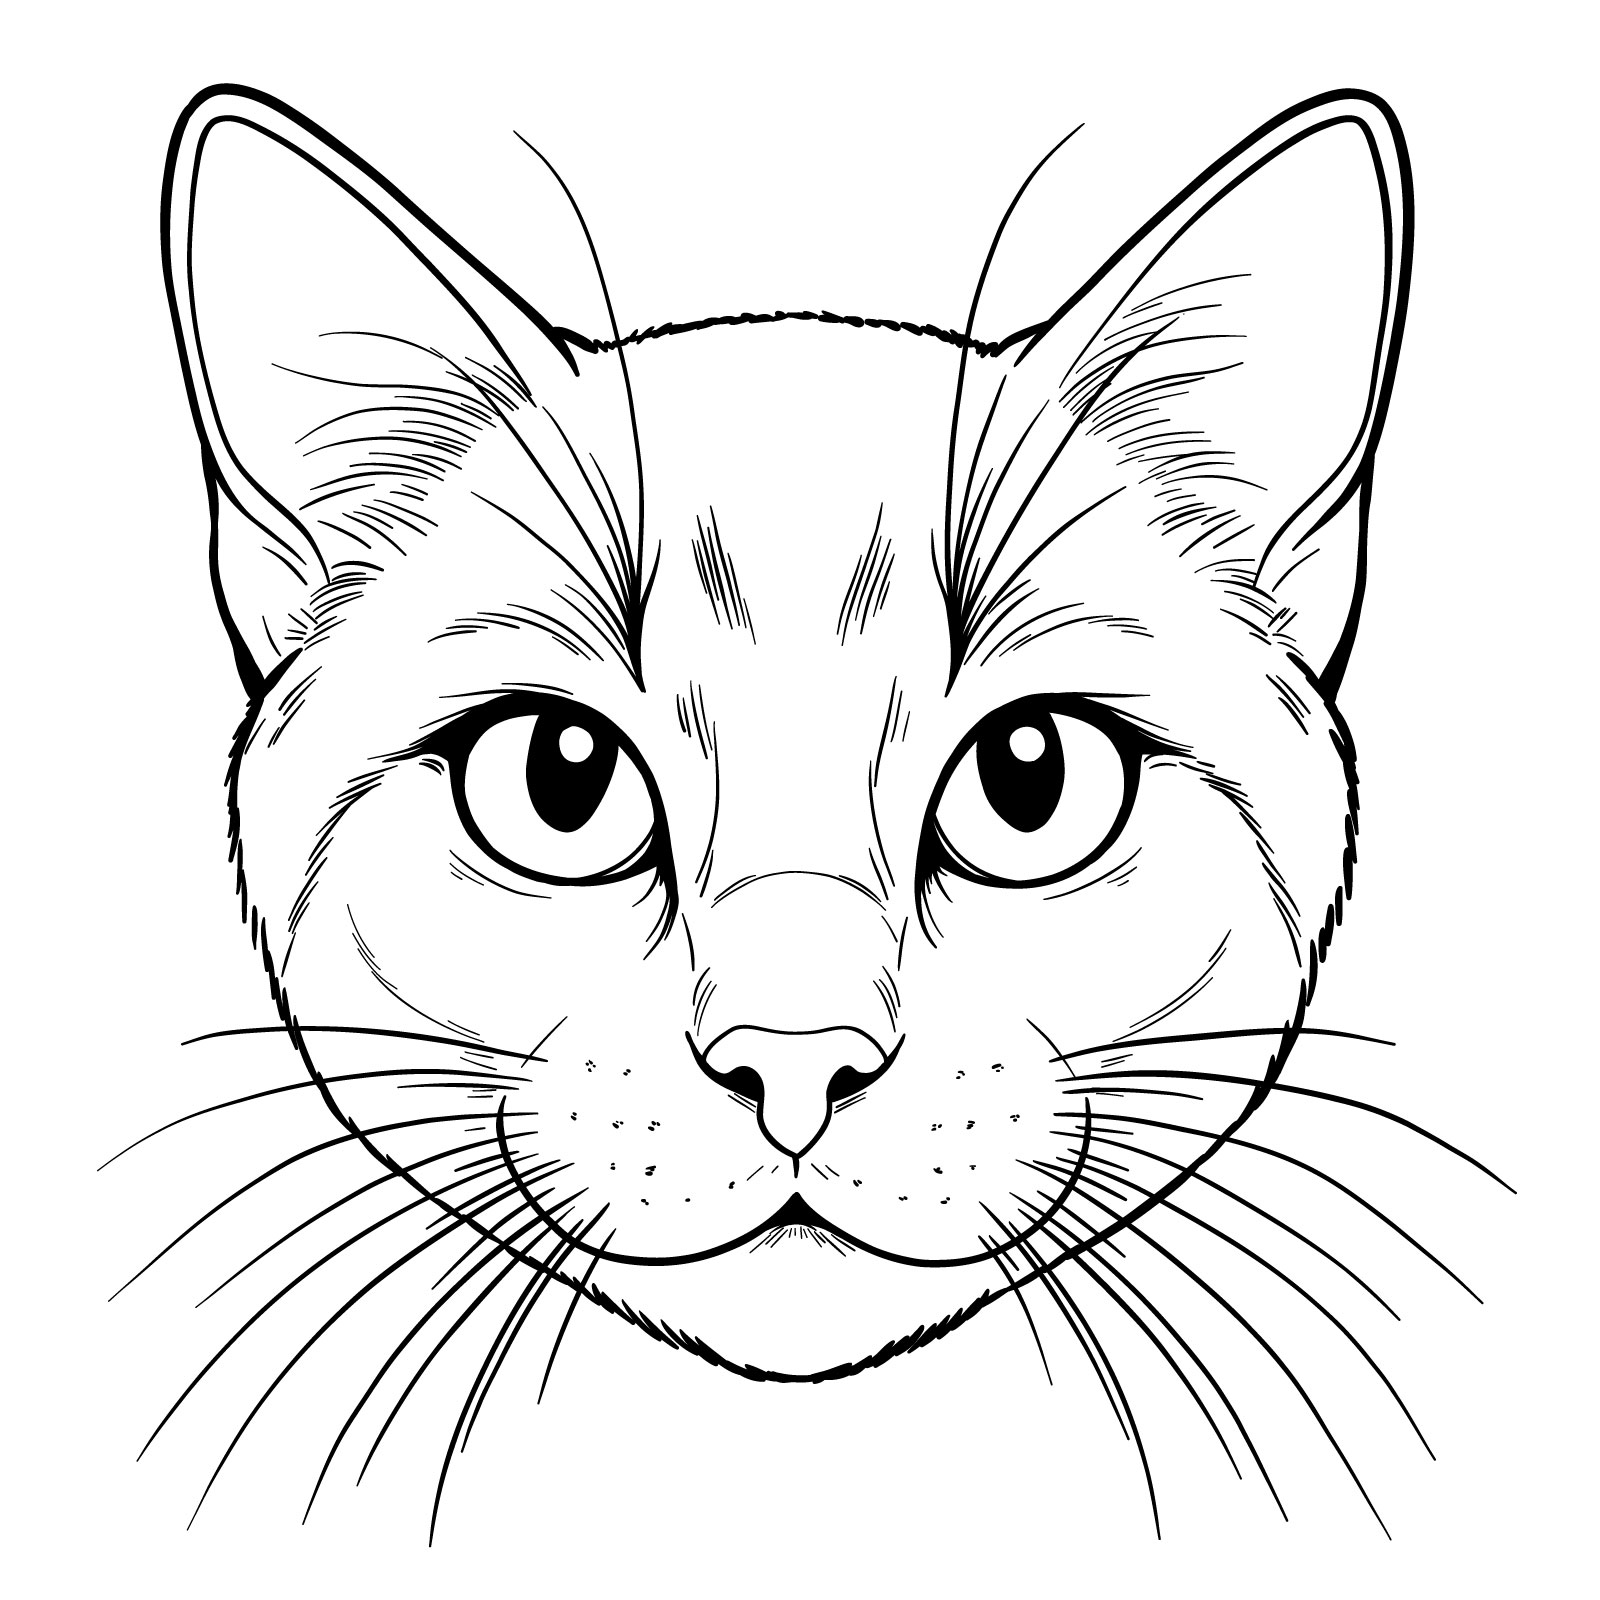
Advancing to the 6th guide , we delve into the finer details of how to draw a cat ’ s face . This 12-step tutorial is design to aid you capture the realistic feature of a guy ’ s side with precision . Unlike the more simplistic style we ’ ve tackled so far , this guide focuses on create a proportional structure from the start , laying the foundation for the intricate details that succeed . You ’ ll learn to layer each pace to sculpt the cat ’ s facial features , from the piercing gaze of its eye to the fragile beard and fur texture . Whether you ’ re a veteran artist or a queer beginner , this guide will elevate your drawing skills and bring the captivating expressions of a cat to your paper .
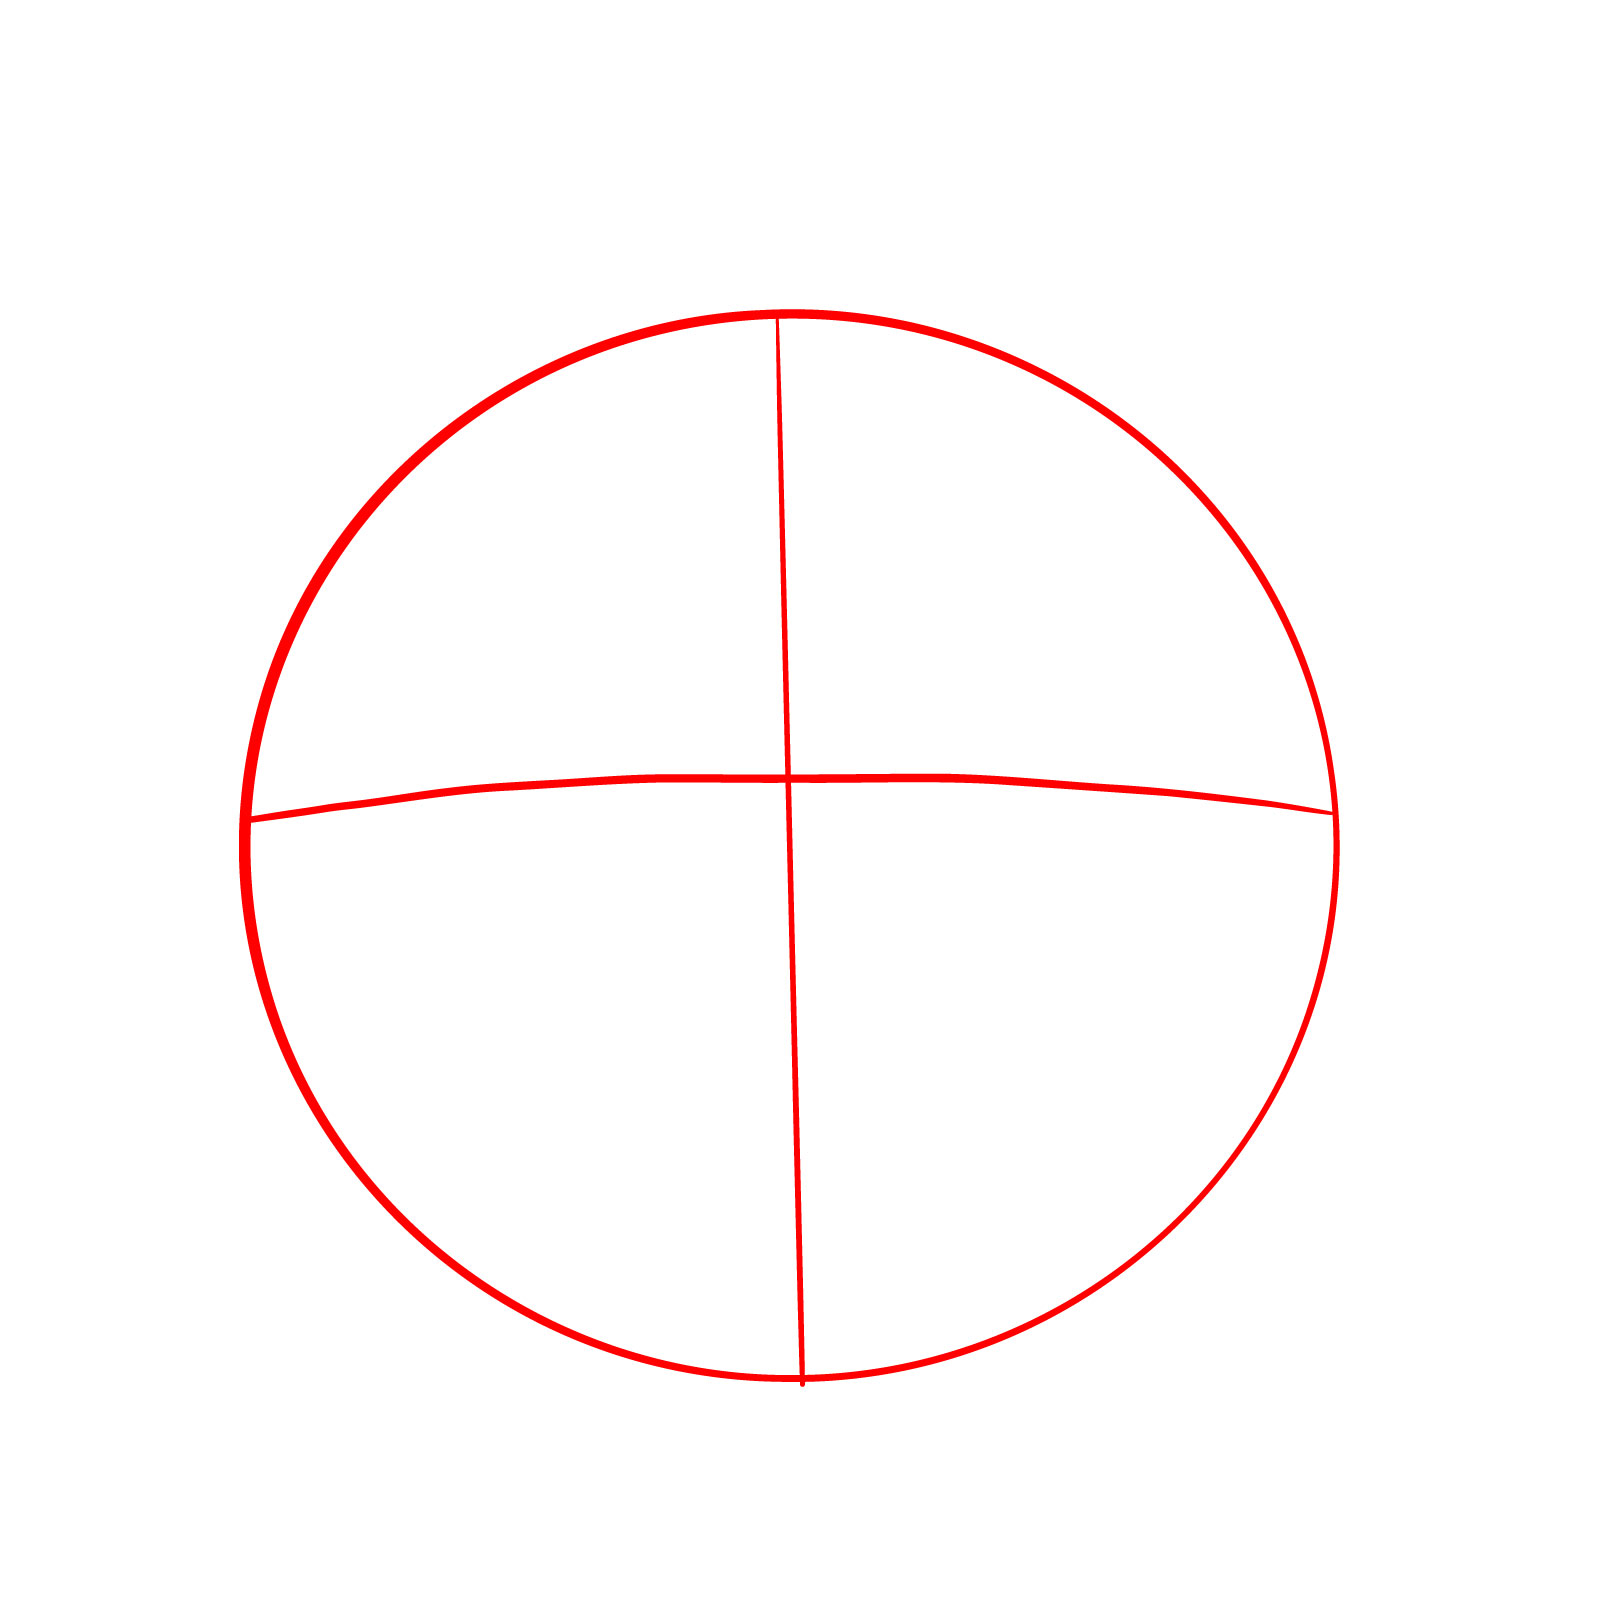
Step 01 – Begin your realistic guy face make with a simple circle . This foundational flesh is split into half with a erect line and a curved horizontal line to map out facial proportions accurately . Position the horizontal line slightly above the center to establish the eyes ’ level
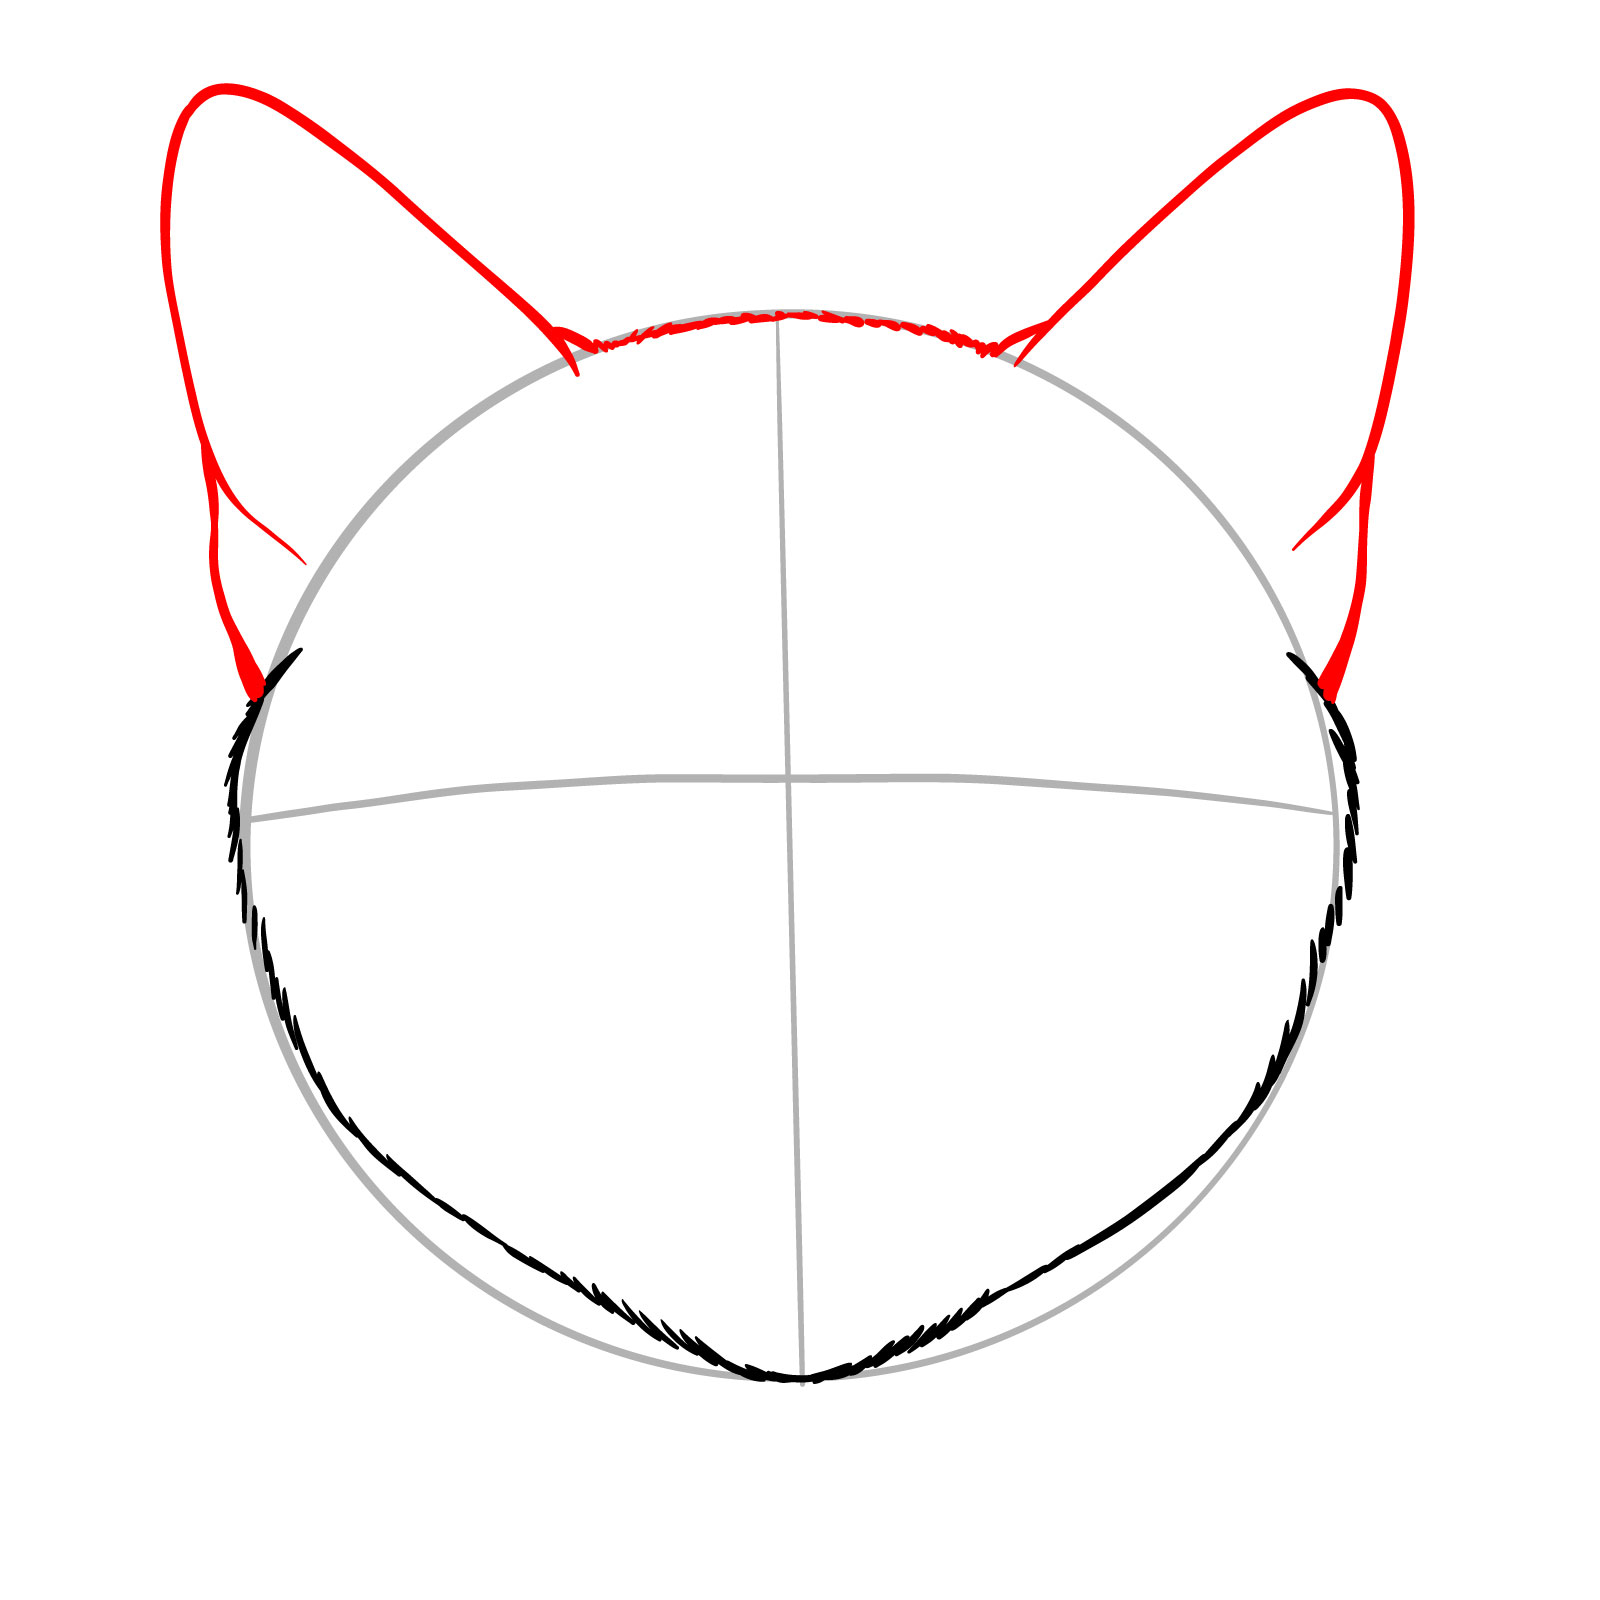
Measure 02 – Shape the chin and the cheekbones of the cat by sketch short shot that mimic fur texture . Start the outline more or less one-third above the horizontal guide line and assure that the chin touch the bottom of your initial circle

Pace 03 – Progress to adding the guy ’ s ears and the upper brain . Sketch two triangular ears reach out from the height of the head , keeping in head the position and angle of the ear in relative to the face
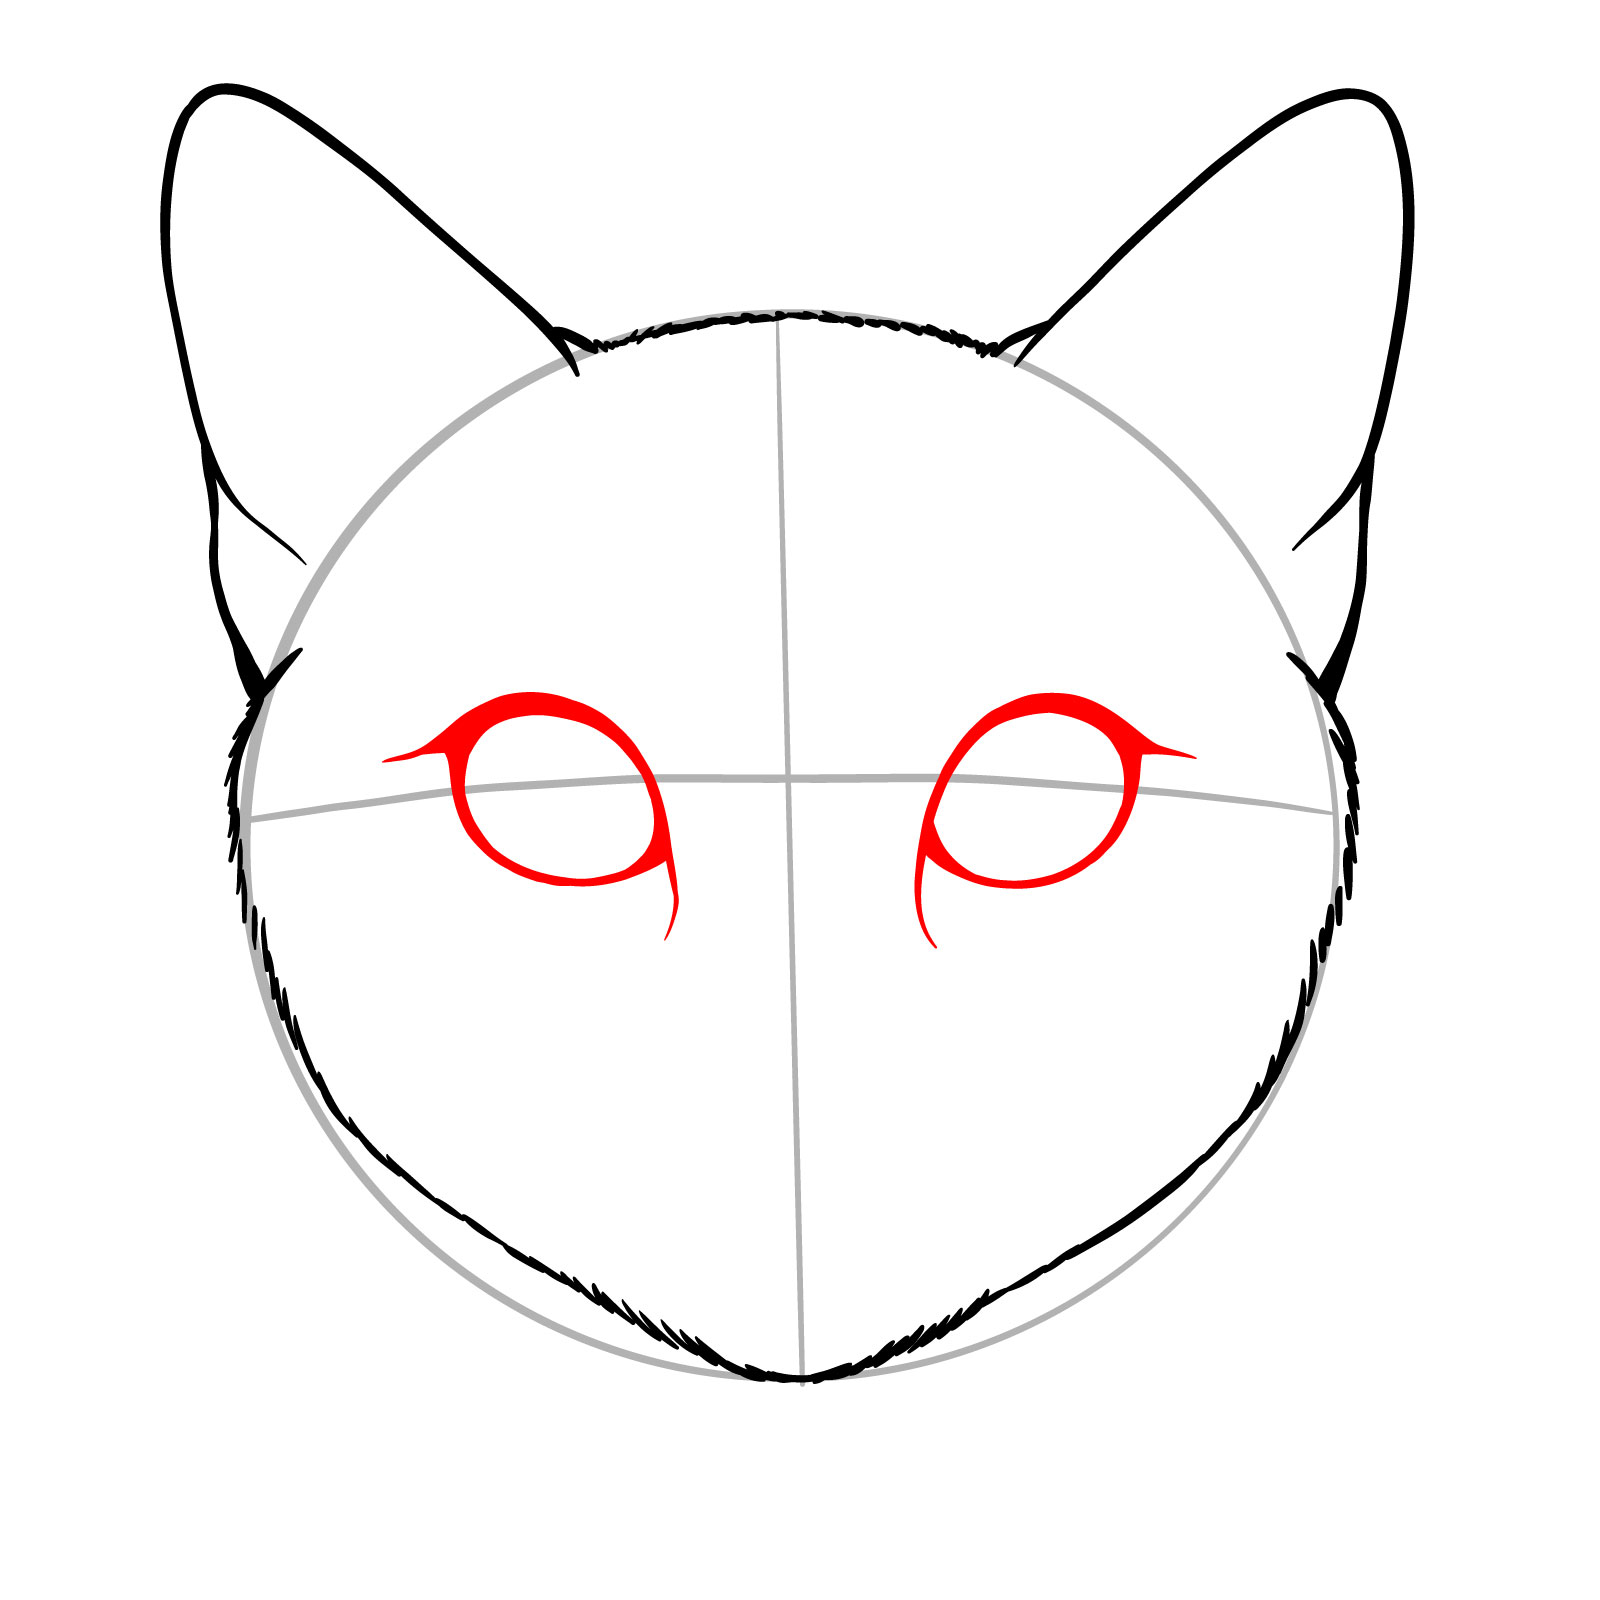
Step 04 – Focus on the guy ’ s eyes by lend almond-shaped outlines . Position them symmetrically across the vertical note to check a balanced facial formula . The center live a focal point and are essential for capture the cat ’ sec essence
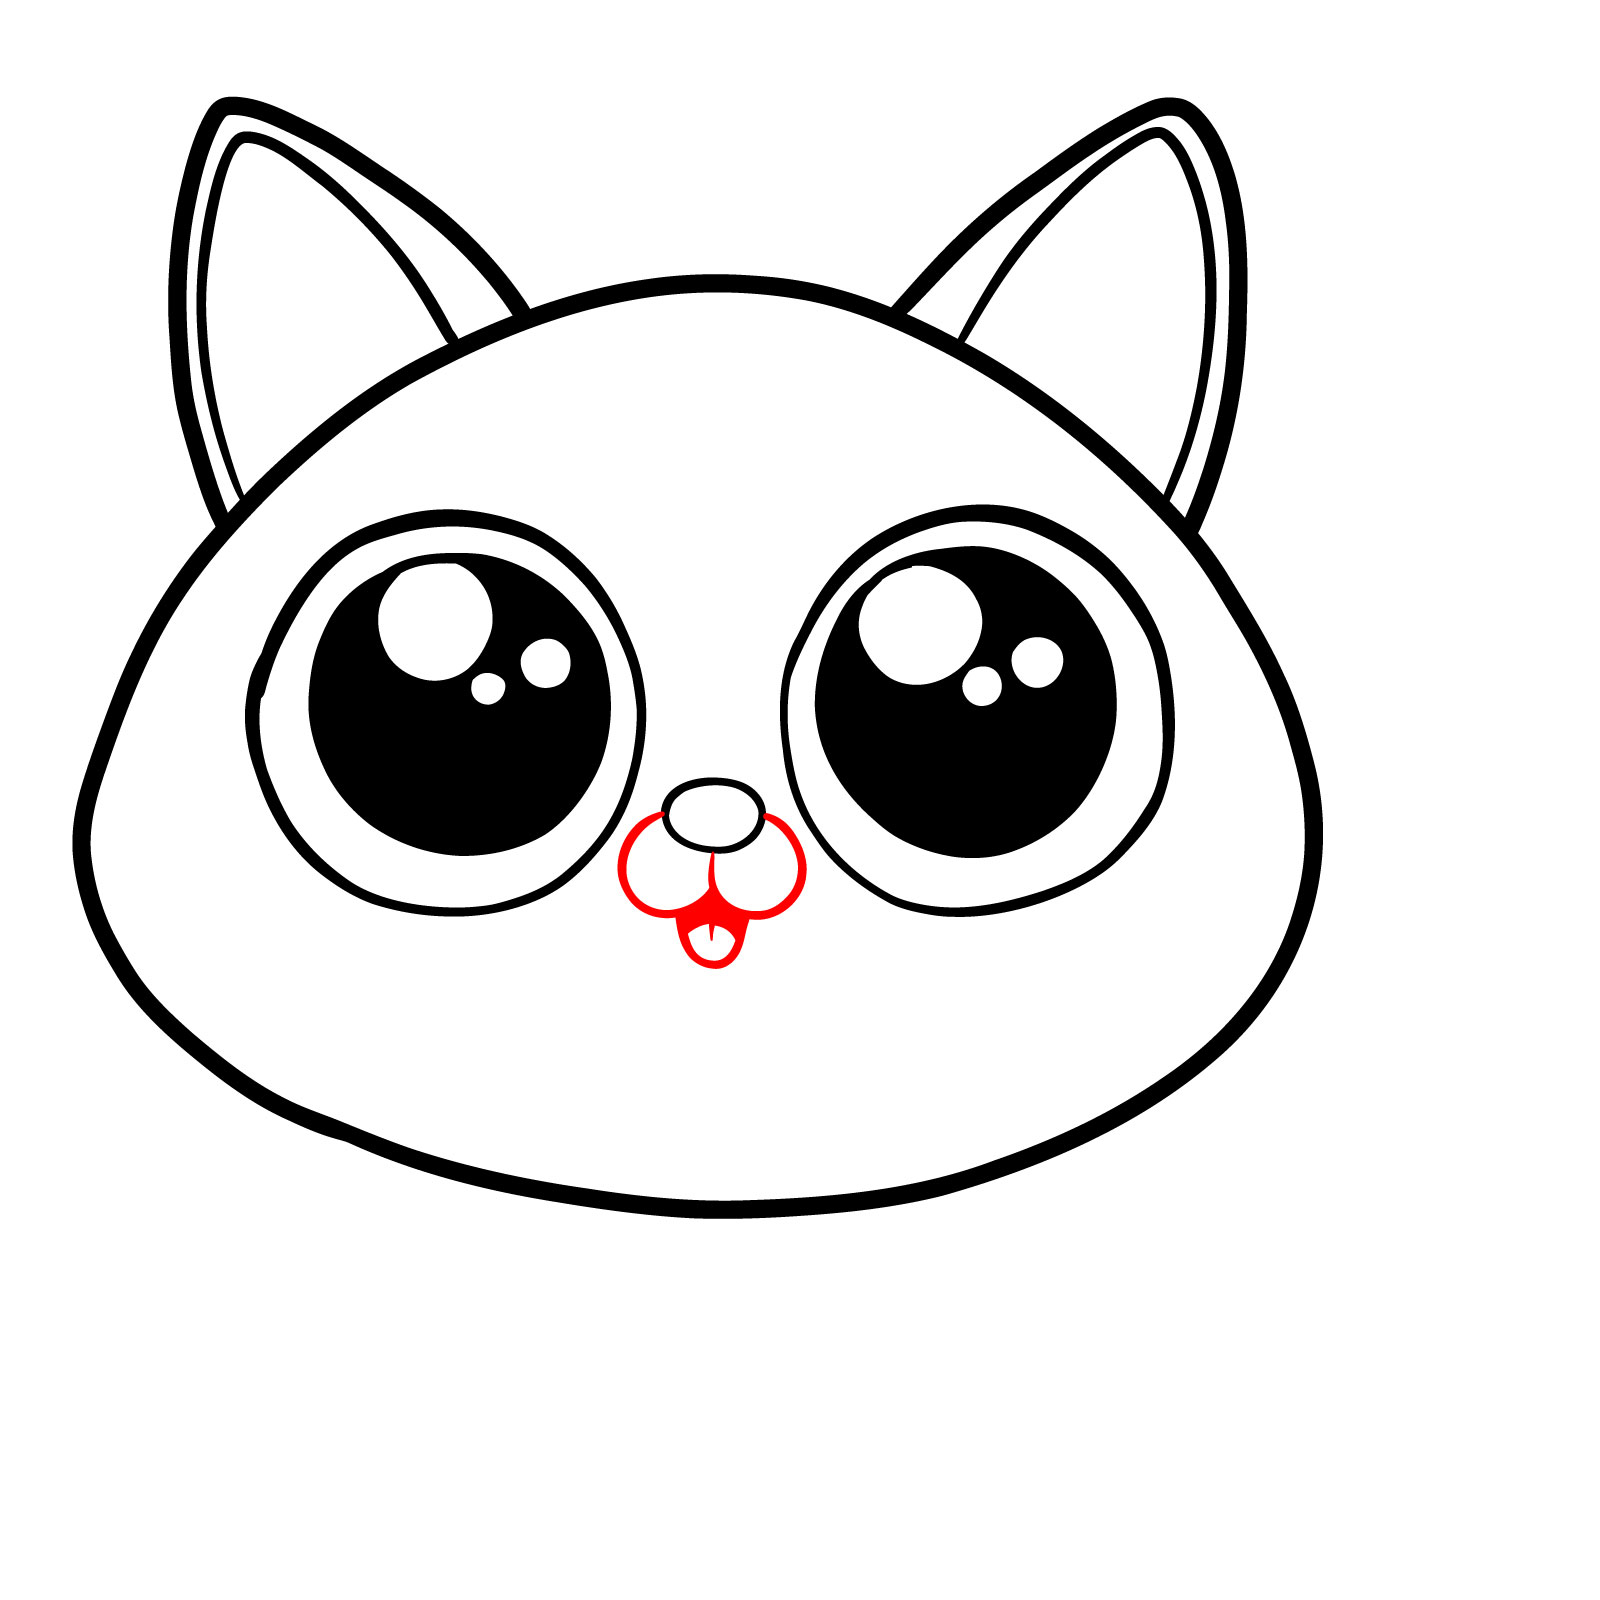
Measure 05 – With the guy ’ s eyes in position , add student satisfy with black and lead little white dots for highlights to give spirit to the gaze . Outline a subtle T-shaped outline to indicate the nose placement , giving your cat ’ s face a more defined appearance
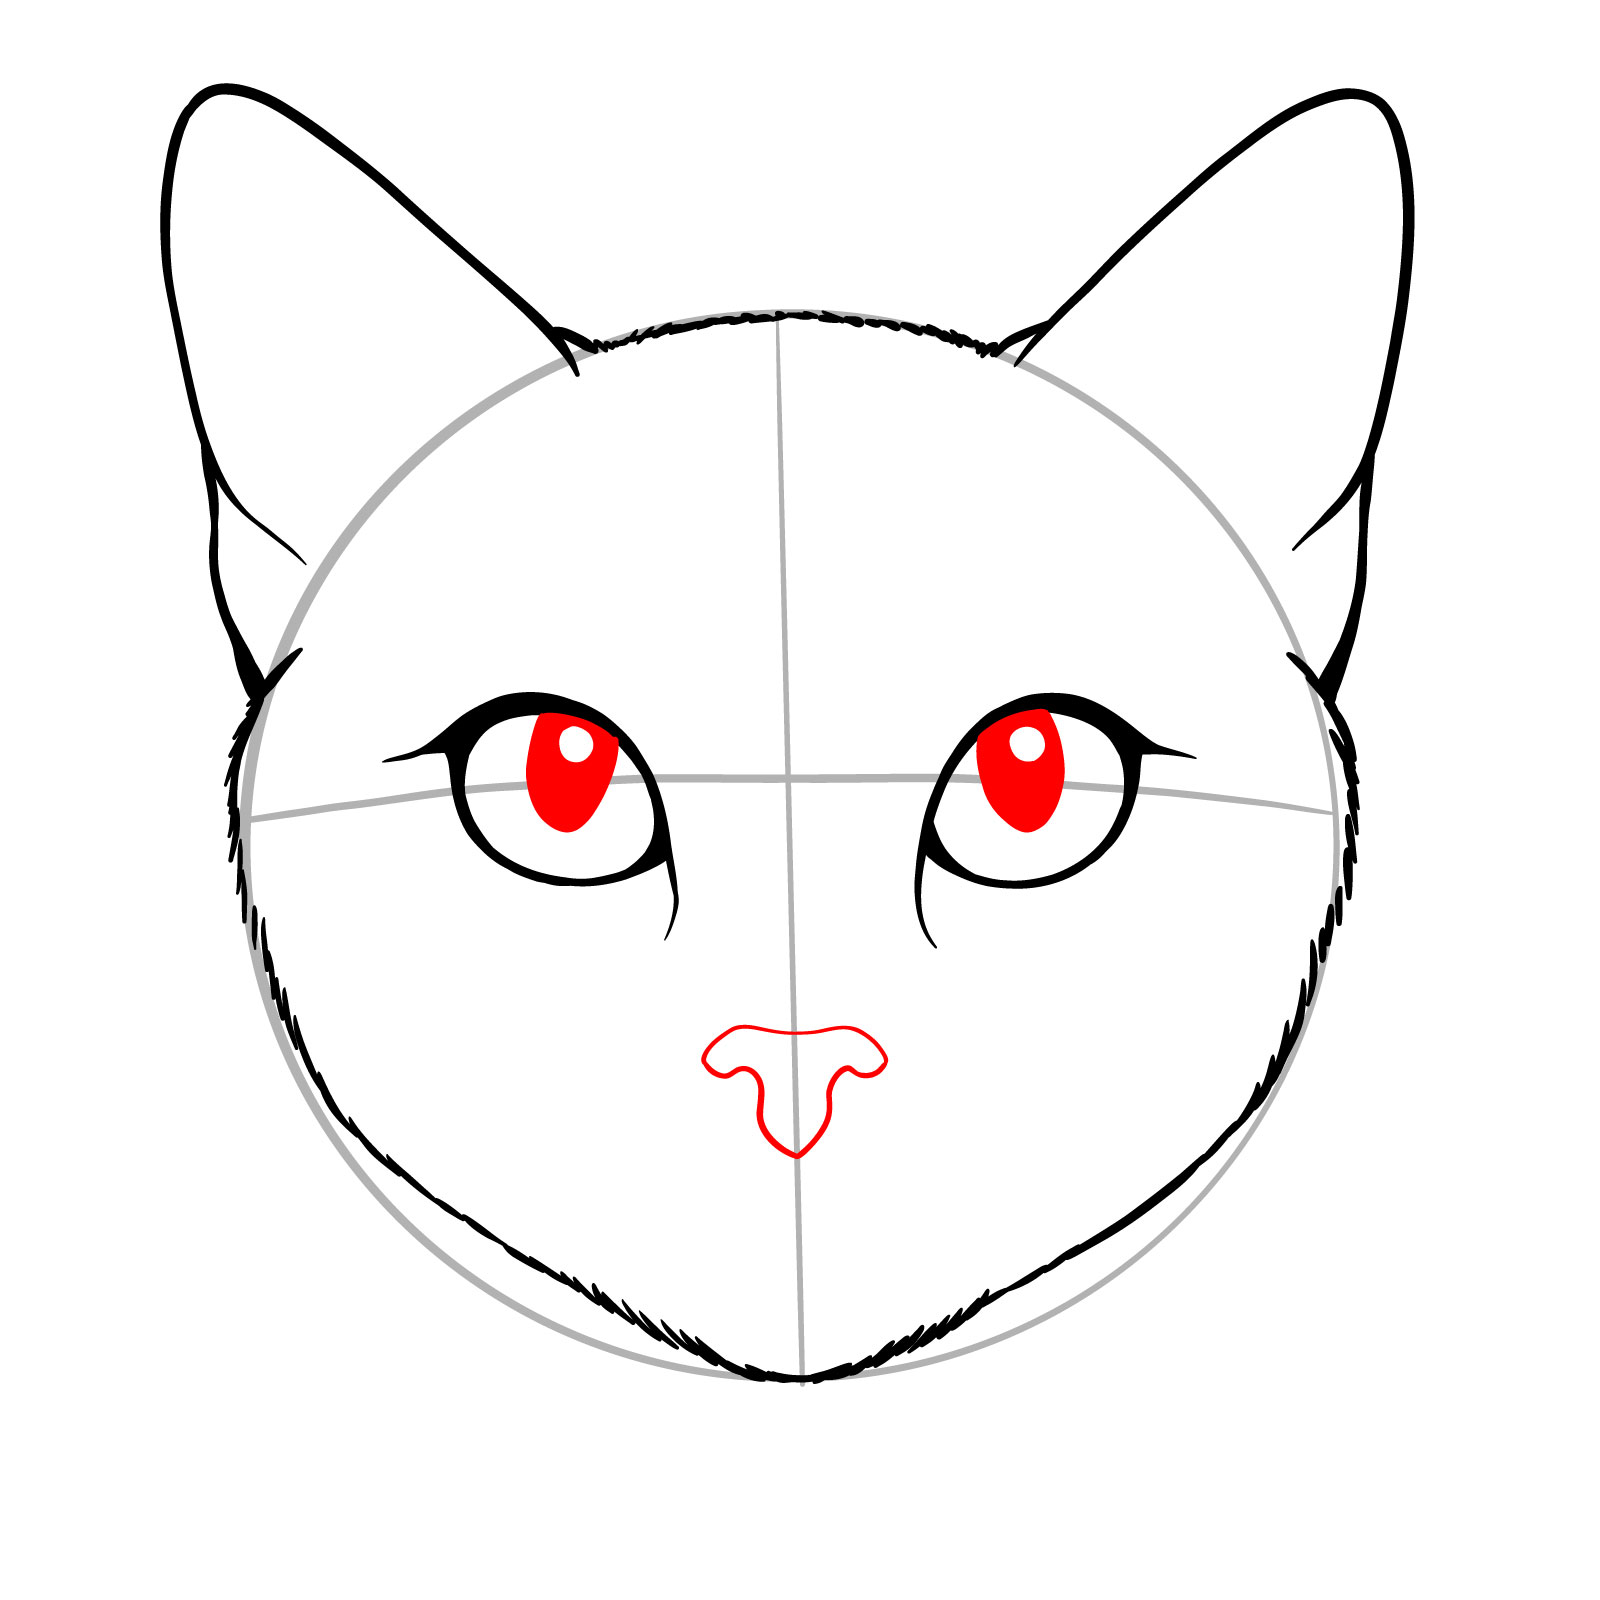
Pace 06 – Darken the nostrils for depth and depict a curved ‘ W ’ shape to make the cat ’ sec mouth . This step start to bring together the facial feature , providing a guide for the more intricate details to follow
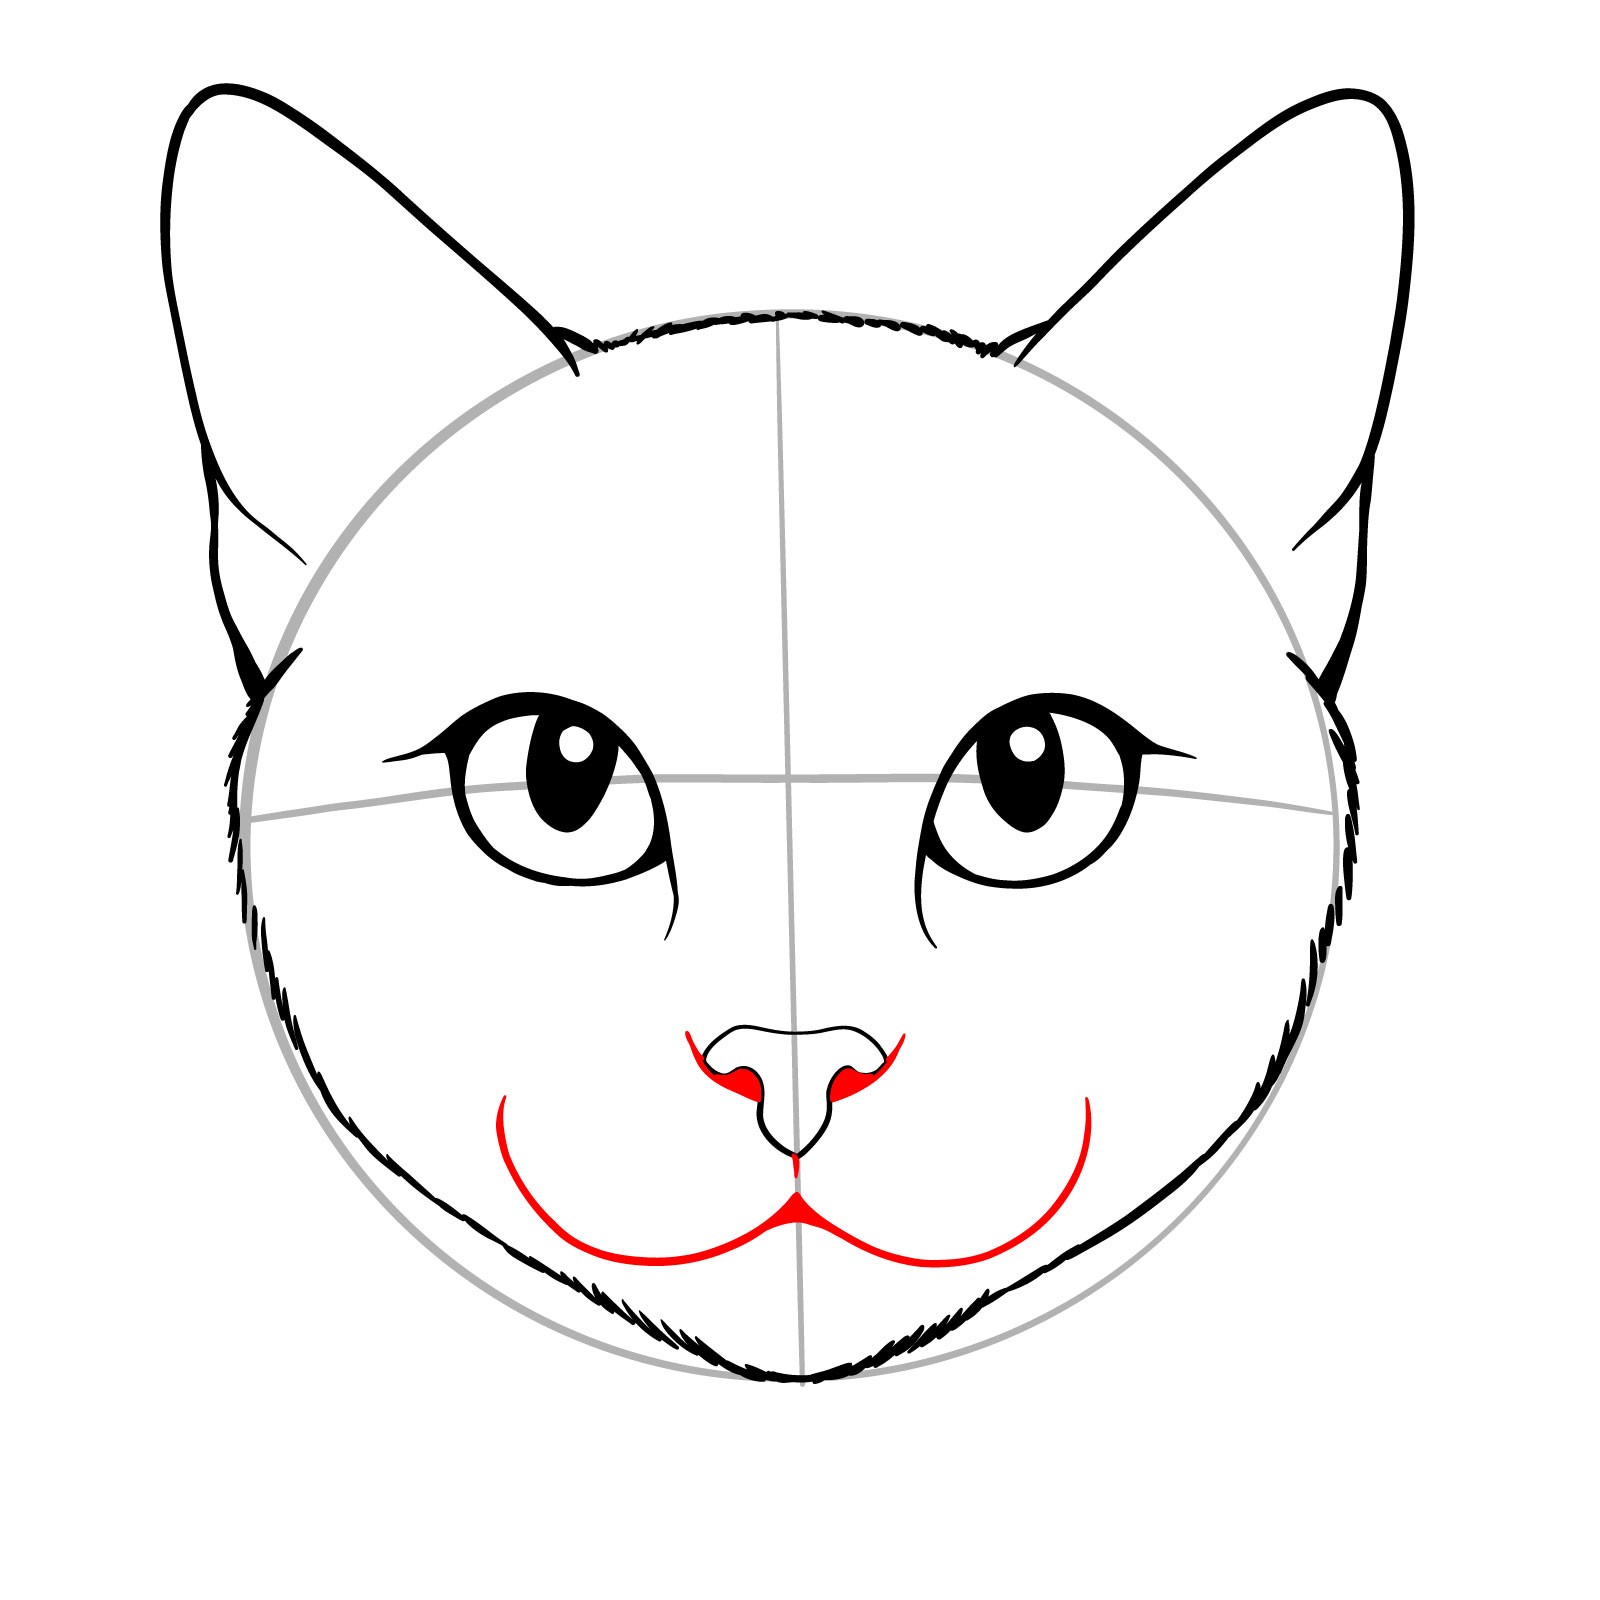
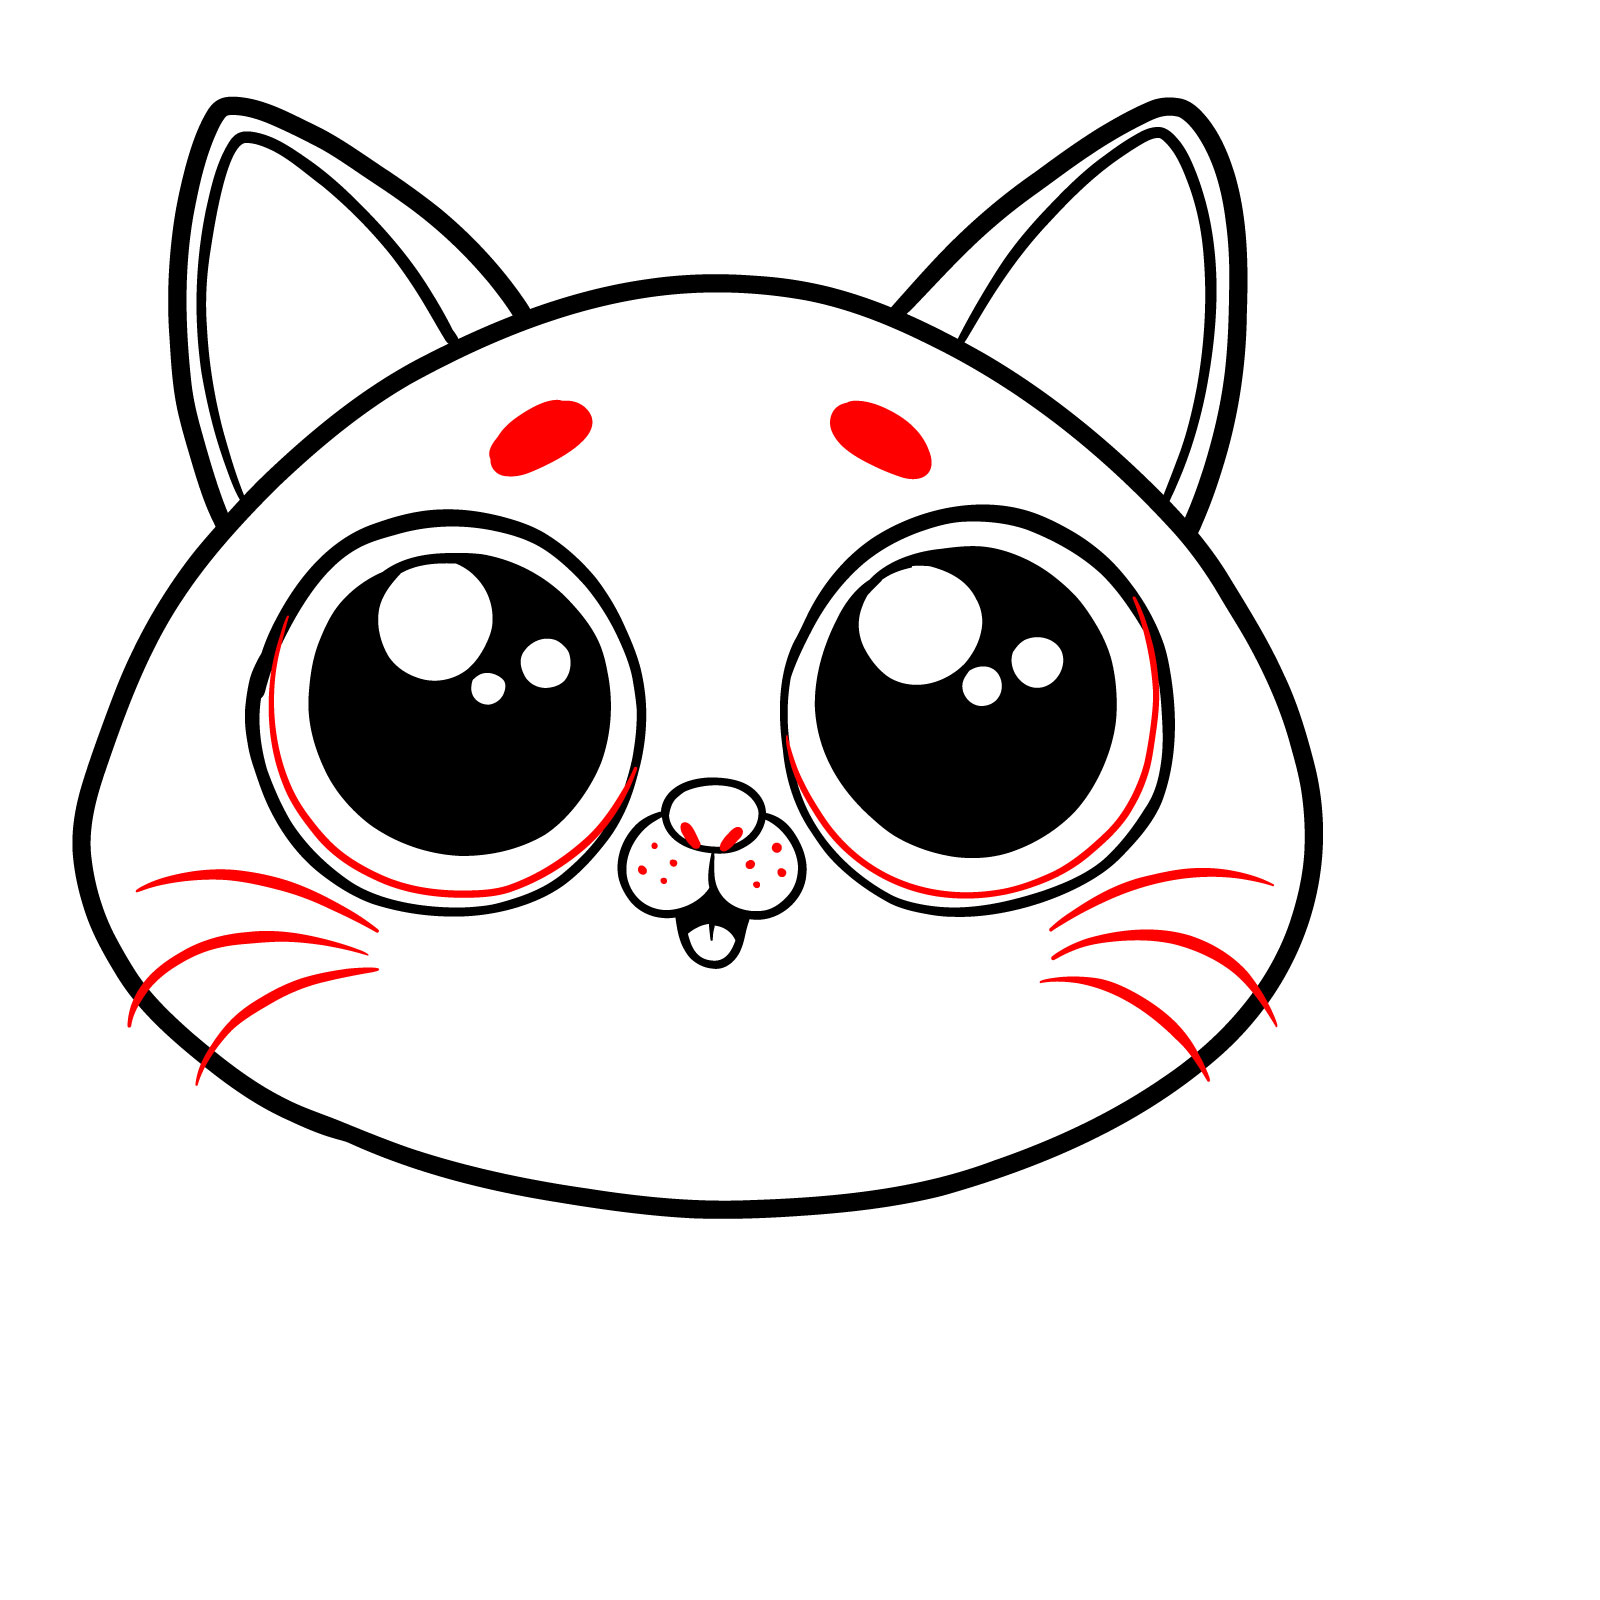
Measure 07 – Enhance the Platonism of your guy ’ s face by adding short lines around the nose and cheek to suggest fur texture . This step lend volume and character to the drawing , making the look look more dynamic and three-dimensional
Step 08 – Define the inner ear course and employ still , gentle shot to represent the fur within the ears and below them . These subtle touch add softness and texture , which are essential for the realistic depiction of a cat ’ s side
Step 09 – Depict the beard by describe fine , radiating erect lines from the forehead area . Add short stroke above the eye to imitate fur , hold your drawing an excess level of detail
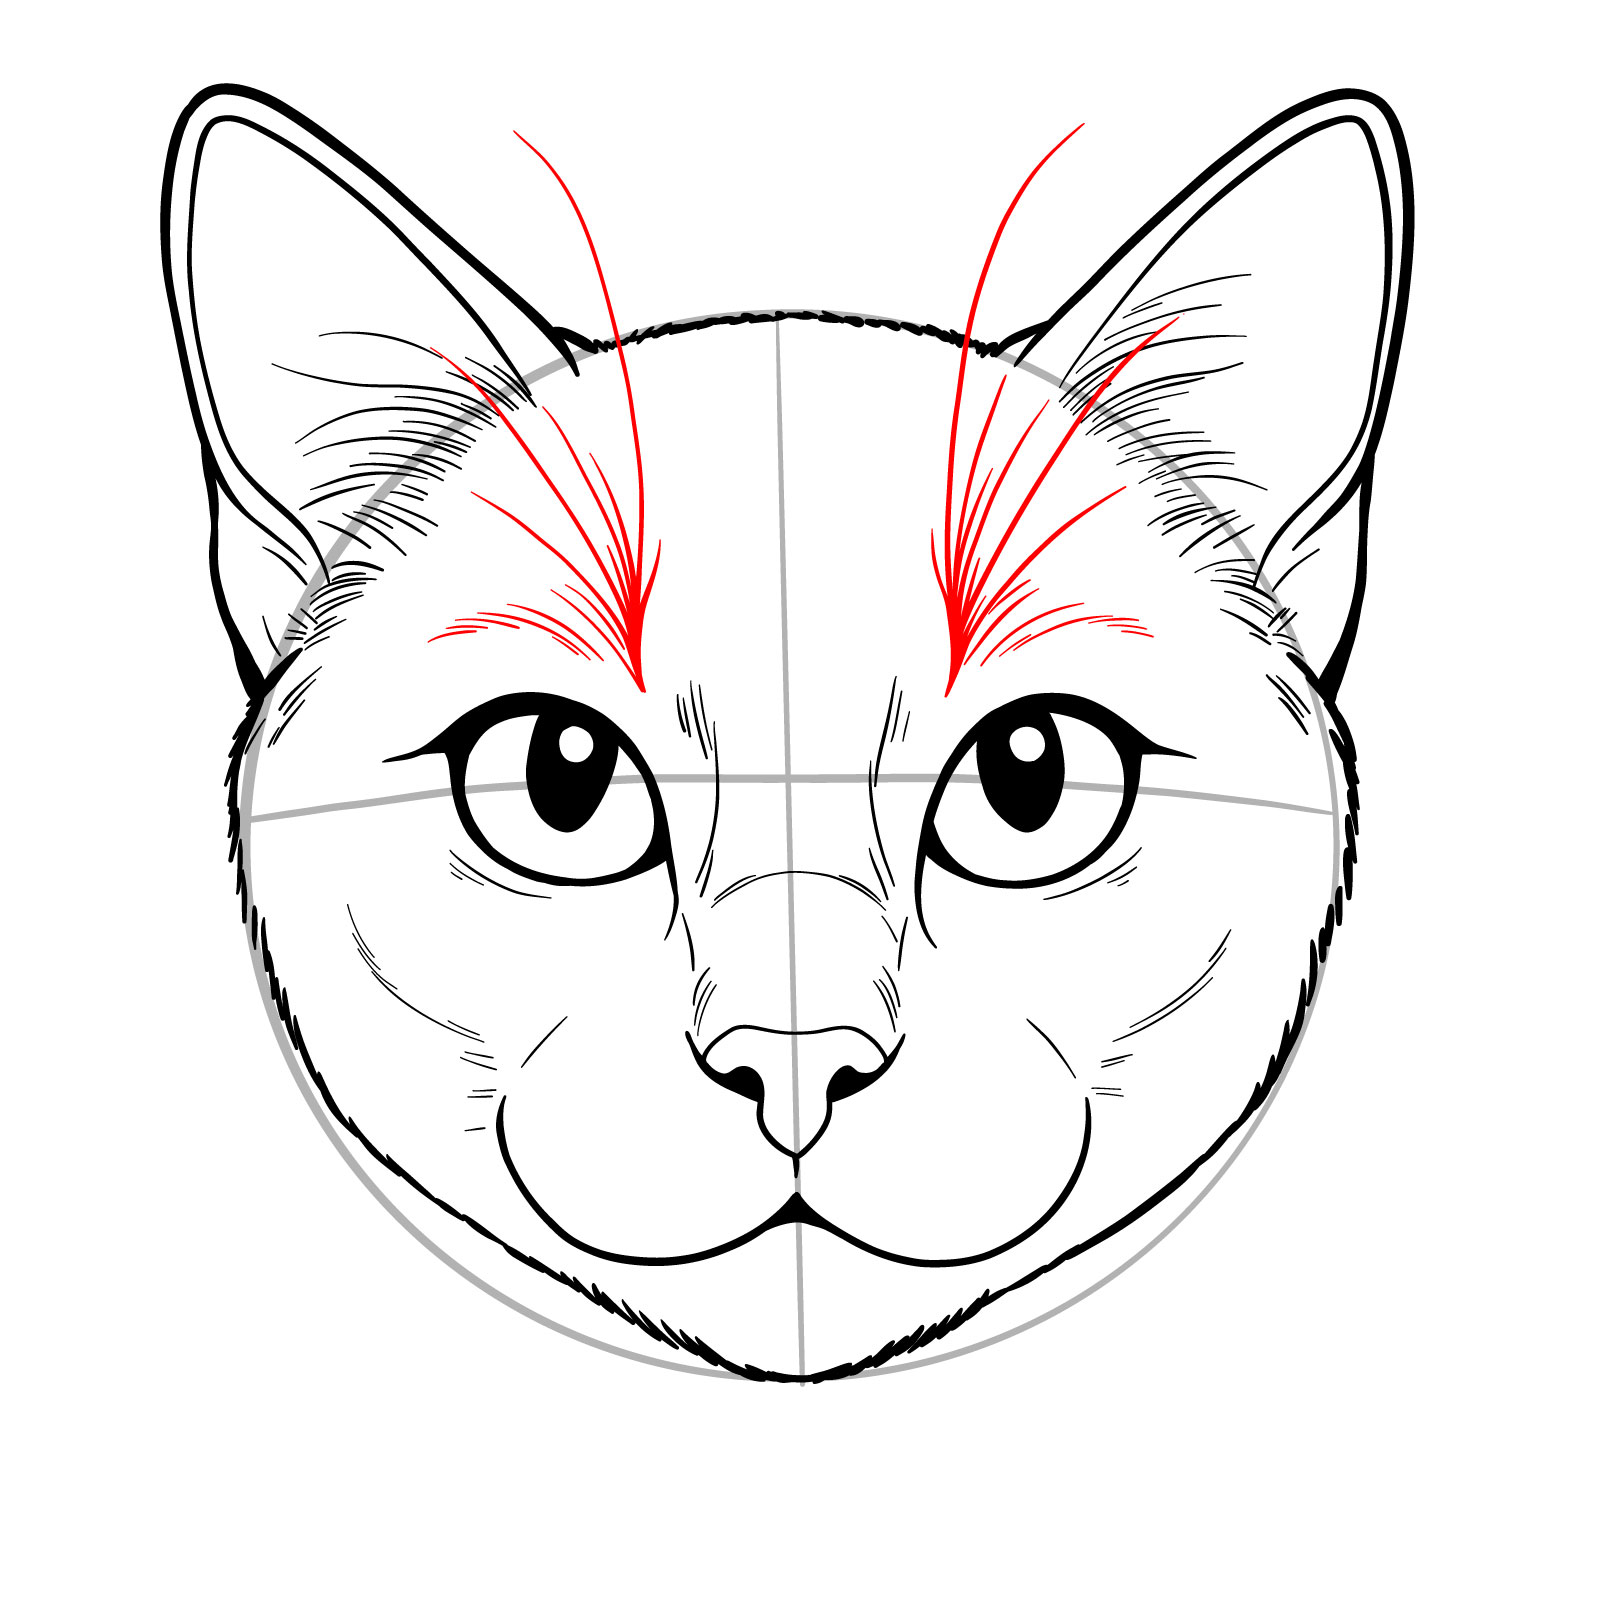
Pace 10 – Intensify the fur point around the middle and on the forehead . Apply a series of short line to create a fur rule

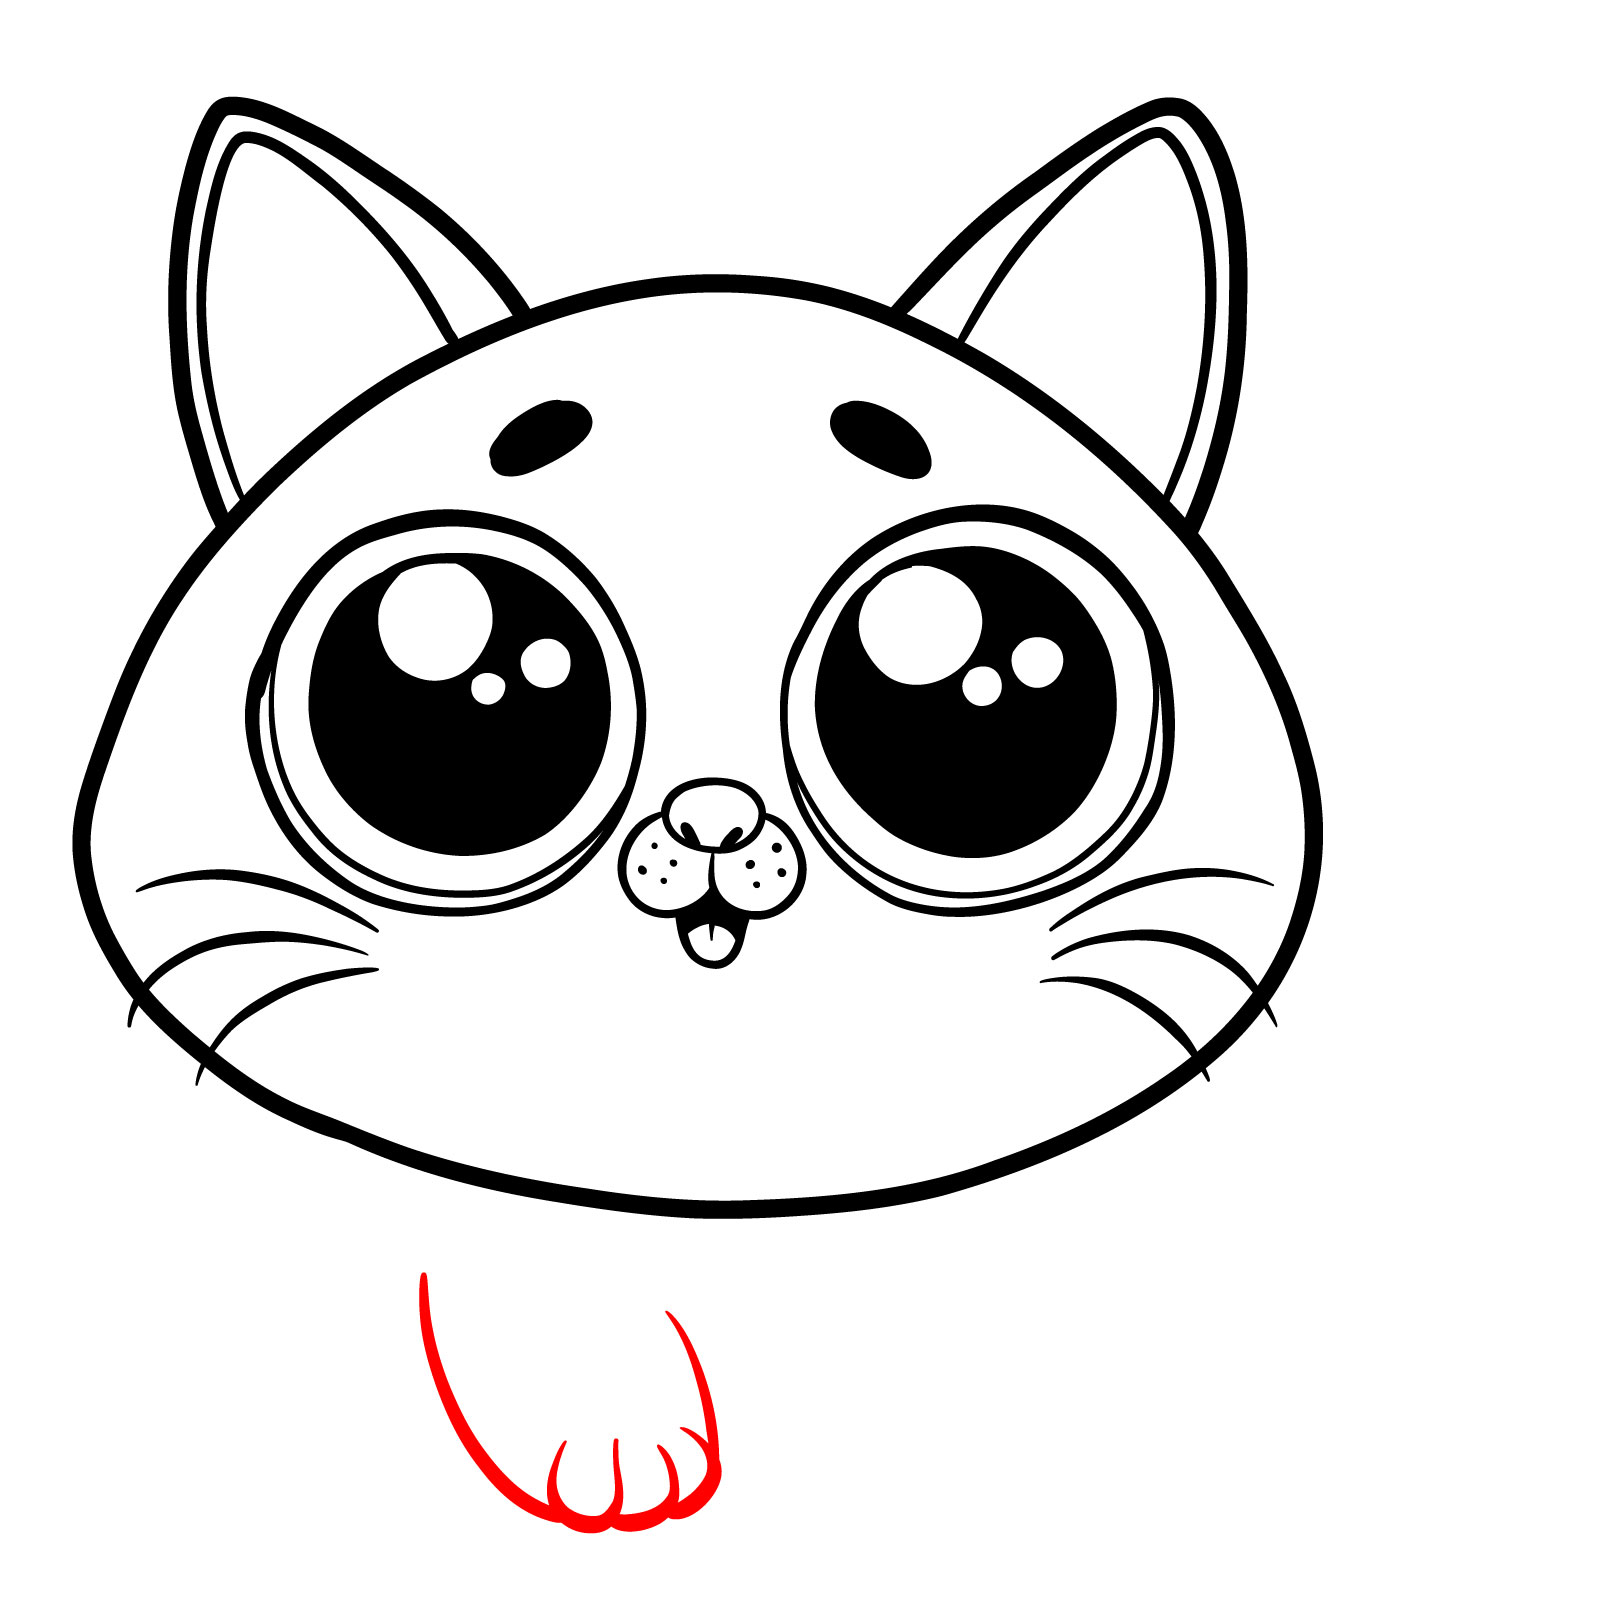
Pace 11 – Draw the whisker spots as humble dots where the whiskers emanate from the snout . Add additional whiskers to these spots , ensuring they are of varying lengths to mimic the natural randomness see in a cat ’ s side

Step 12 – Conclude the guide on how to depict a cat ’ s face with the last touches on beard and fur patterns if needed . Review the overall form and symmetry to see to it a vivid representation . The effect is a elaborate and authentic portrayal of a guy ’ s face that artist of any level can achieve with pattern and attention to detail
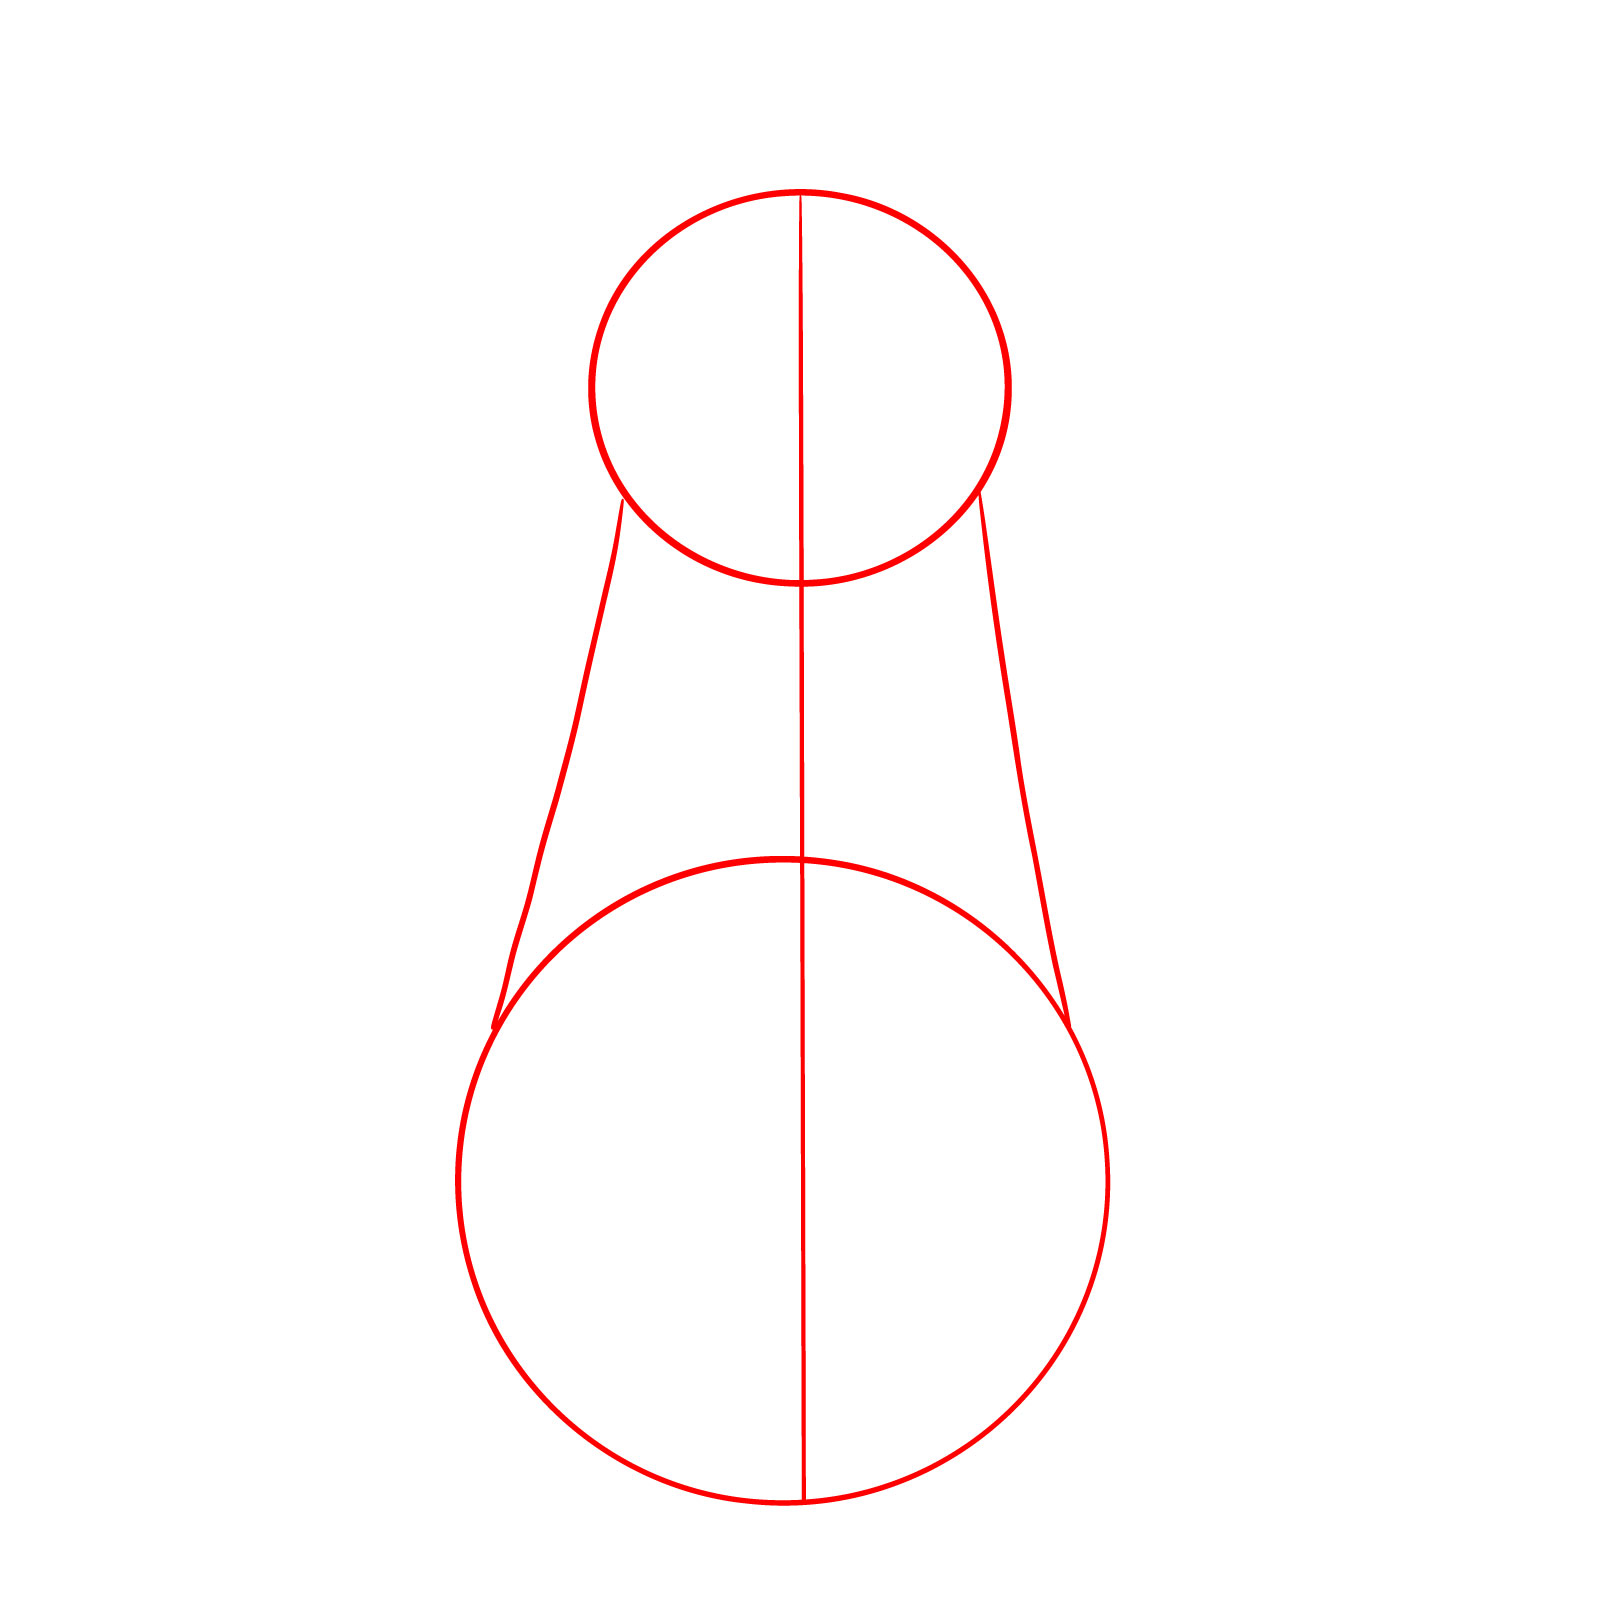
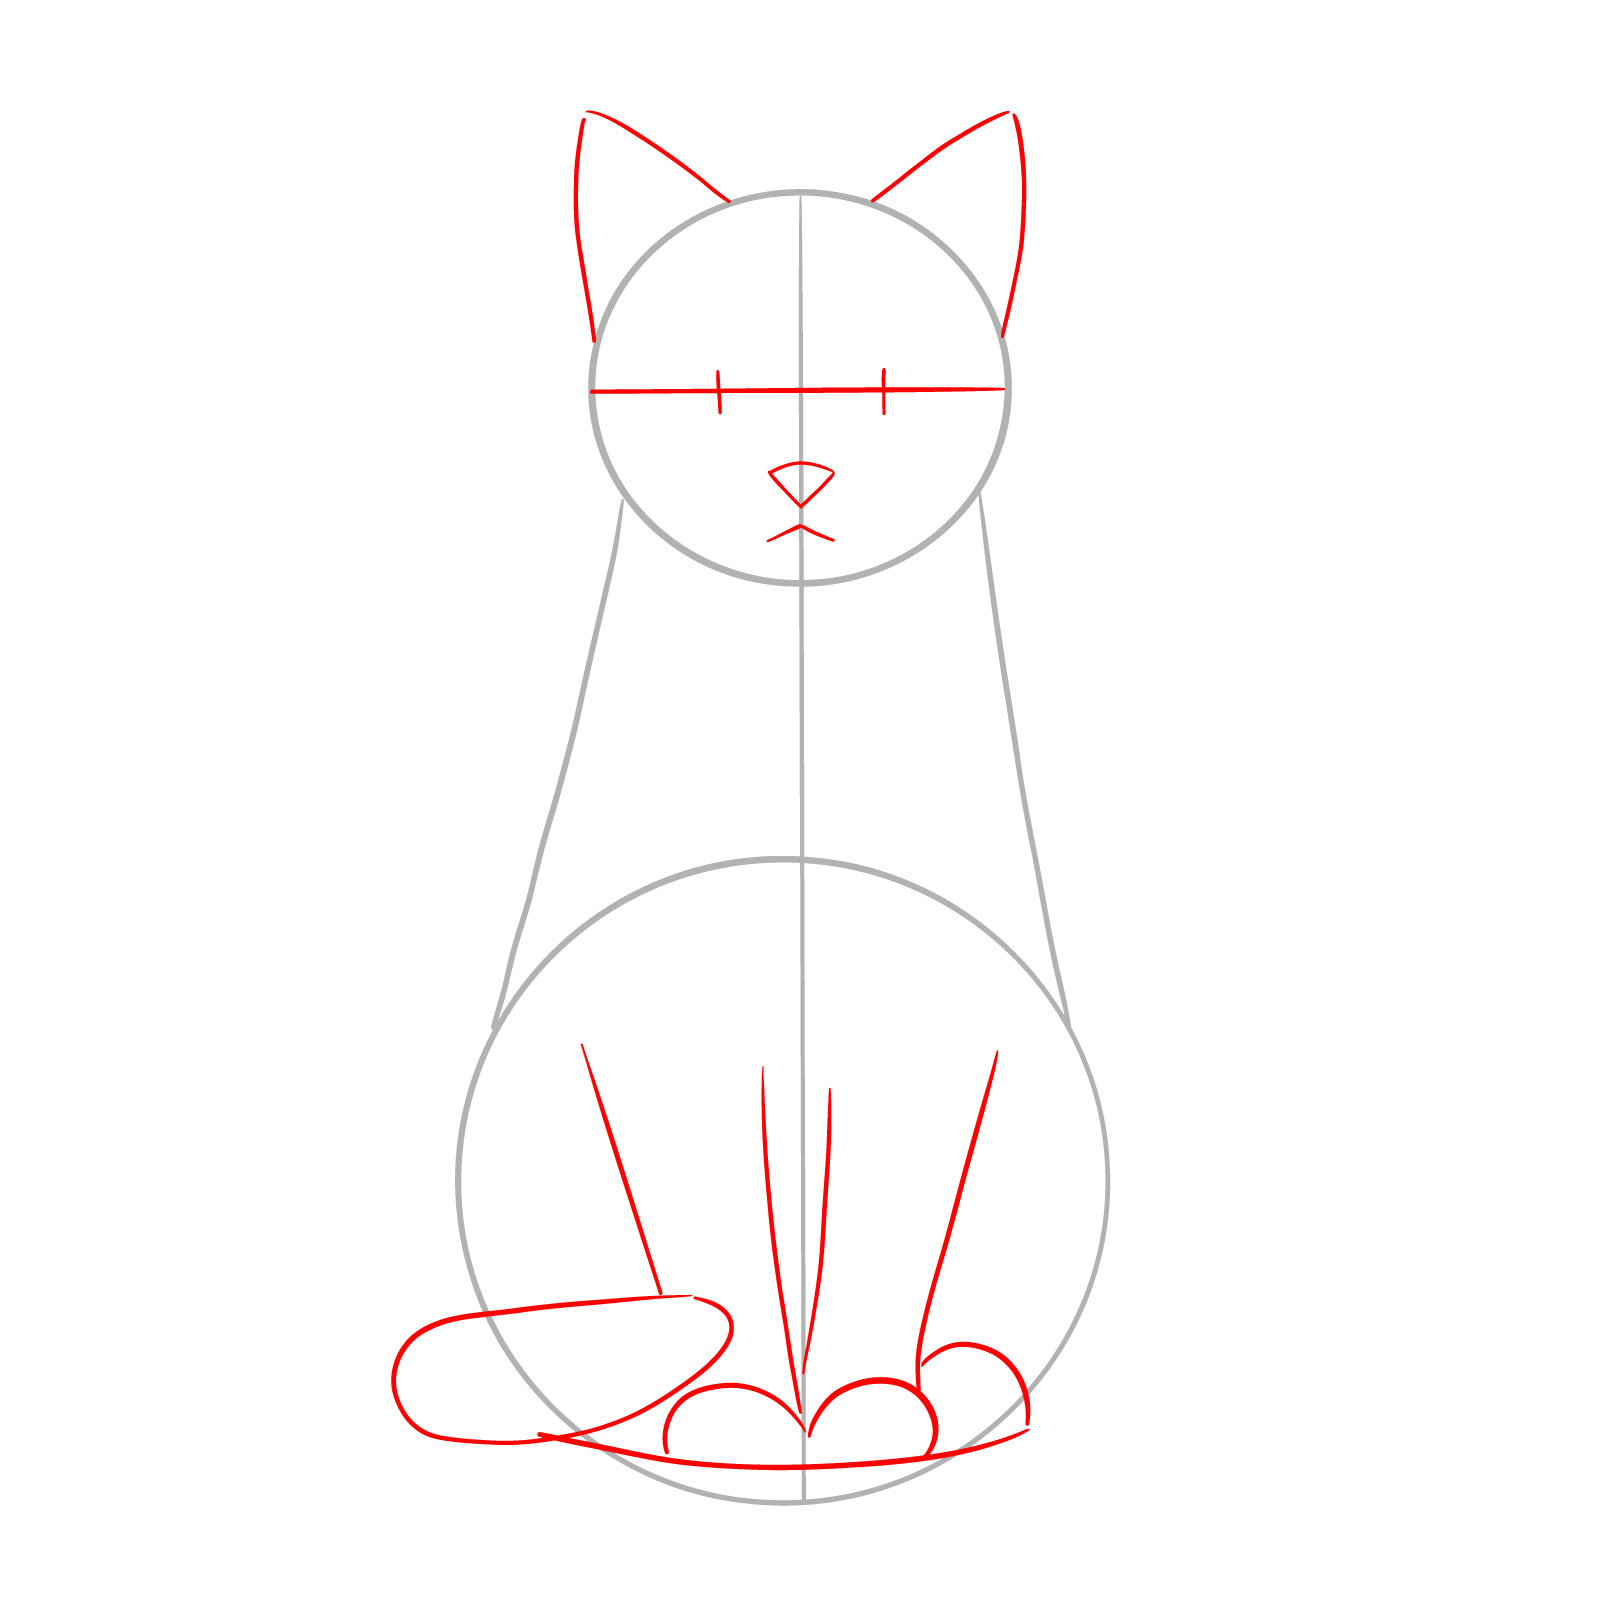
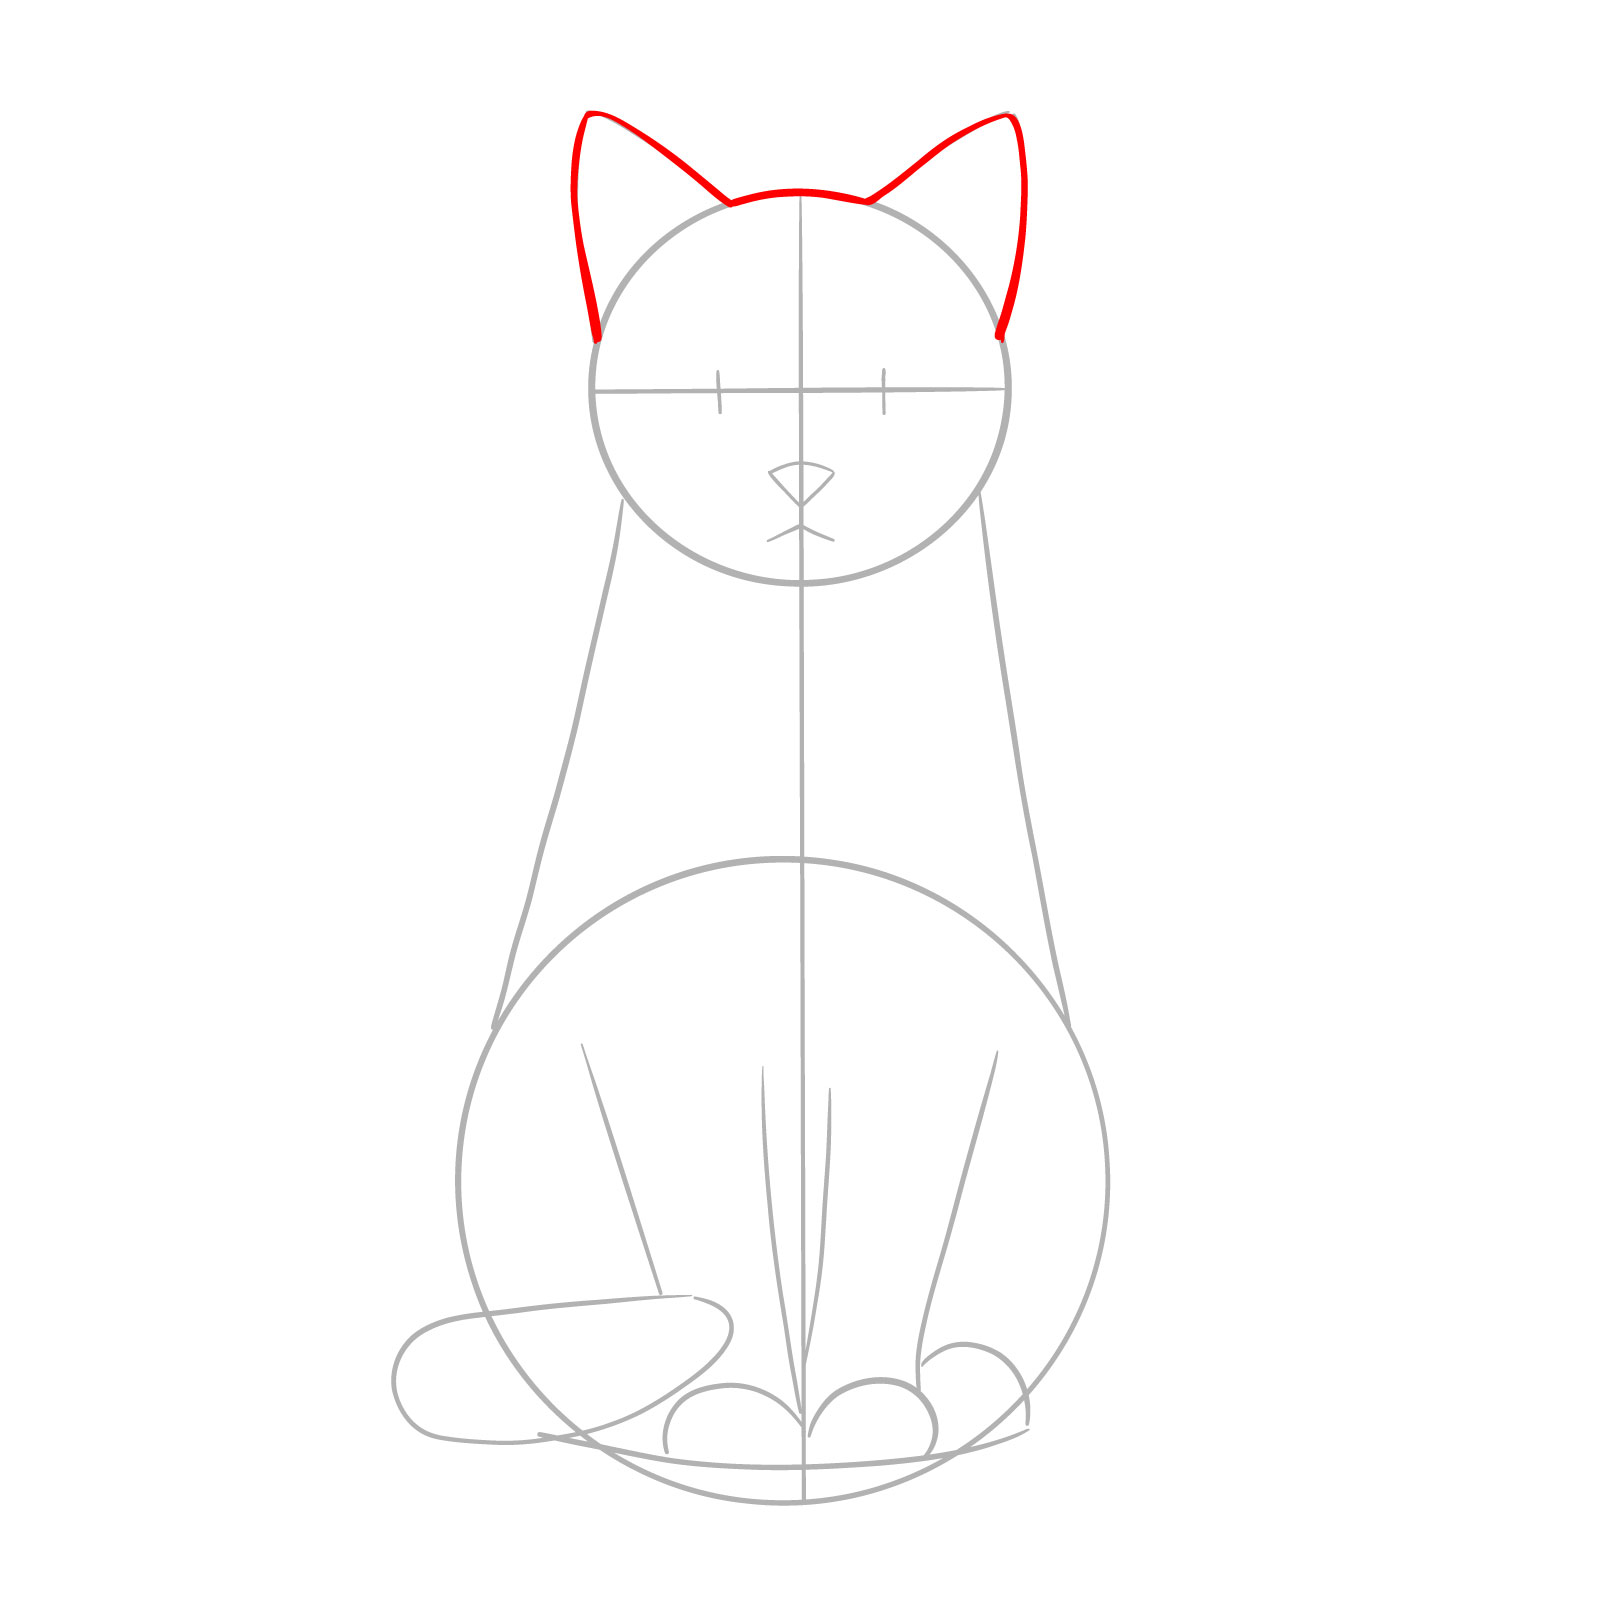
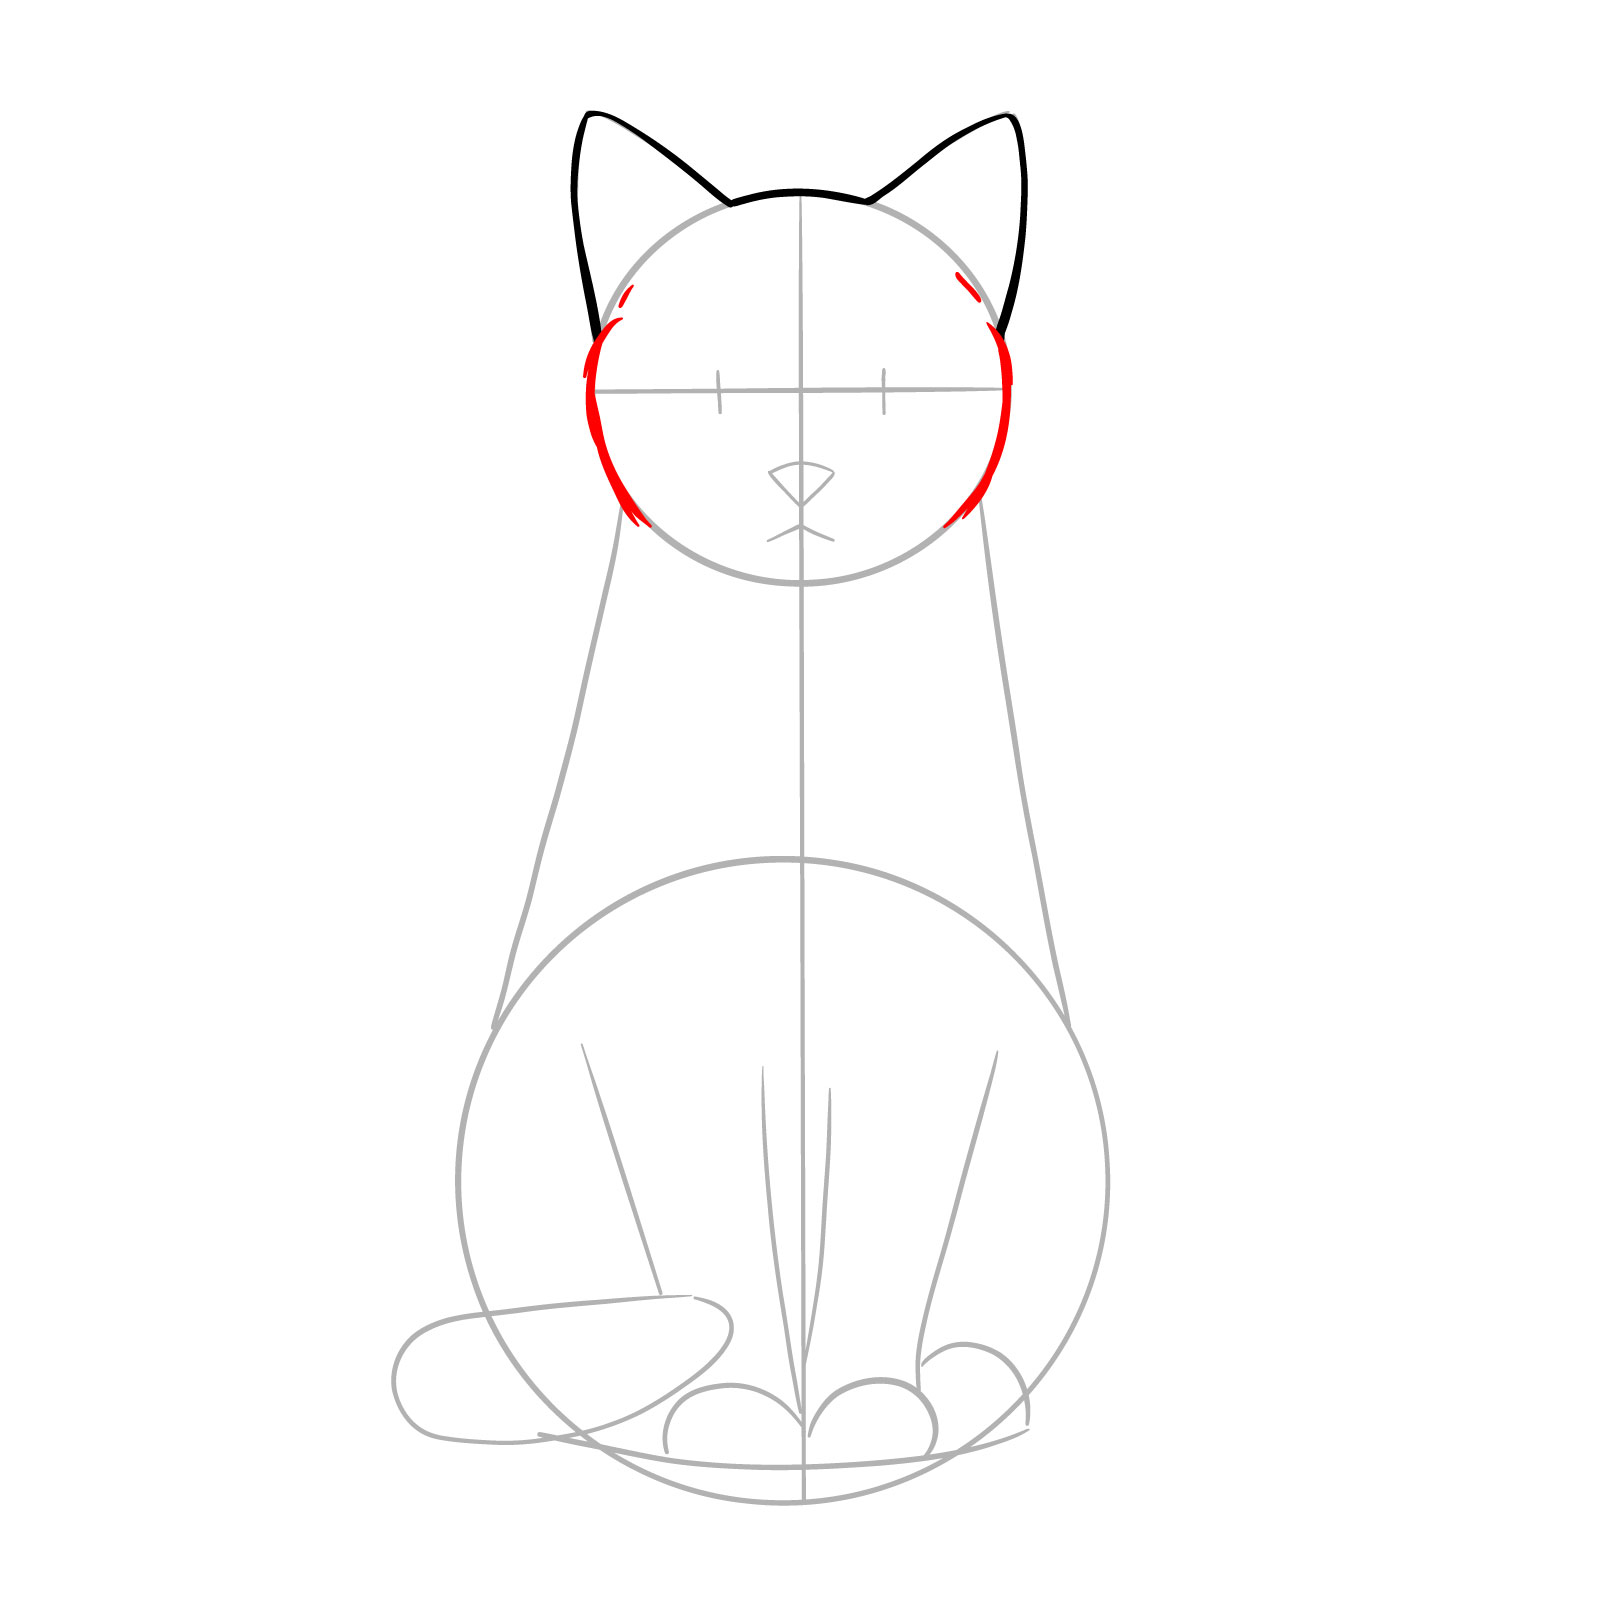
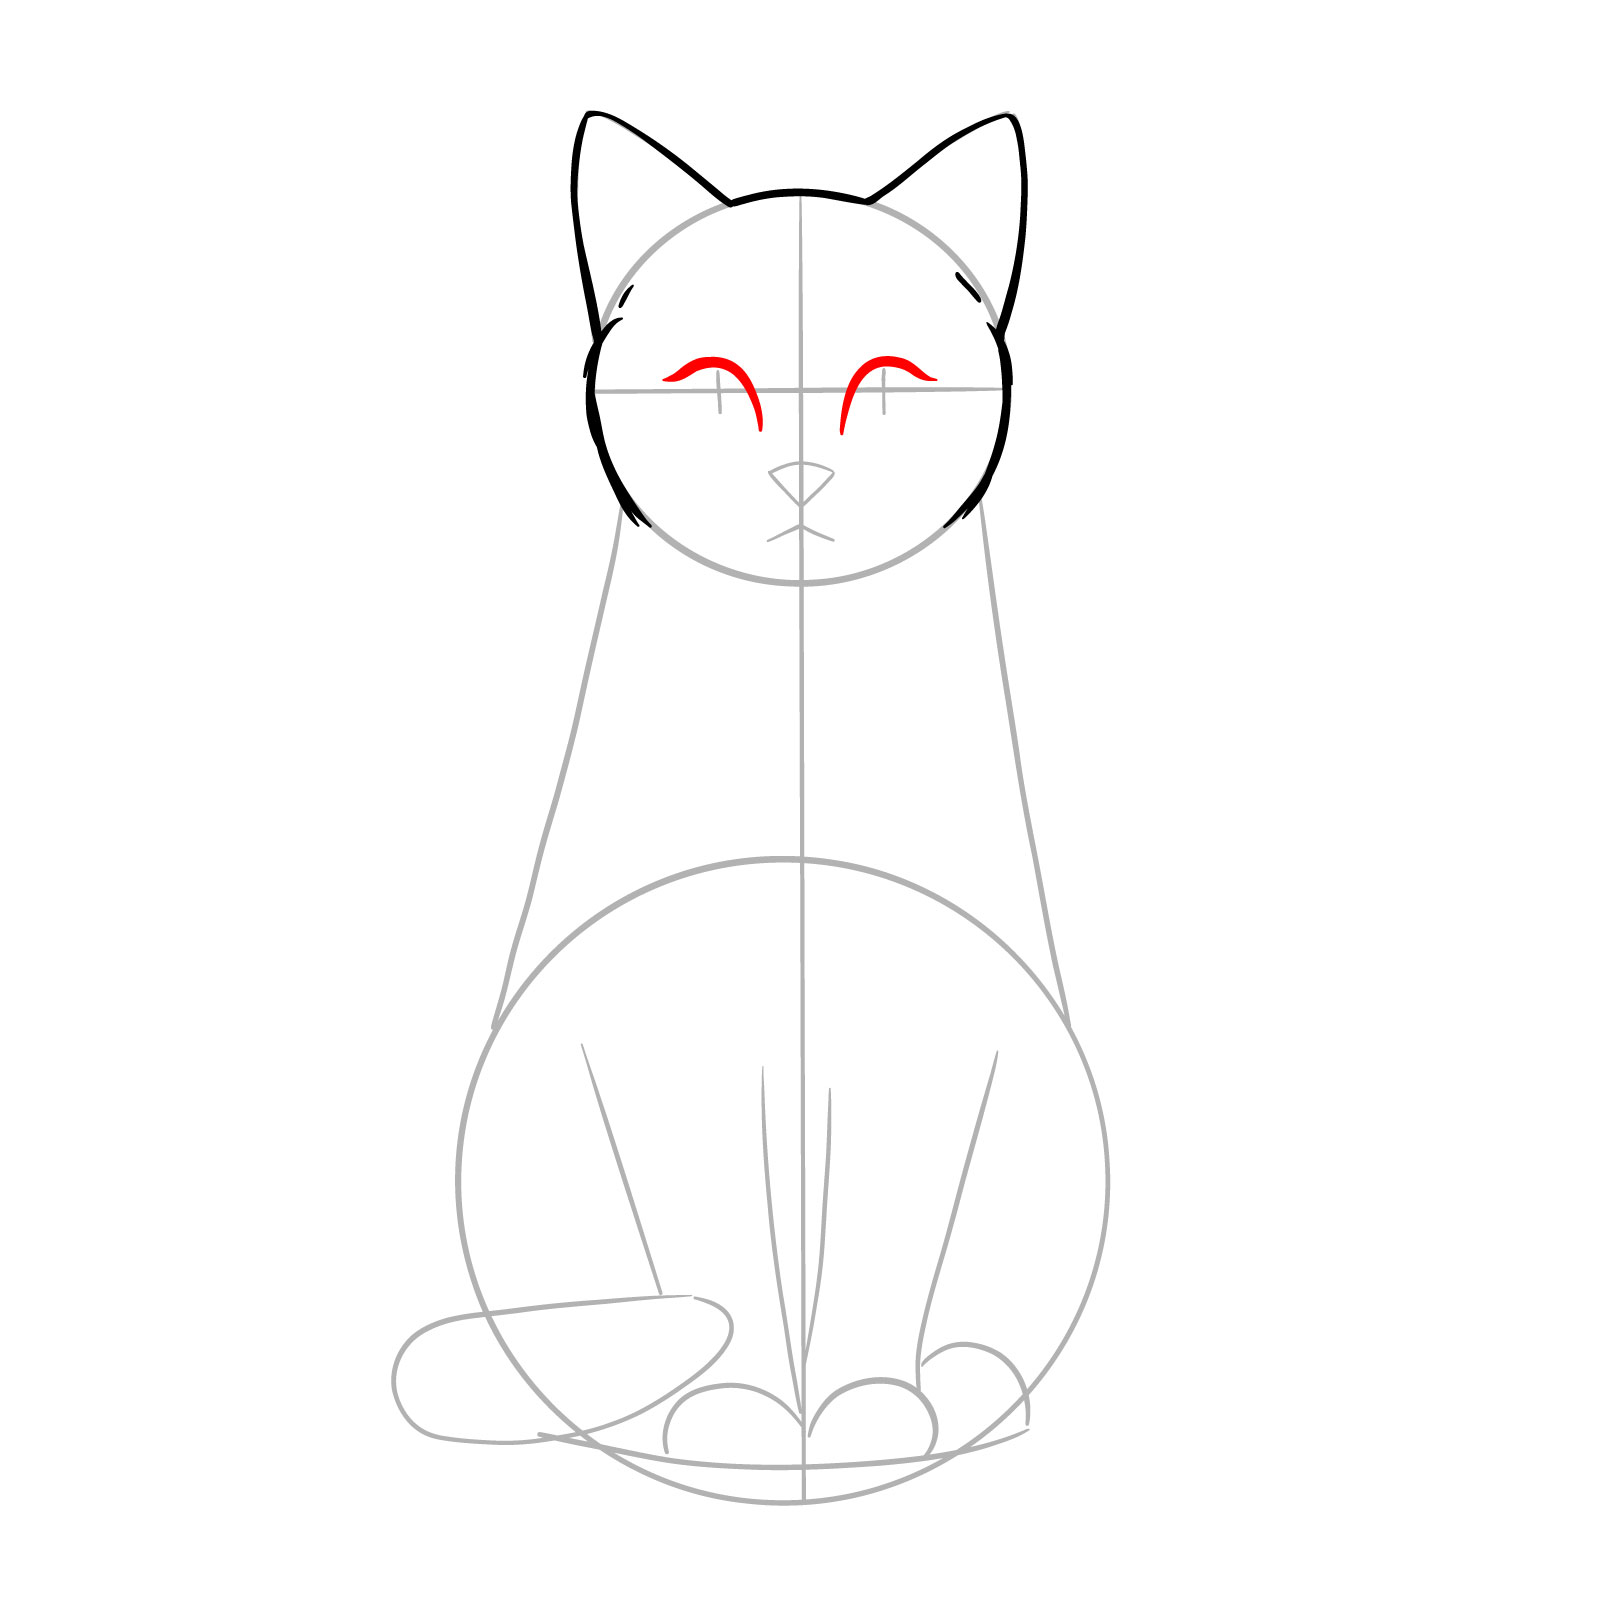
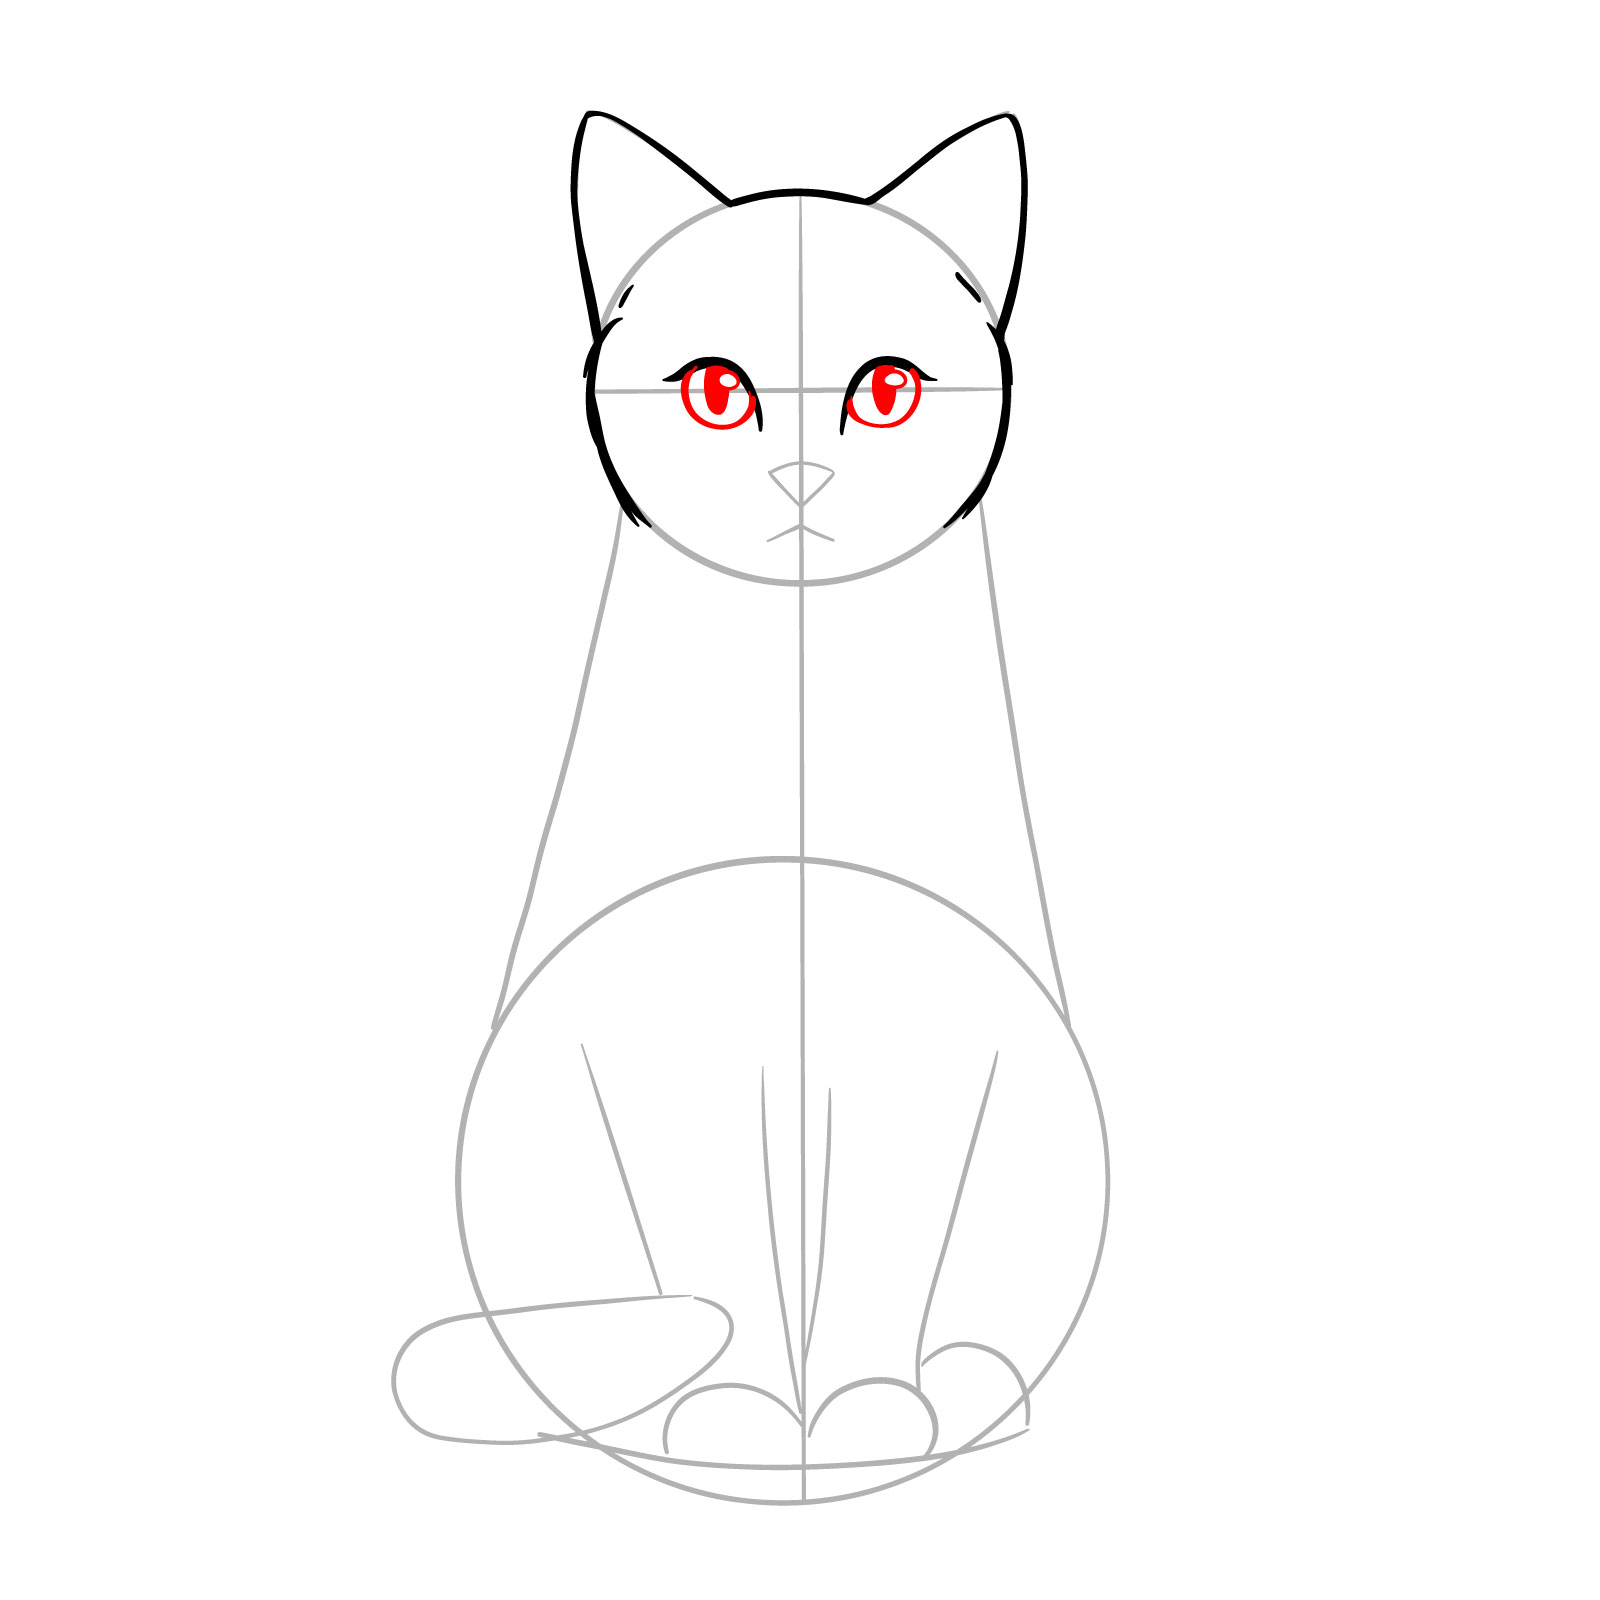
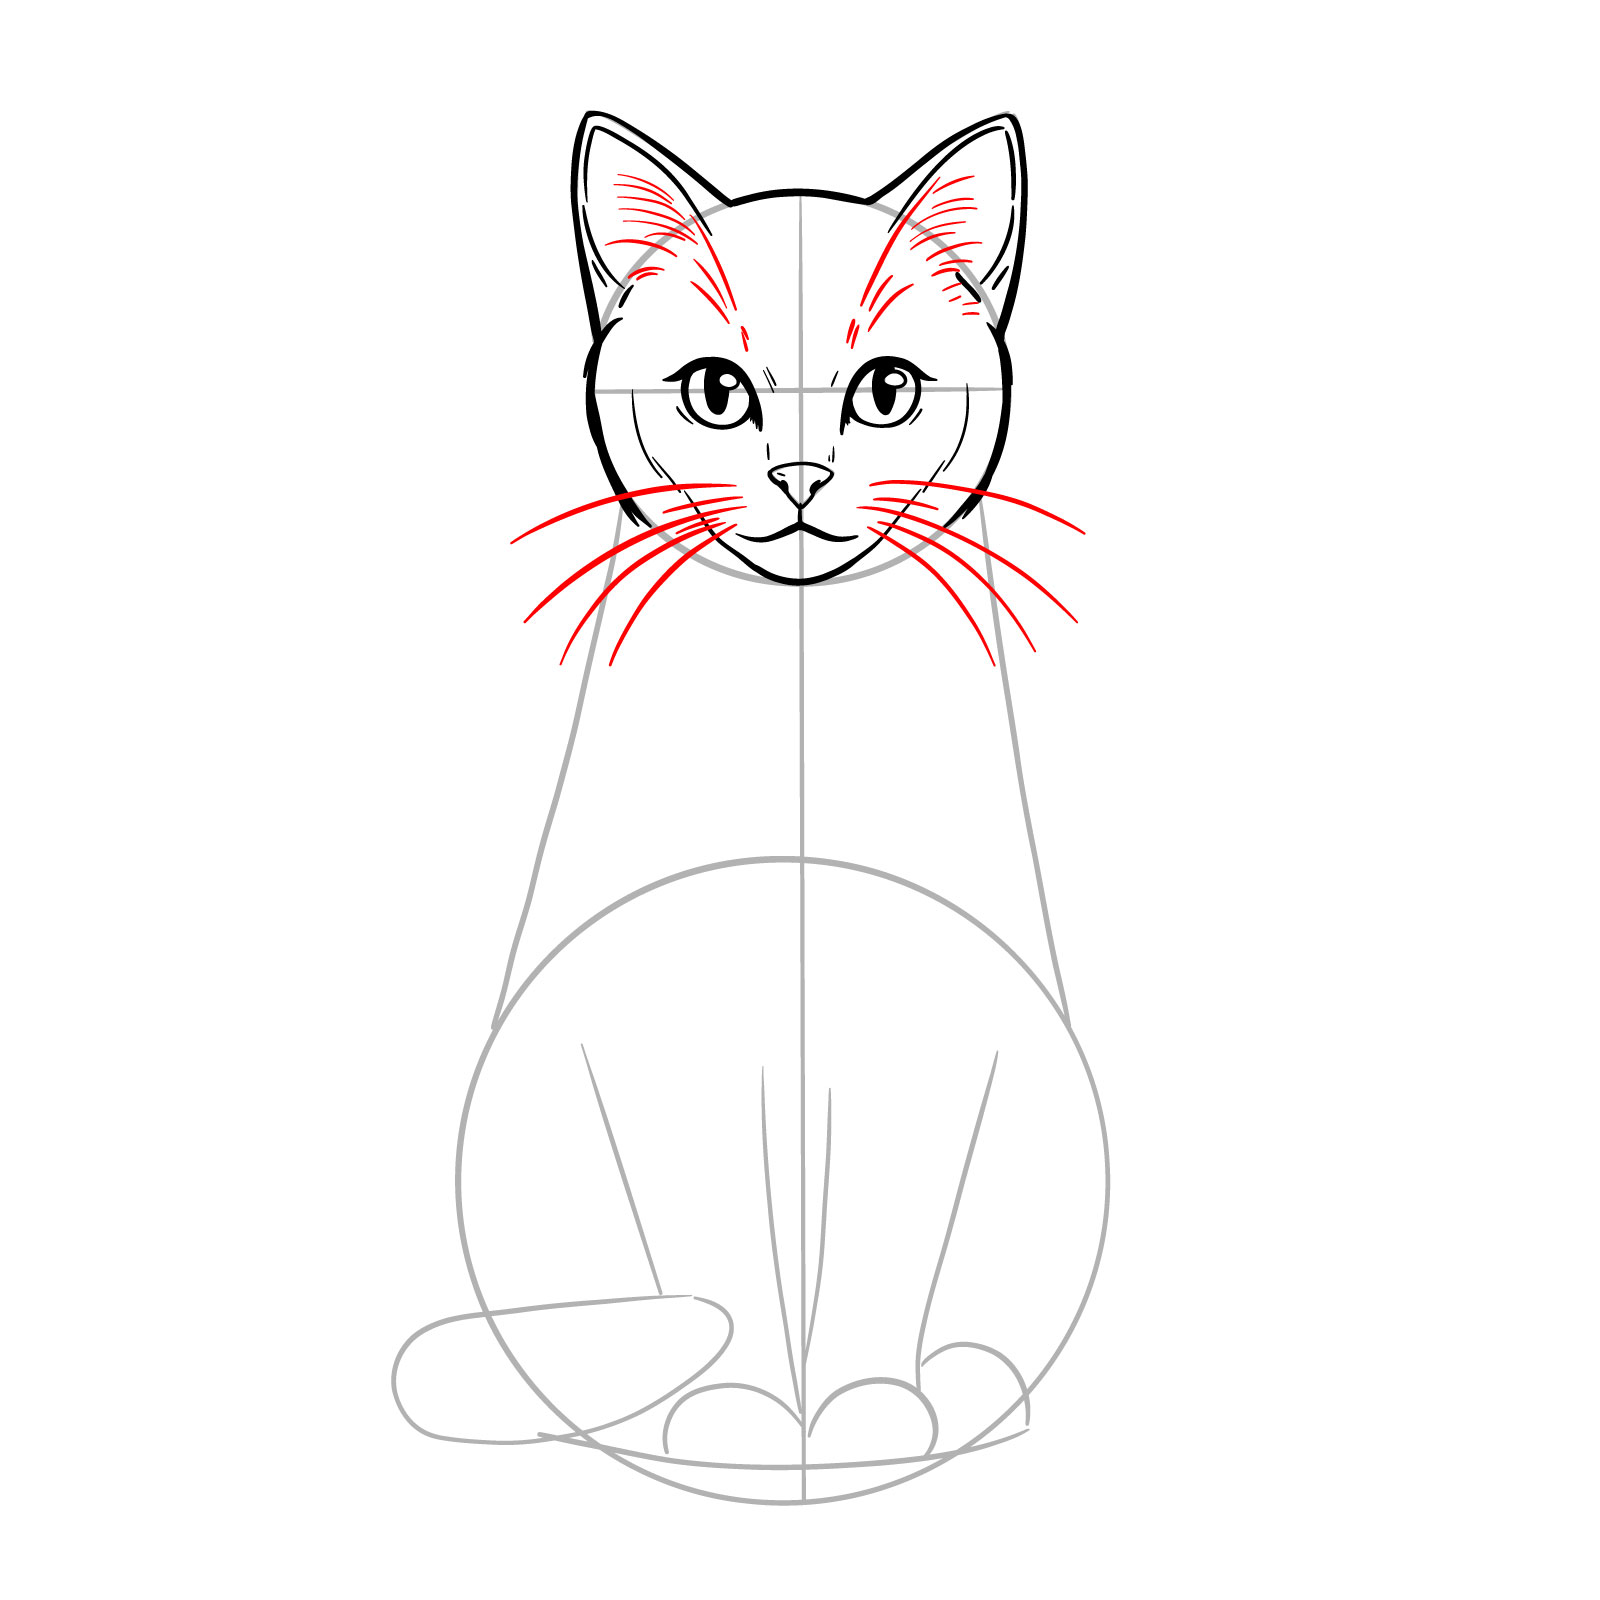
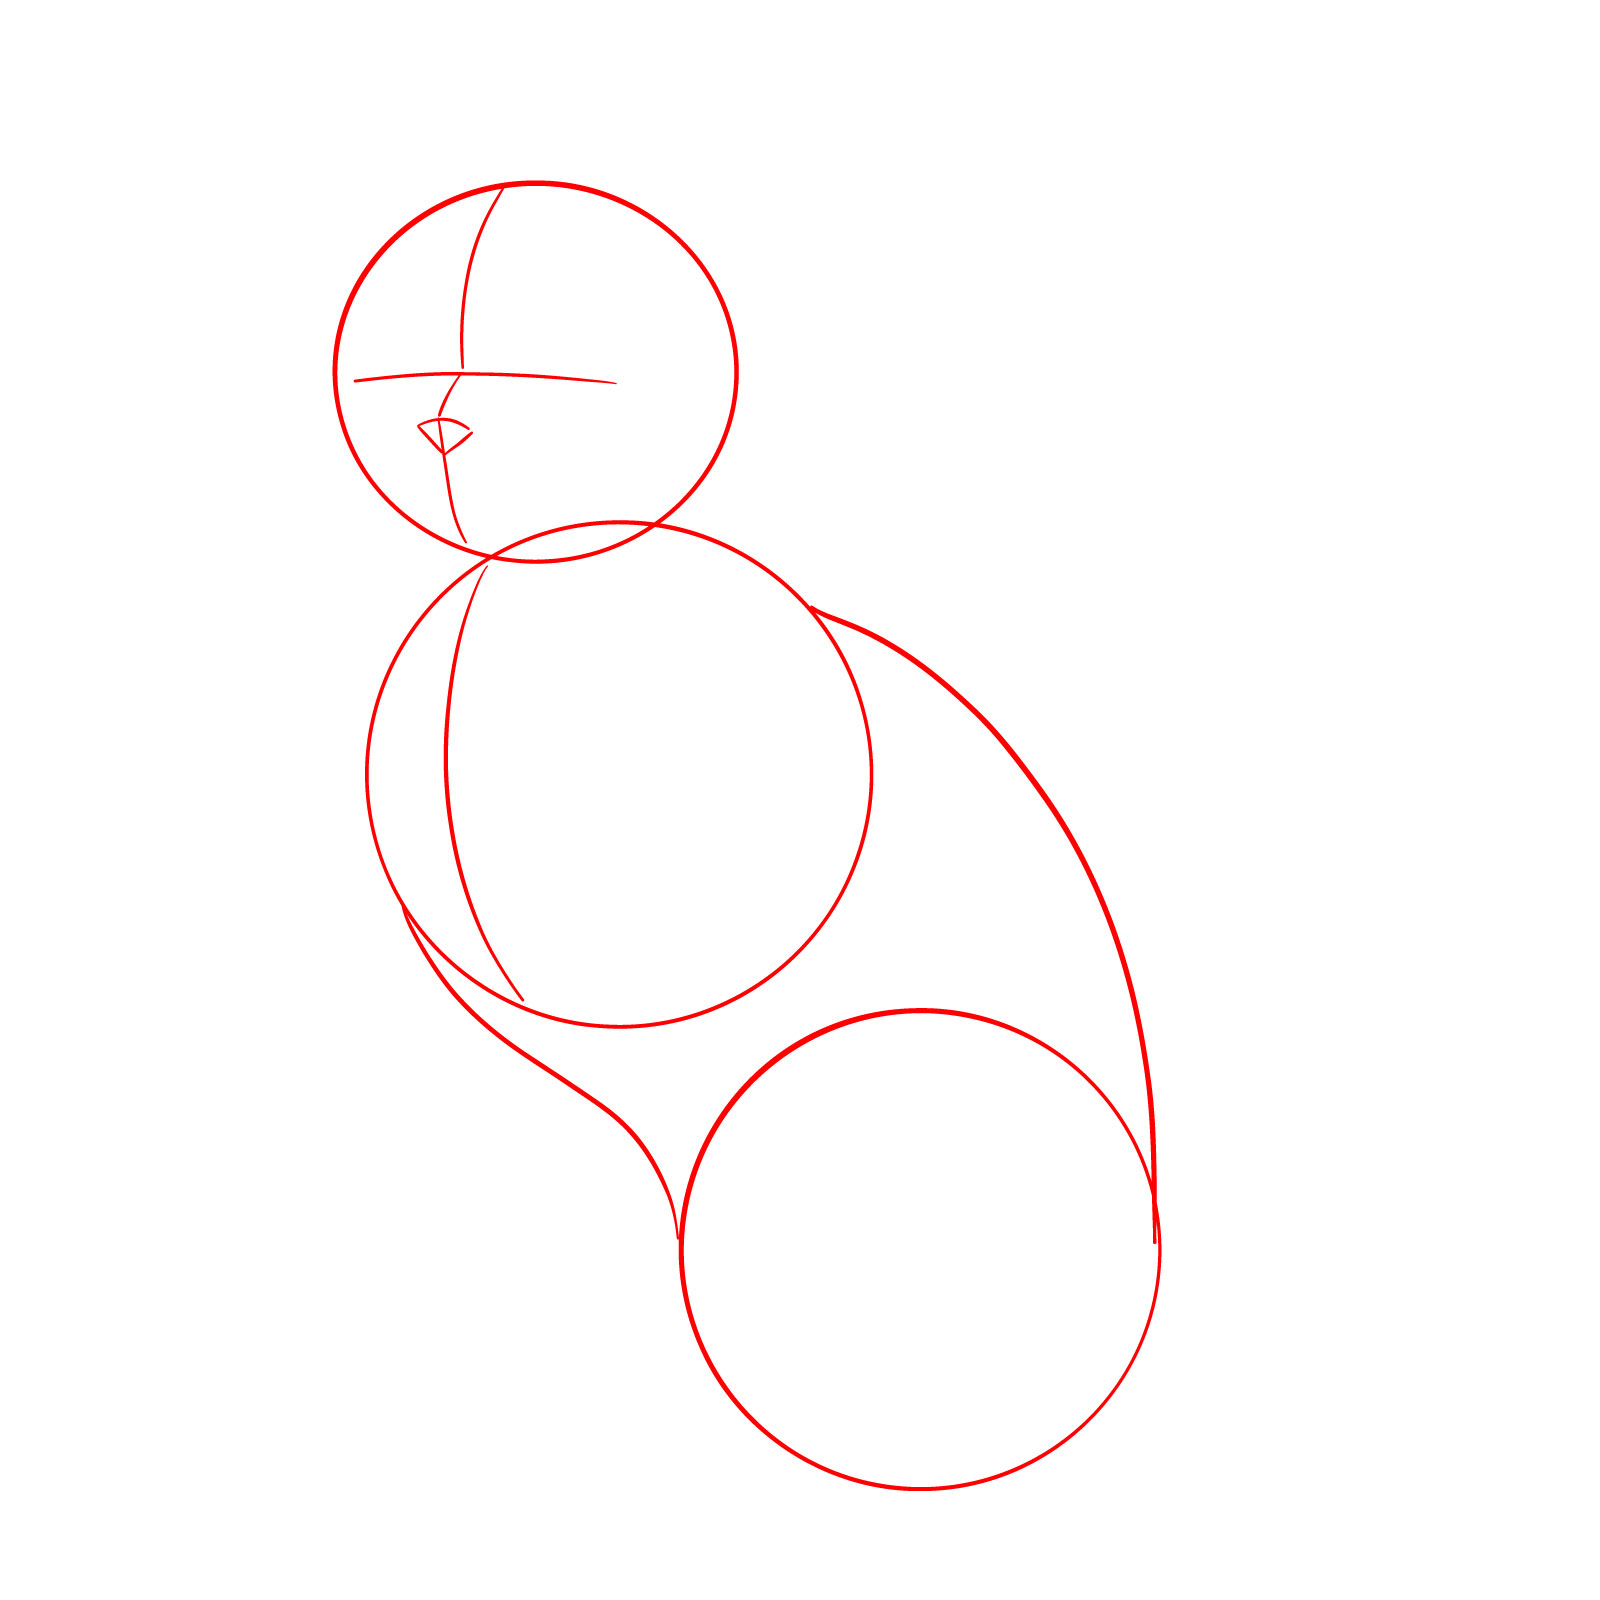
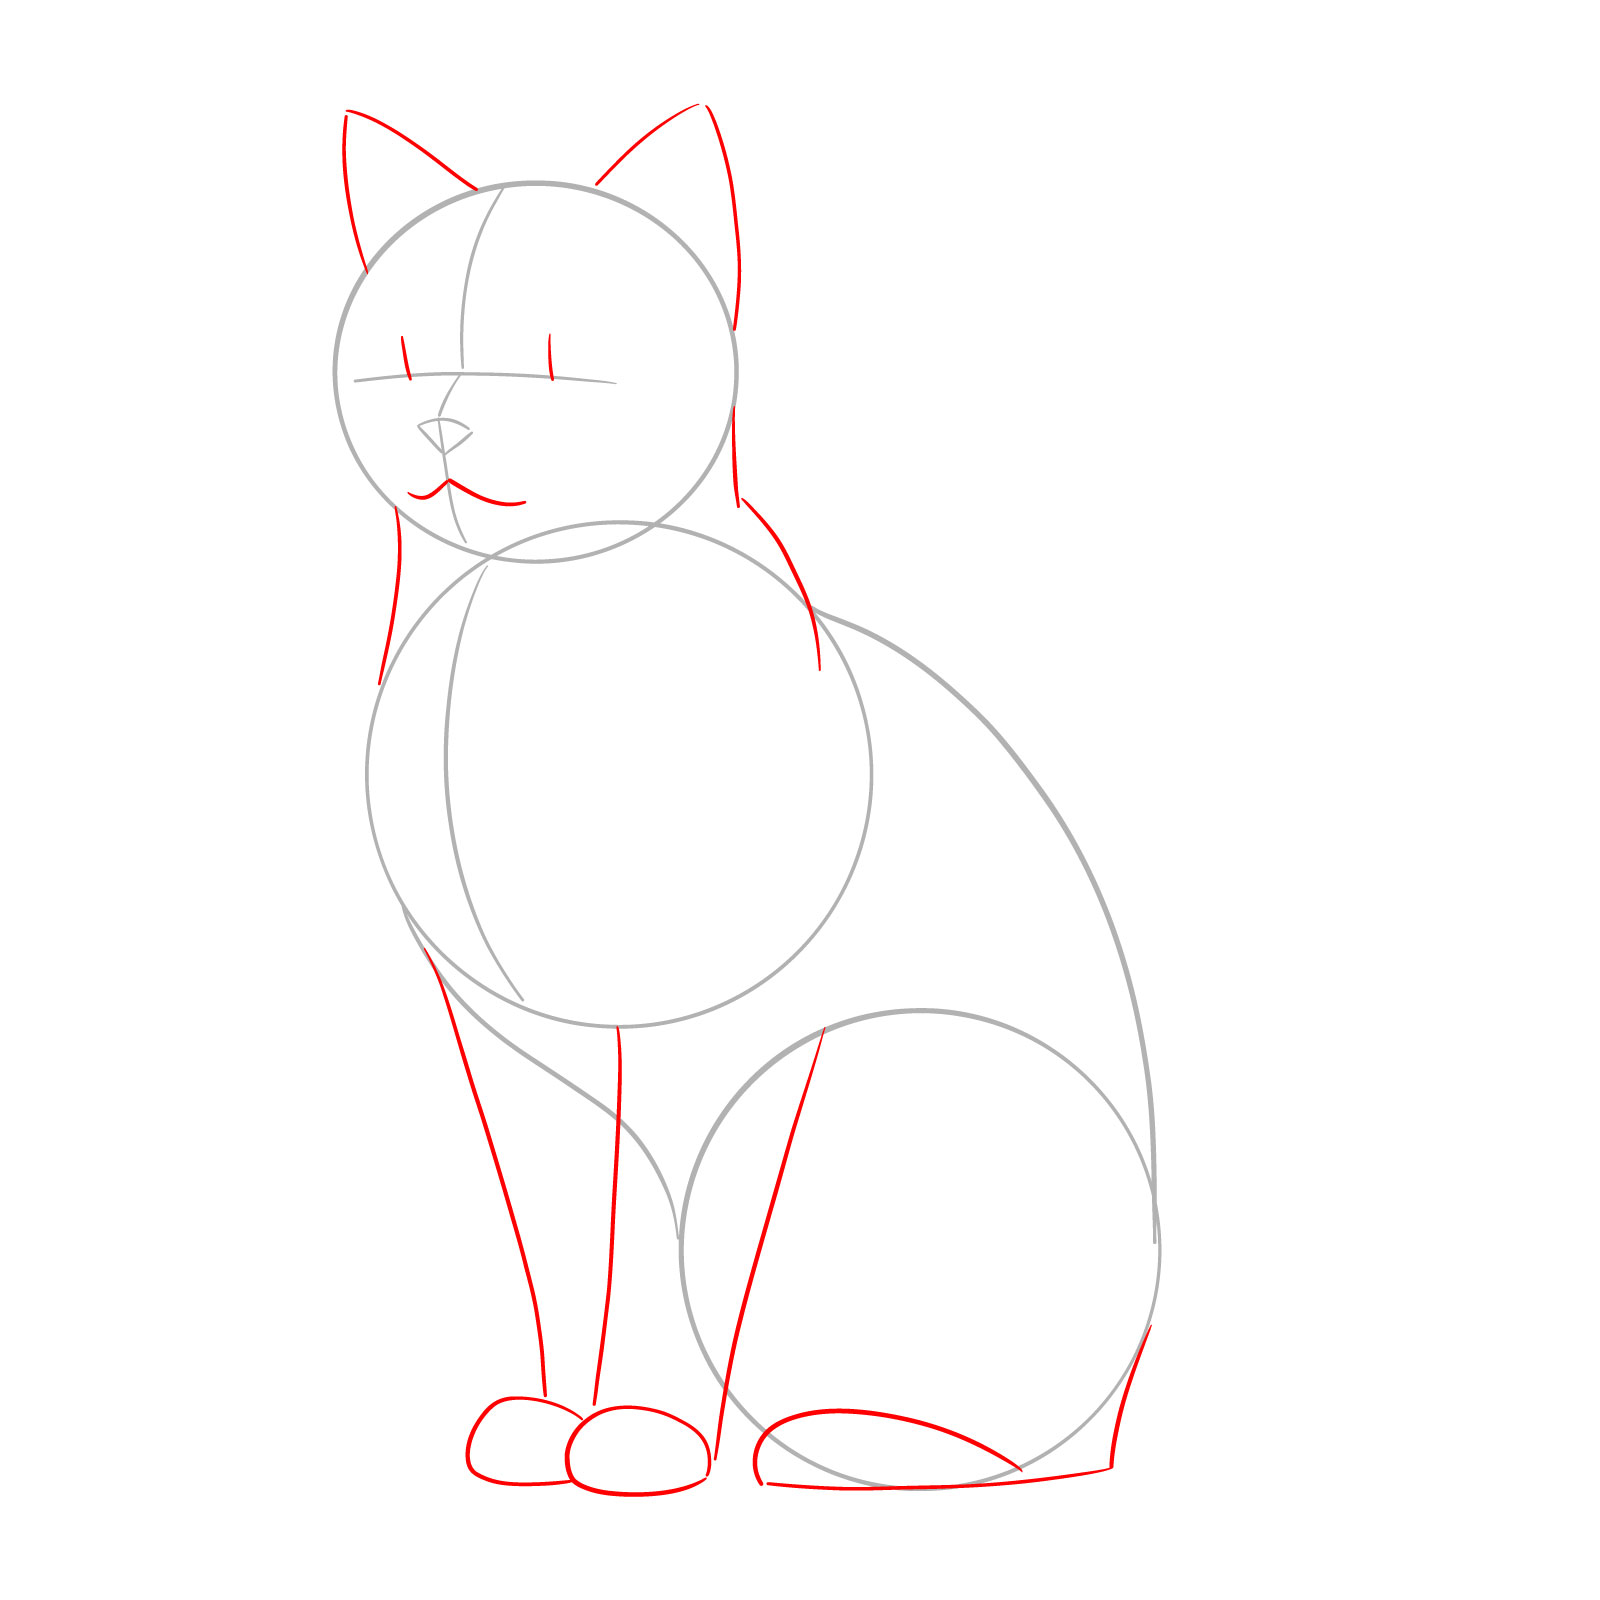
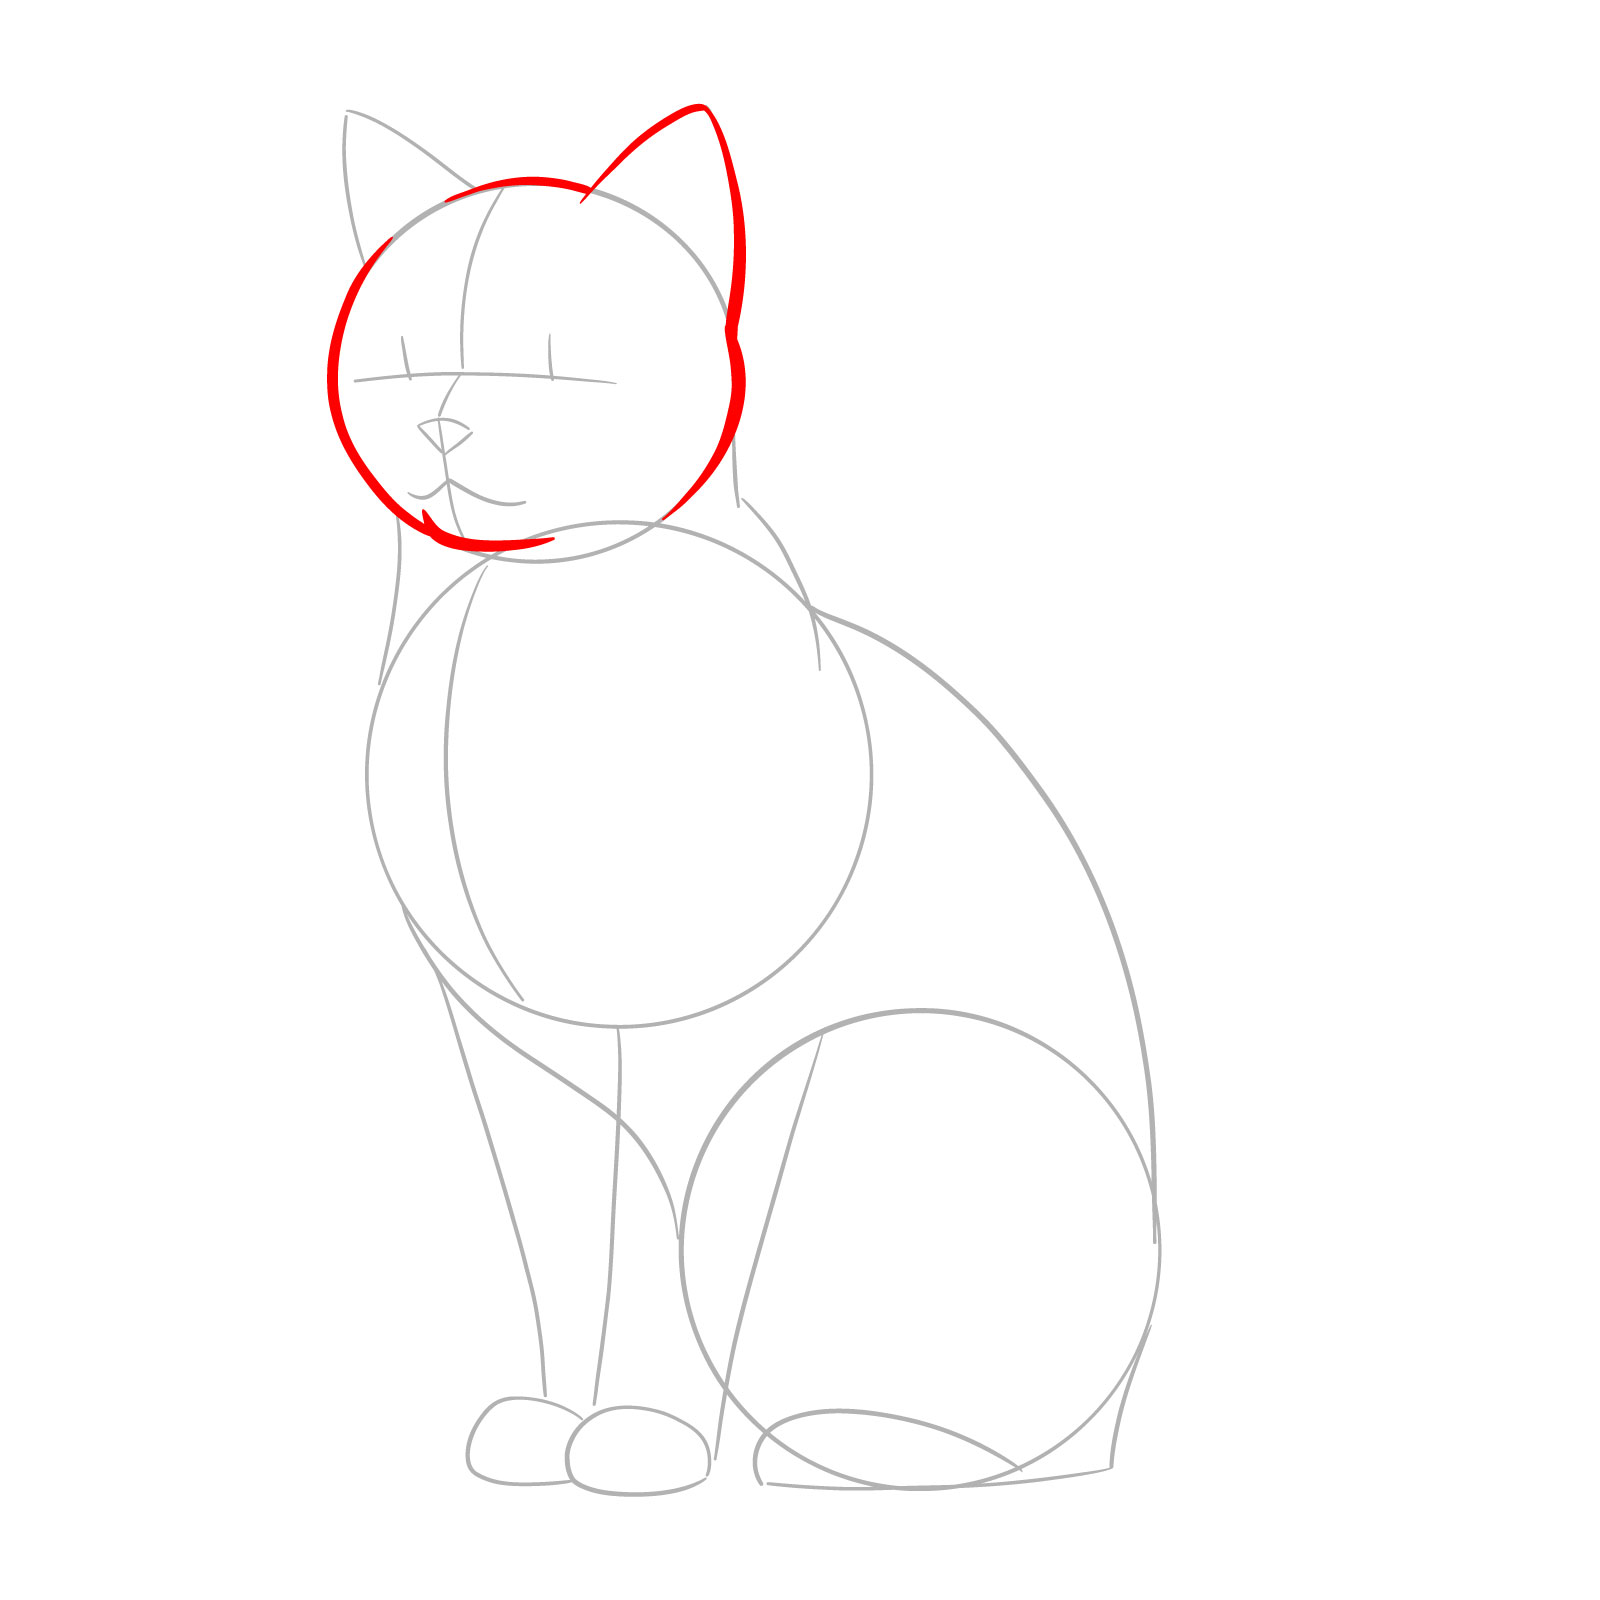
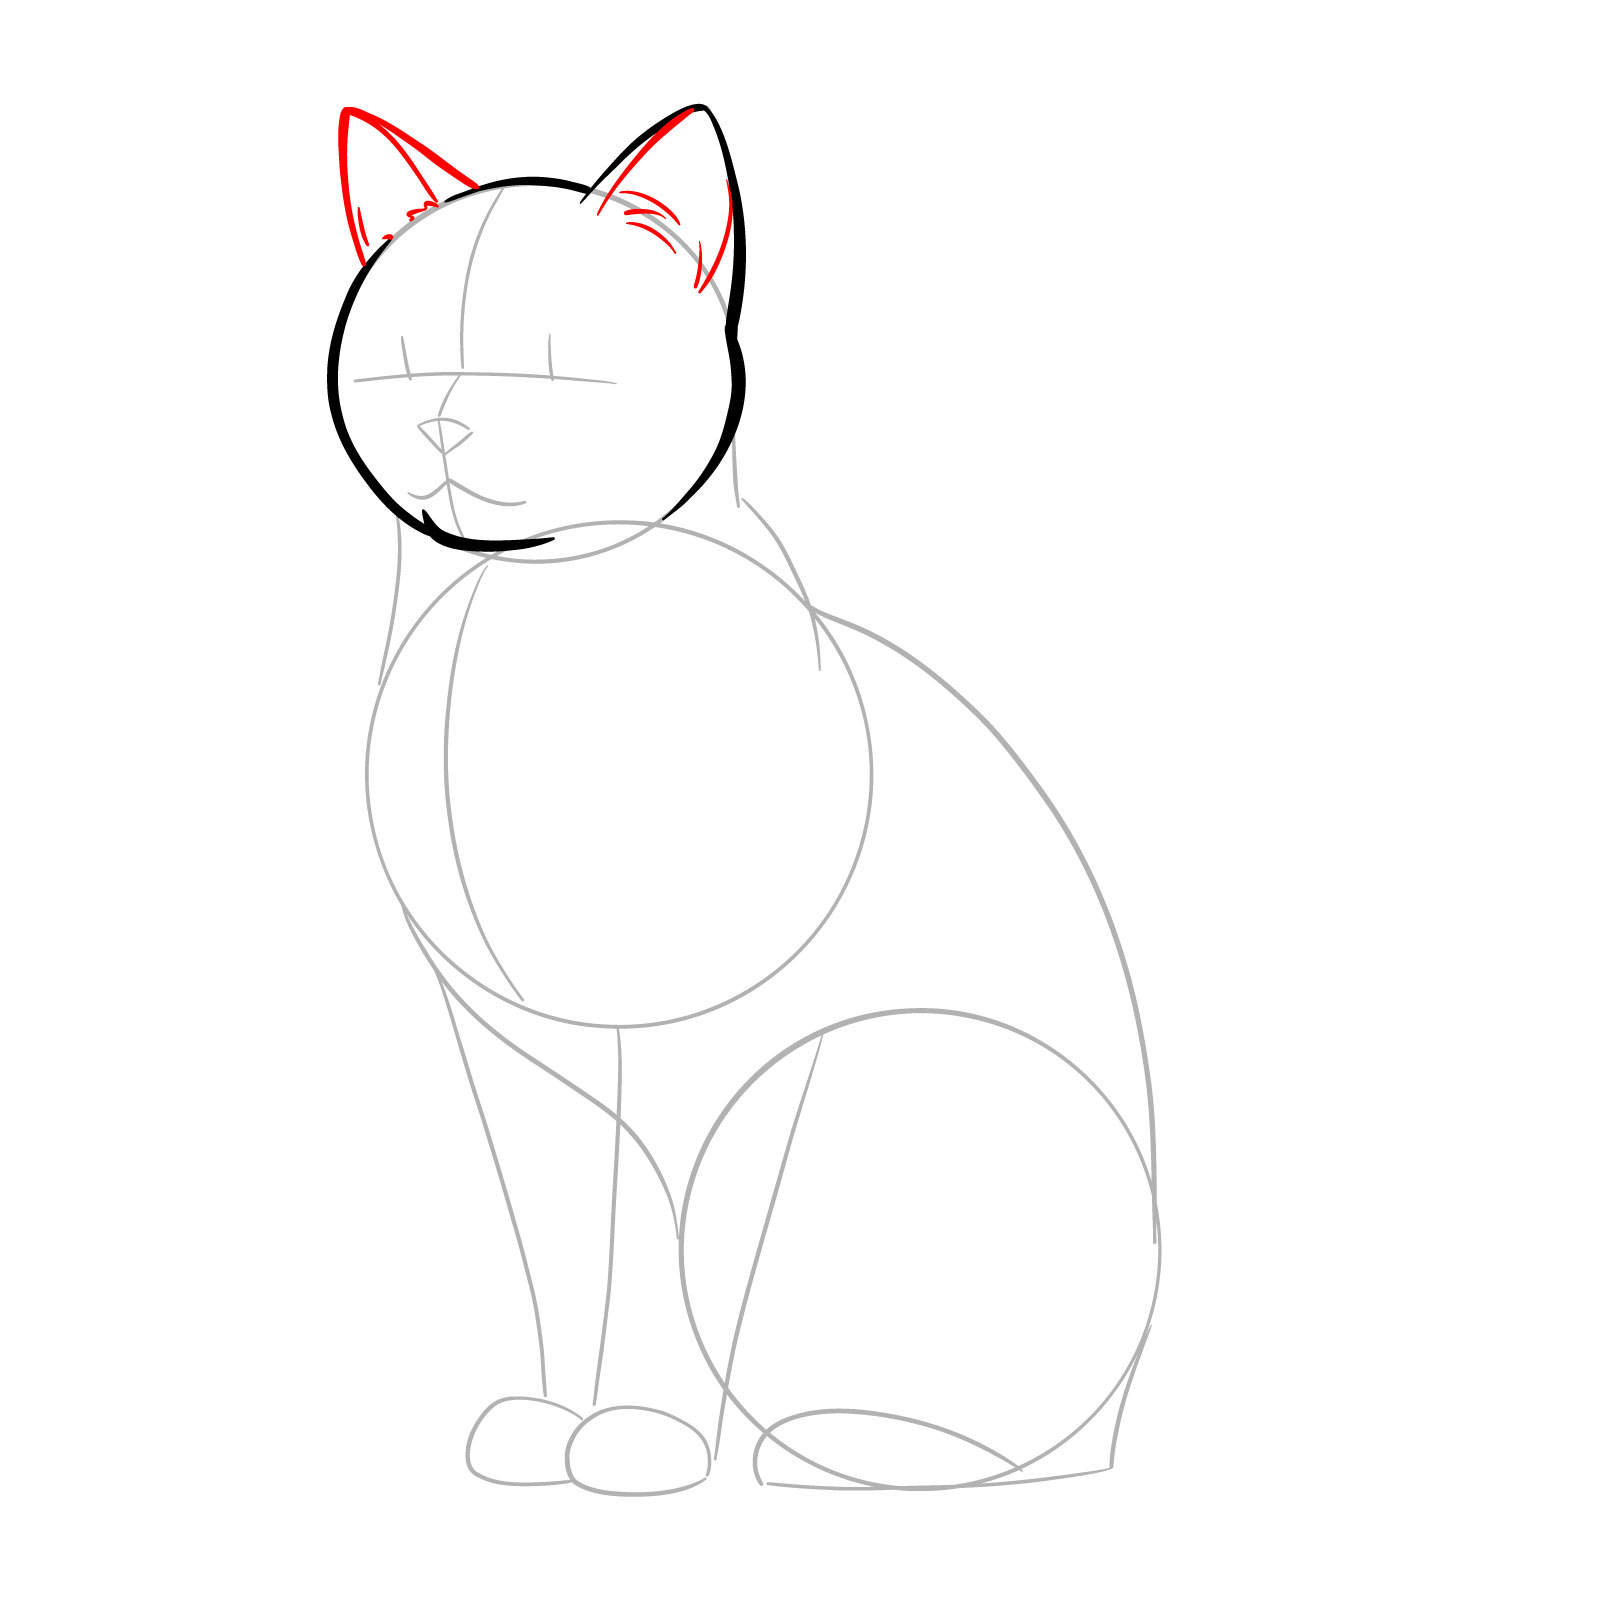
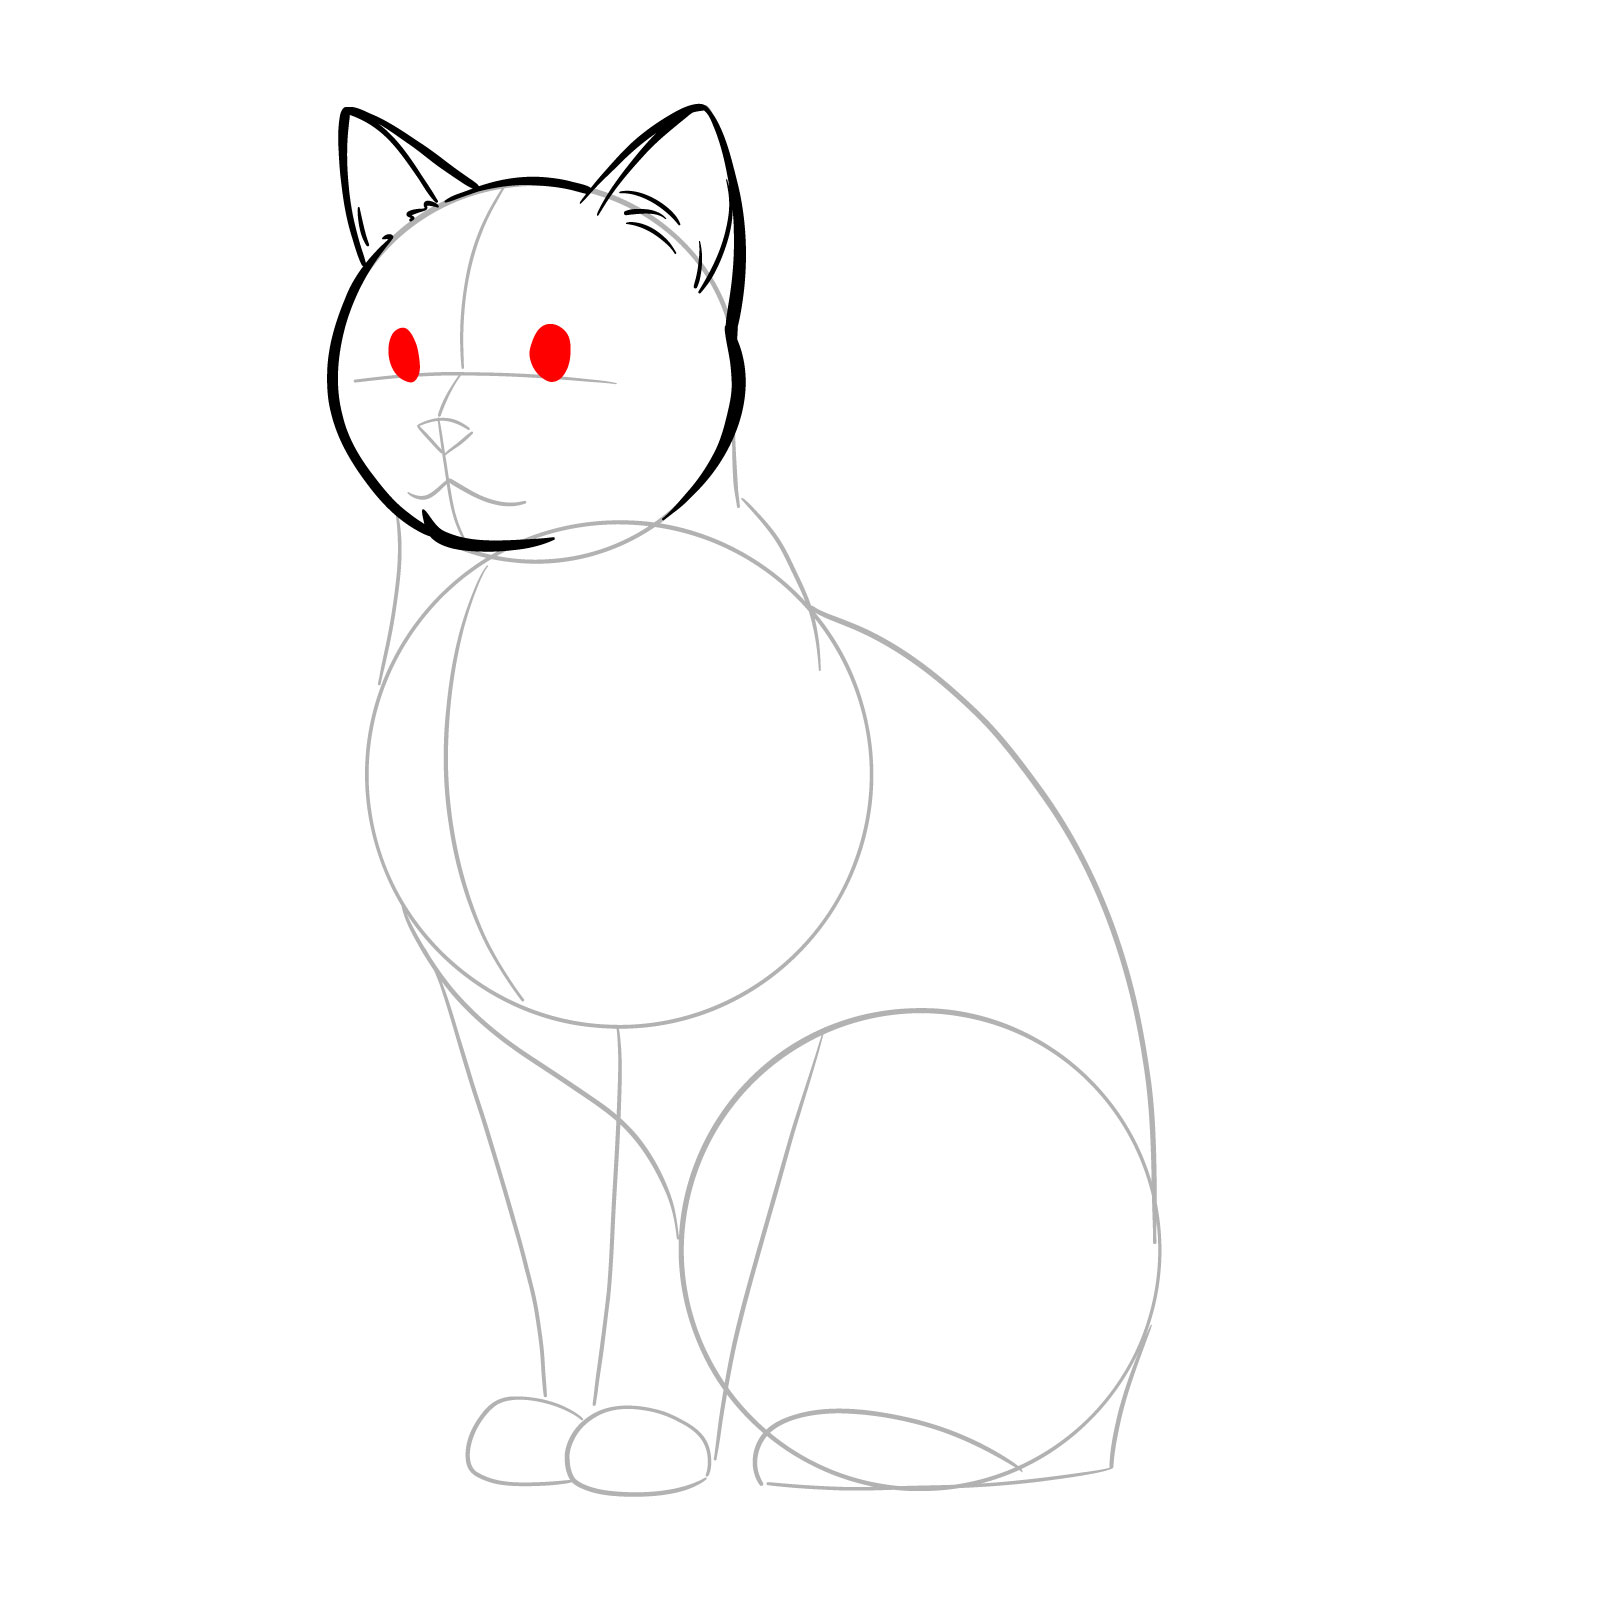
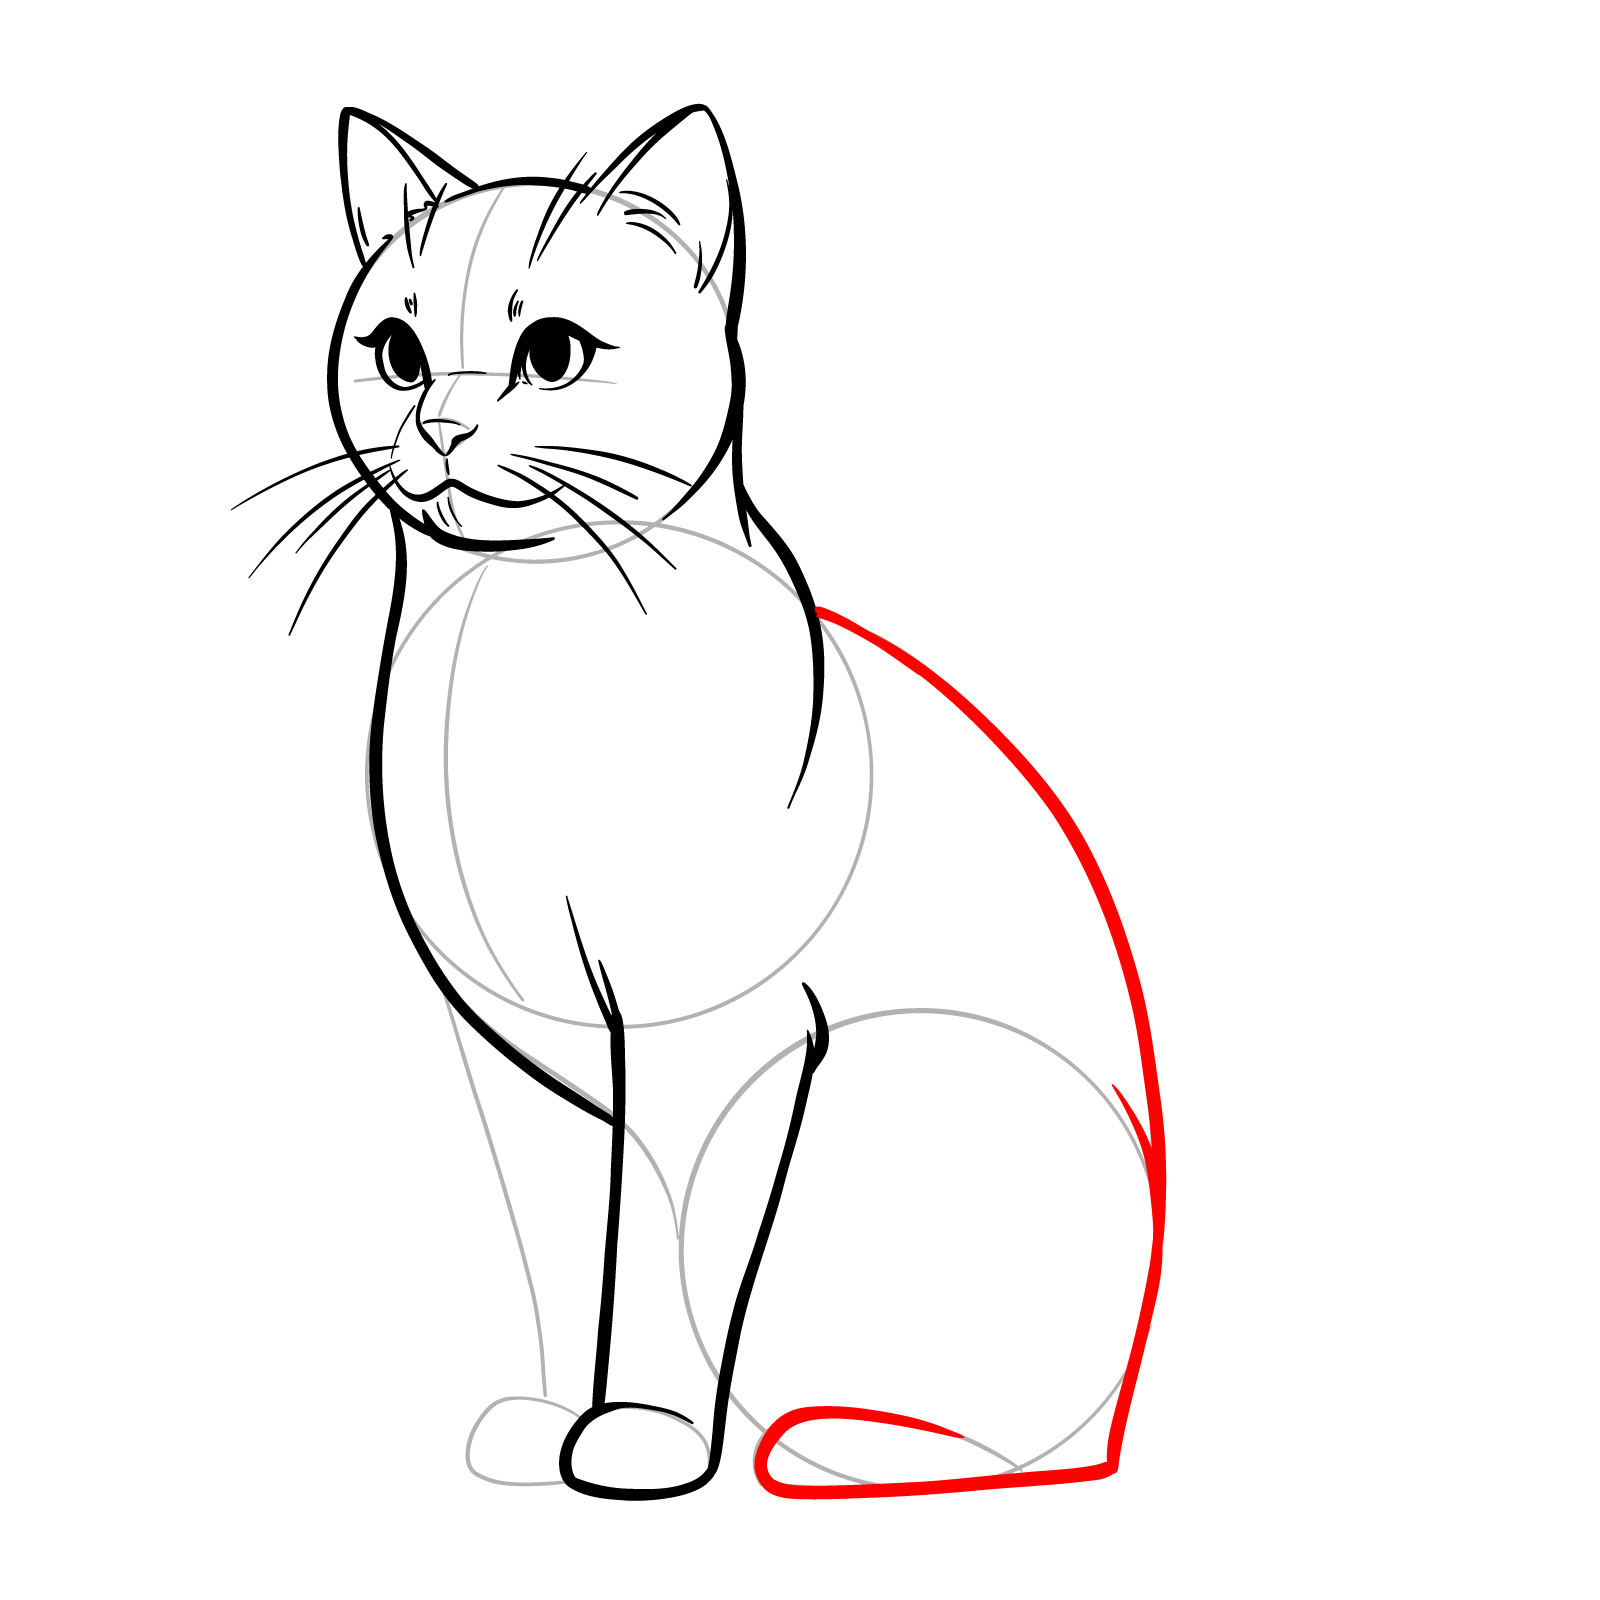
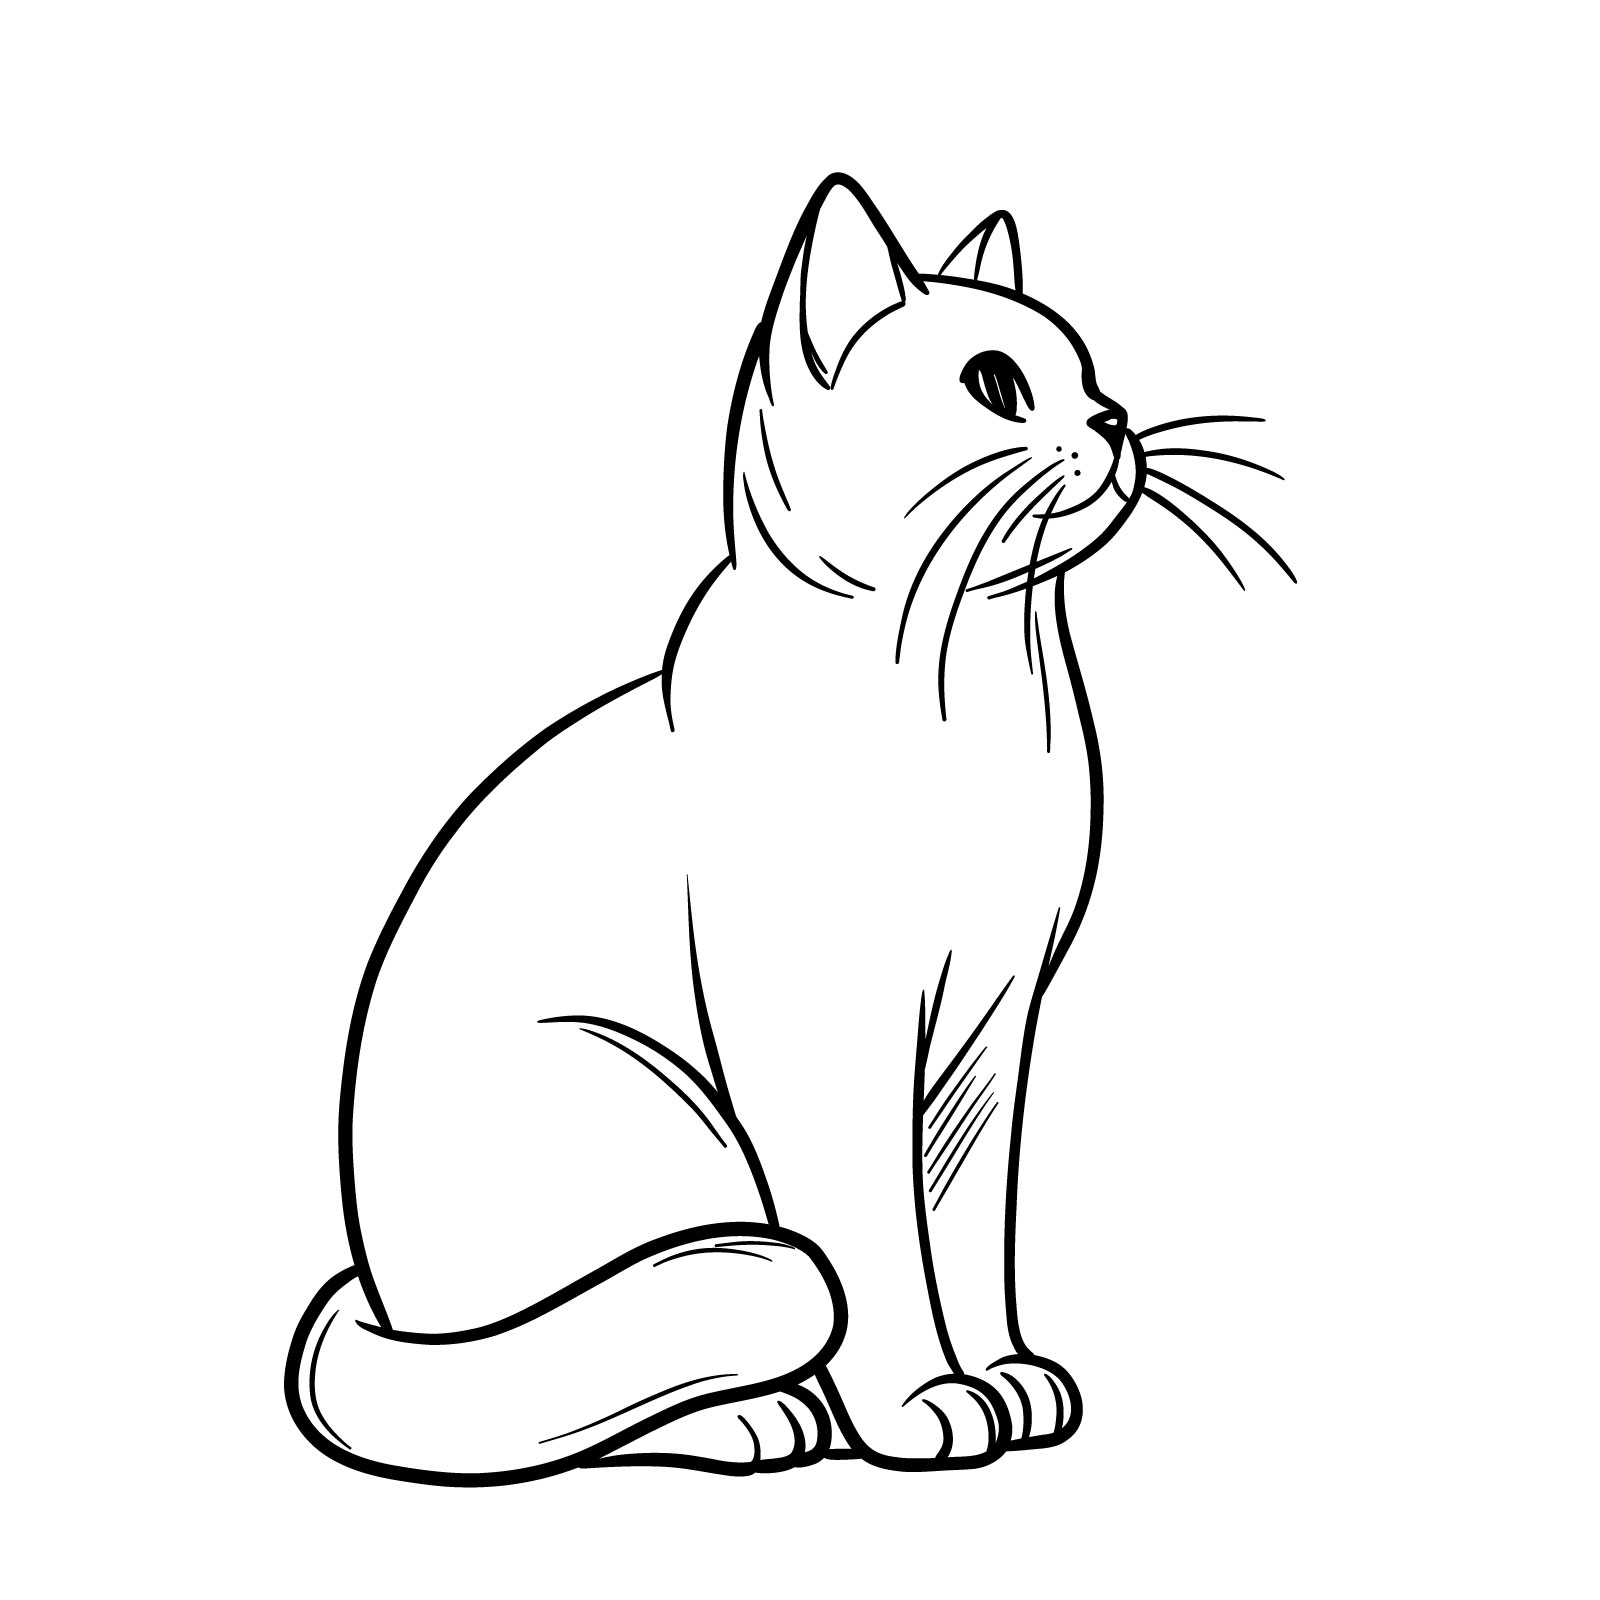
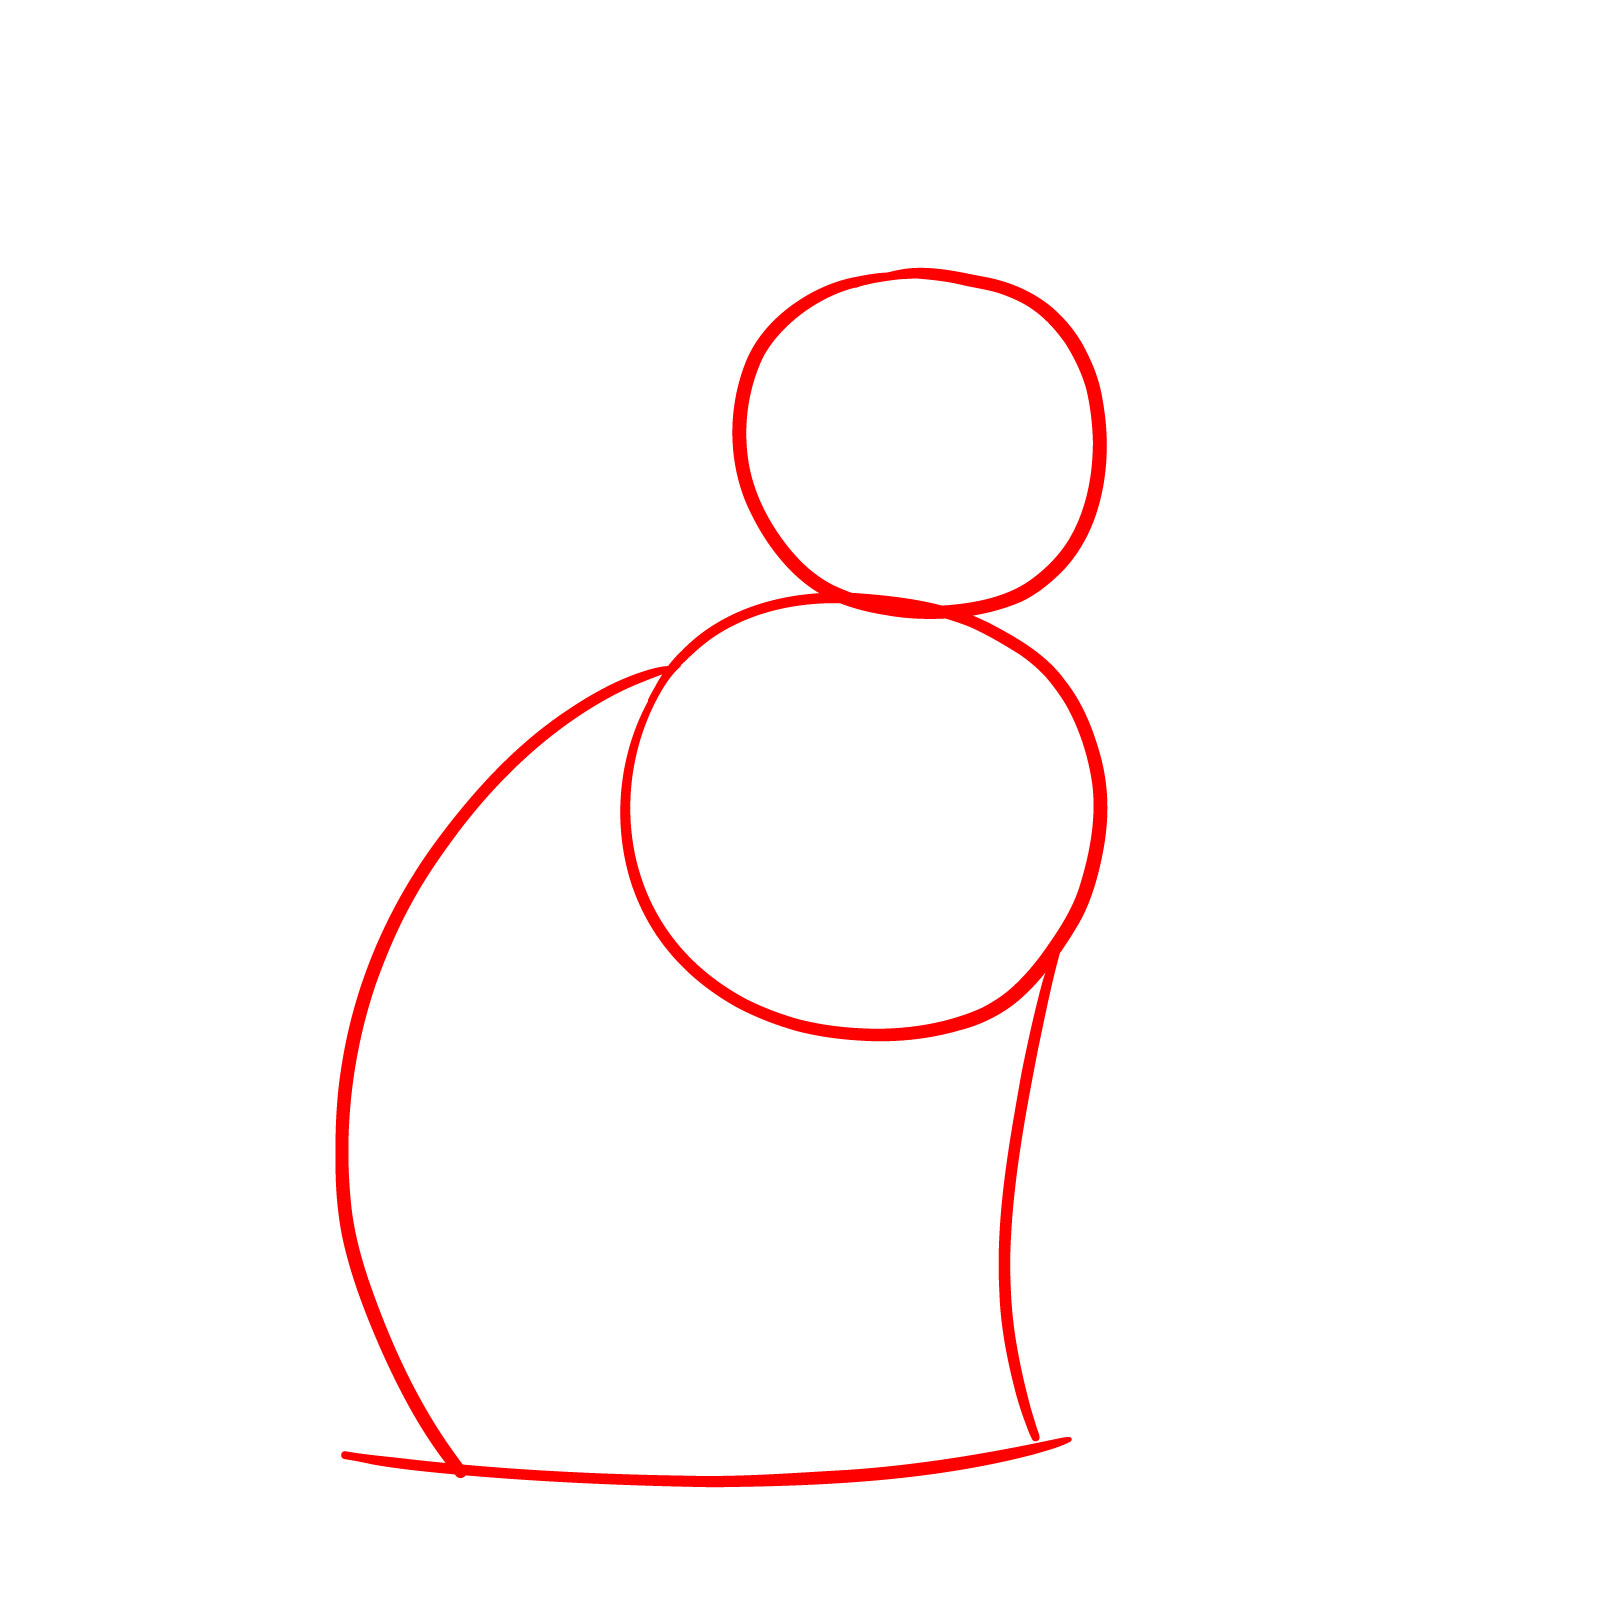
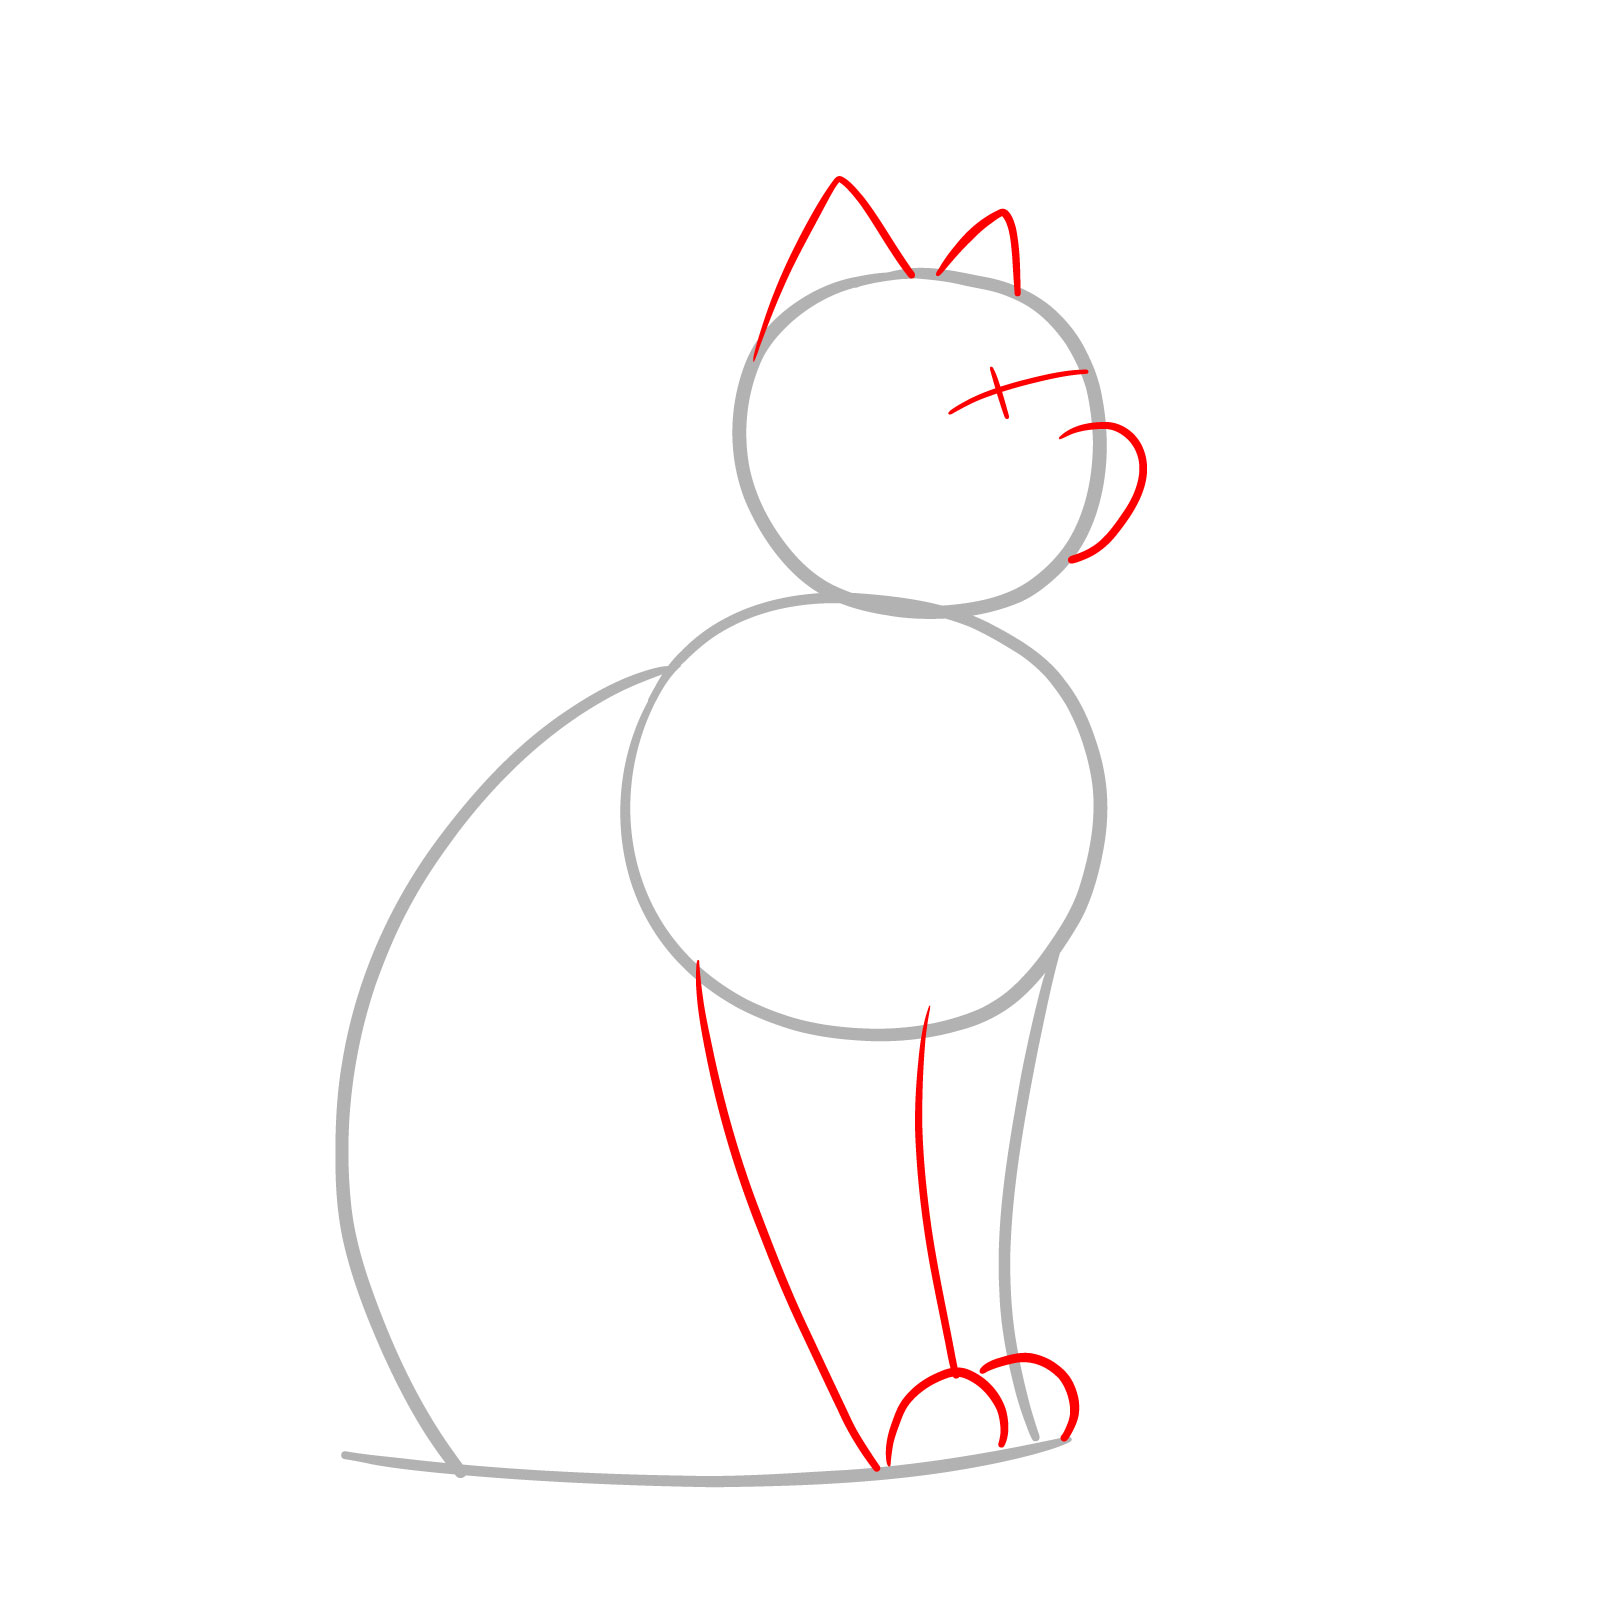
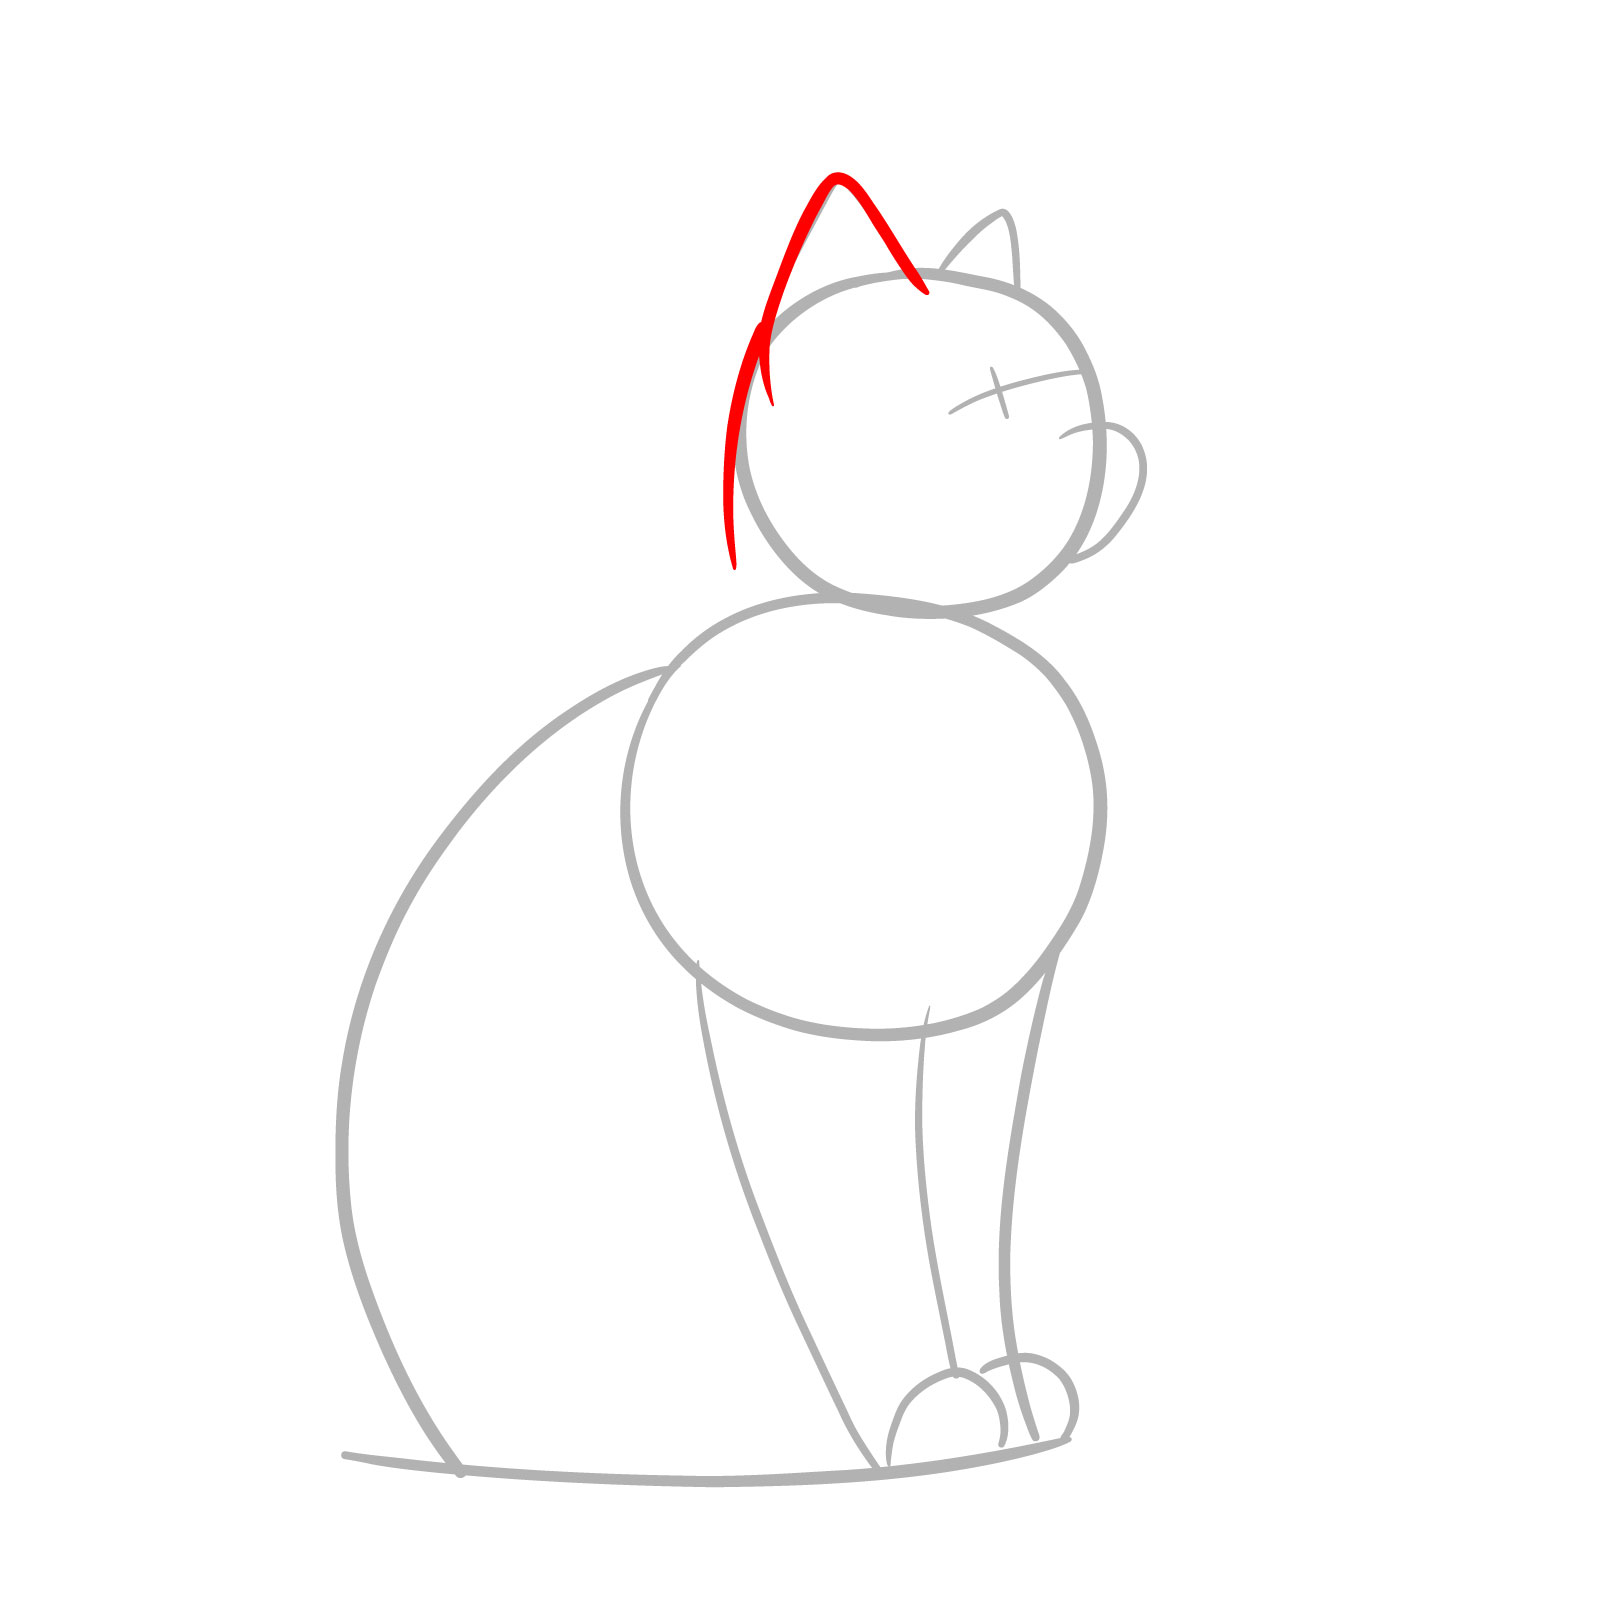
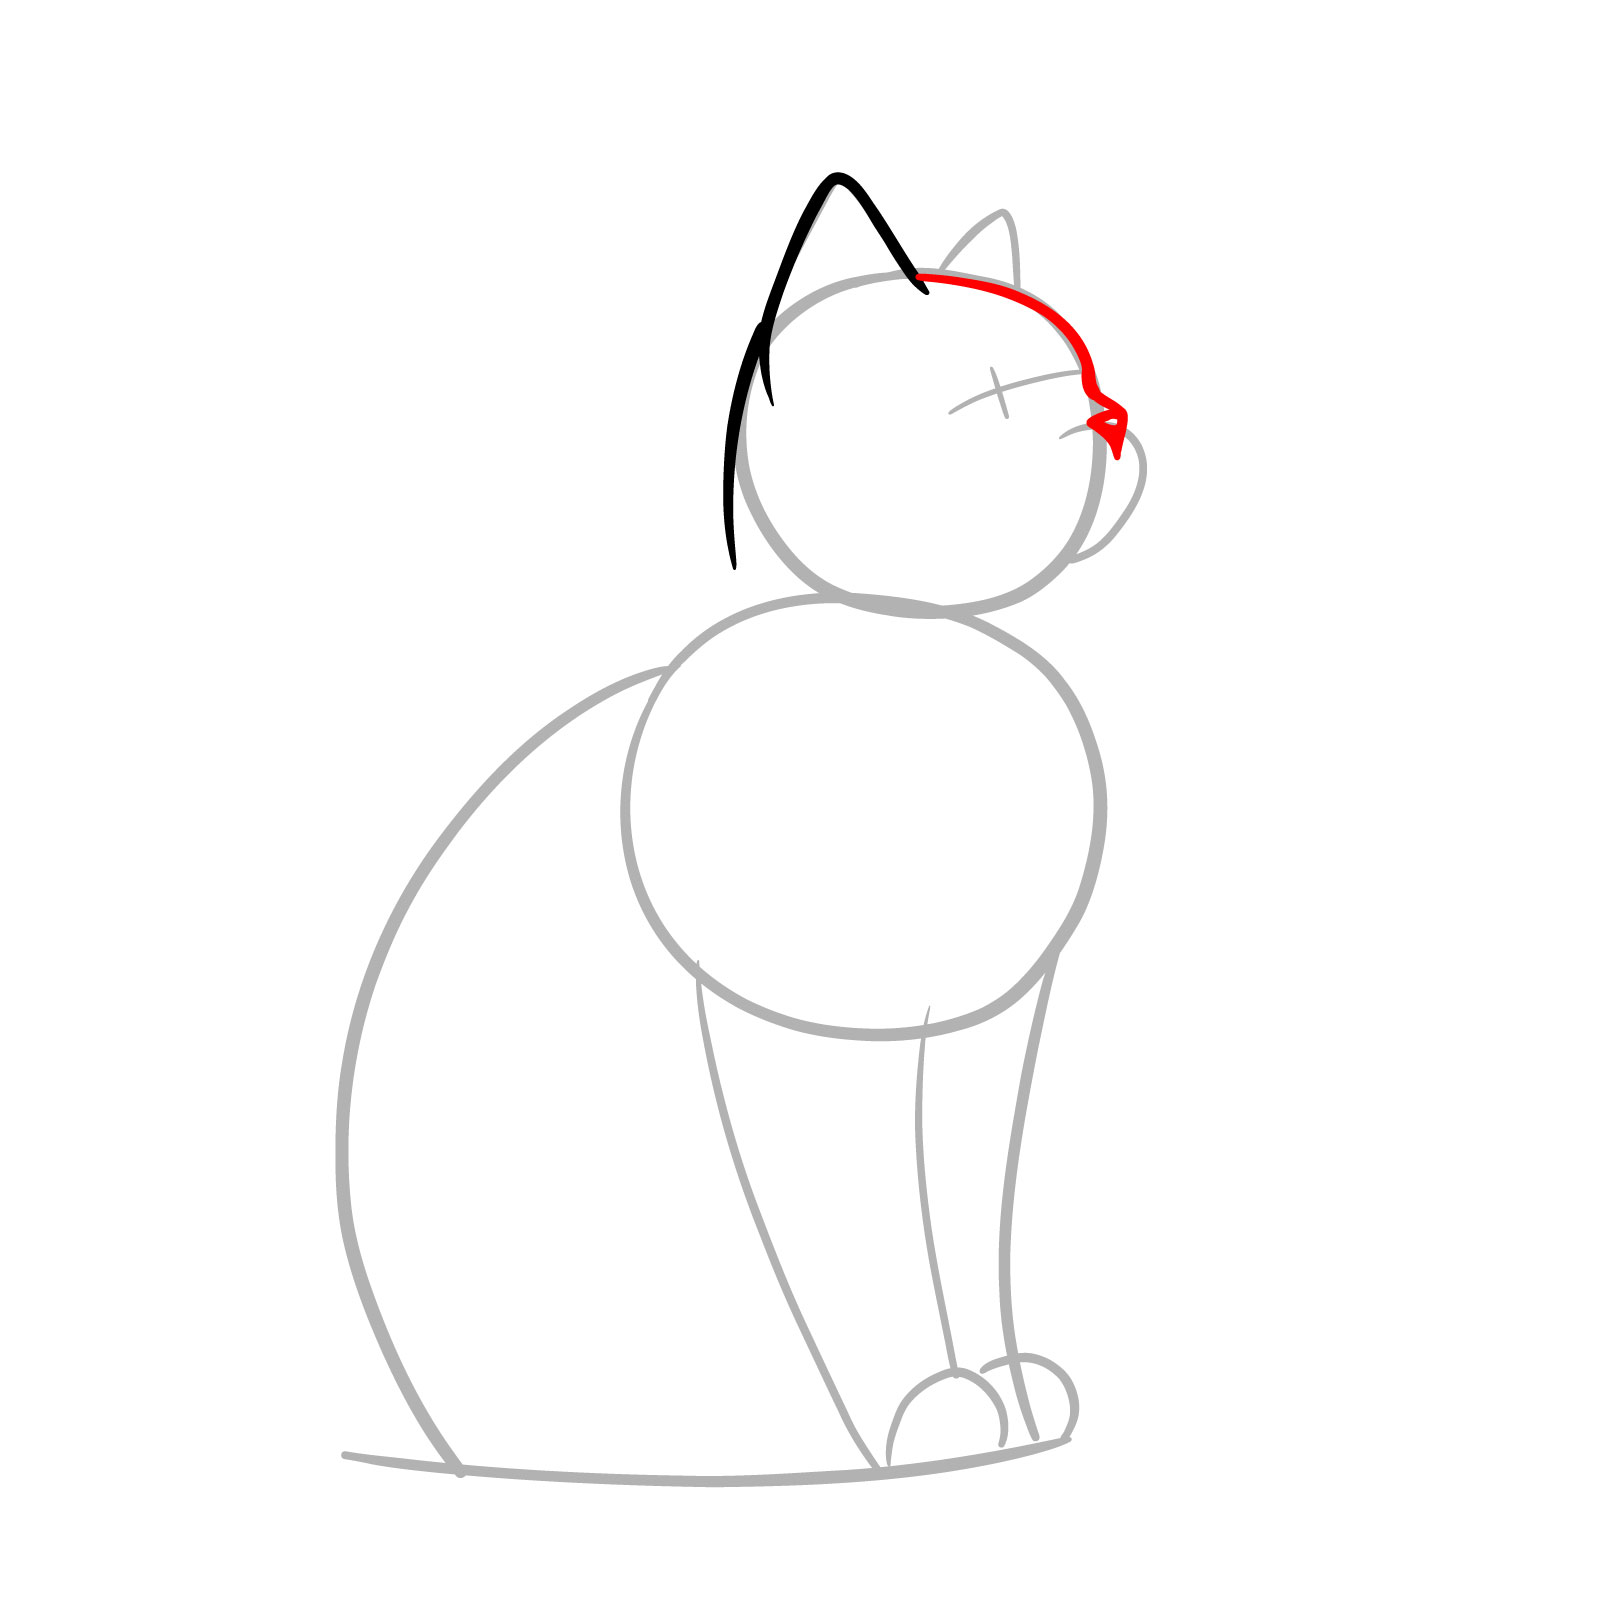
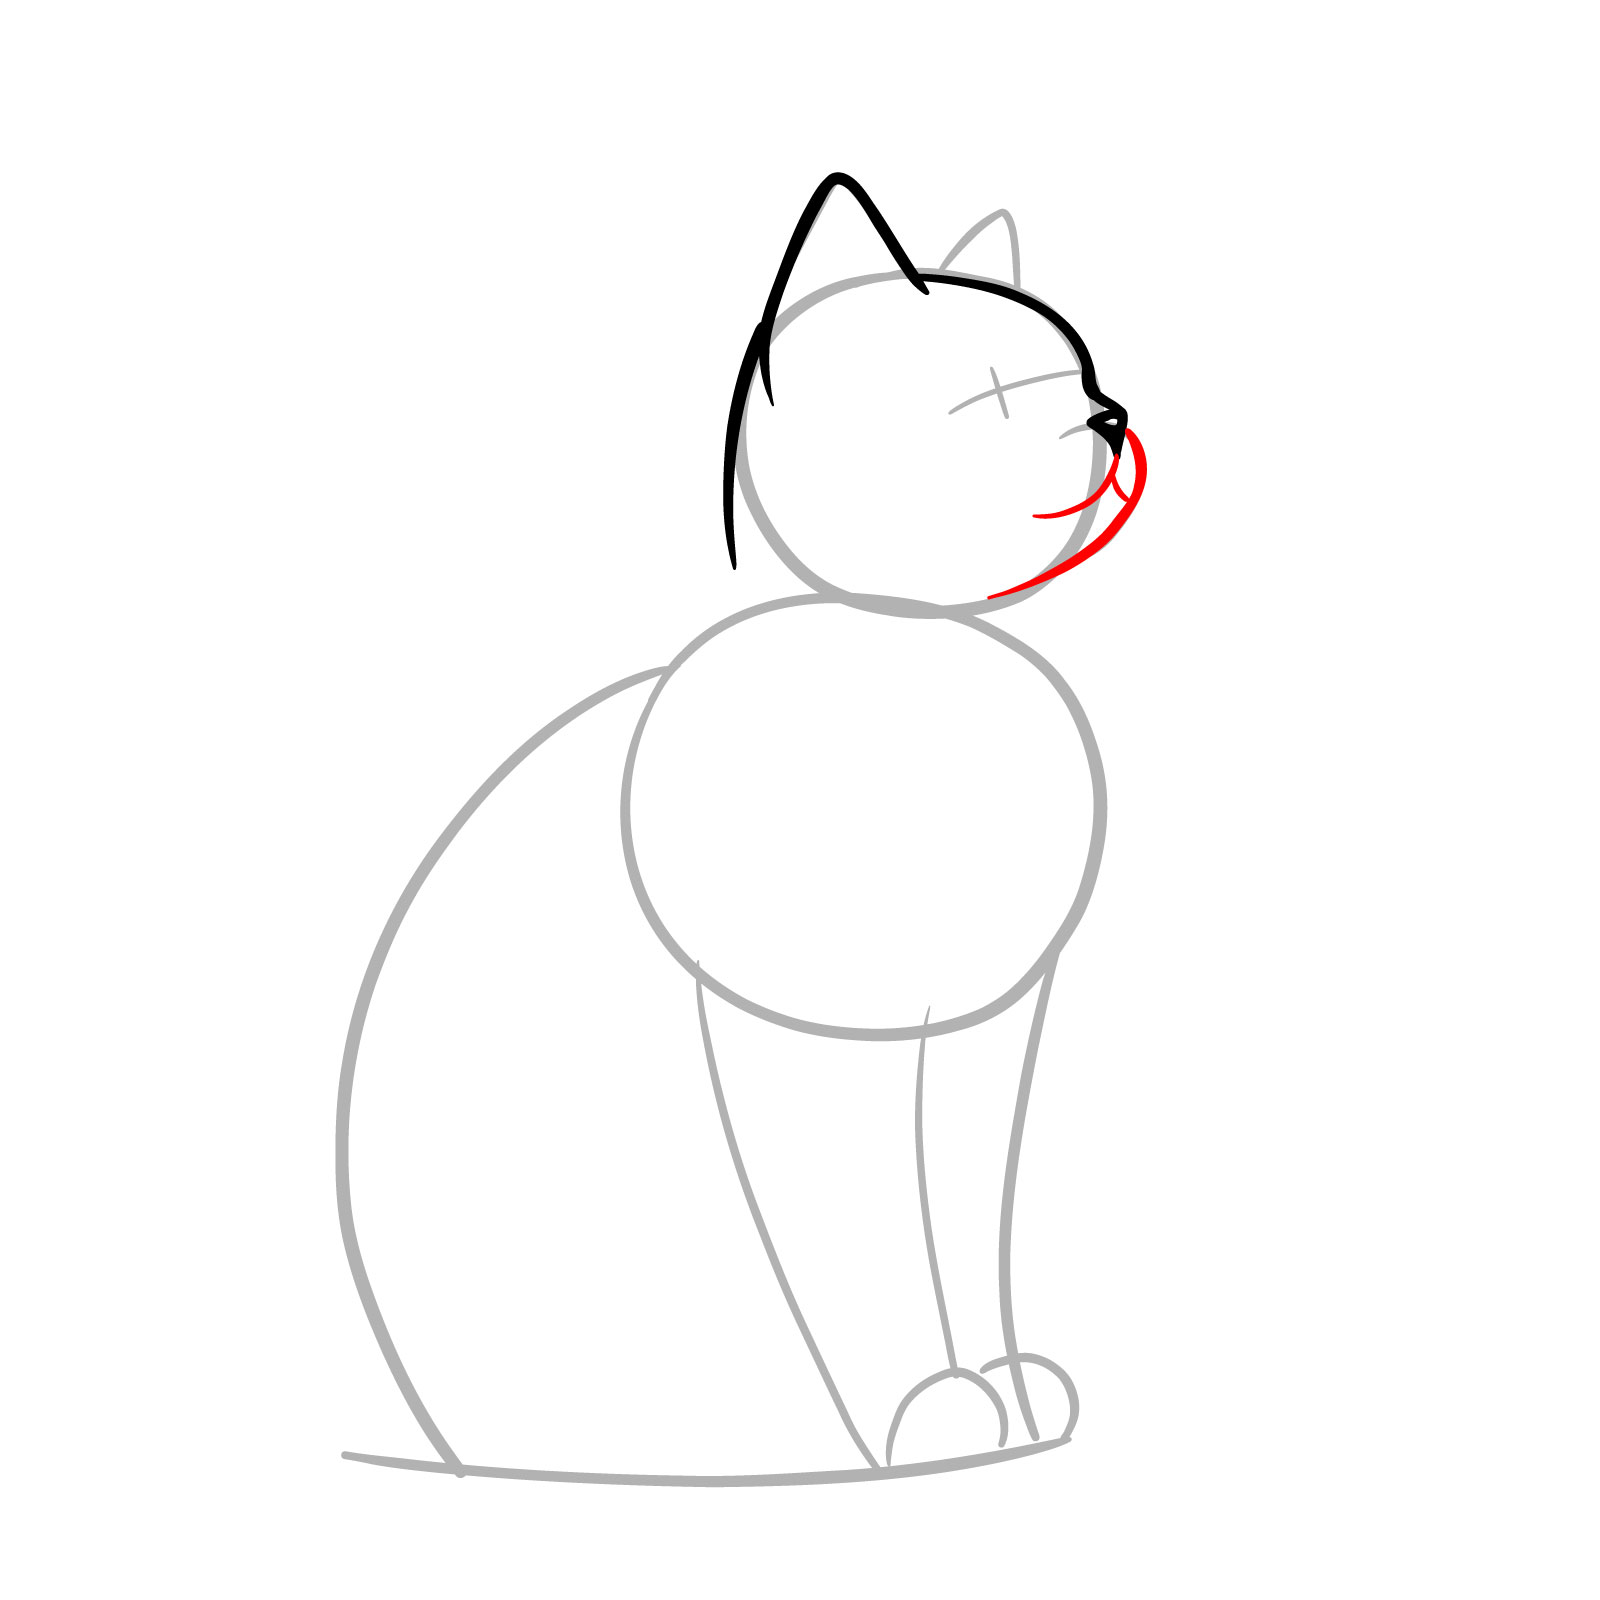
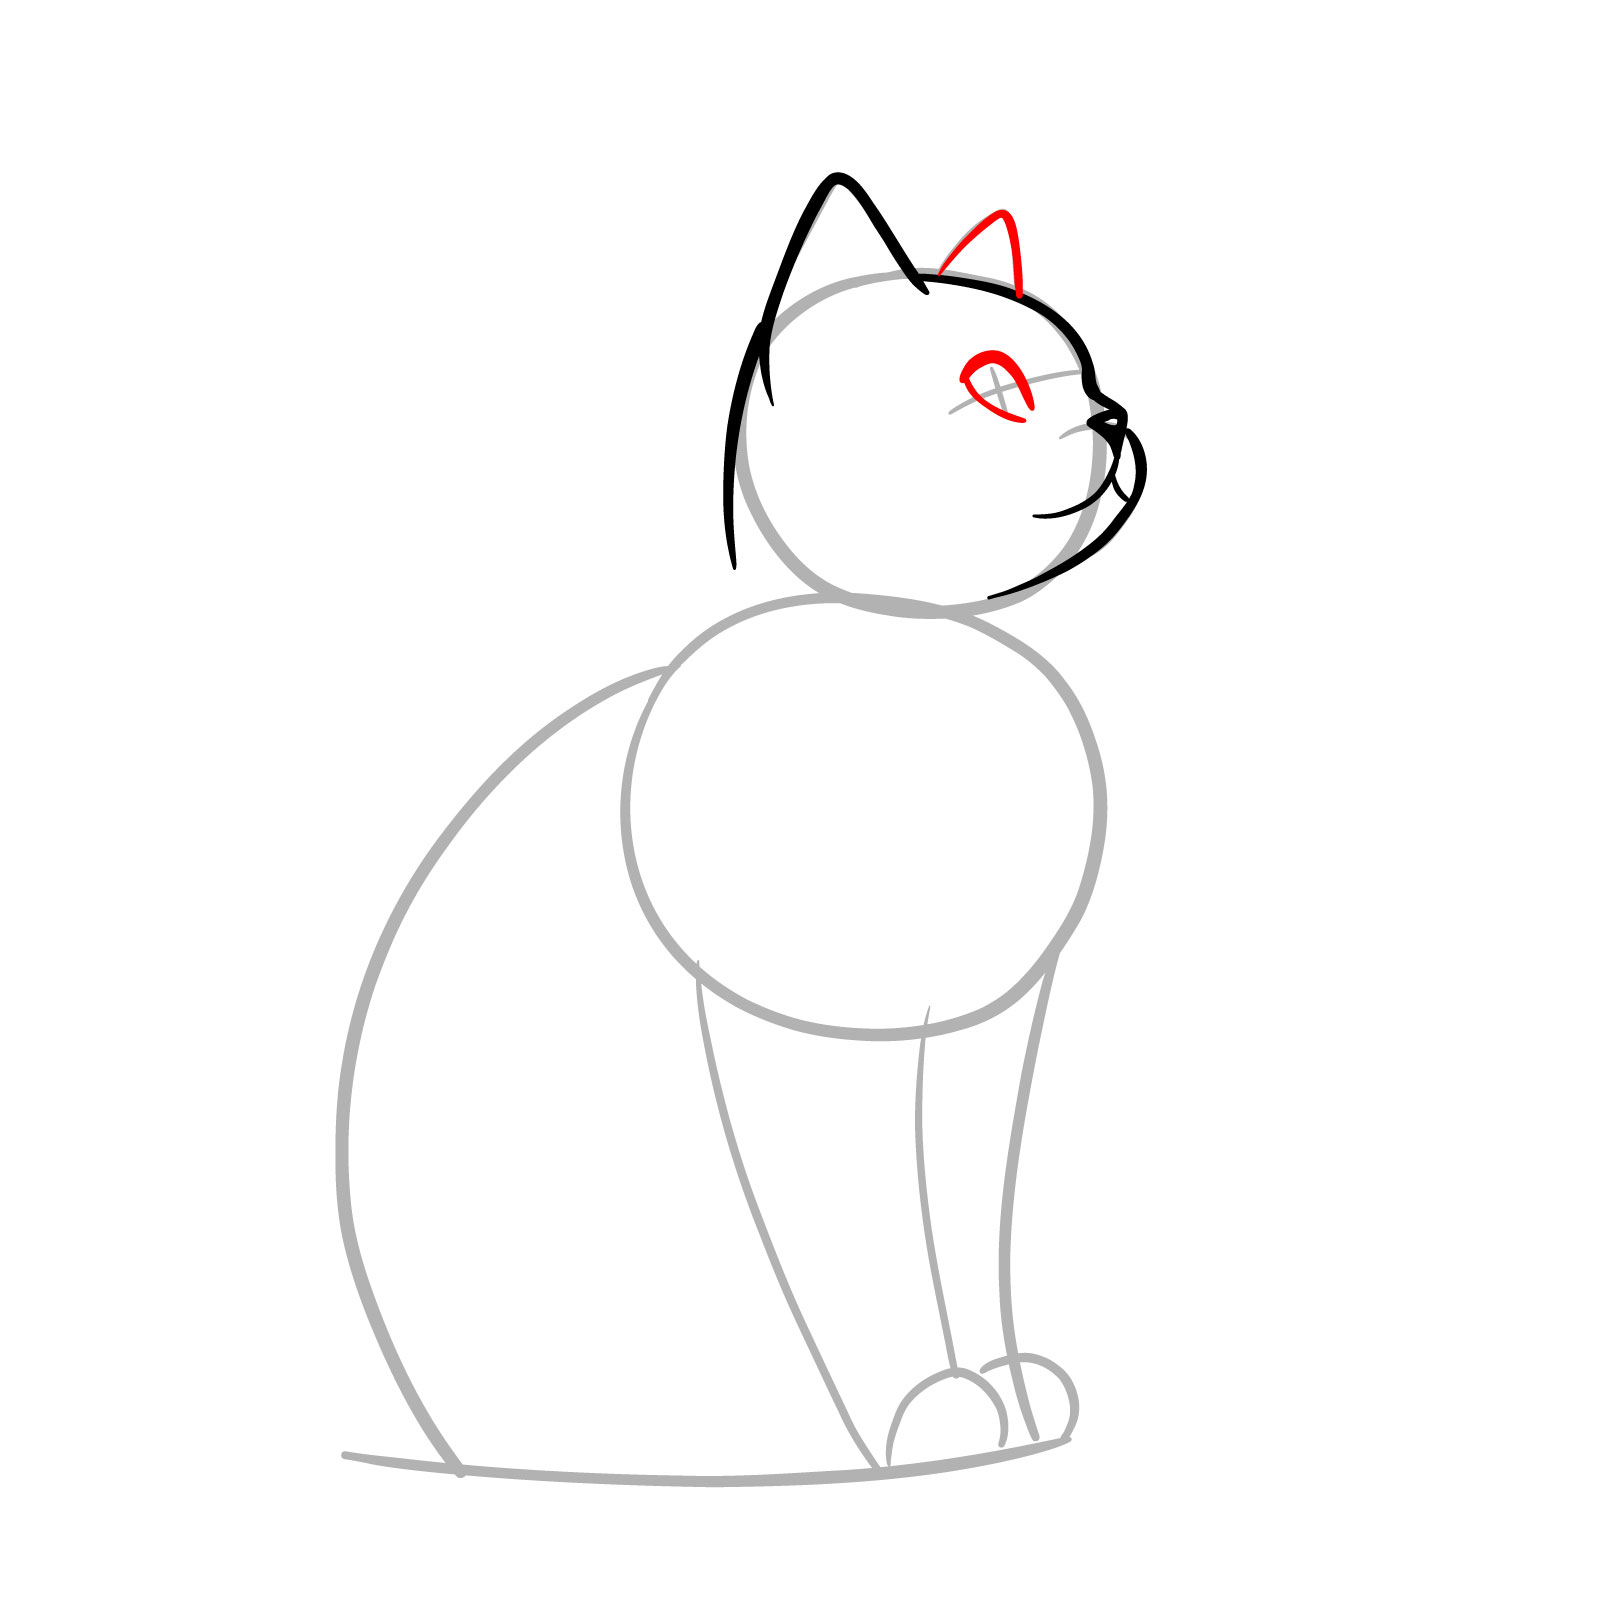
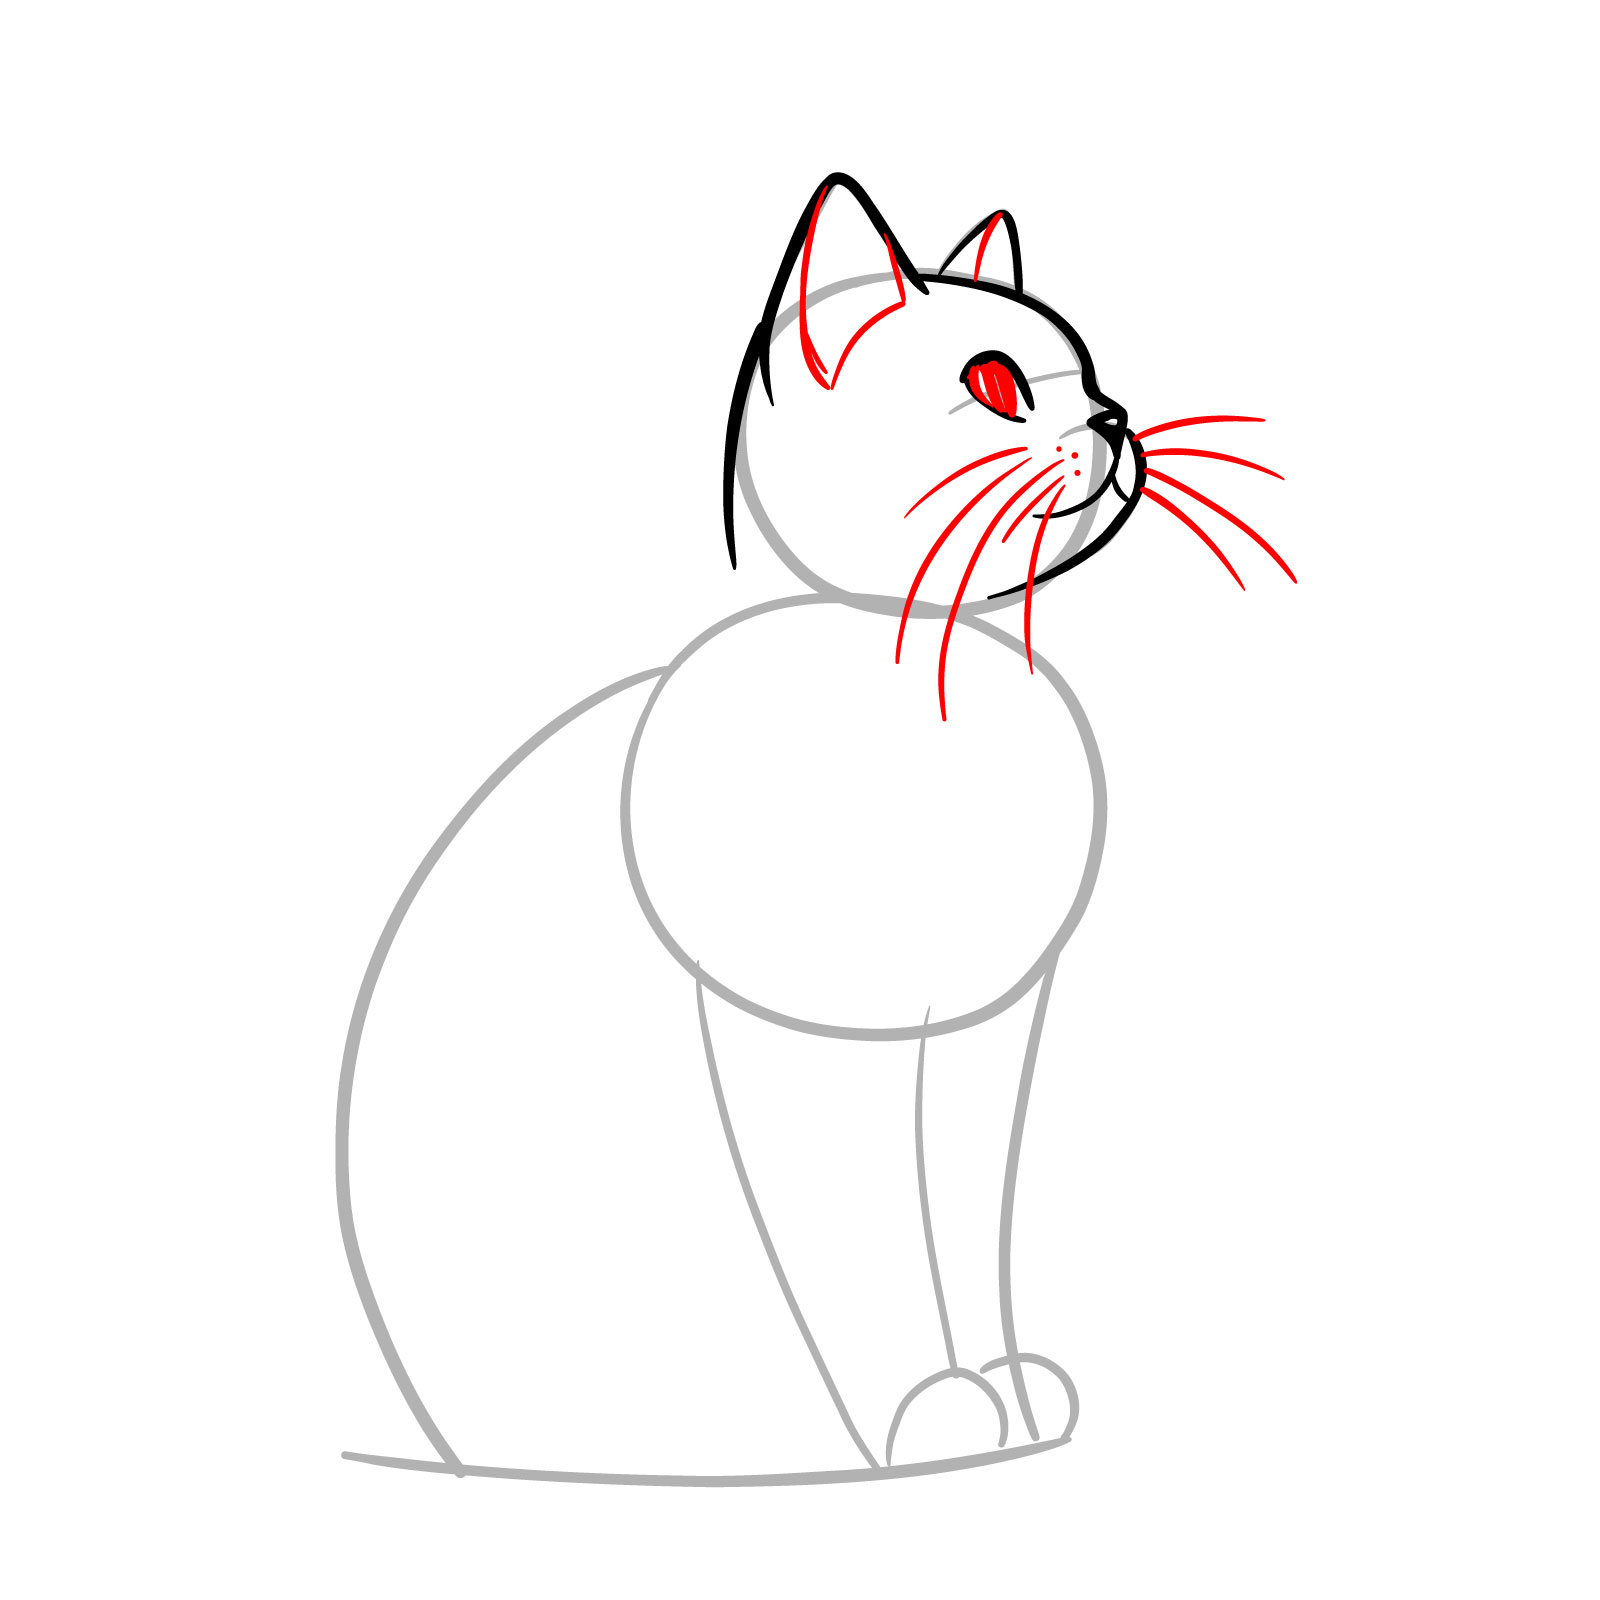
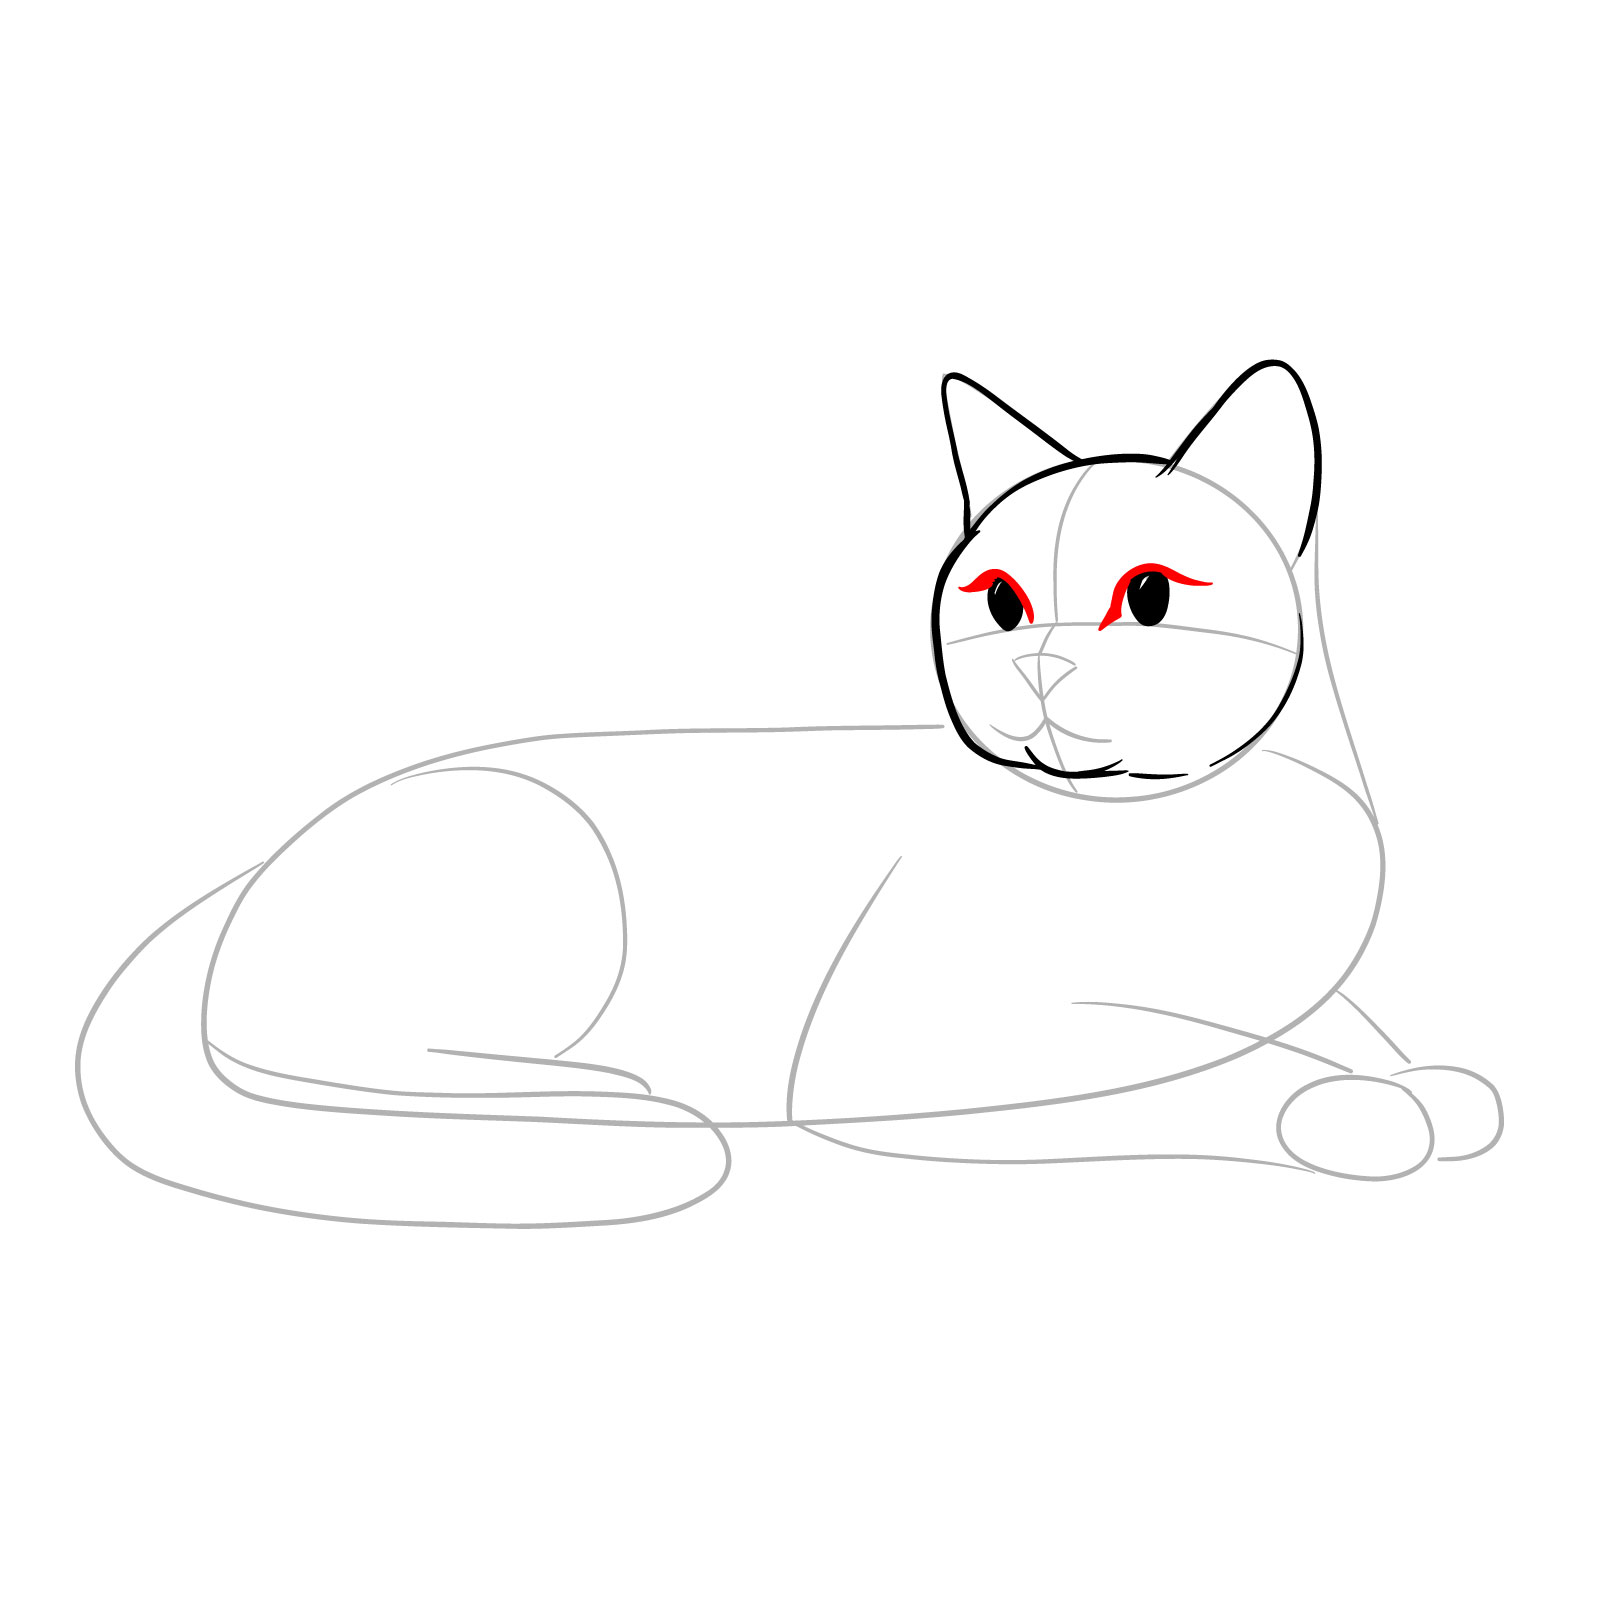
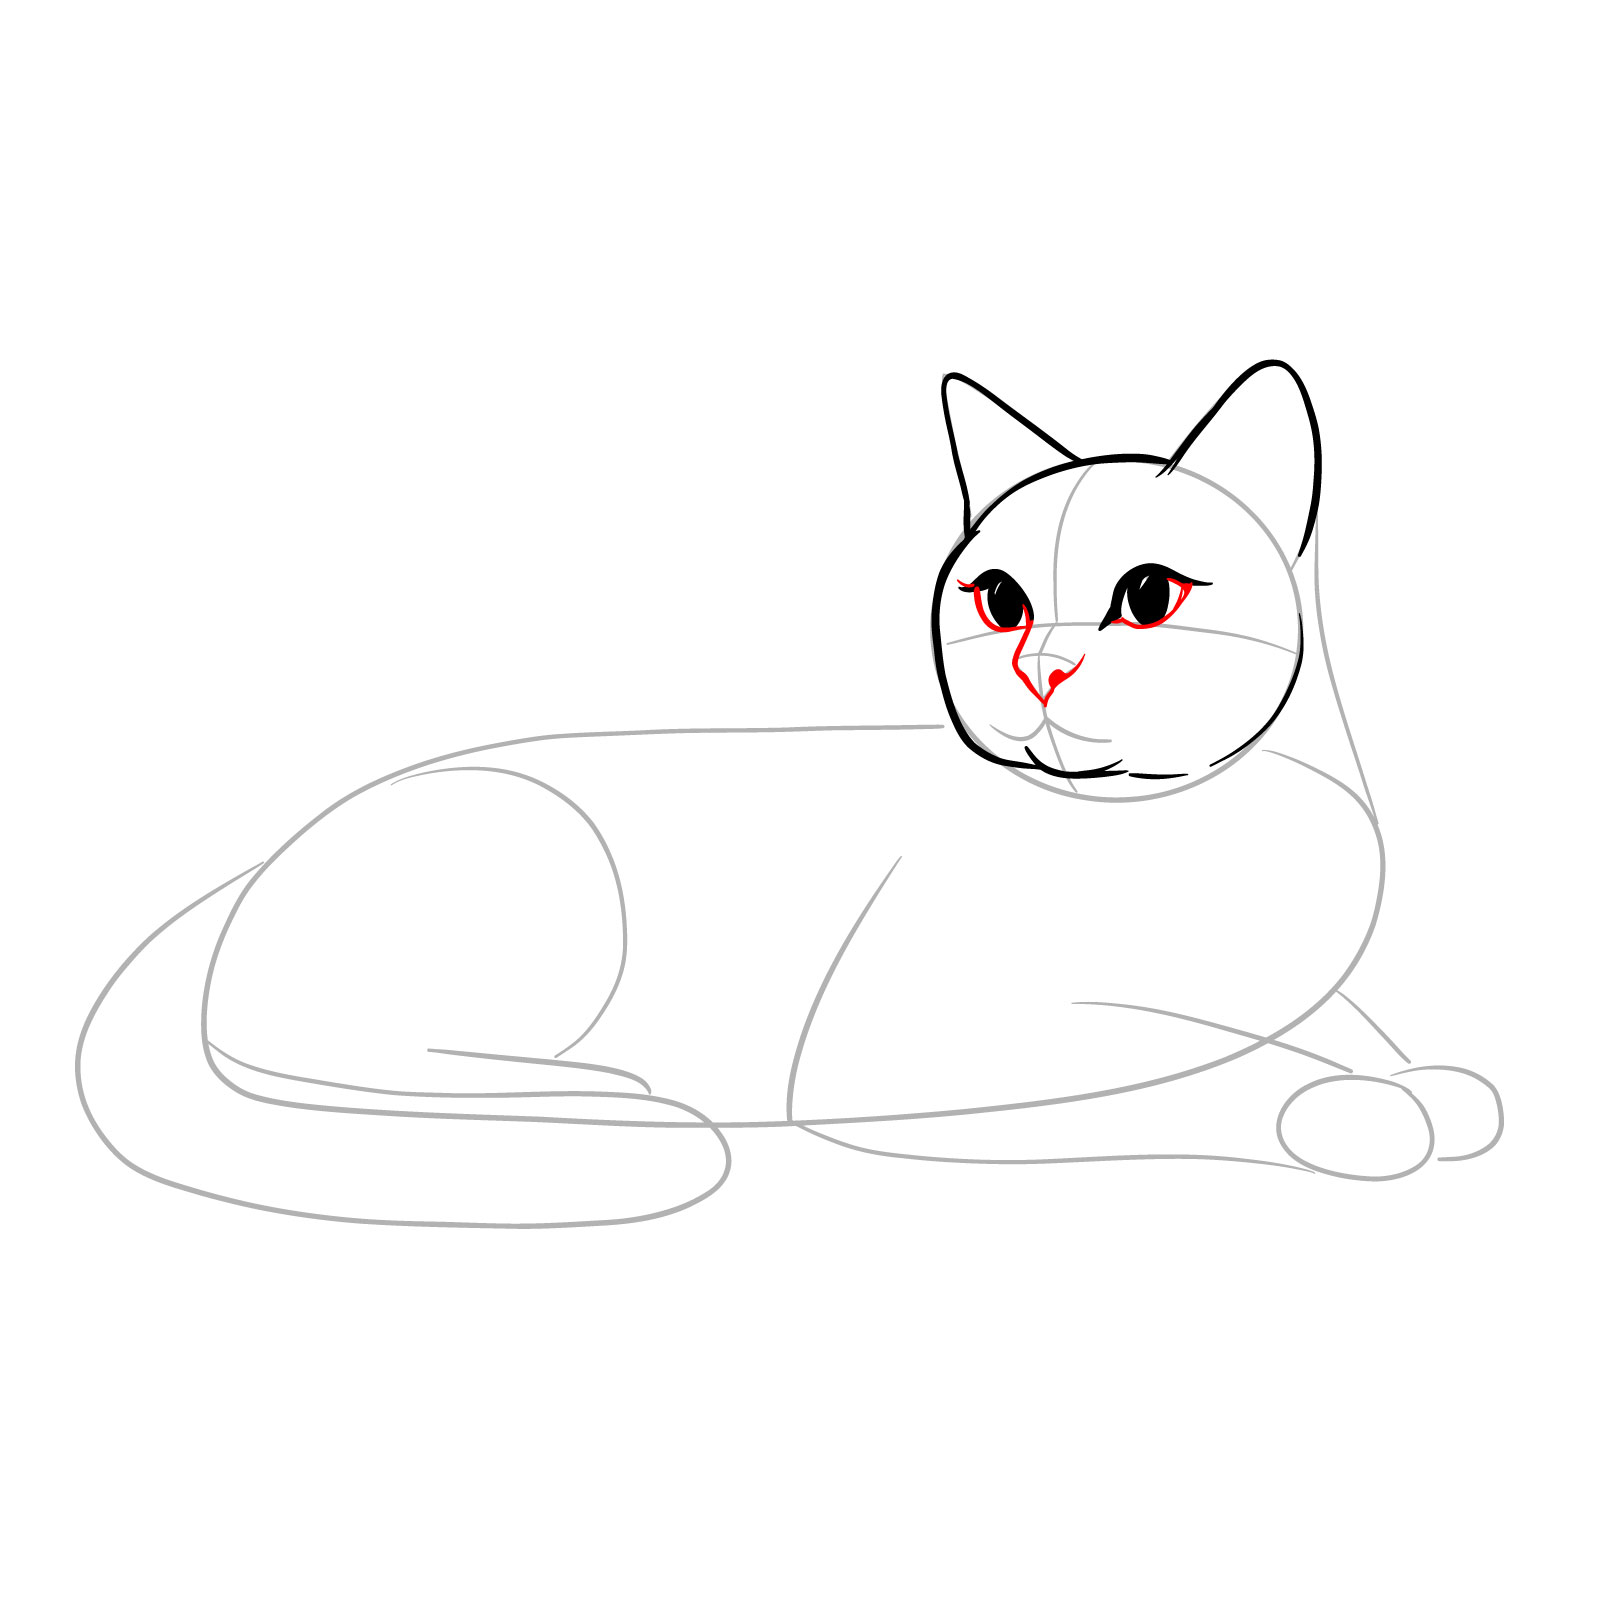
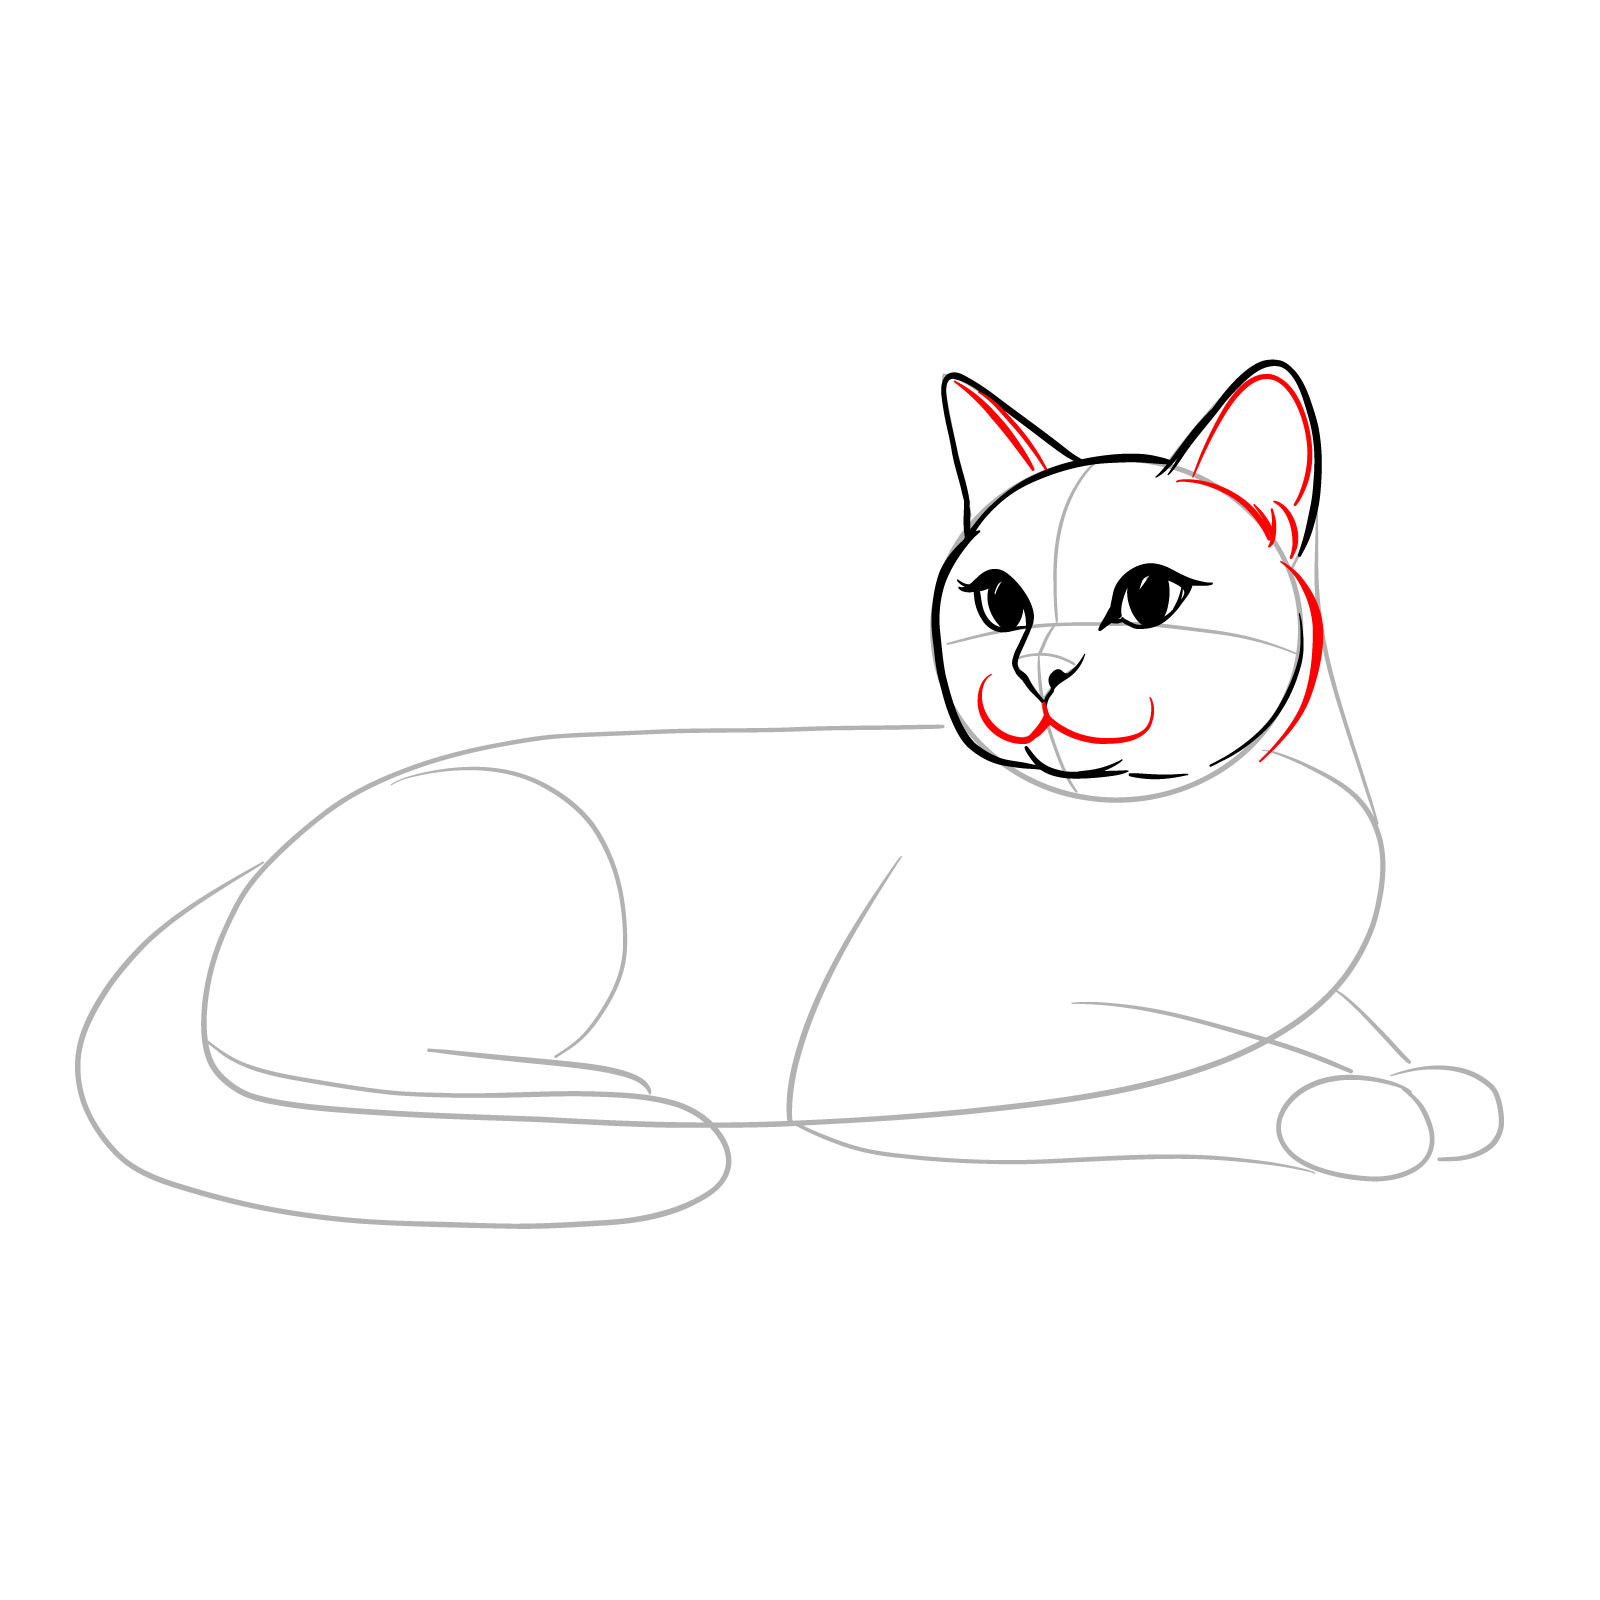
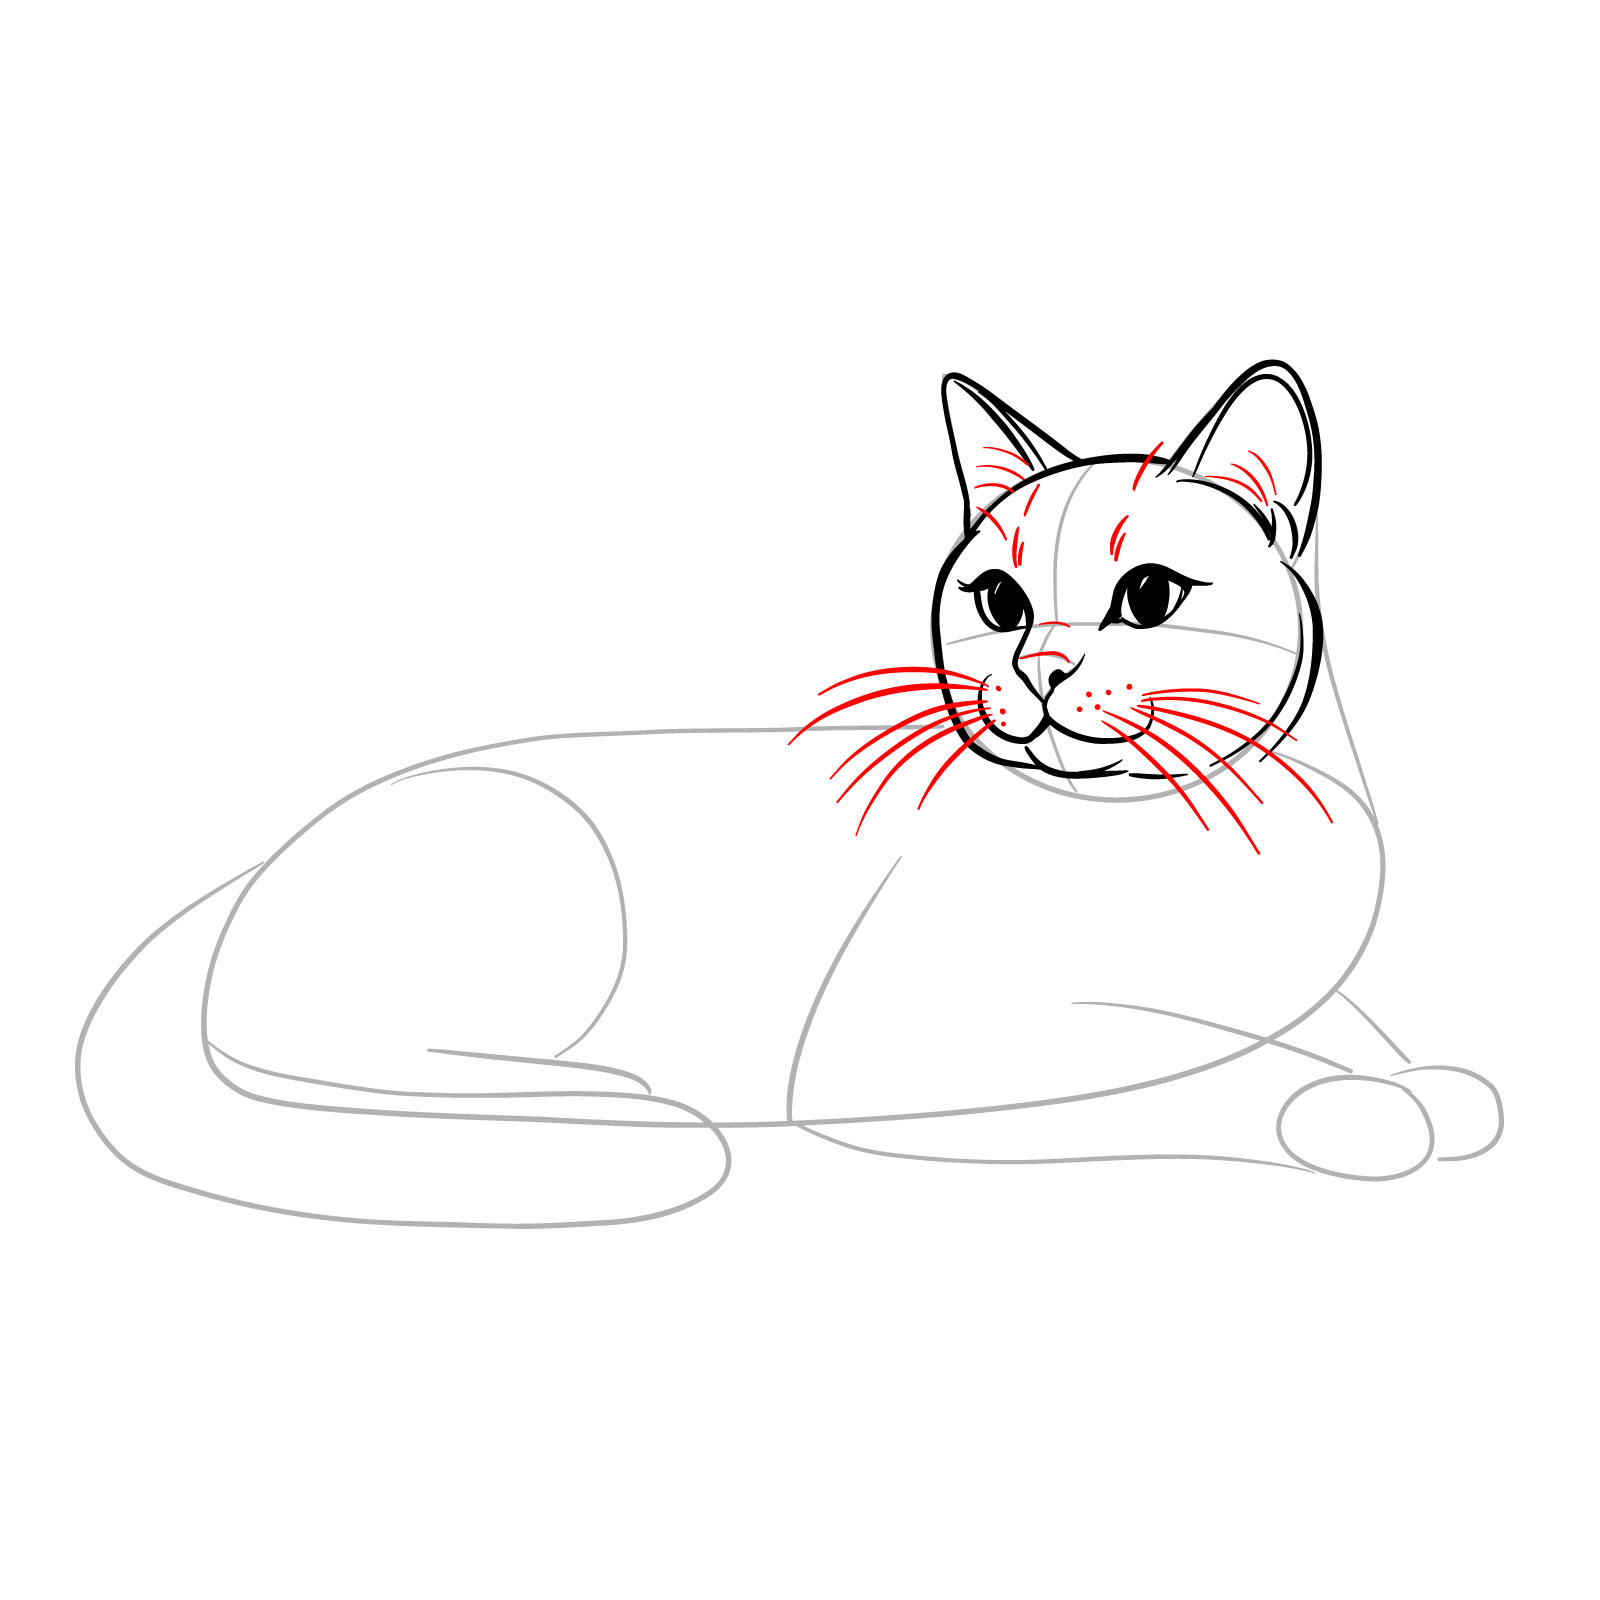
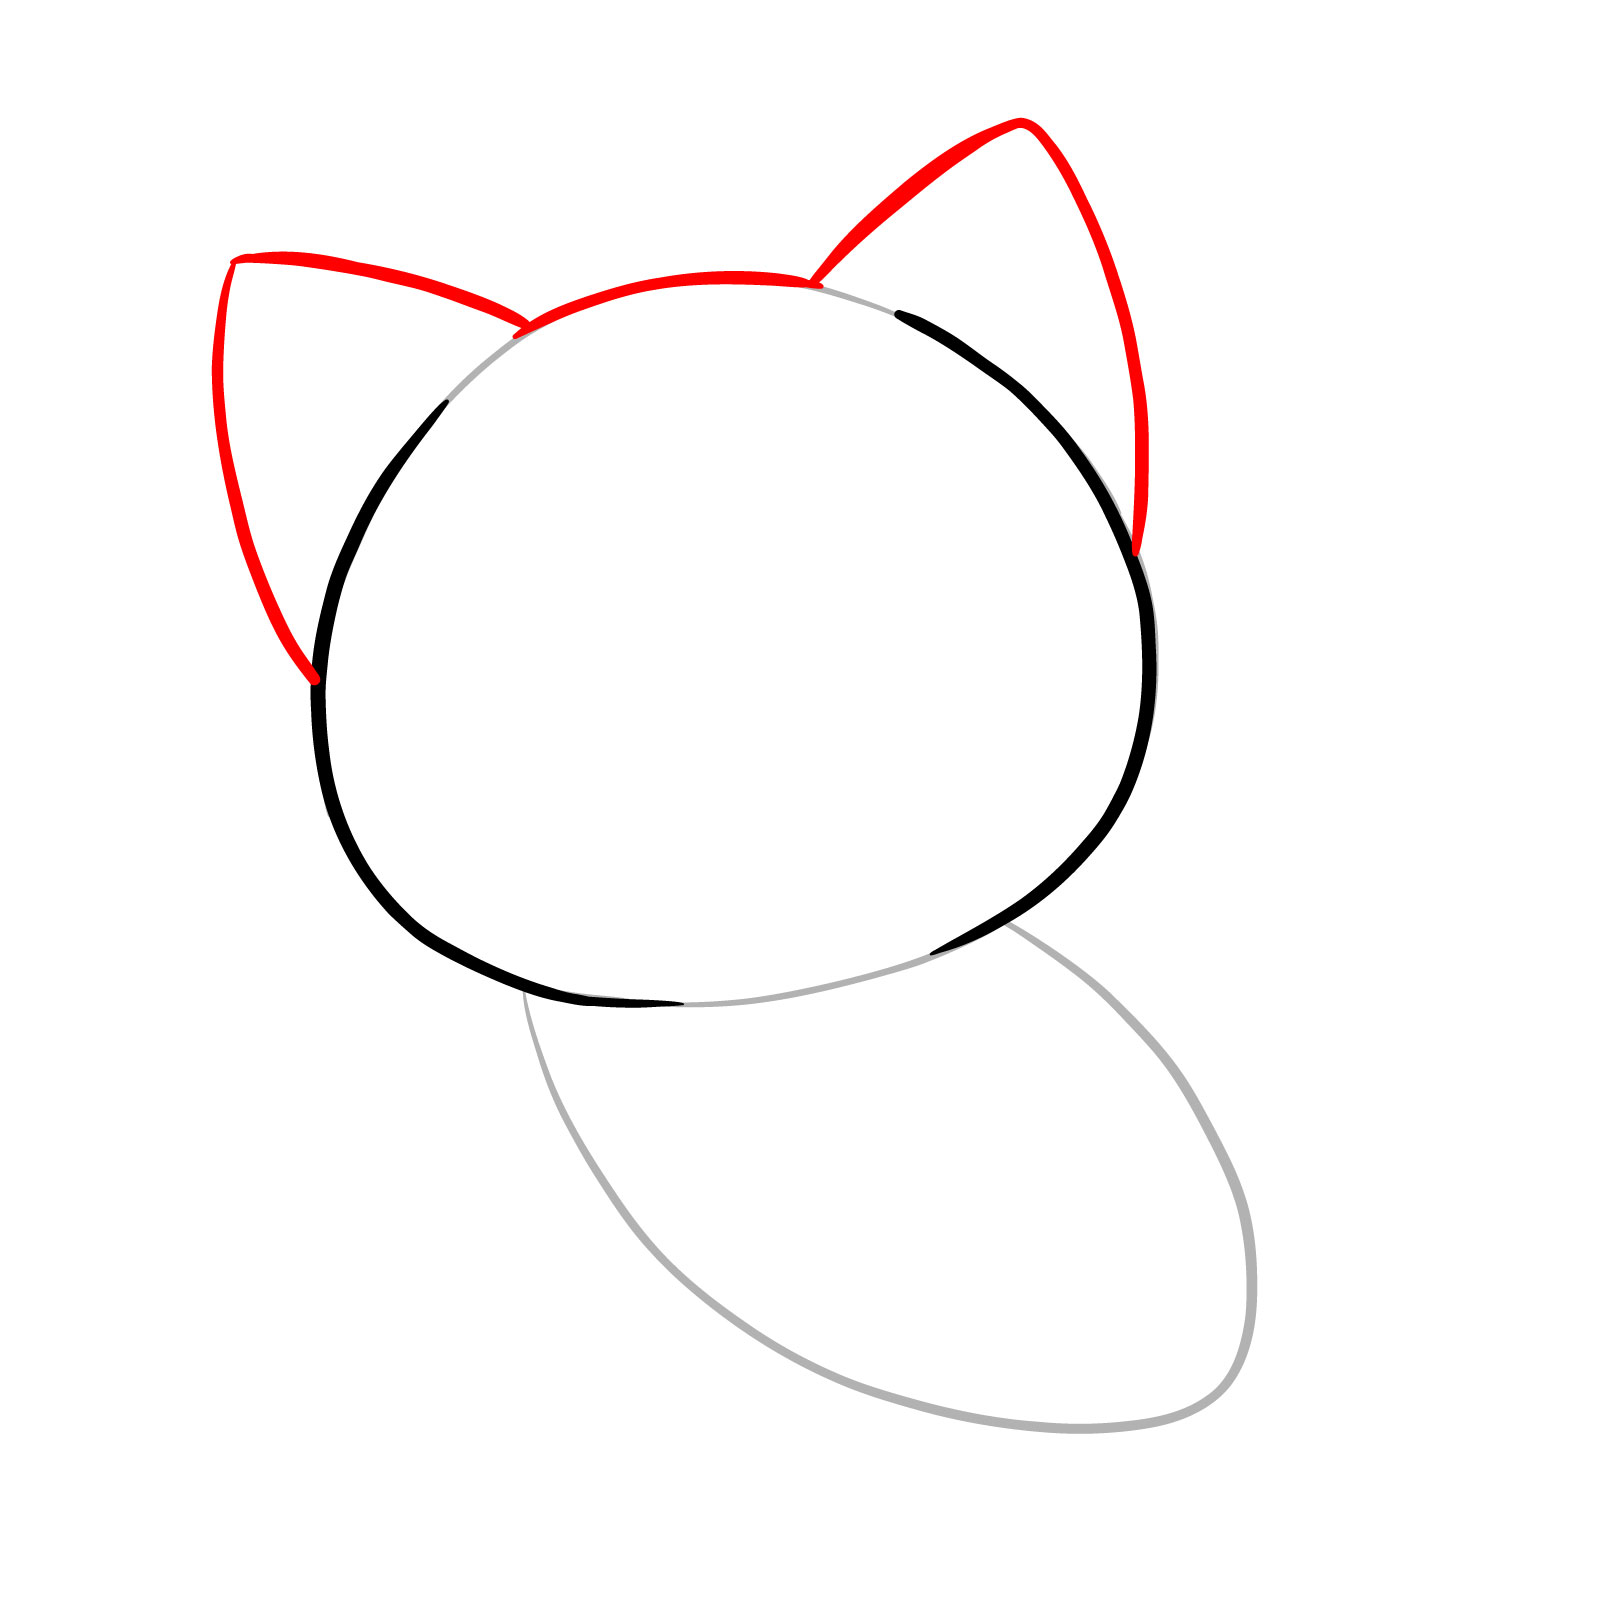
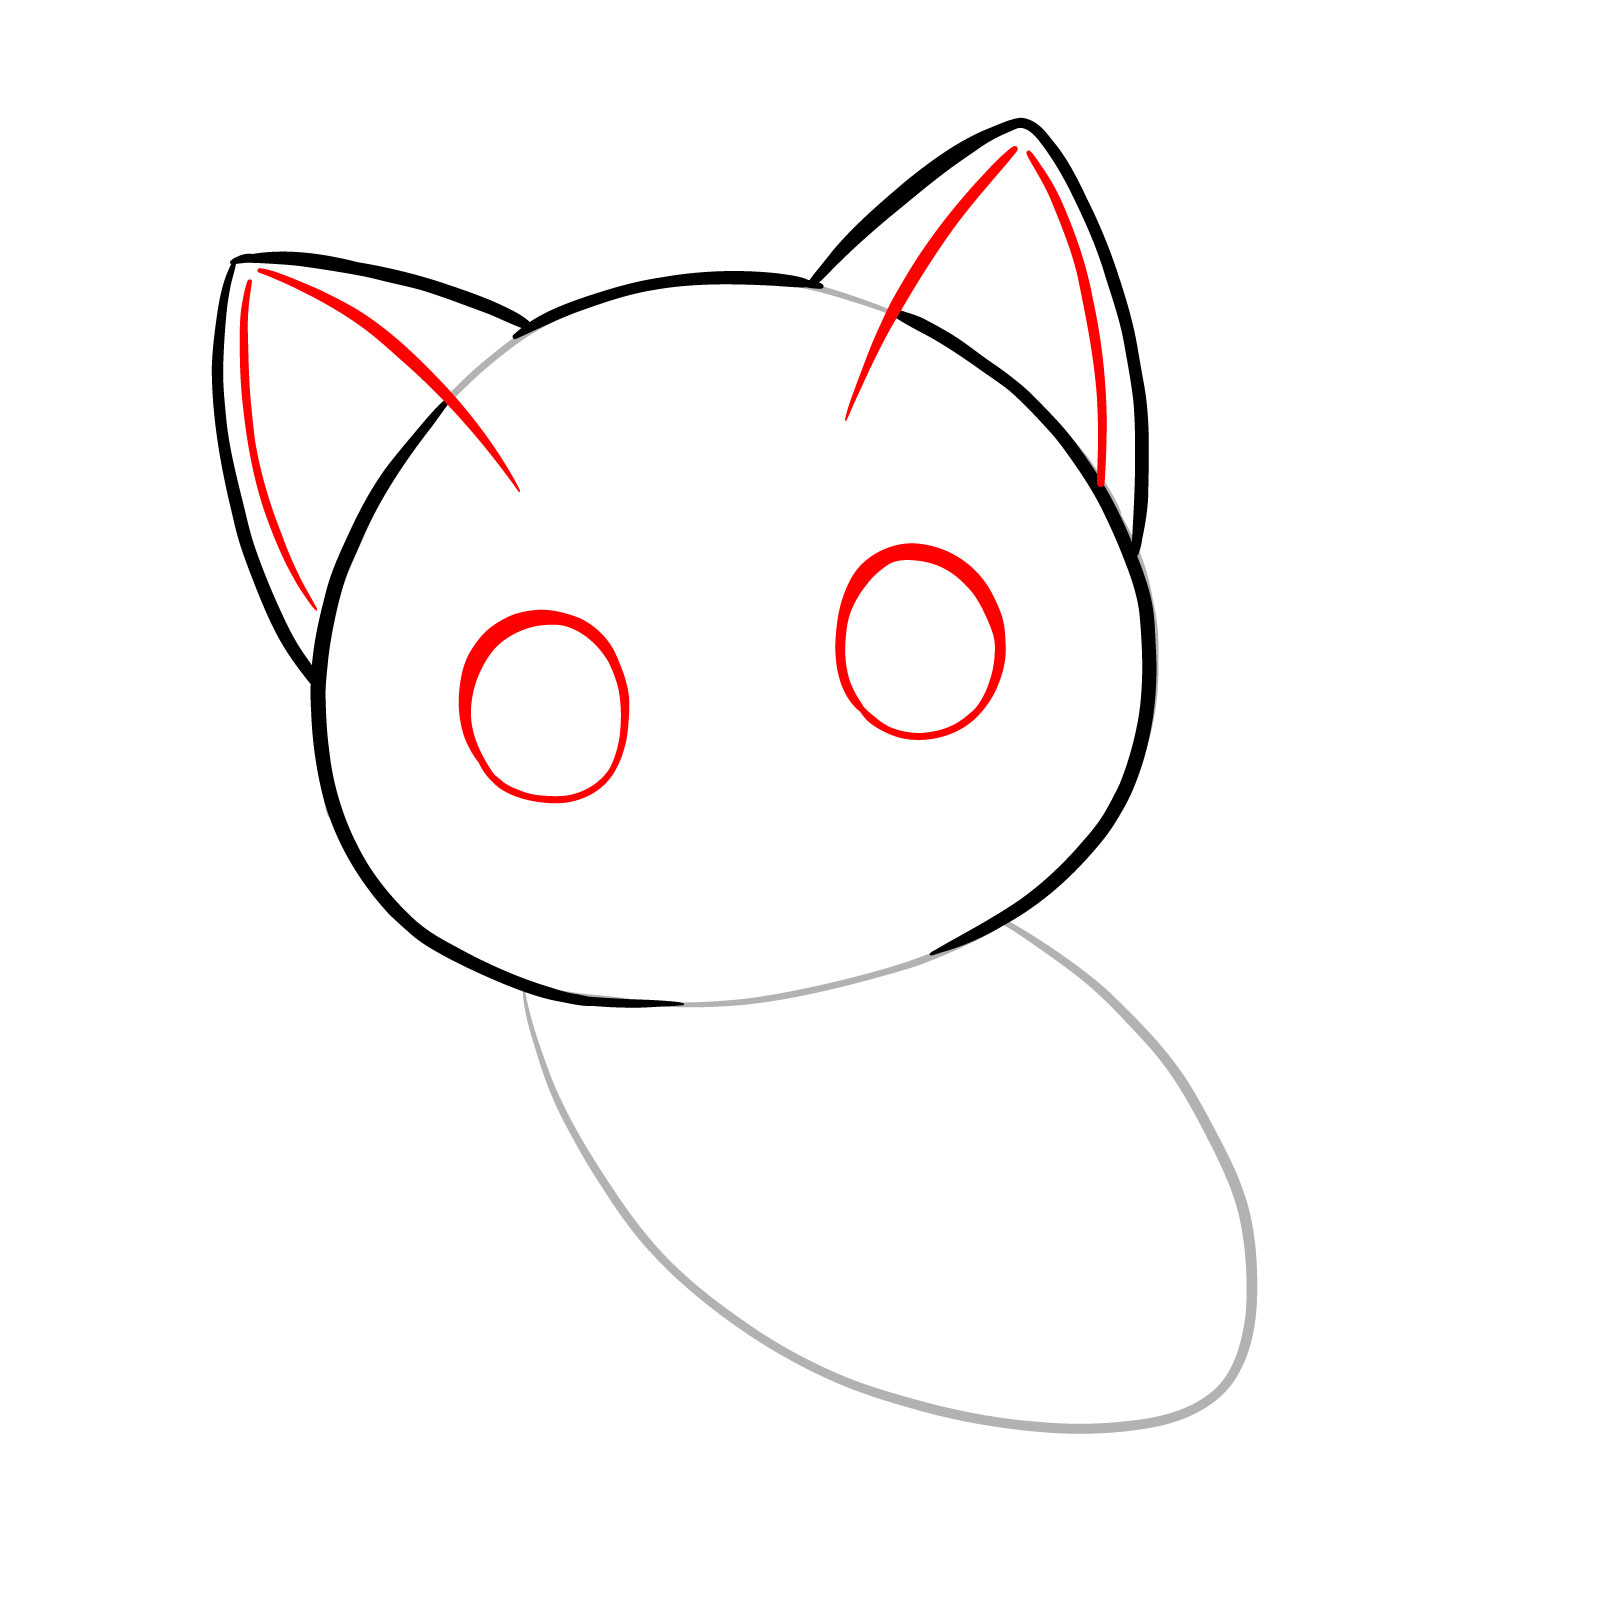
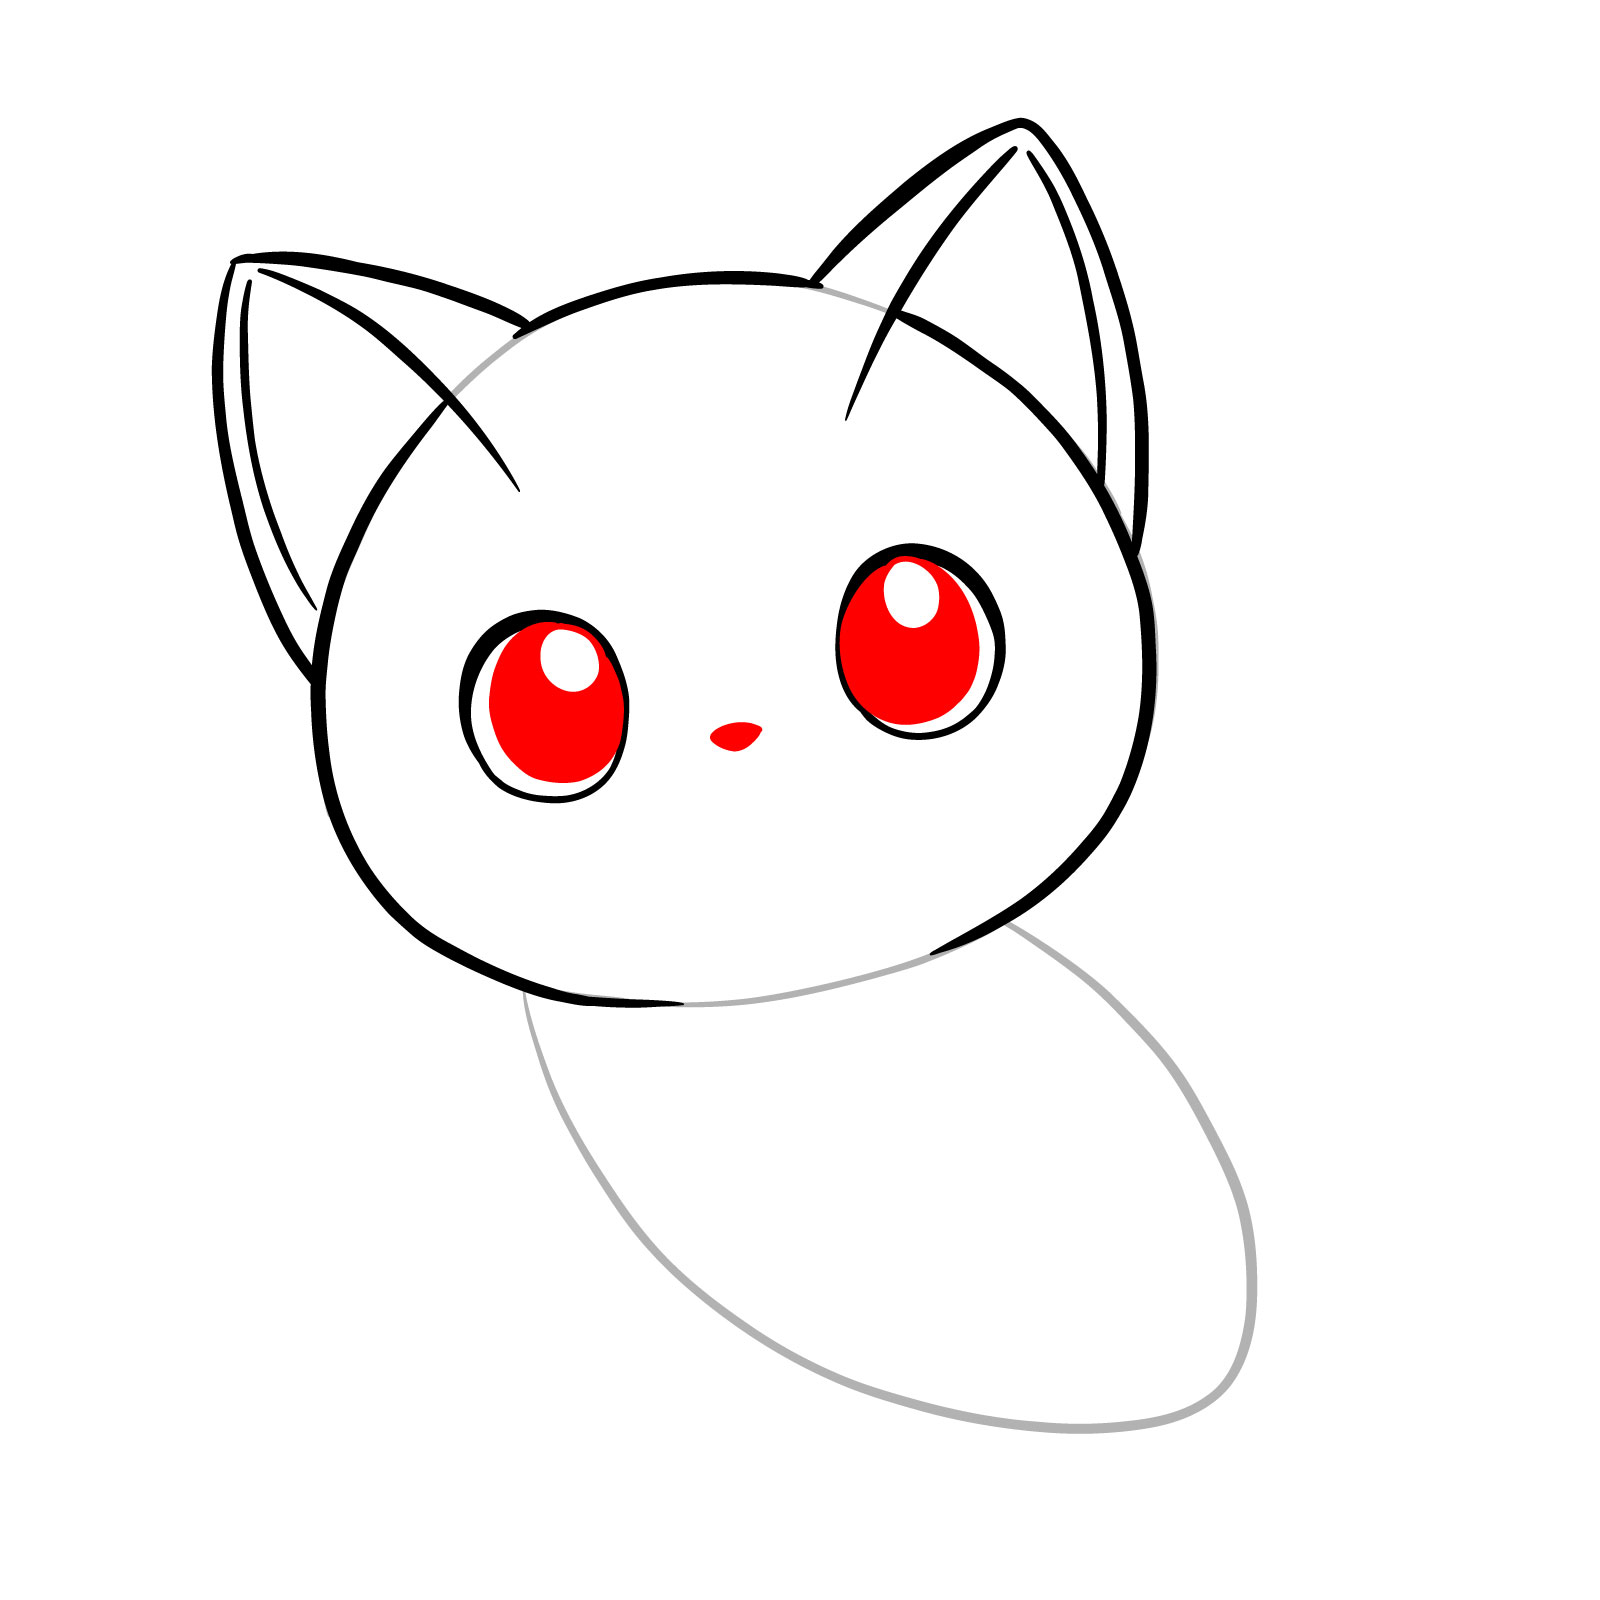
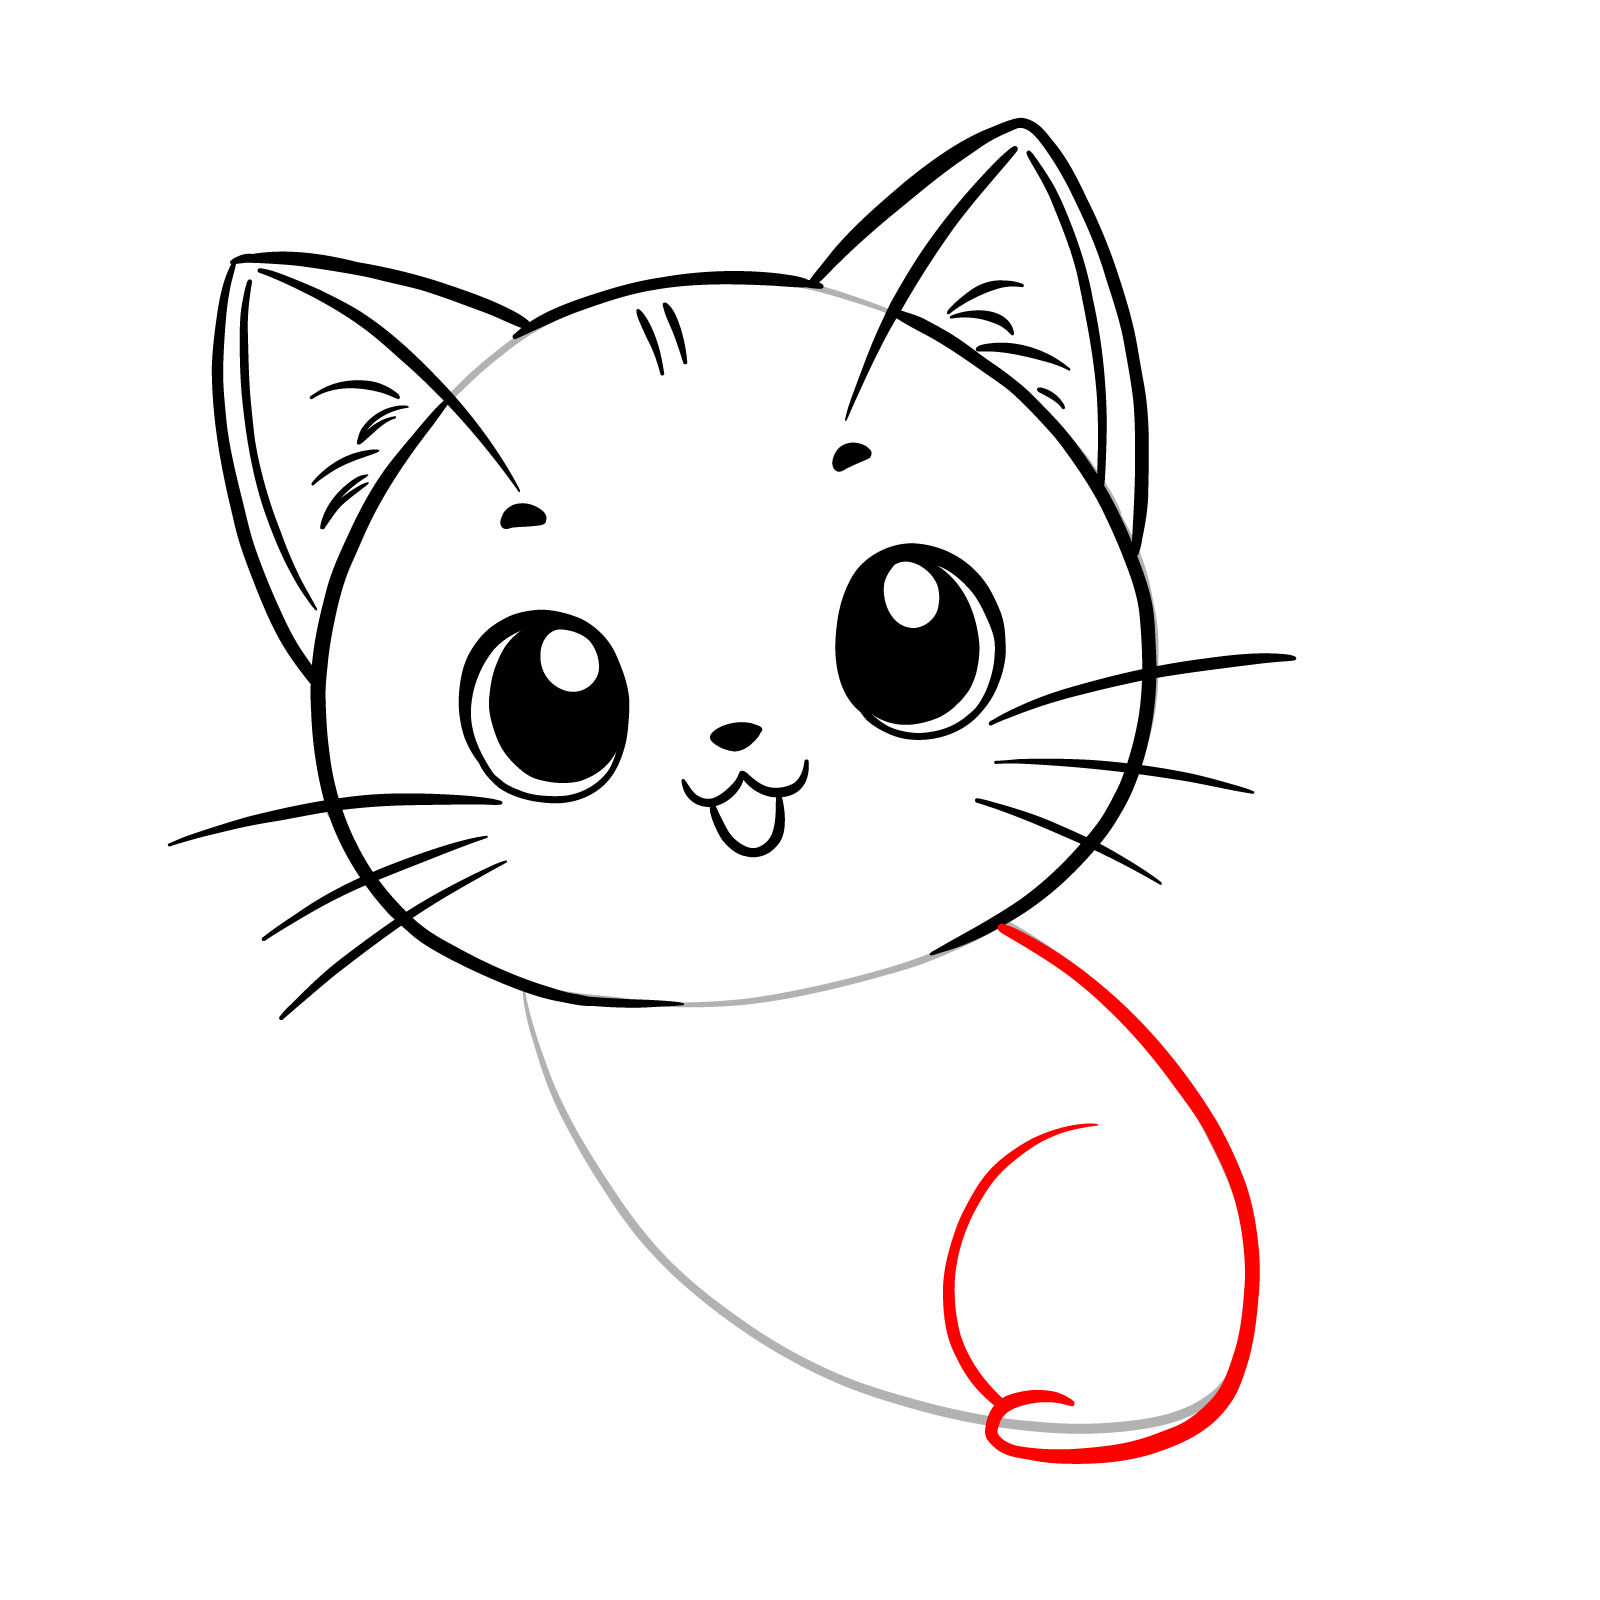
Guide 7 : How to Attract a Sitting Cat – Front View – 16 Steps
Moving ahead in our make series , allow ’ s hear how to draw a sitting cat , viewed from the front . This tutorial disclose the procedure down into 16 manageable steps , assure clarity and ease for artists at any level . While this guy introduce a realistic shape , it is not burdened with an overwhelming amount of detail , impress a symmetry between authenticity and simplicity . The first two measure will guide you in creating a proportional structure , which serve as the foundation for the repose of your drawing . By succeed each step , you will be able to draw this composed feline with confidence and ease .
Step 01 – Start by draw a band for the top dog and a bigger circle for the torso . Link these band with two course on the sides to make the guy ’ sec neck and back . A erect melody bisects the structure , marking the center and ensuring symmetry in the pose
Step 02 – Add a horizontal melody across the head circle with two short business to point the future status of the pupils . Outline the basic outlines for the nose , mouth , and ears , and introduce the cardinal shapes for the legs and tail , prepare the groundwork for the cat ’ sec sitting posture
Step 03 – Refine the height of the head and outline the pointed ear , ensuring they align with the guidelines . This pace shape the chief ’ s contour , which is intact for a realistic depiction of a ride cat
Pace 04 – Draw the sides of the guy ’ s mind to indicate the cheekbones , which lend dimension and shape to the face
Measure 05 – Define the upper portion of the guy ’ s eye , which resemble eyelashes , to get stress to the eyes
Pace 06 – Complete the eye shapes by adding the lower lines , and filling in the student with color , get out little blank circles for highlights
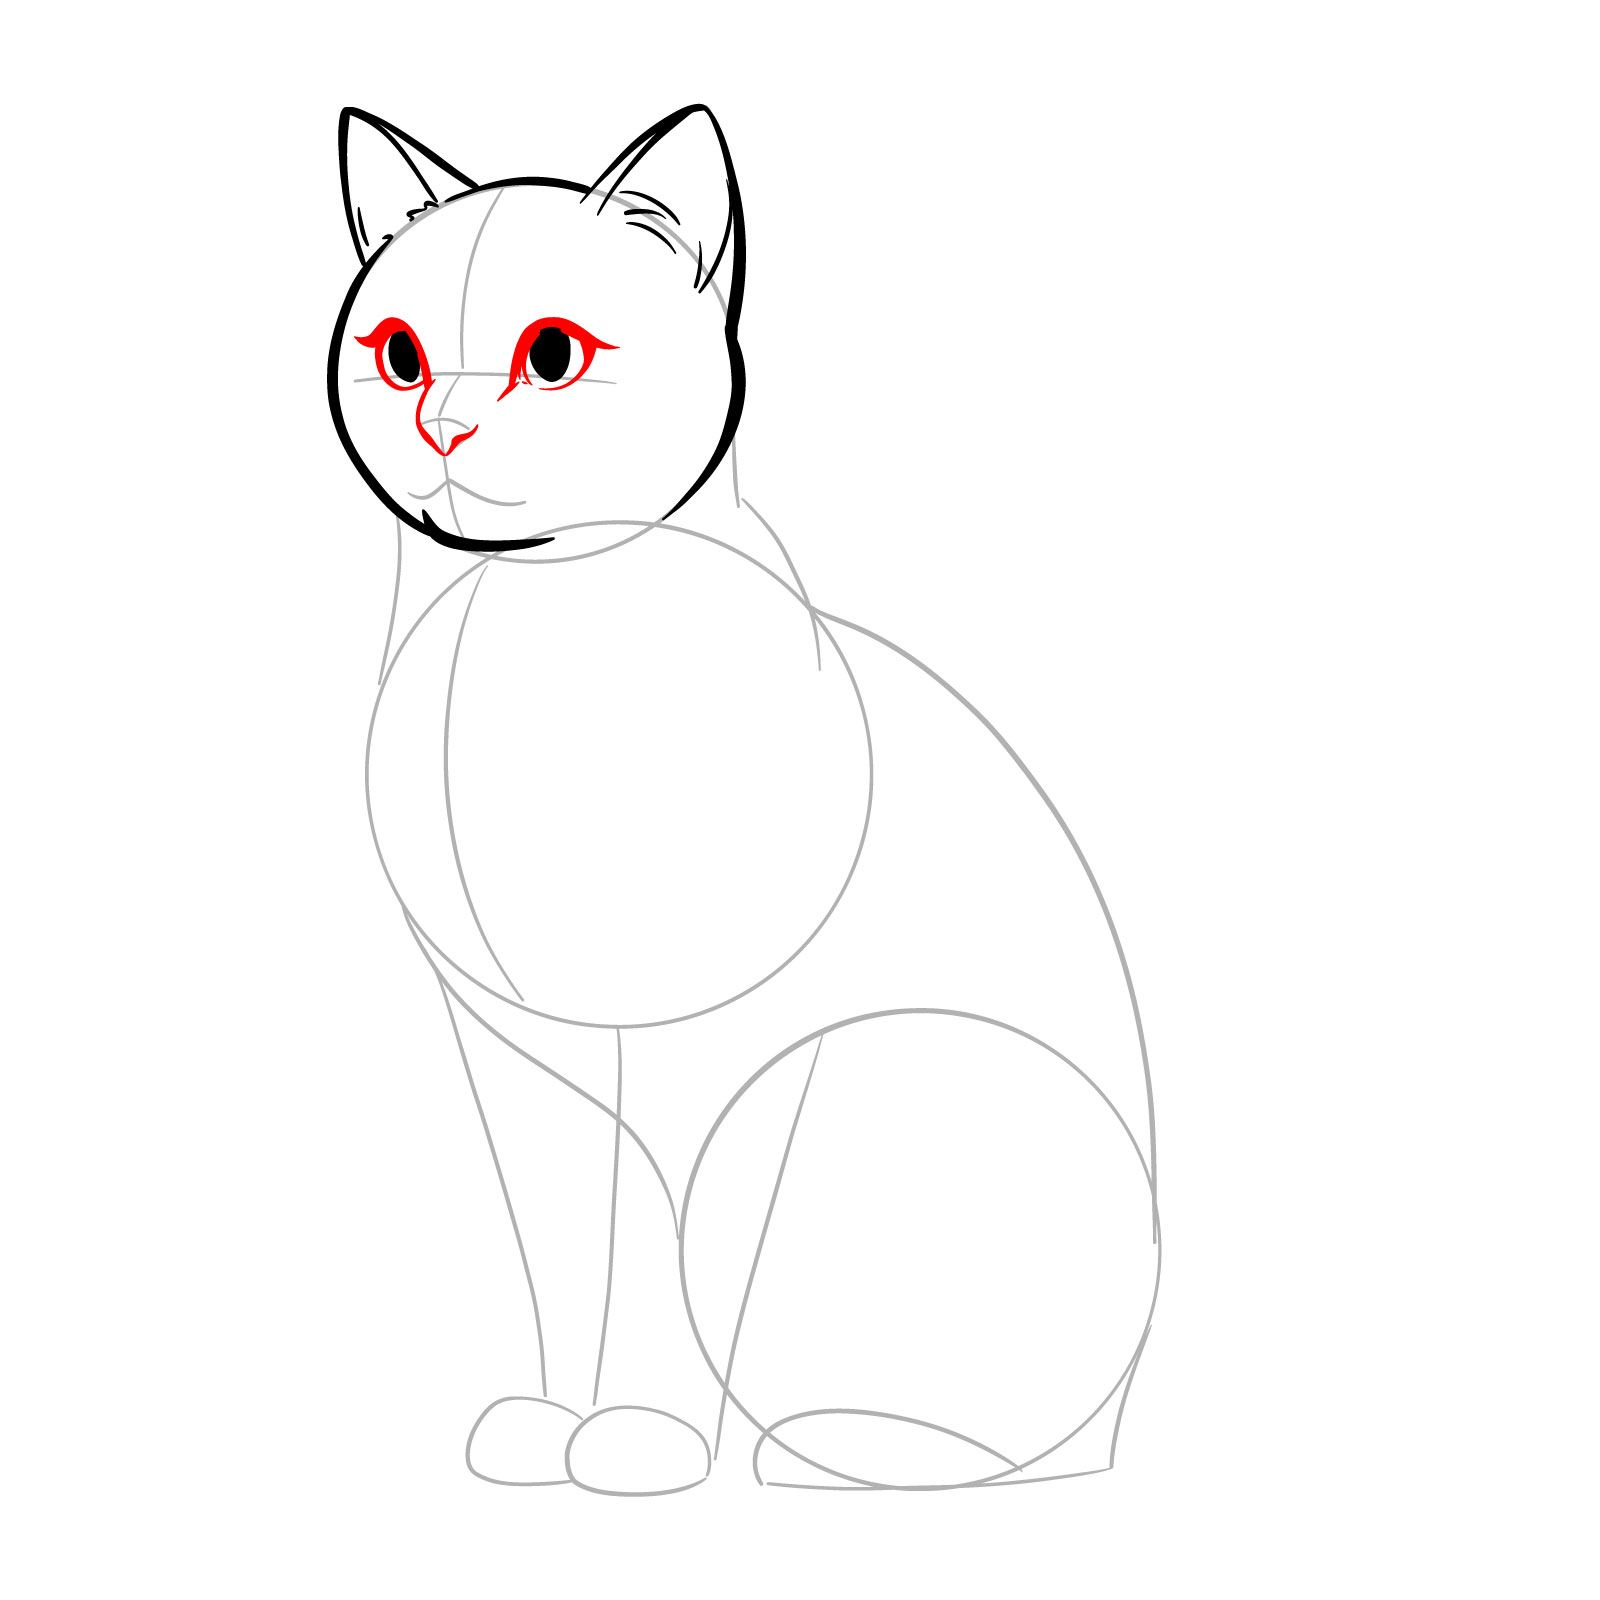
Step 07 – Outline a triangular pattern for the nose , positioned in the center of the facial guidelines
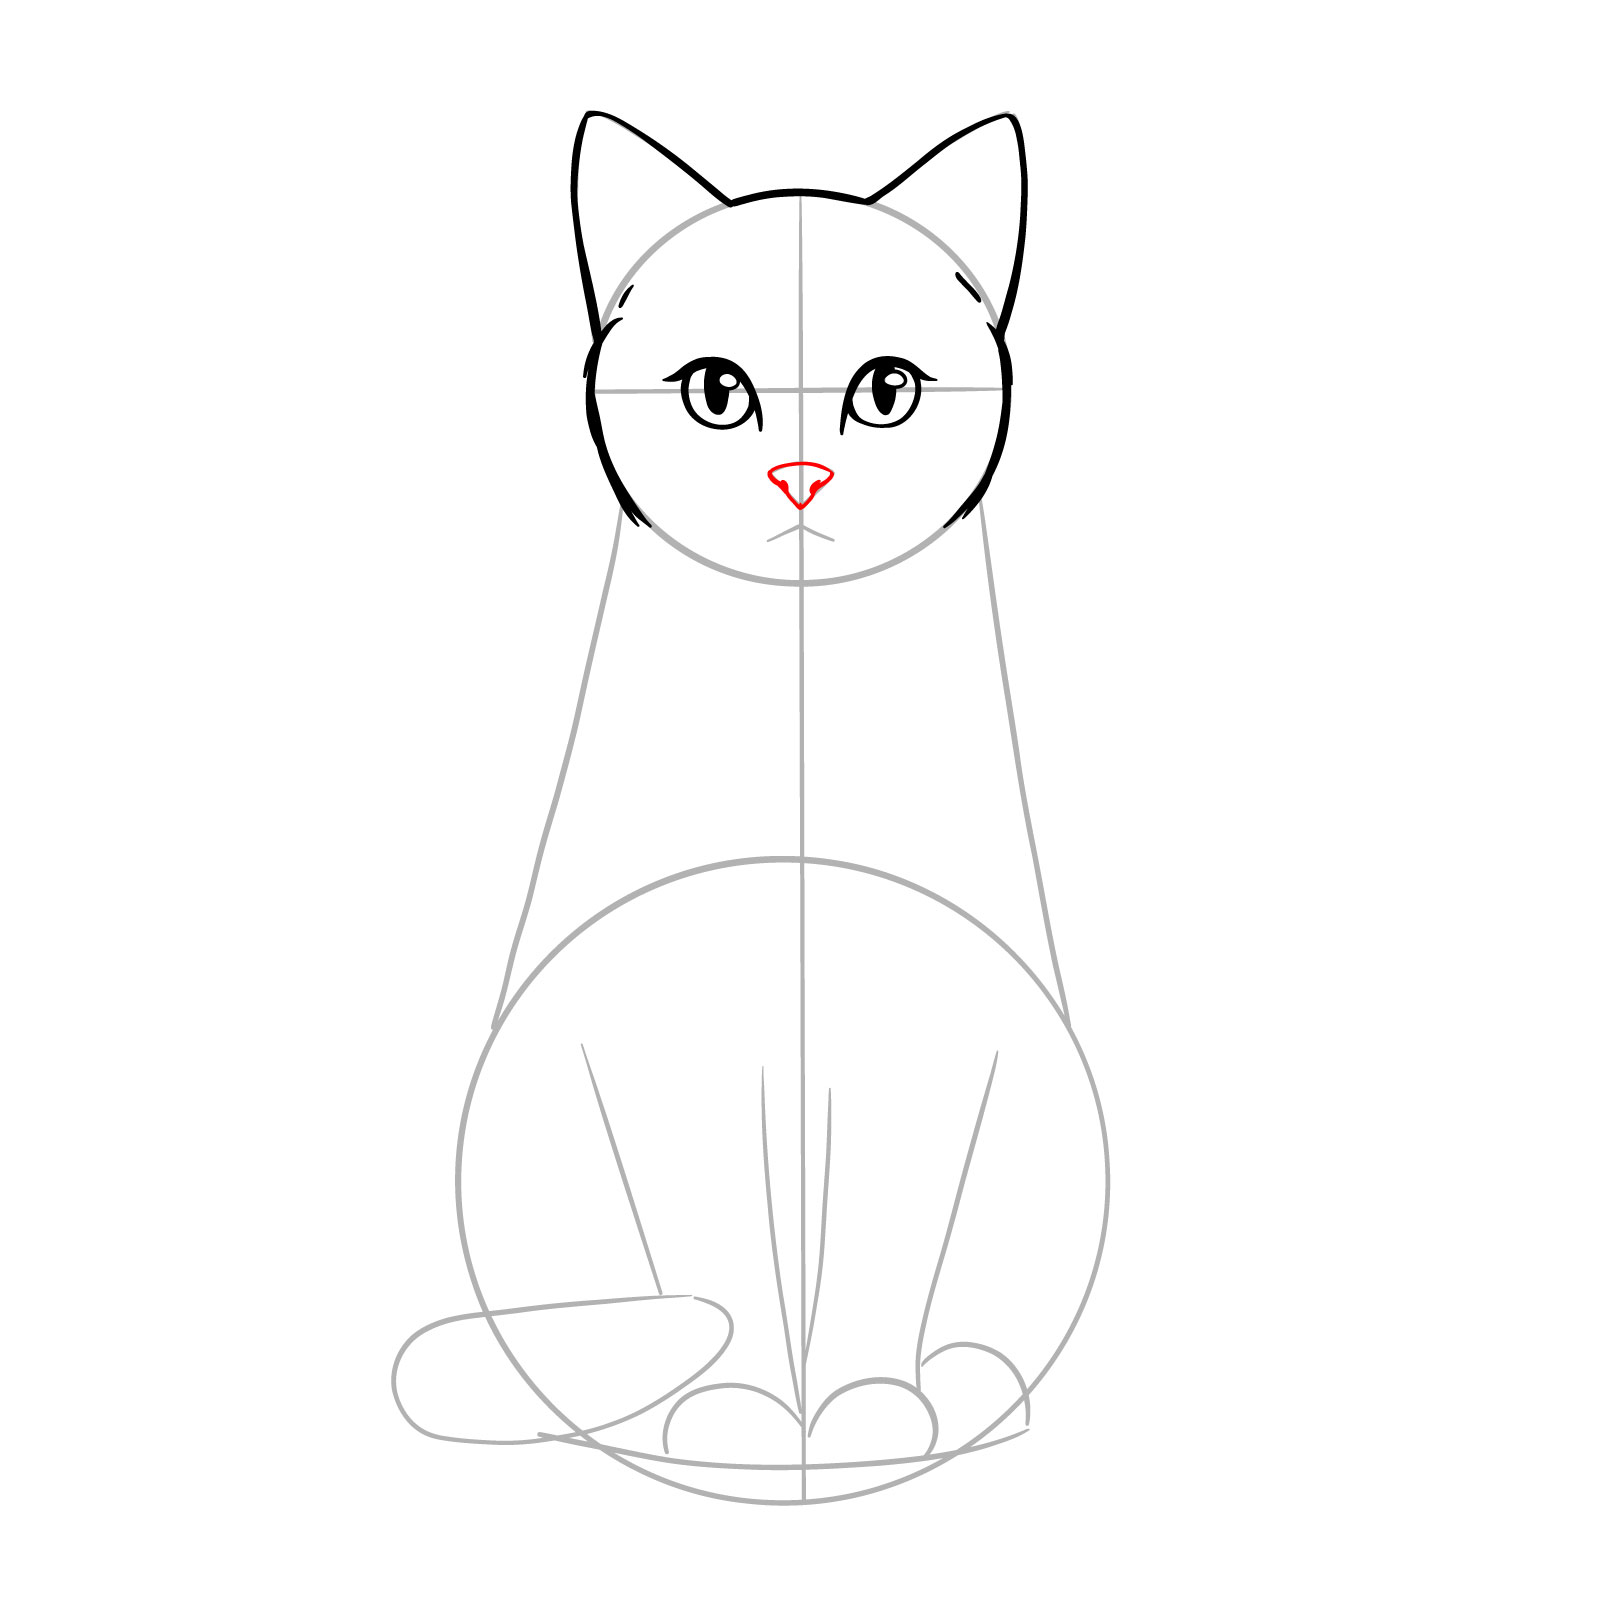
Step 08 – Sketch the guy ’ sec mouth , make the chin and whisker pads , and apply short , gentle course to suggest a fur texture . This technique avoid the appearance of smooth , unnatural lines , adding a sense of realism to the drawing
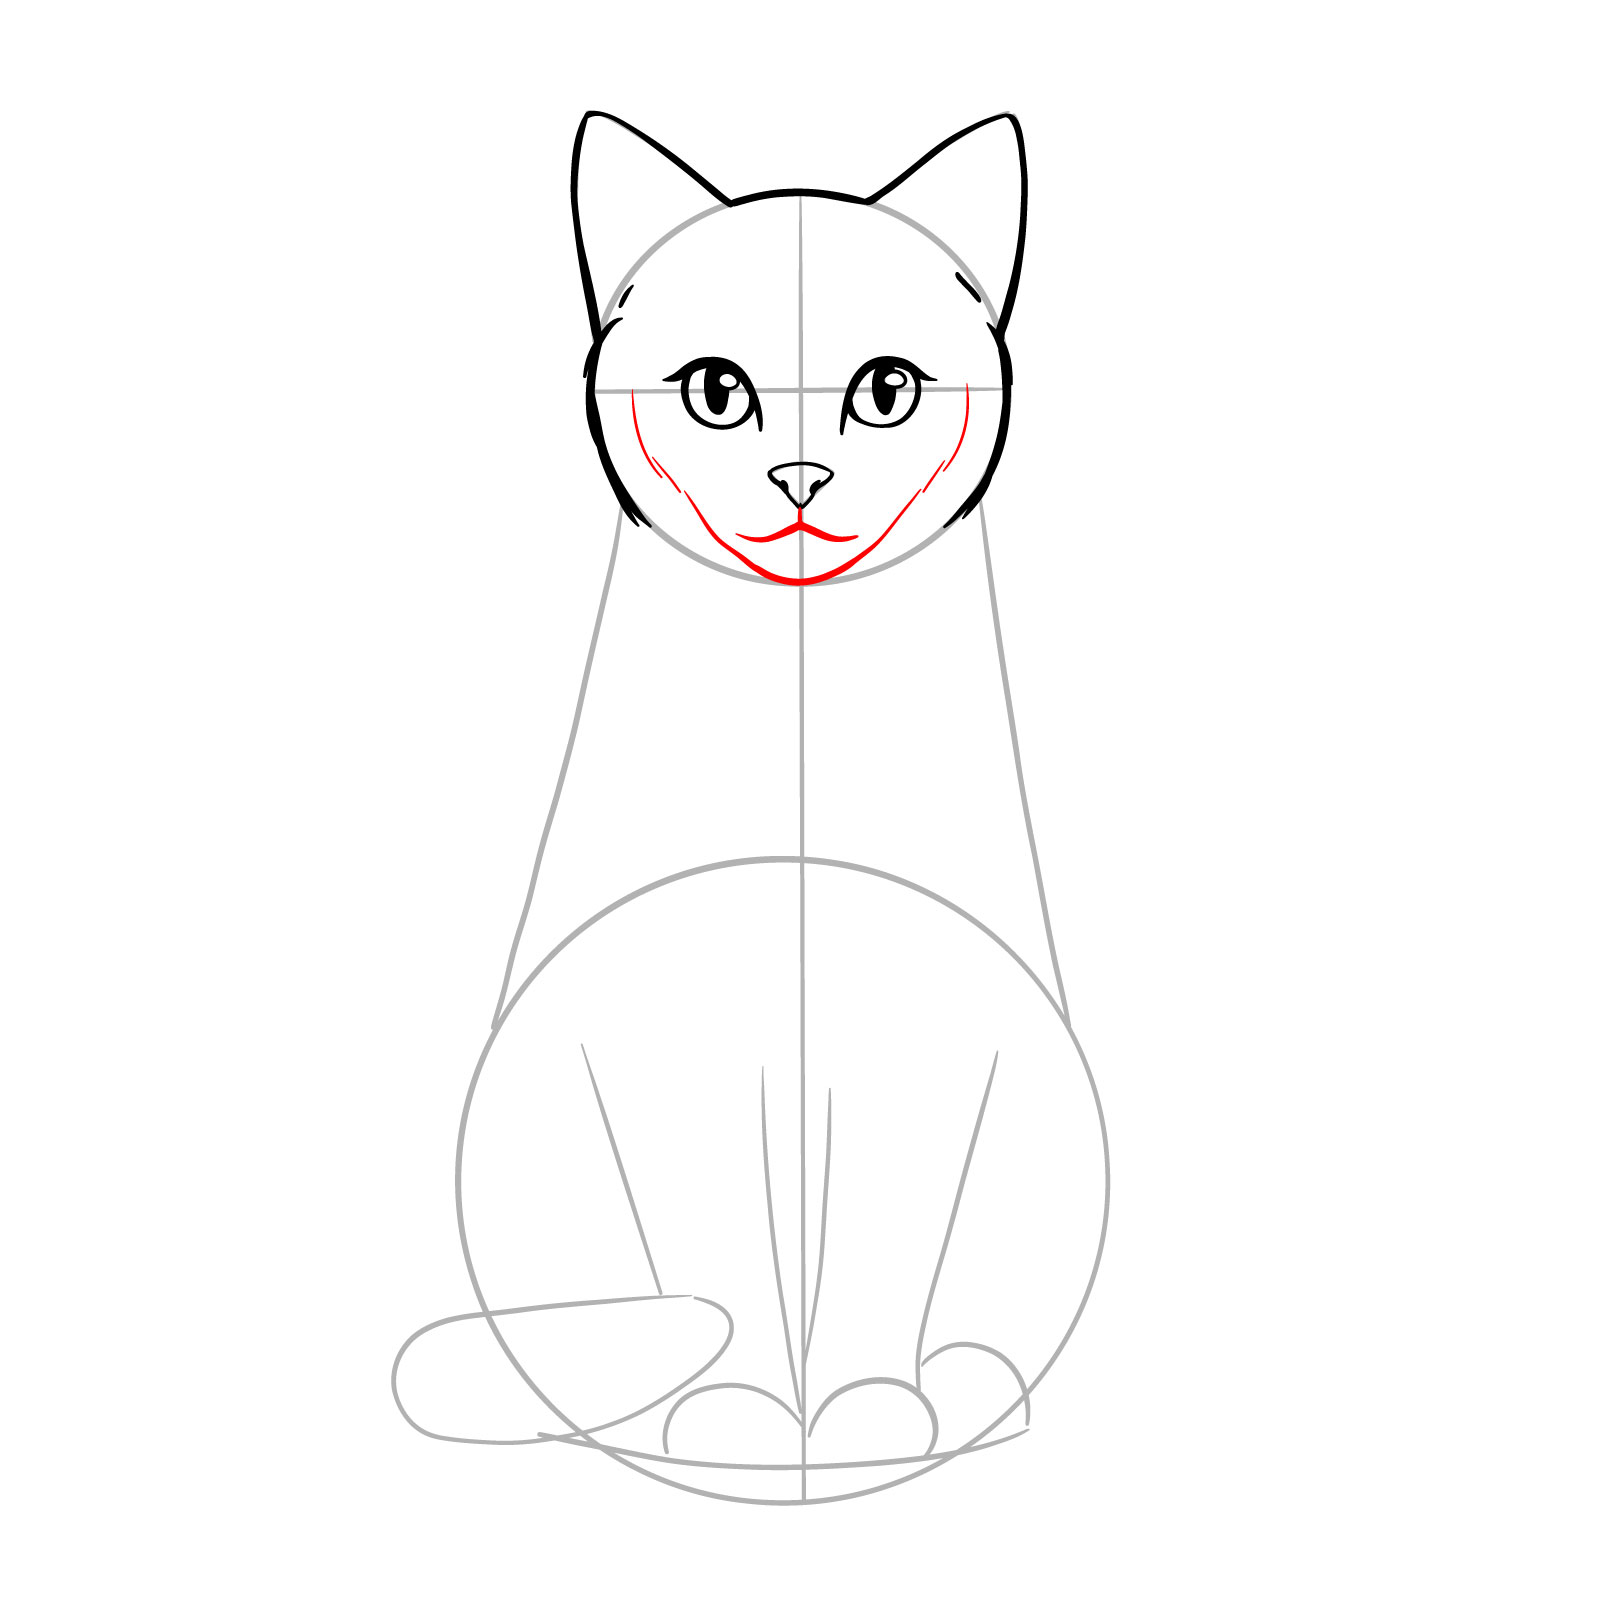
Pace 09 – Refine the sphere around the eyes by lend more defined lines to illustrate the cat ’ sec gaze . Insert inner lines within the ears to give some depth
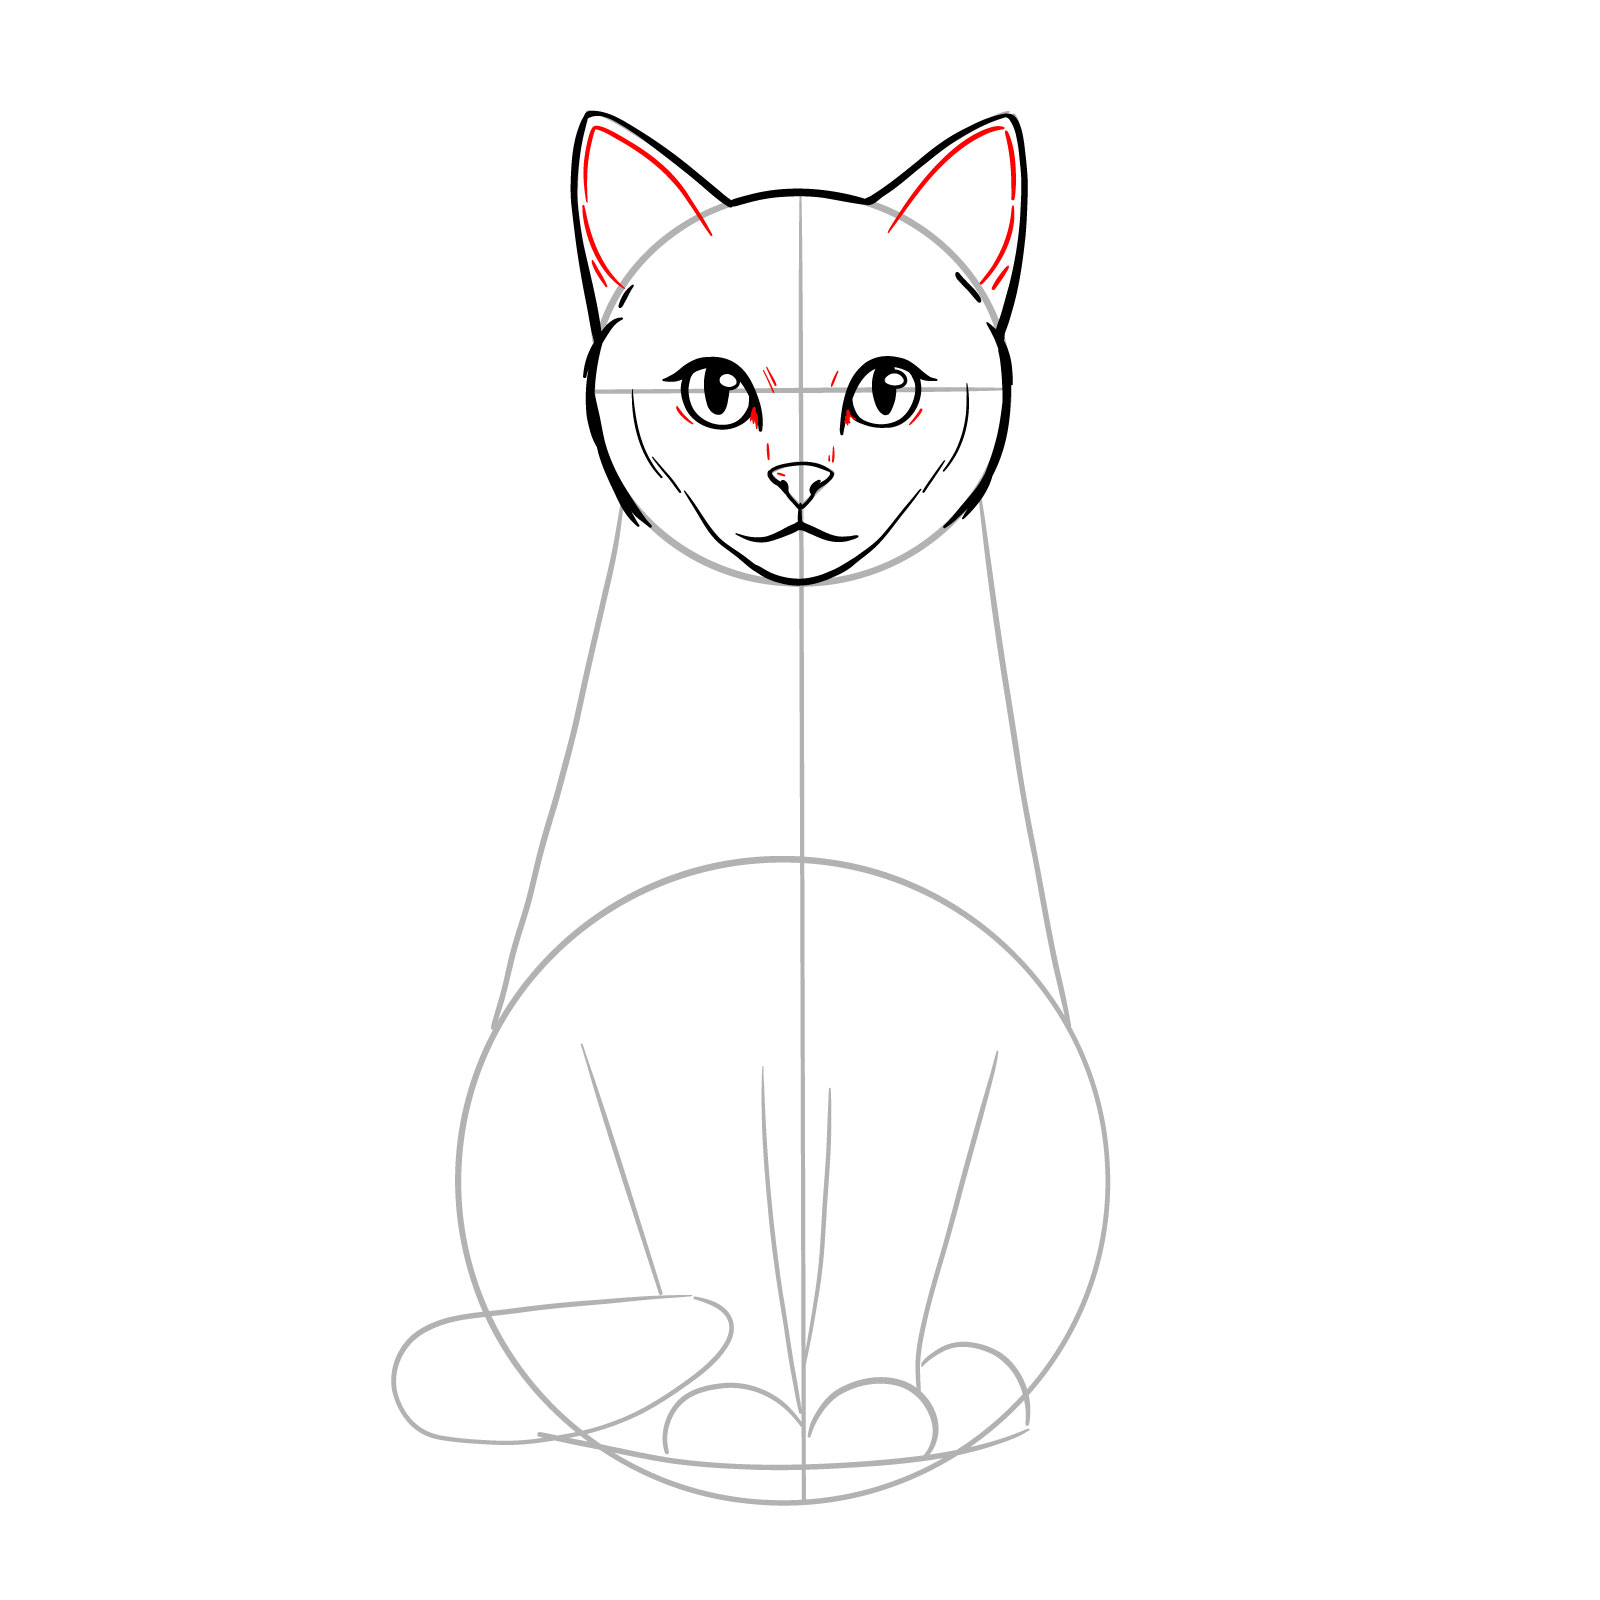
Measure 10 – Draw beard hold out from the muzzle and add fine line above the eyes to stand for the fine hair in that sphere . Include fur details within the ears to make a soft texture that capture the essence of a cat ’ s ears
Measure 11 – Sketch the neck , transitioning smoothly into the upper body to establish the guy ’ s position
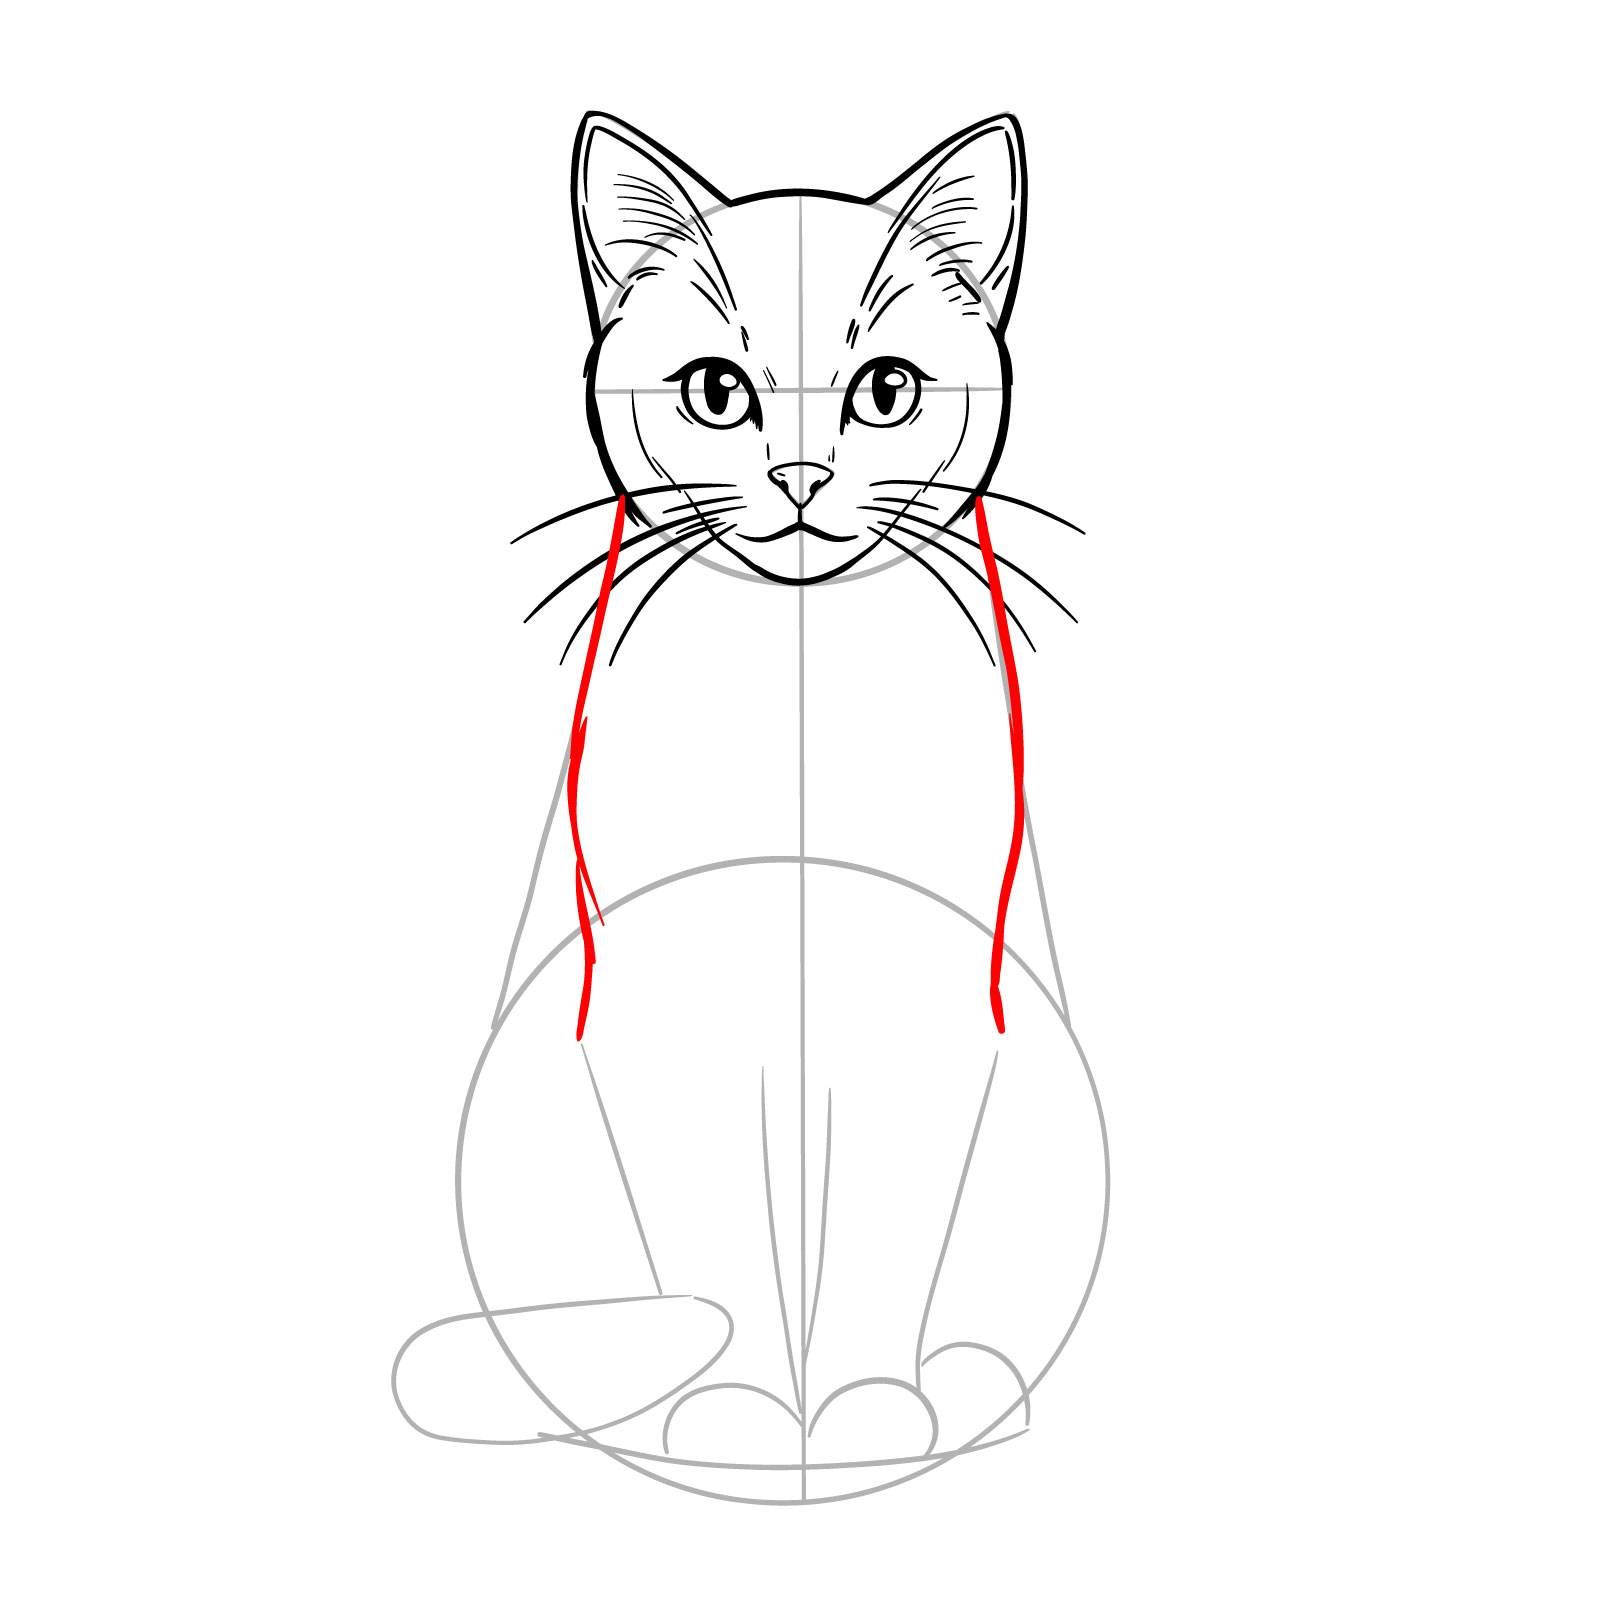
Measure 12 – Finalize the outline of the guy ’ sec torso , veer down to the stem where the tail start . Outline the ass with a smooth , flowing lines
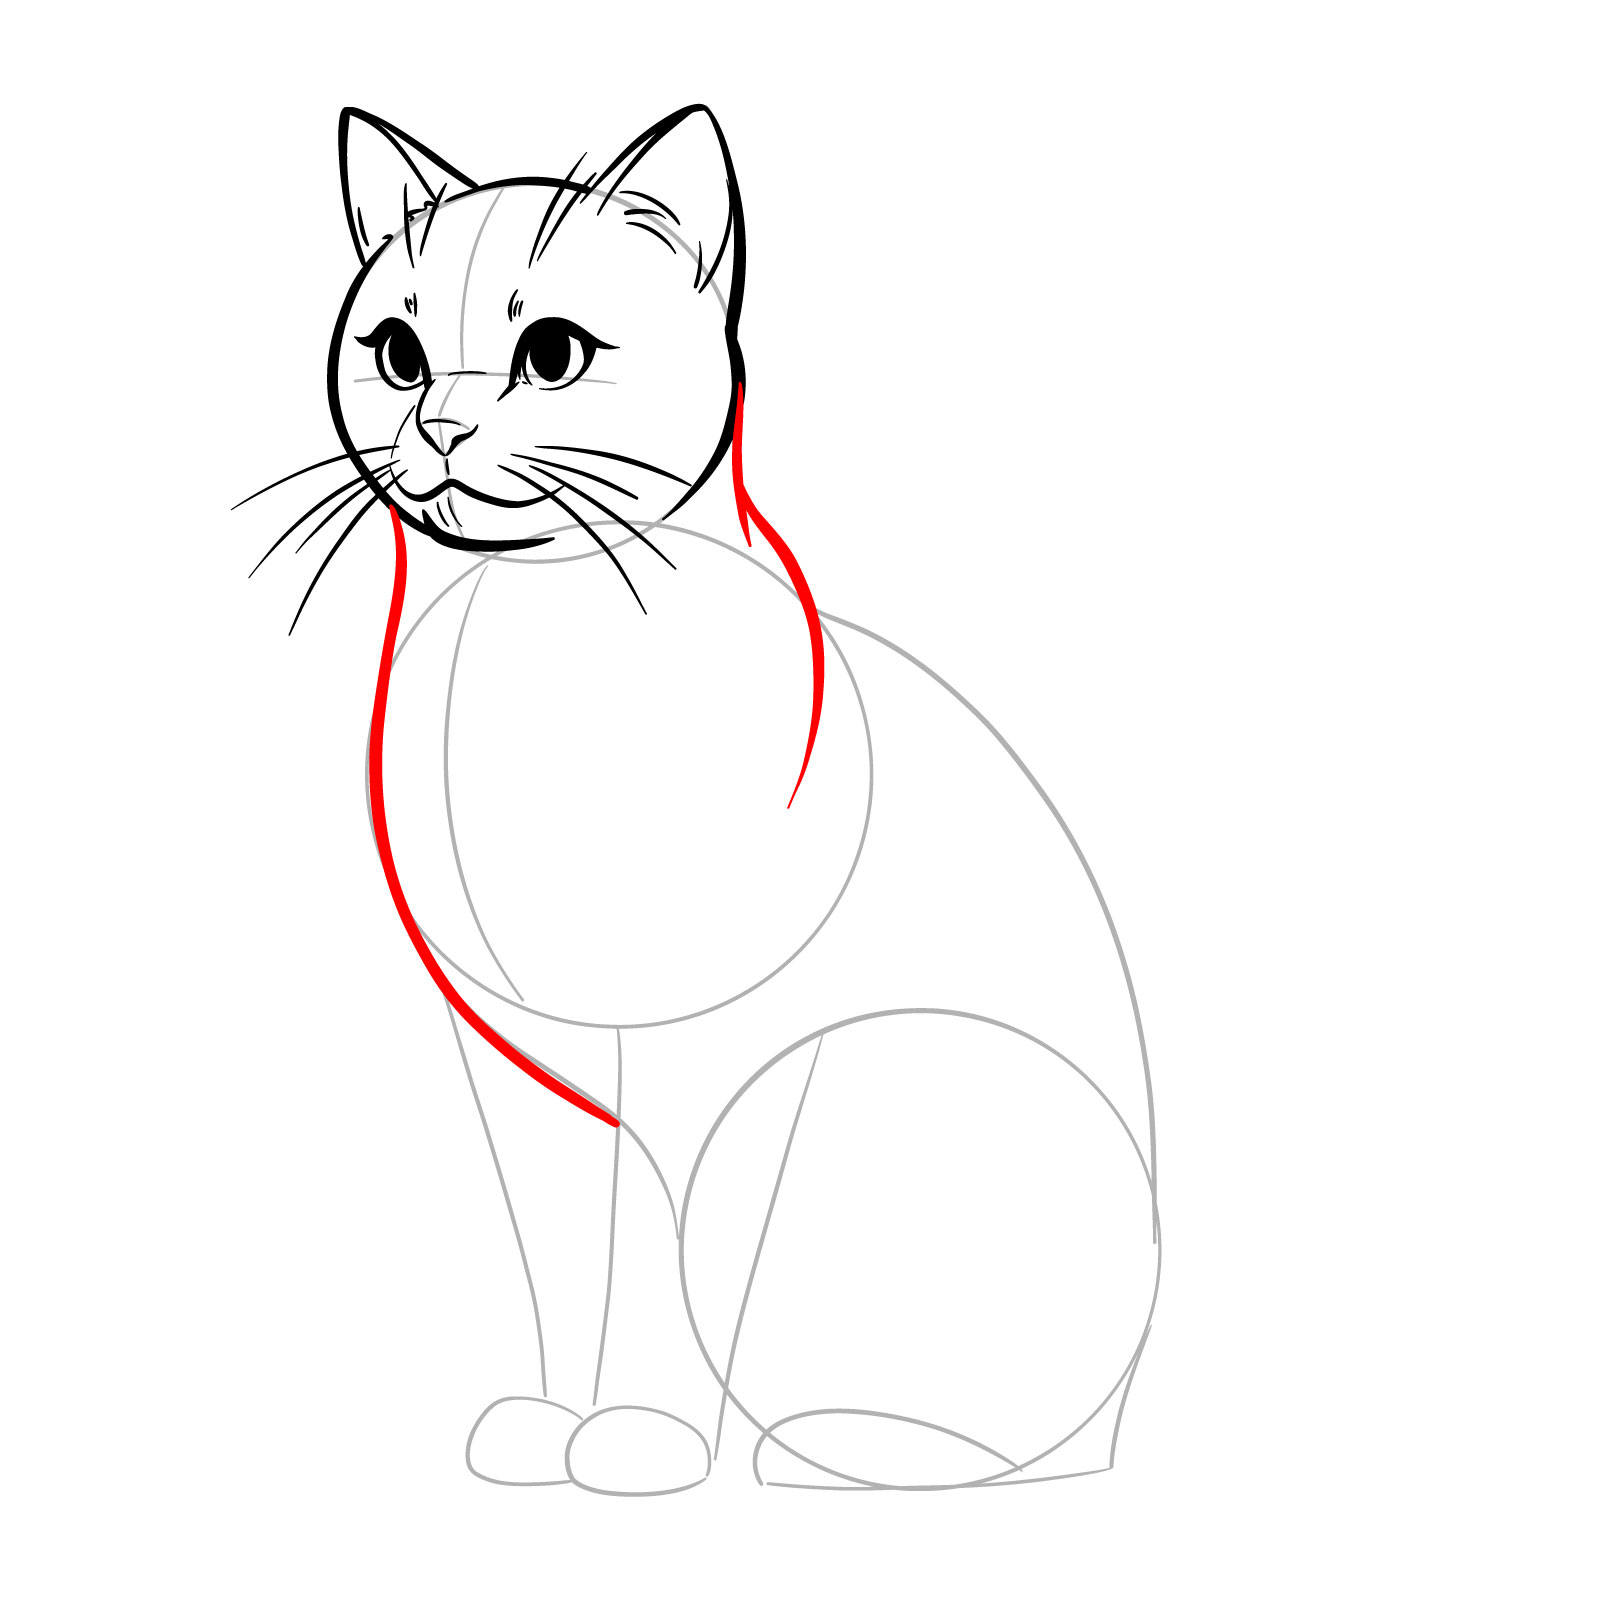
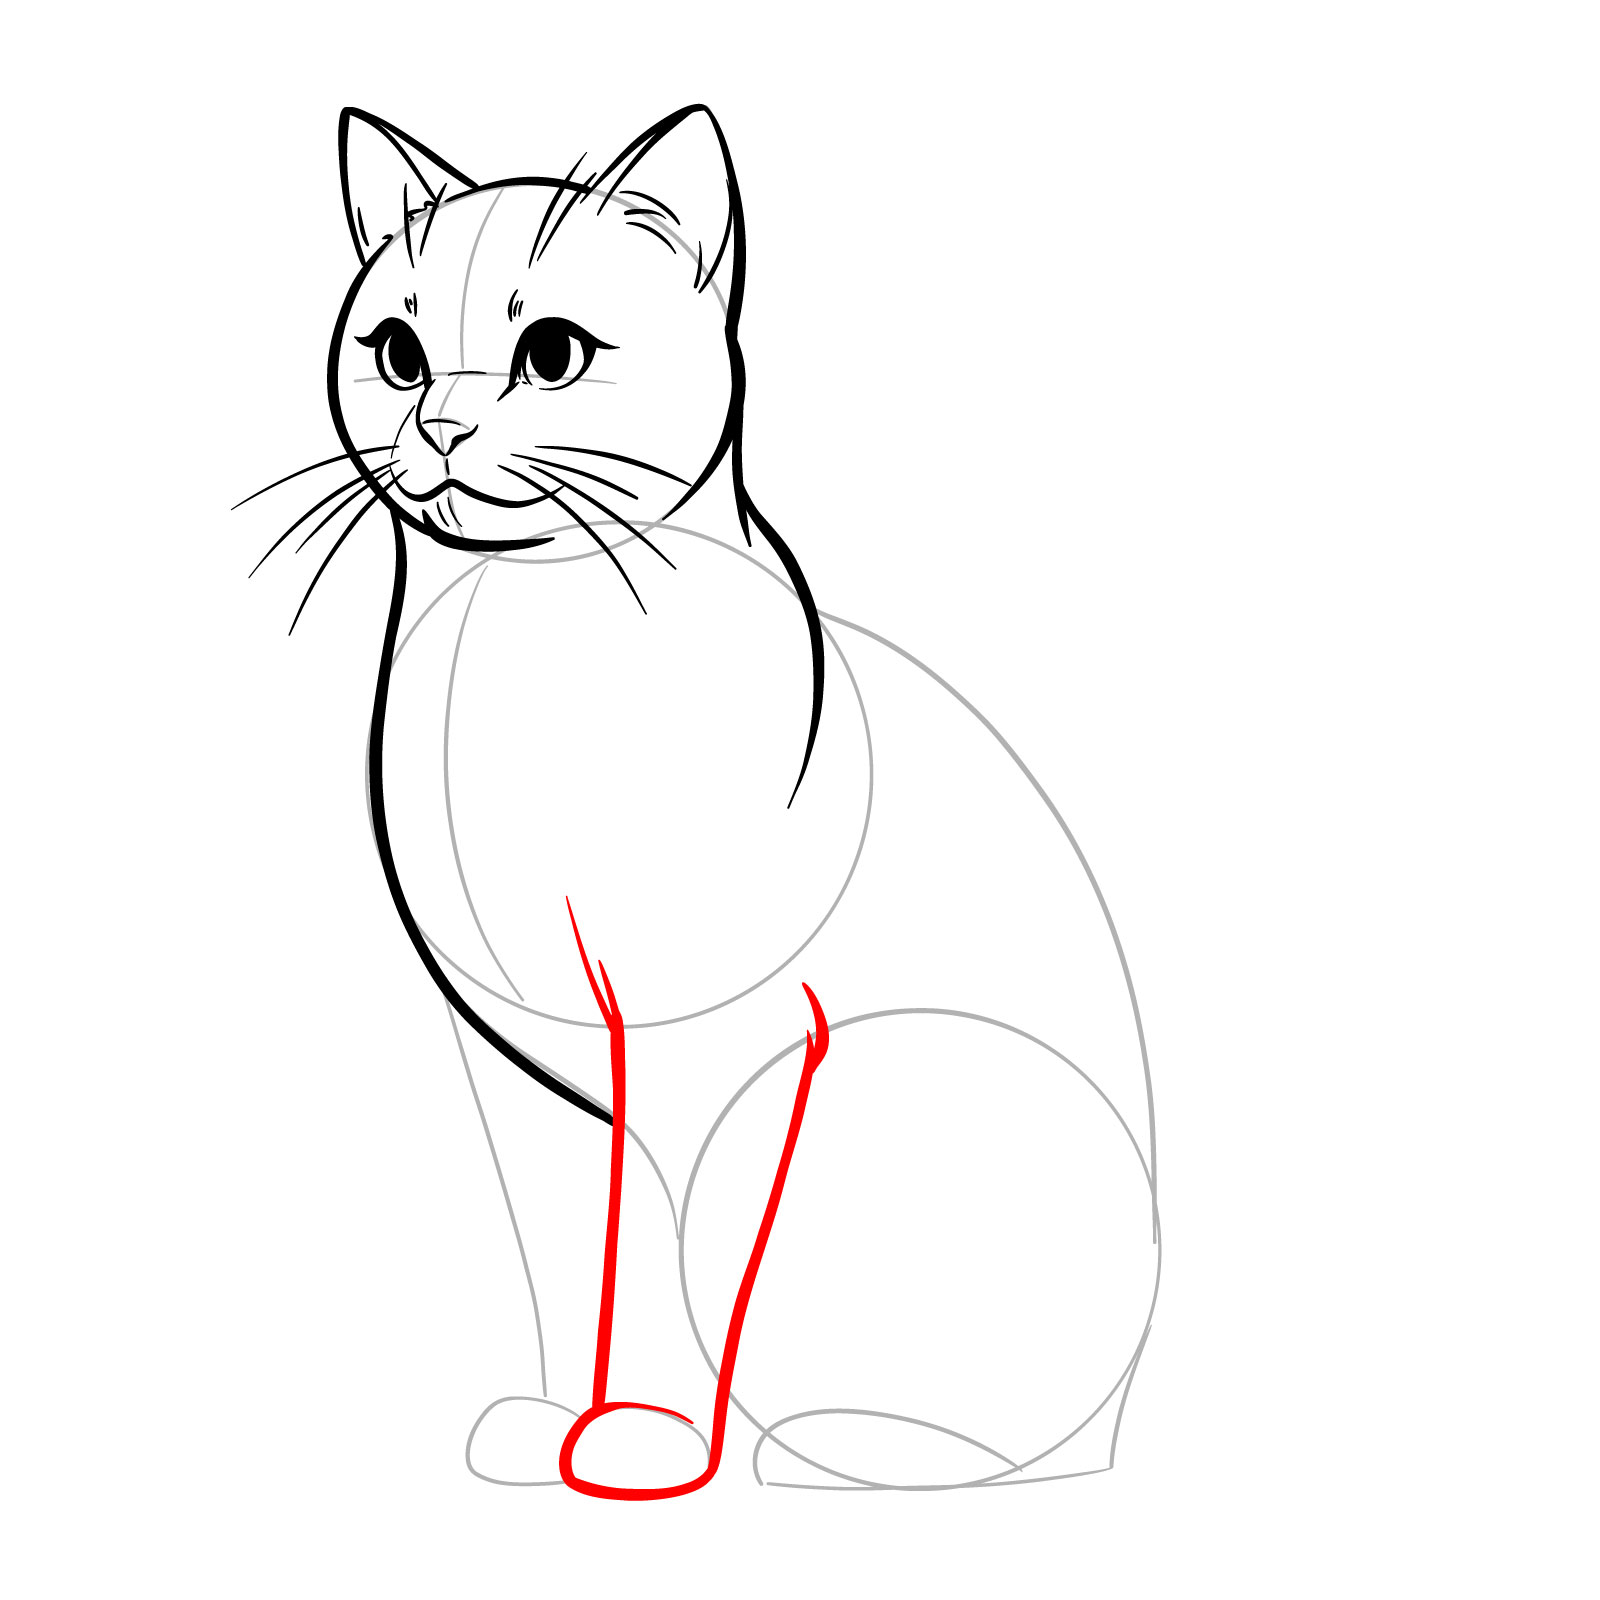
Pace 13 – Begin shaping the two front branch , assure they equal proportionate and symmetrical

Step 14 – Draw the second side of the guy ’ s torso and outline the back legs , tucked comfortably underneath
Step 15 – Separate the paws into individual department , much referred to as toes or hand pads , to add realism . Introduce some texture to the ass for a fluffy appearance , which enhances the cat ’ s lifelike look
Pace 16 – Your guide on how to draw a ride cat concludes with a finished drawing , showcasing a calm feline in a presence sitting posture . Review all job for clearness , lend any final touches to fur texture , and ensure the overall symmetry and balance . Accurately erase the basic structural resume if needed . Optionally , ink your resume and erase the pencil lines and sign then .
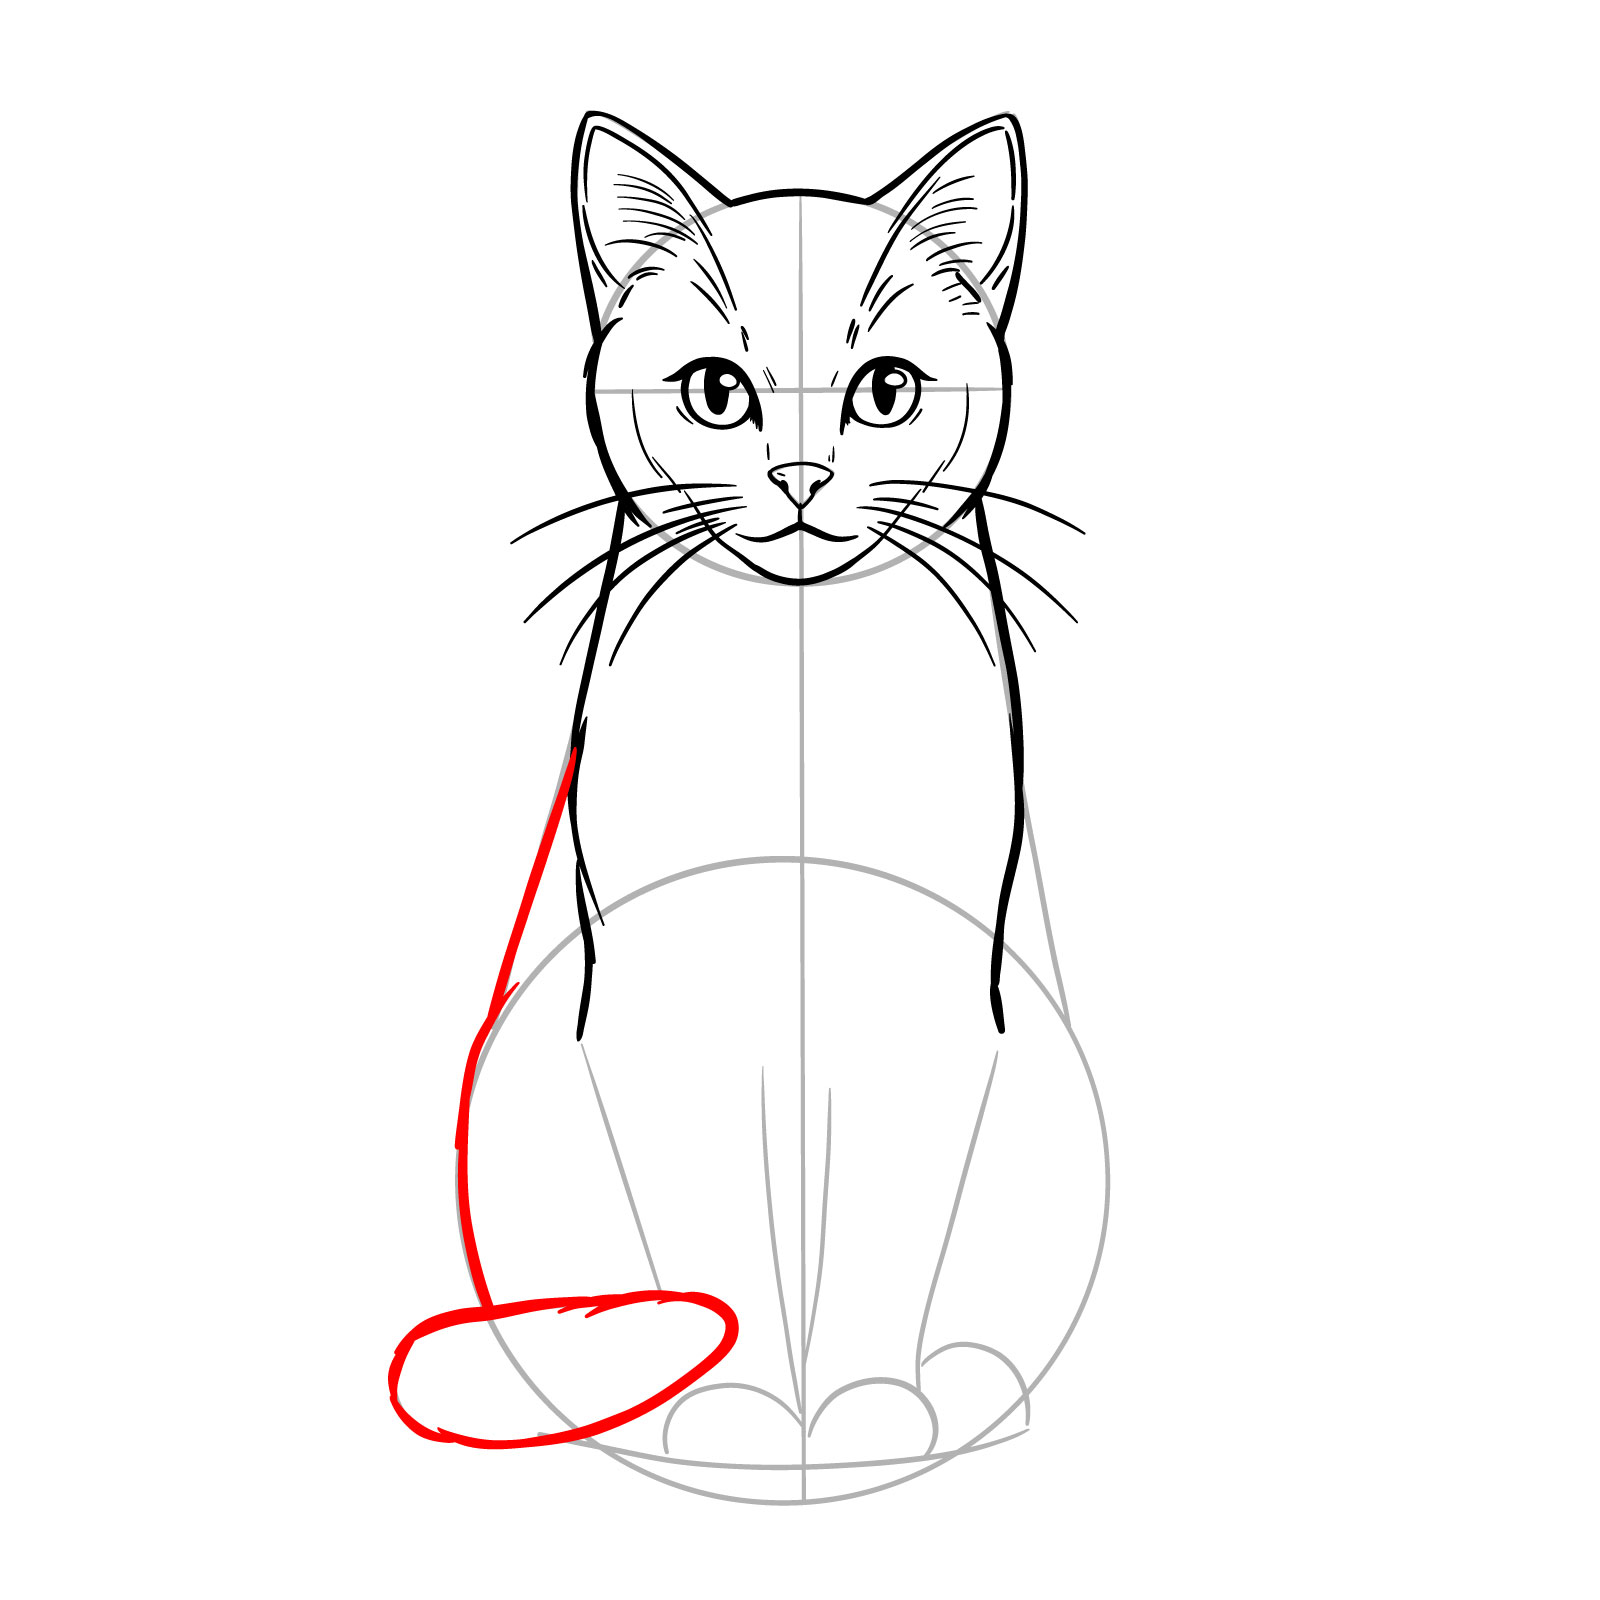
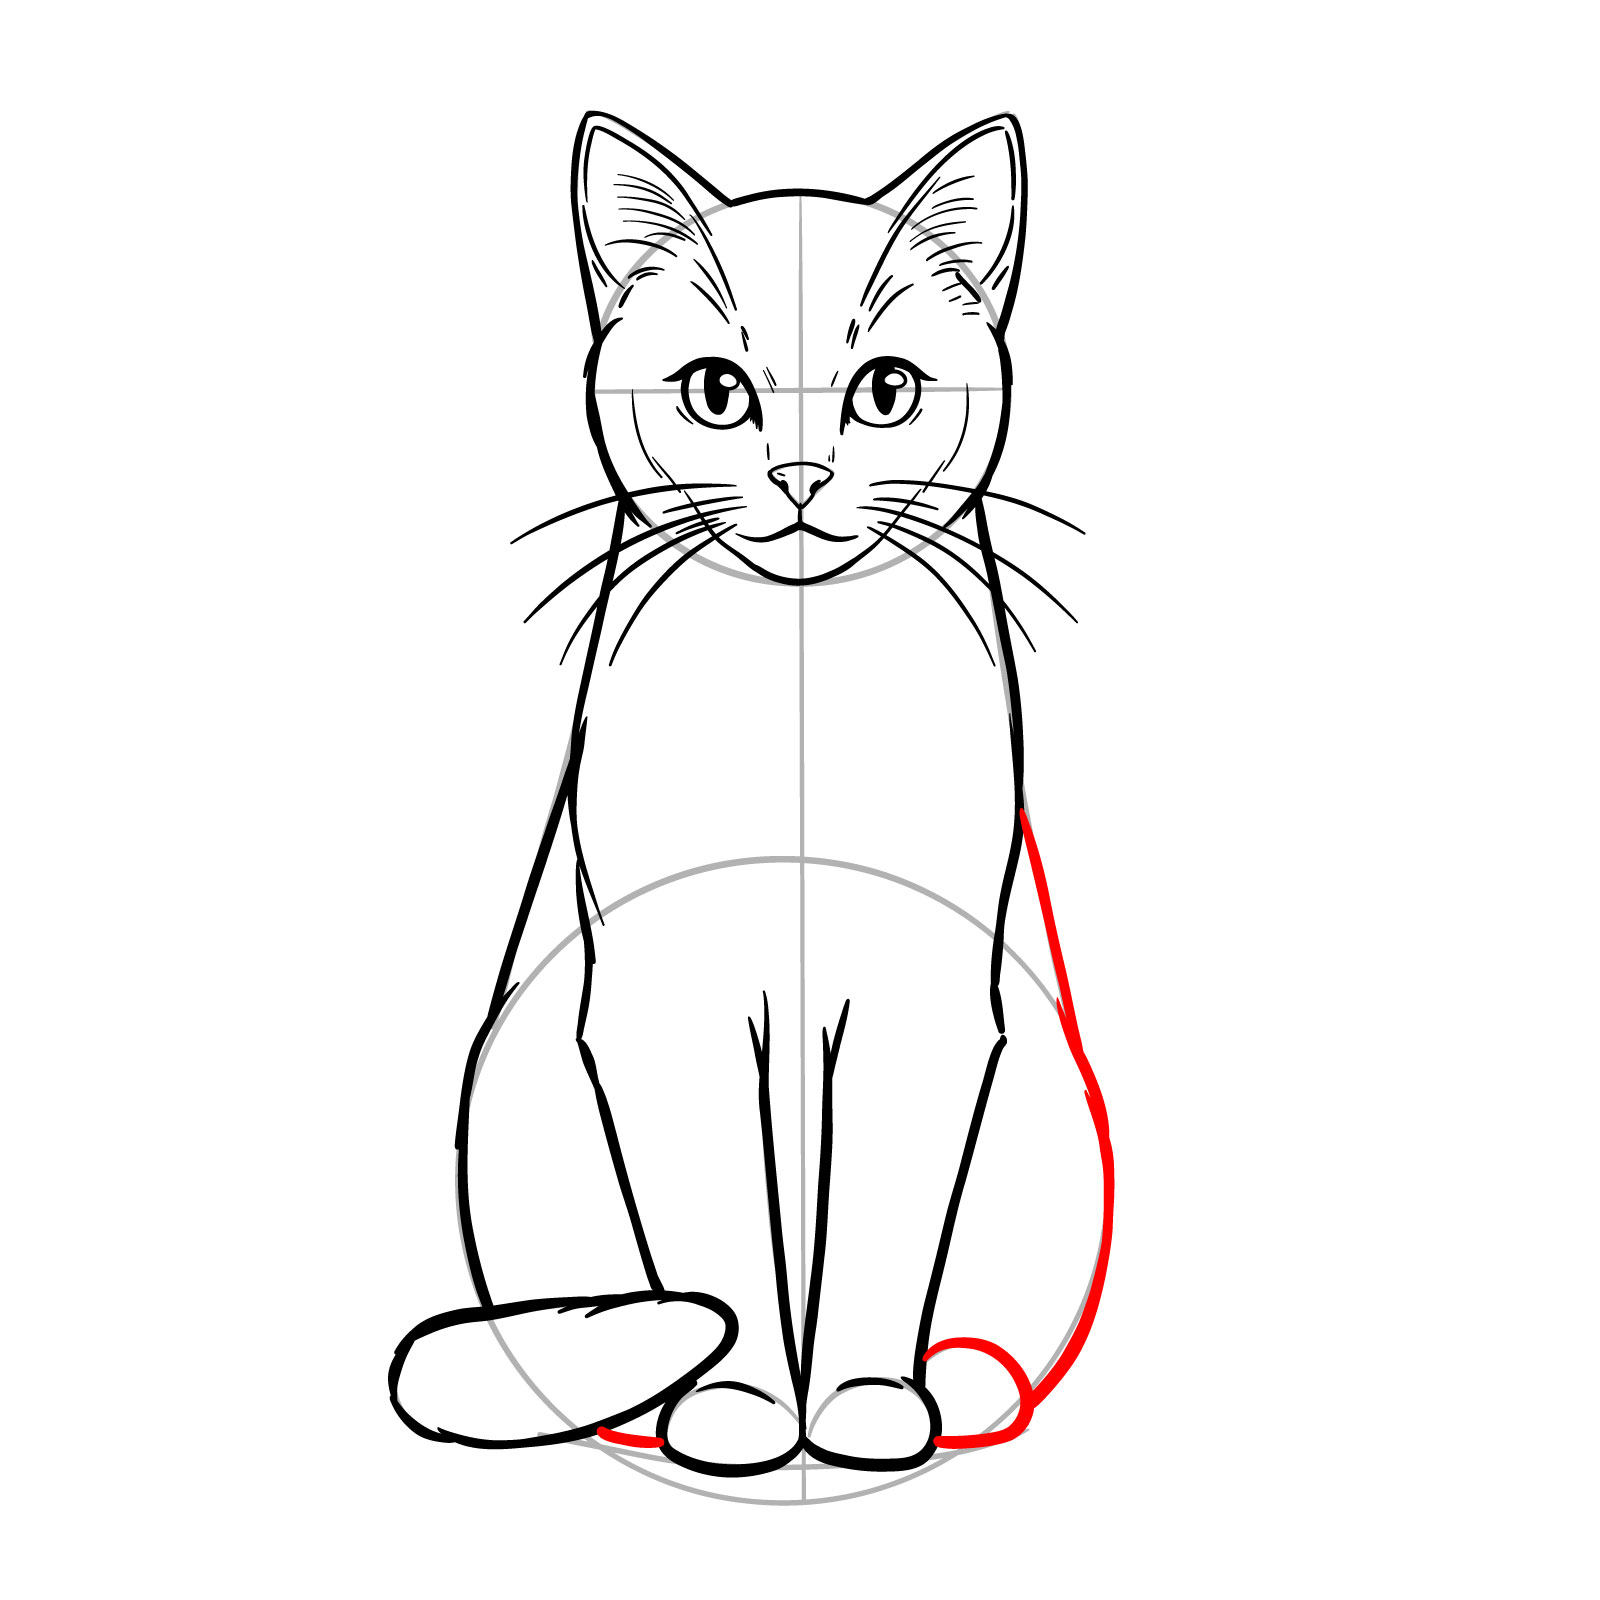
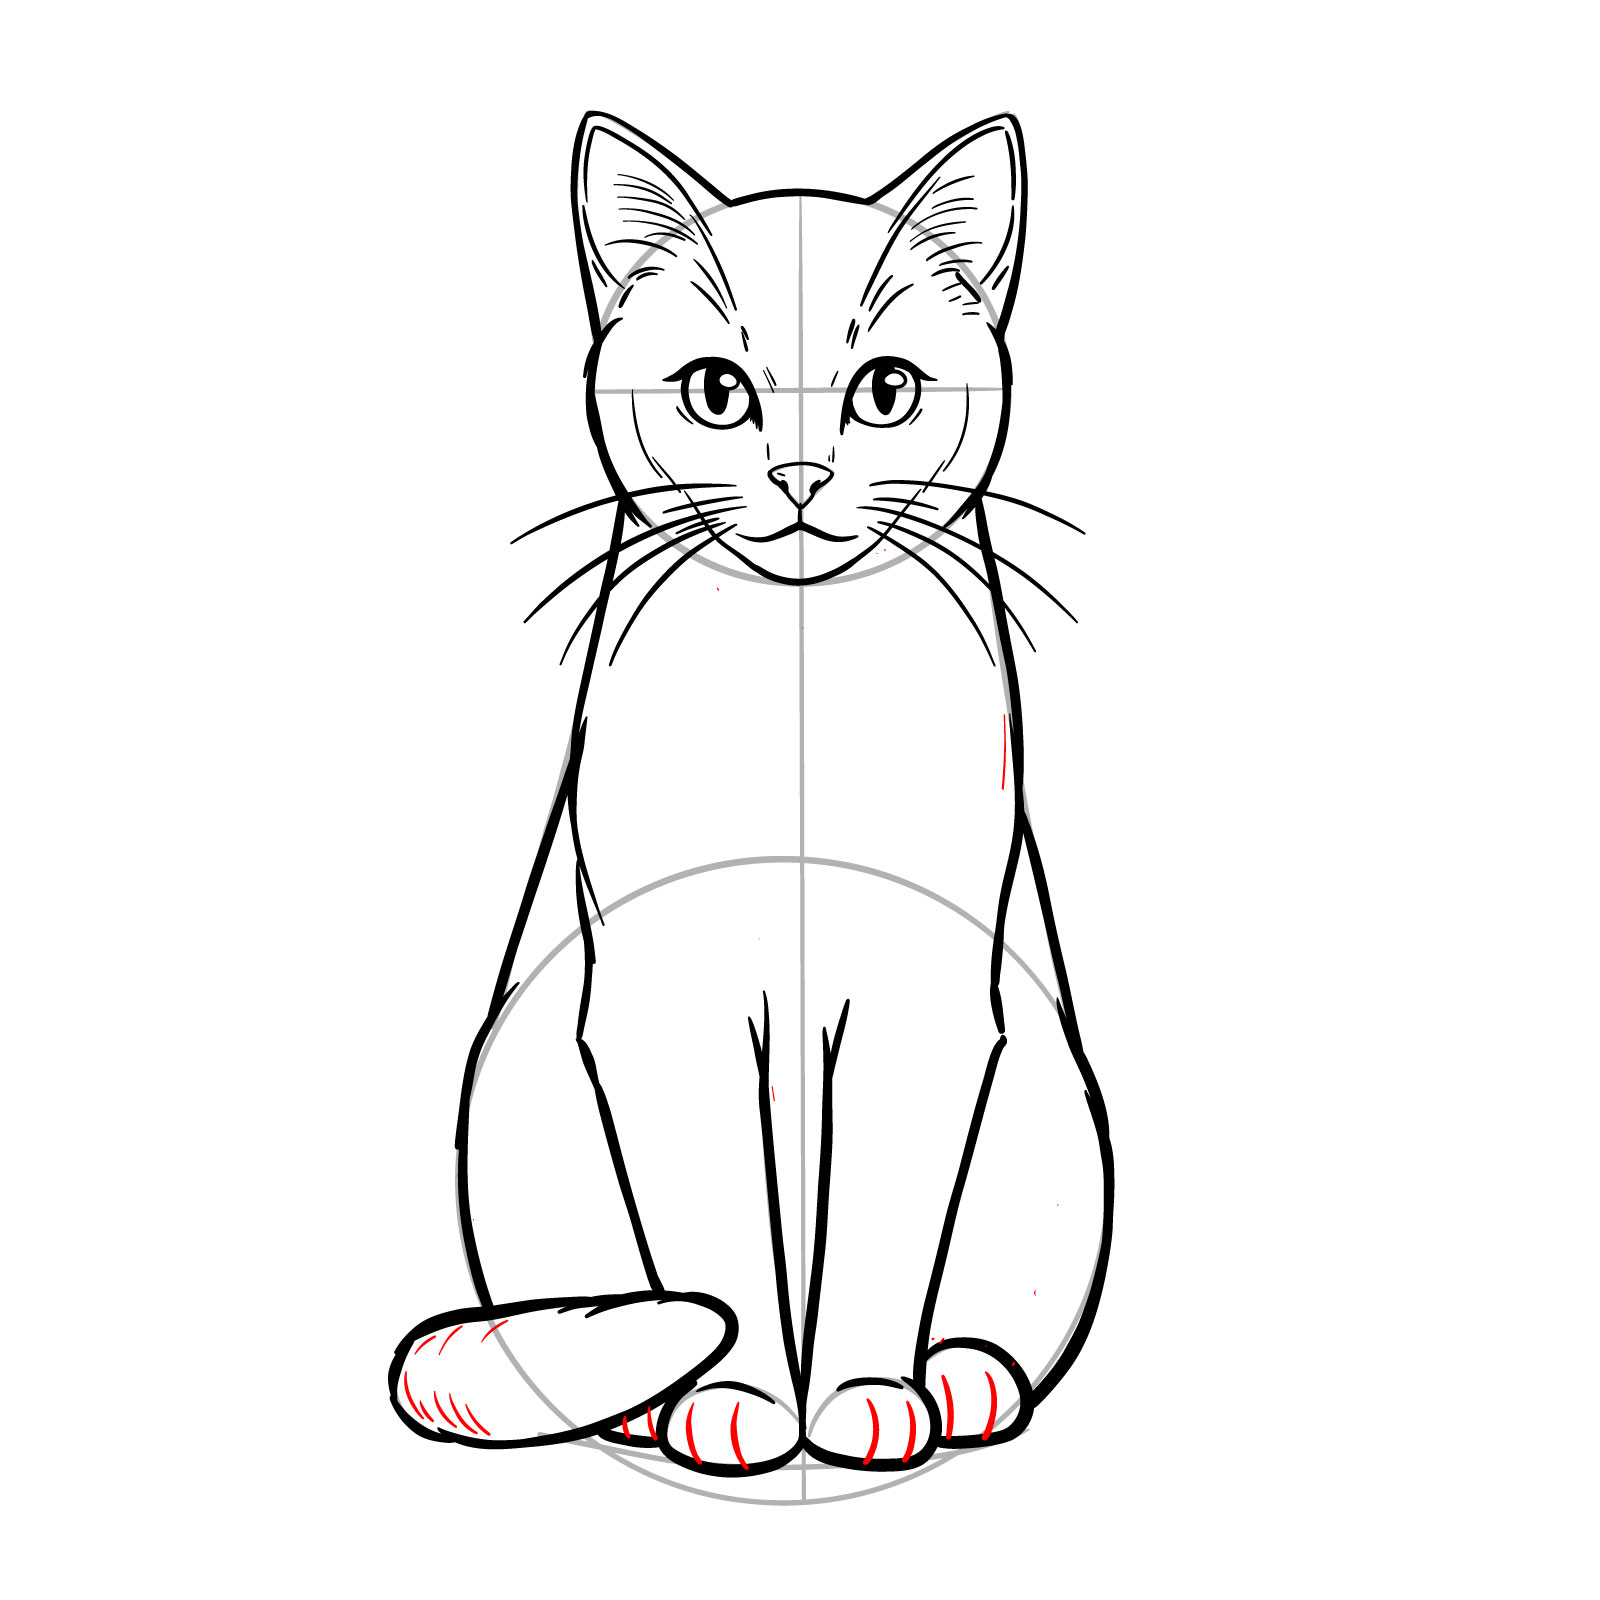
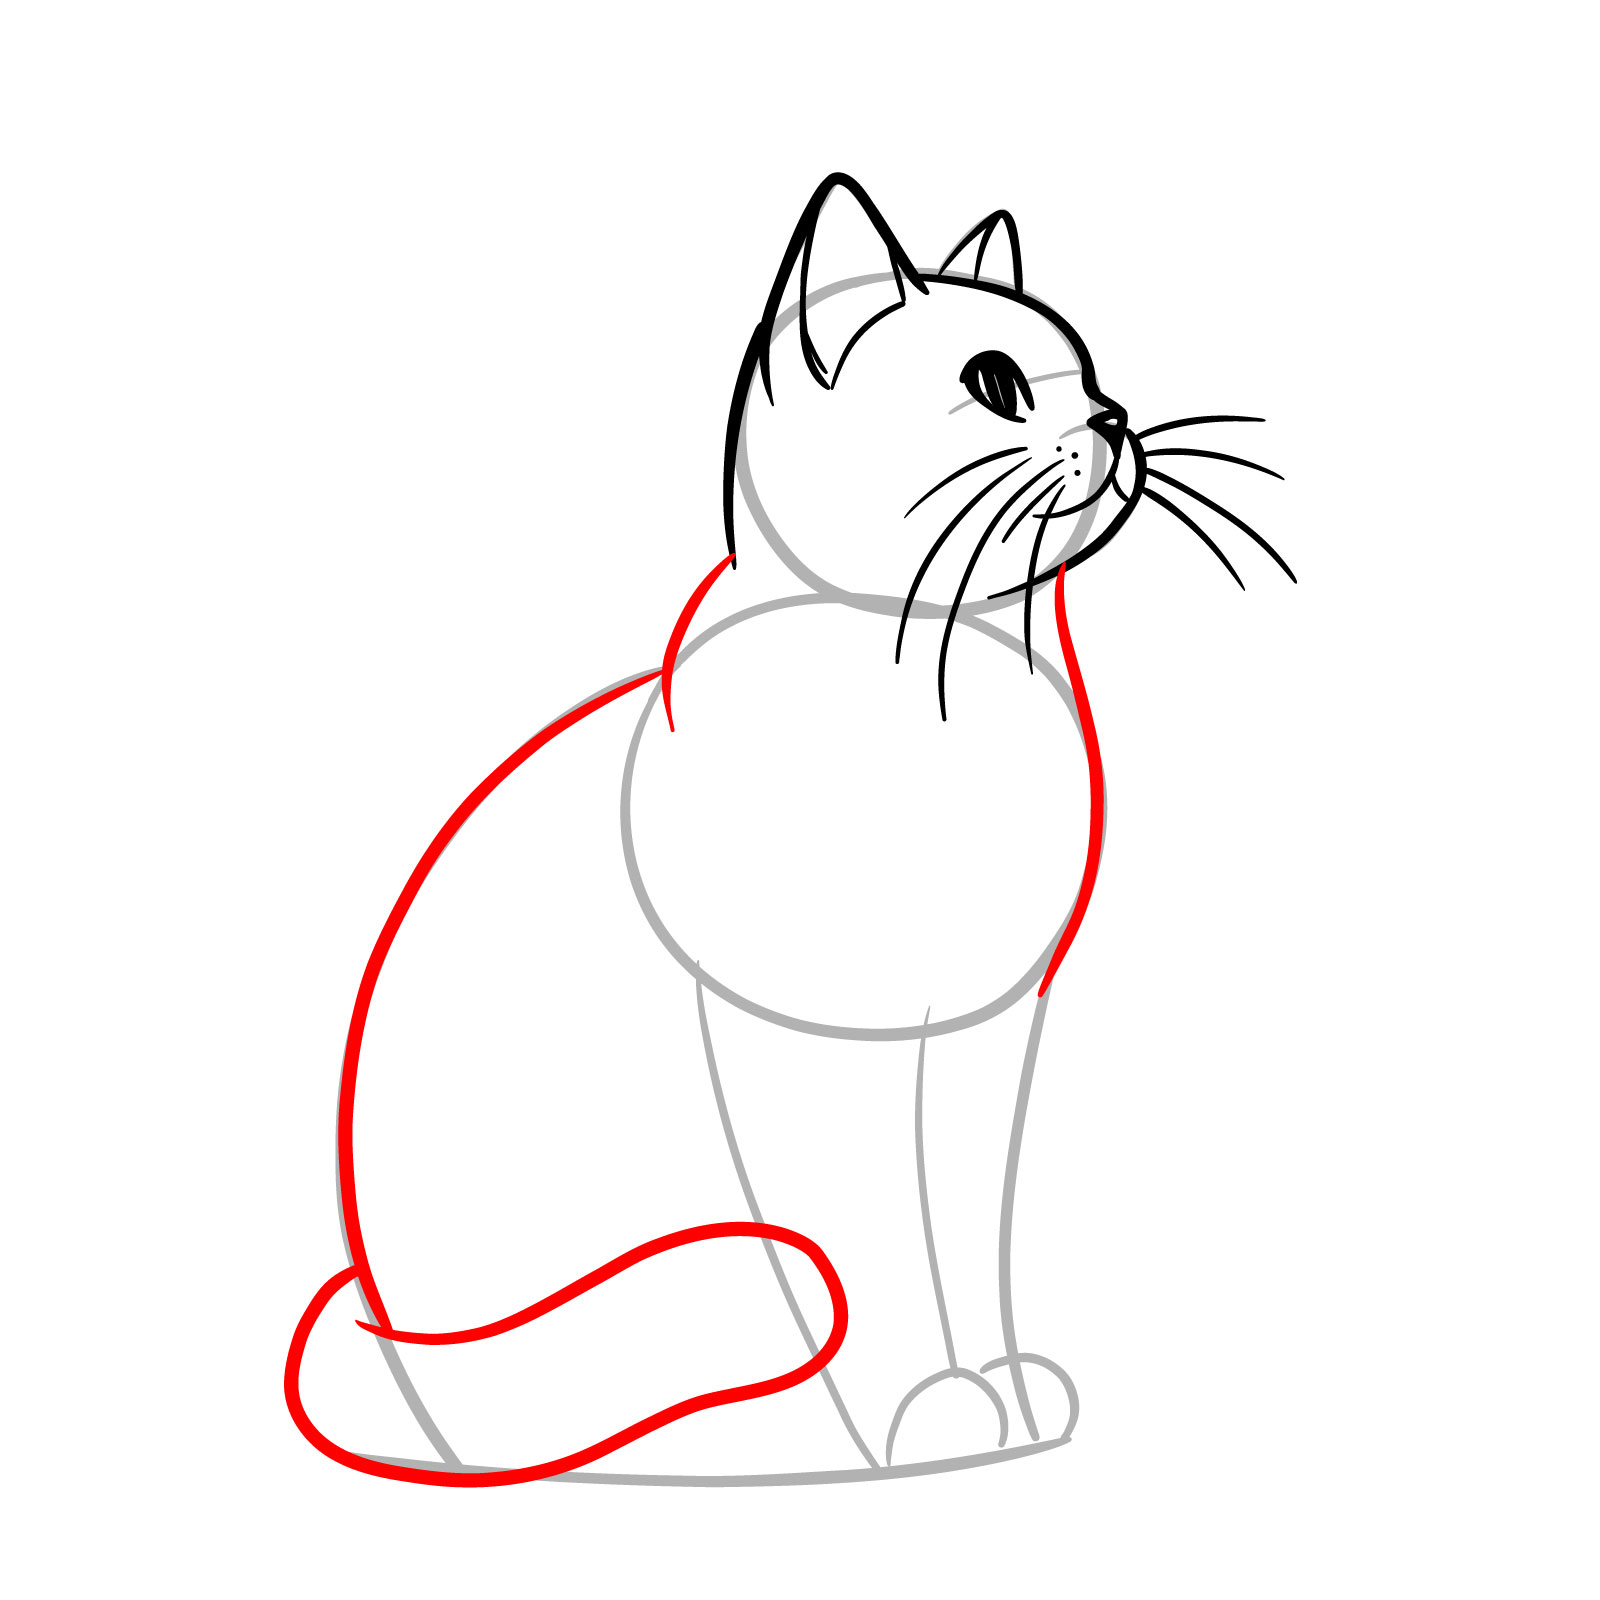
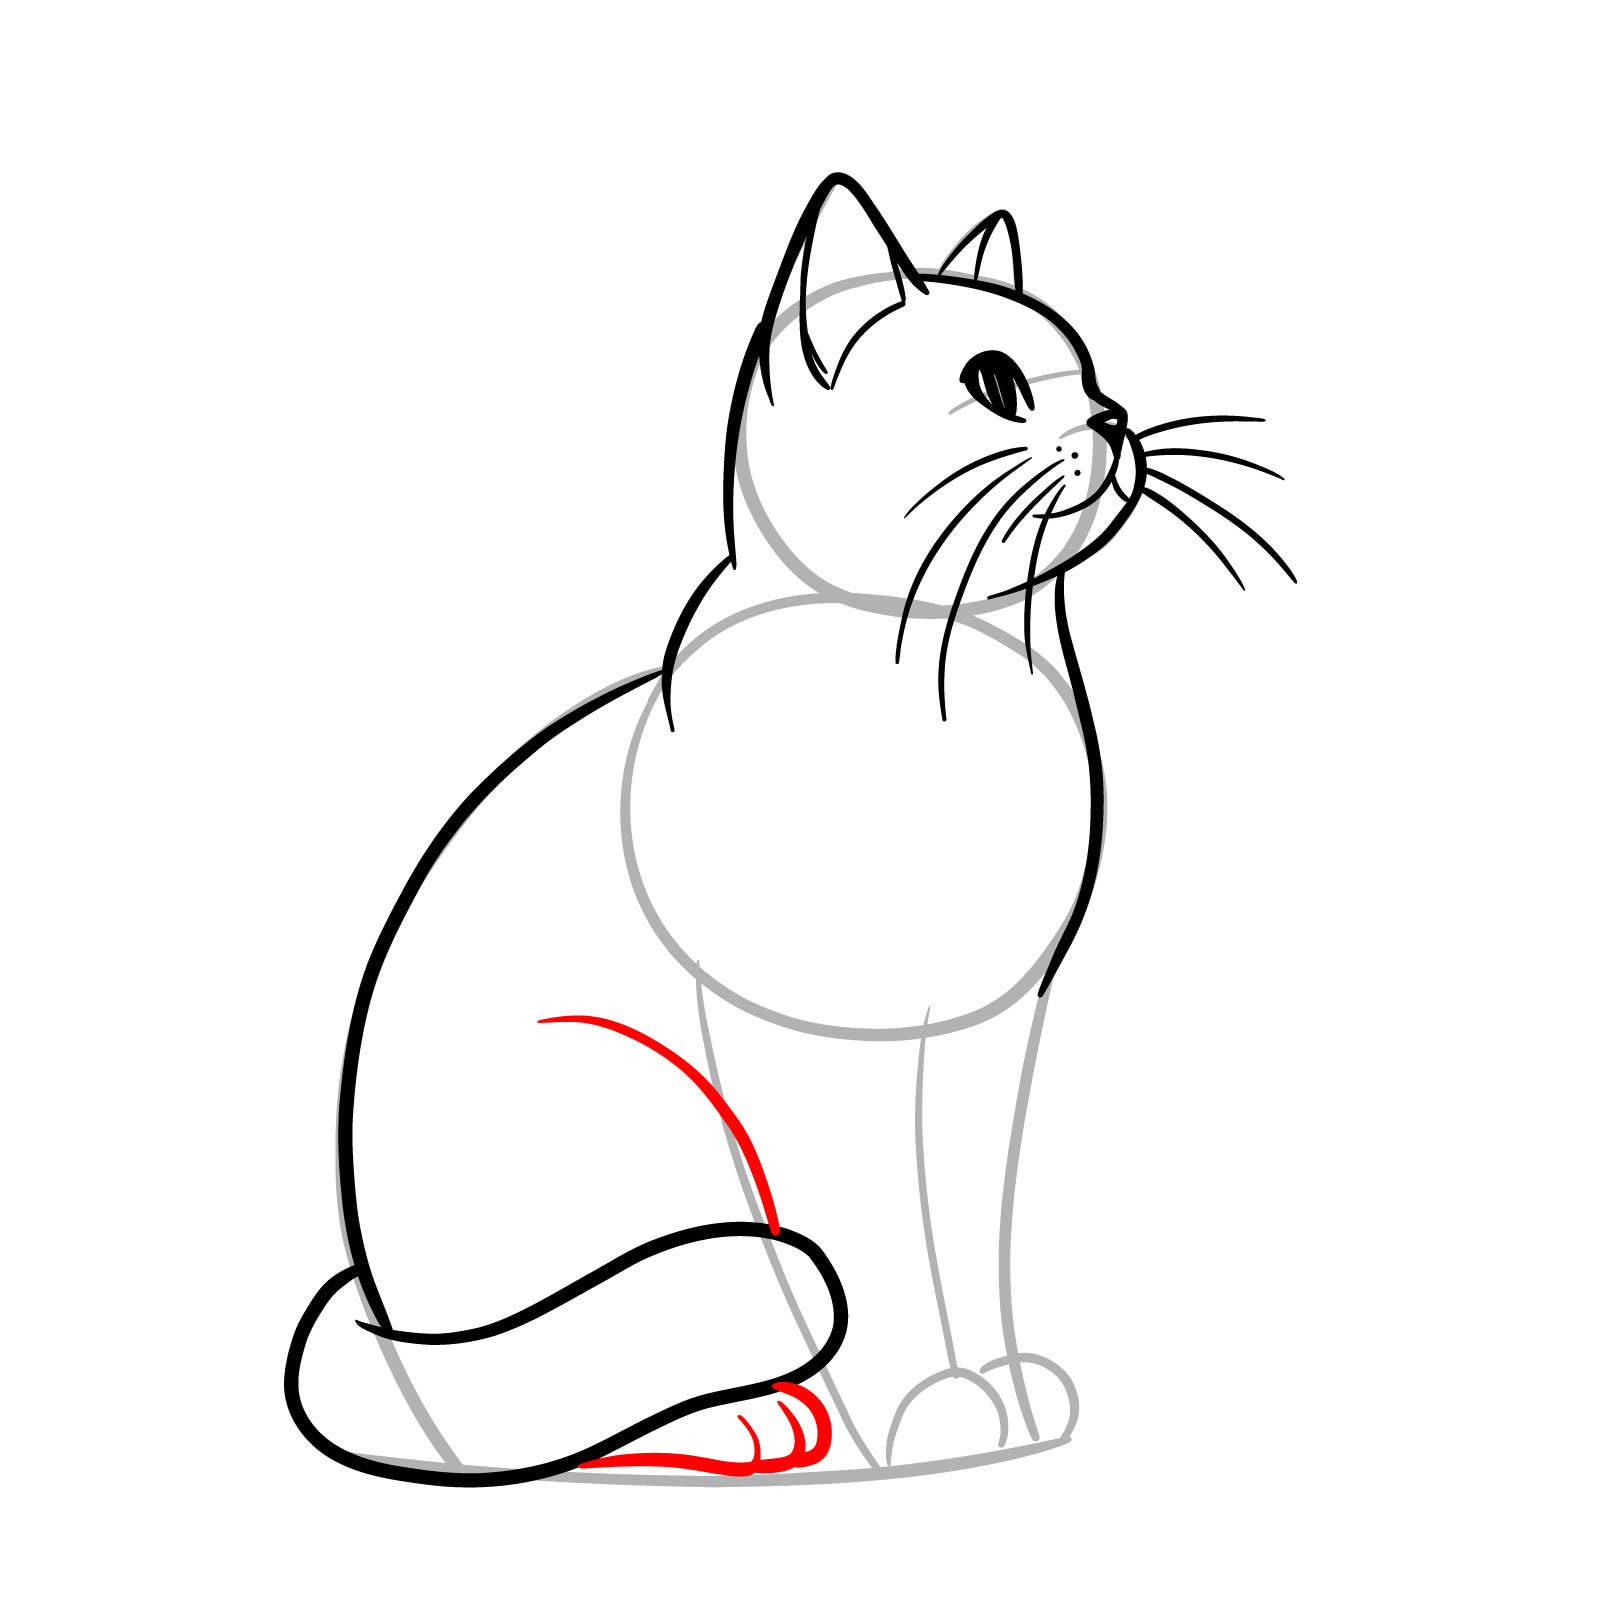
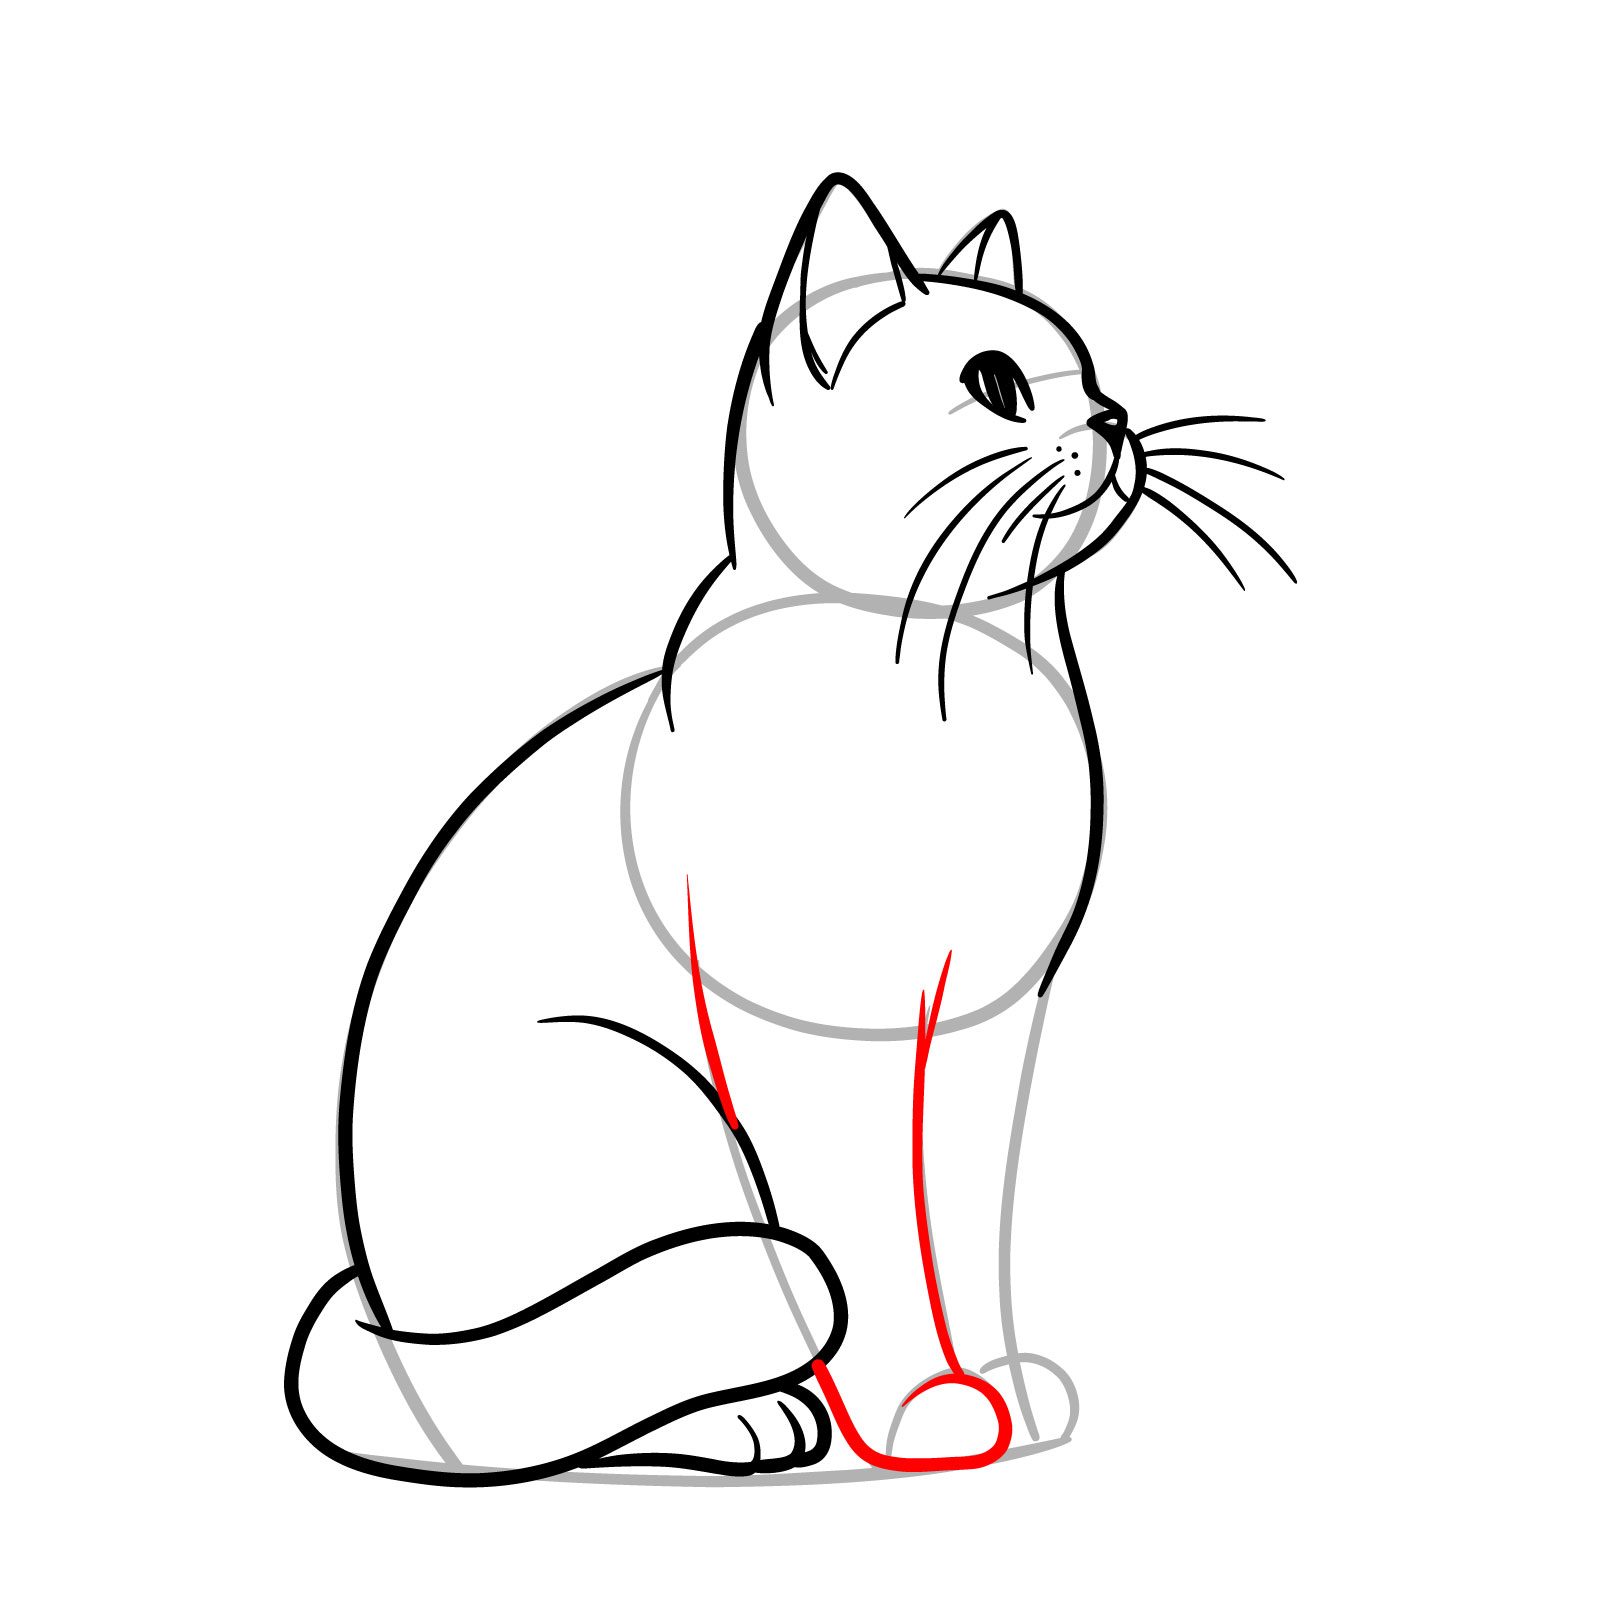
Guide 8 : How to Draw a Sitting Cat – 3/4 Left Side View – 13 Steps

Proceed our artistic exploration , this eighth guide focus on how to trace a sit down guy from a left slope opinion . The 3/4 get out slope perspective have depth and proportion to our subject . This 13-step process be ranked as normal in complexity , extend a rest between detail and manageability . By following these steps , artists can confidently depict a realistic guy without getting bogged down by intricacies . We begin by establishing a proportional structure within the first two stairs , adjust a firm foundation for the guy ’ sec poise and attentive stance . Measure by measure , you ’ ll bring this graceful feline to living .
Step 01 – Draw a circle for the guy ’ s head and intersect it with a erect melody for center alignment and a horizontal line for middle placement . Sketch the posture of the nose and muzzle . Add a larger lot for the upper body , slightly overlapping the head lot . For the bottom piece of the torso , pull a circle that ’ s between the head and upper torso in size . Connect these two big circle with curving lines to set the body ’ s frame
Step 02 – Map the pupils , mouth , and ears onto the head band . Draft the neck ’ sec curve and then outline basic flesh and lines for the branch stem and hand , produce a framework for the sitting strength
Step 03 – Outline the pattern of the mind , making sure to classify the chin with a distinct course begin within the head circle . Too , outline one ear ’ s outline ( which is near to us ) , pursue the curvature of the brain
Step 04 – Add the second ear , ensuring it ’ s consistent with the perspective of a 3/4 side view . Sketch the inner business and add fur details within the ears to give them depth and texture
Measure 05 – Draw oval pattern where the pupils will be , check they are proportionately placed within the guidelines set for the center
Pace 06 – Outline the upper and abject eyelid to make the shape of the eyes . Then , set the nose ’ sec shape , follow the initial guidelines for the muzzle
Pace 07 – Sketch the mouth and lend course for the whiskers on either slope of the nose and above the middle . Introduce some short lines around the look to suggest fur texture

Measure 08 – Draw the lines that spring the upper part of the body , create the back ’ sec curve and the chest ’ s front course , to hold structure to the cat ’ sec pose posture
Step 09 – Begin by outline the presence branch with a light survey , make up attention to its proportion to the torso and its placement , check it look natural and stand the cat ’ s sitting posture
Pace 10 – Continue the cat ’ sec form by sketching the curve of the back , extending into the hind branch . Make the hind branch with a slight fold to get the relaxed , sitting position , maintain the overall balance of the fig
Pace 11 – Refine the branch by adding subtle business to advise muscle structure . Sketch the remain movement and back legs , ensuring they watch the natural symmetry and muscular shade of a guy ’ s posture

Step 12 – Draw the tail with a gentle curve to enhance the relaxed pose . Incorporate fur texture with light strokes across the body , and classify the hand into discrete department to reflect the figure of the cat ’ s foot

Step 13 – Conclude the guide by go over the entire figure , making last adjustment to the guy ’ sec look , ensuring the formula is serene and attentive . Your drawing of a ride cat in a 3/4 left side view should today be complete . If so , let ’ s move to the next 1 !
Guide 9 : How to Draw a Sitting Cat – 3/4 Right Side View – 13 Steps
Our ninth guide invite you to master the art of make a ride guy , this time from a 3/4 correct side scene . This perspective offers the same angle but from the other slope . In 13 well-paced steps , this tutorial maintains a normal level of complexity , making it quite accessible for artist to trace . The realistic portrayal stress on capturing the cat ’ sec center without an excessive focus on minute point . Starting with a proportional framework in the initial stairs , you will build upon this to flesh out a lifelike and poised cat , comfortably sitting and discover its surroundings .
Measure 01 – Begin your drawing by sketching out the fundamental shapes that make the cat ’ sec structure . Start with a circle to define the mind . Below it , pull a larger circle for the upper body to capture the volume of the torso . Ultimately , create a flowing base shape that will stabilize your guy ’ sec sitting attitude
Step 02 – With the basic figure in place , softly sketch the facial guidelines to suggest the place of the eyes and muzzle . For the ears , place two triangular form at the top of the head lot . Draft the movement limbs with mere lines and shapes to represent the hand rest on the torso
Step 03 – Focus on the head and refine its shape . Make the first ear by follow the triangular guideline , create certain it ’ s pointing upwards to think over the guy ’ s alertness . Then , outline the curved job that constitute the back side of the head , giving it a three-dimensional shape
Pace 04 – Now , produce the outline for the forehead and nose to demonstrate the facial structure . Start from the inner base of the ear , contribute the line down to form the forehead . Then , remain to run the line outwards , creating a slim curve that will represent the nose bridge
Measure 05 – Draw the lower part of the guy ’ s side by adding the mouth and the muzzle . Start with a gentle curve for the mouth , using the cross guide for symmetry . Pass this into a little rounded muzzle below the nose , adjust the stage for a elaborate feline expression
Step 06 – Add the second ear , mirror the first in shape but go on perspective in head for a three-quarter view . Then , sketch the outline of the visible heart , using the facial cross as a guide to lay it correctly on the face
Measure 07 – Shape the ears to a more natural item and lend inner note for depth . Attract the eye , with a pupil and a little erect space for a highlight to add life to your cat ’ sec gaze . Sketch whiskers emanating from the muzzle , adding characteristic feline appeal
Measure 08 – Outline the neck , flowing down to the upper torso to create a seamless transition from the top dog . Draw the cat ’ s back , swerve softly towards the seat . Ultimately , sketch the tail itself , hold it a relaxed , curl strength behind the body
Step 09 – Draw the back leg by add a curve that starts below the seat of the body lot and wraps around to the movement . This creates the illusion of the branch being folded underneath the body , a common sitting attitude for cat
Measure 10 – For the front branch , outline a straight note downward from the torso , defining the branch ’ sec outer edge . At the bottom , depict the hand , see to it it appears to defend the cat ’ sec weight . Separate the paw from the leg with a slight indentation to indicate the joint
Pace 11 – Outline the second front branch , partially obscured by the first , to uphold the position . Ensure this branch mirrors the first in its proportions and position , maintain a symmetric and balanced attitude for the guy
Pace 12 – Refine the cat ’ sec kind by add texture and details . Suggest fur patterns with light stroke on the torso and top dog . Define the paws by separating them into sections , lend reality to the survey
Step 13 – Conclude your drawing cats for beginners ’ journey by finalizing the details . Enhance the fur texture , see to it it ’ s consistent with the guy ’ s natural practice . With all element in property , you have a complete illustration of a sit down guy , captured in a dynamic 3/4 right slope view , perfect for guy drawing practice exercise
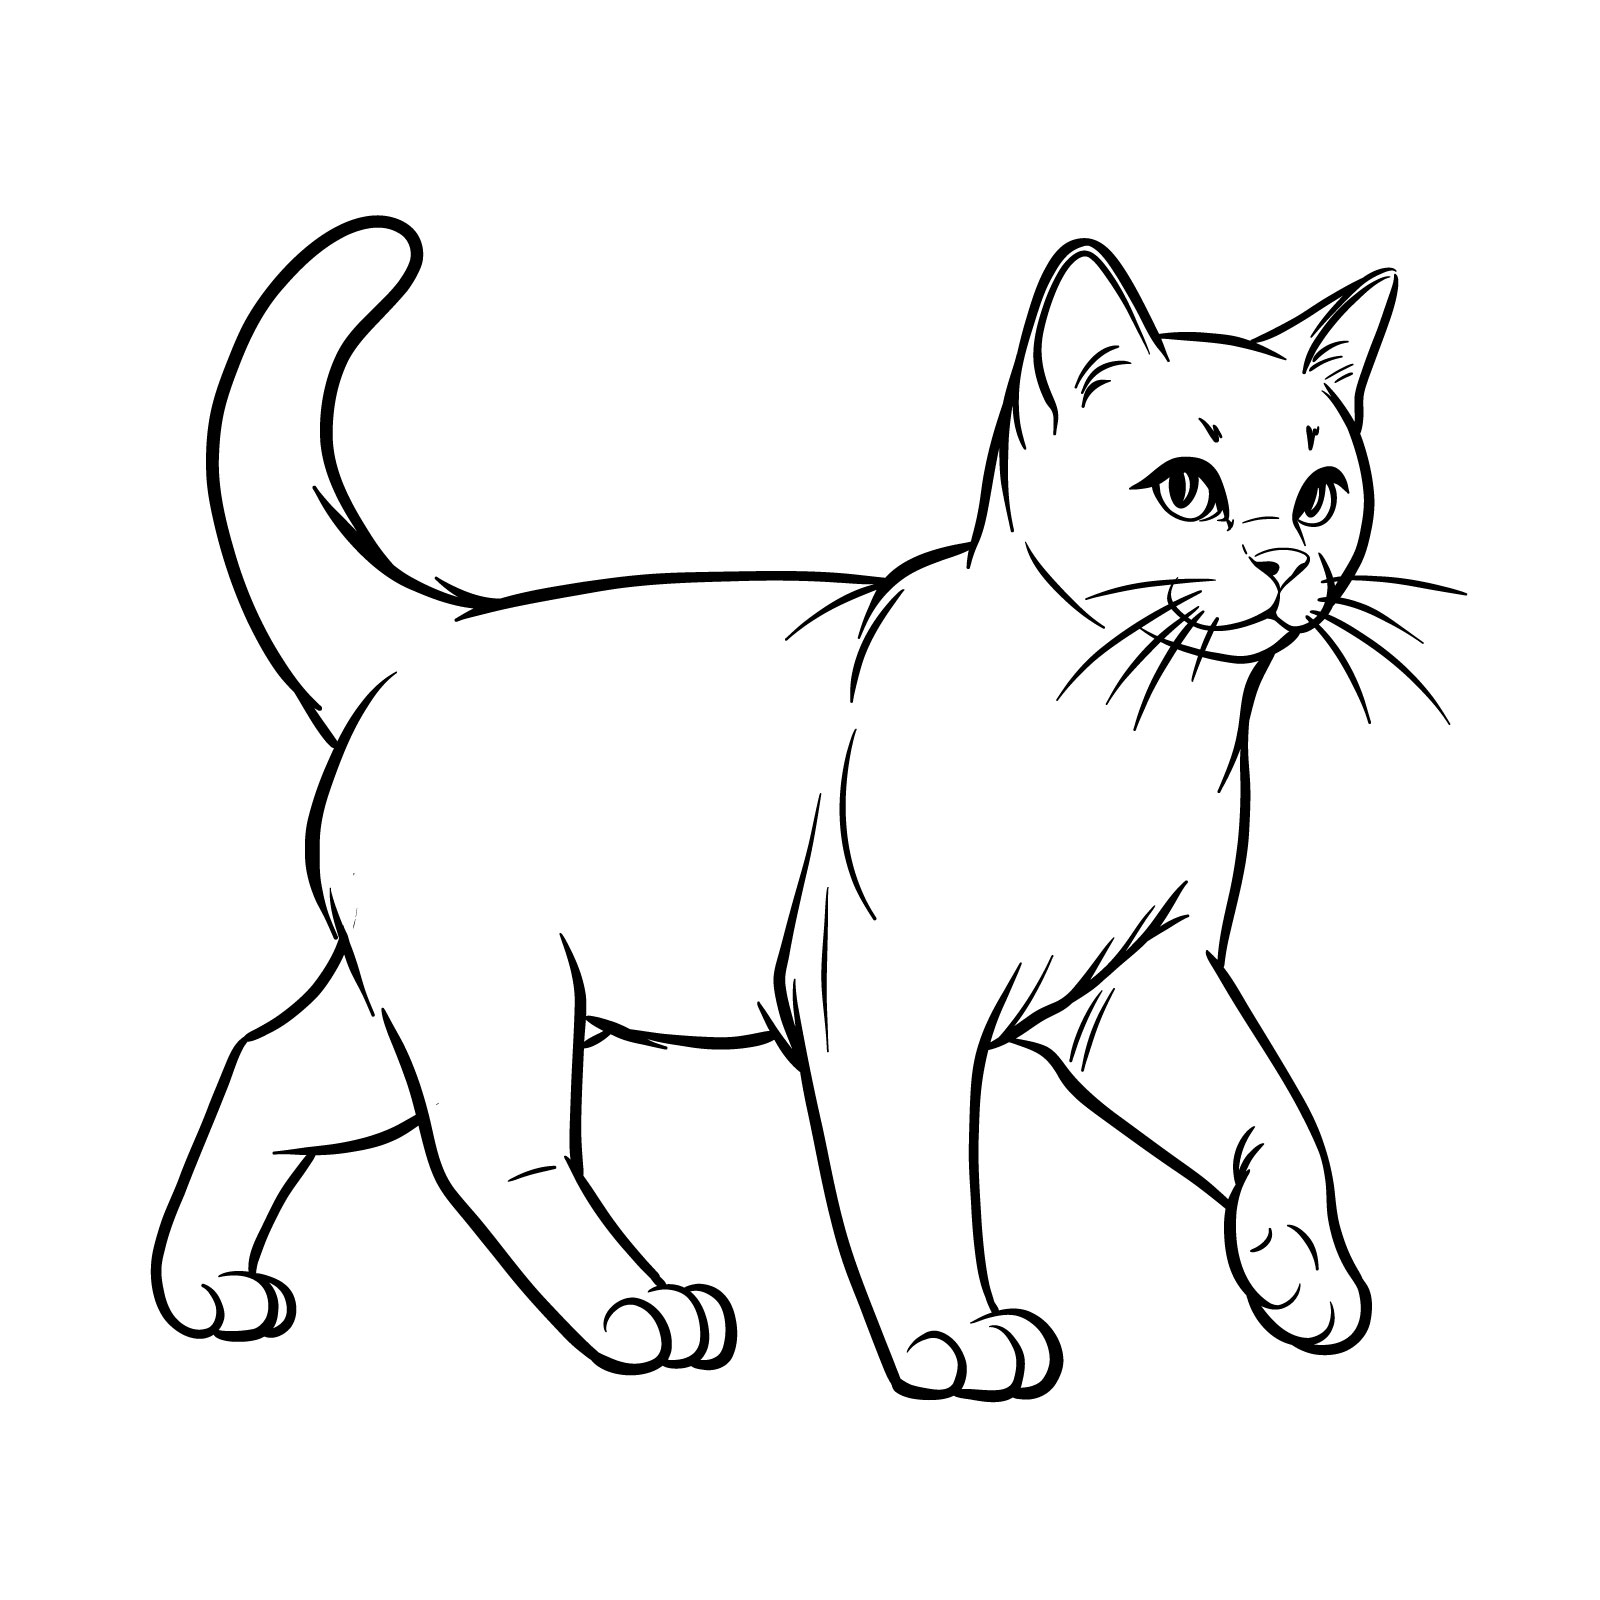
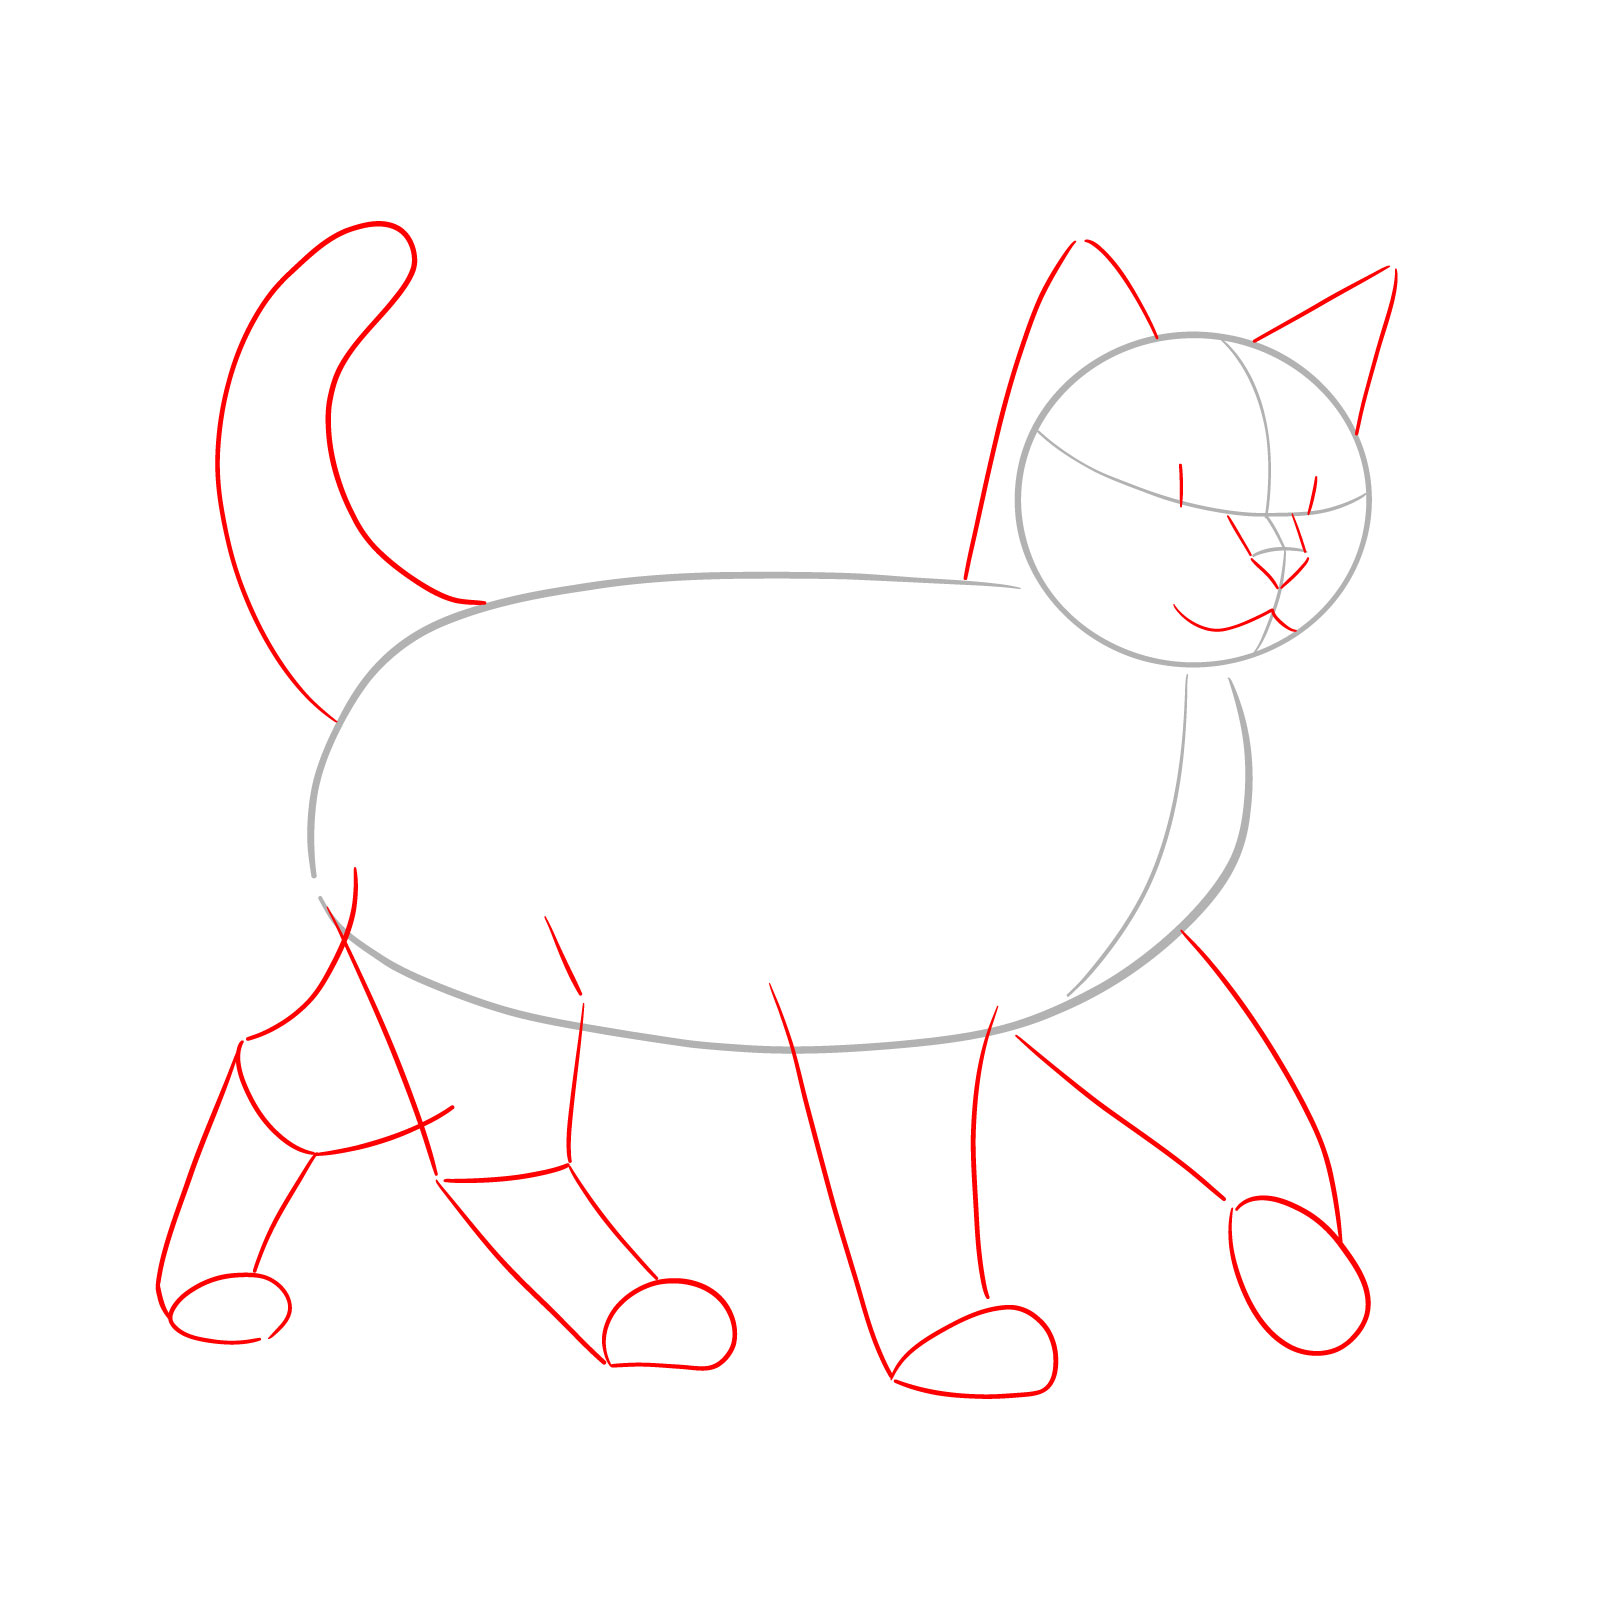
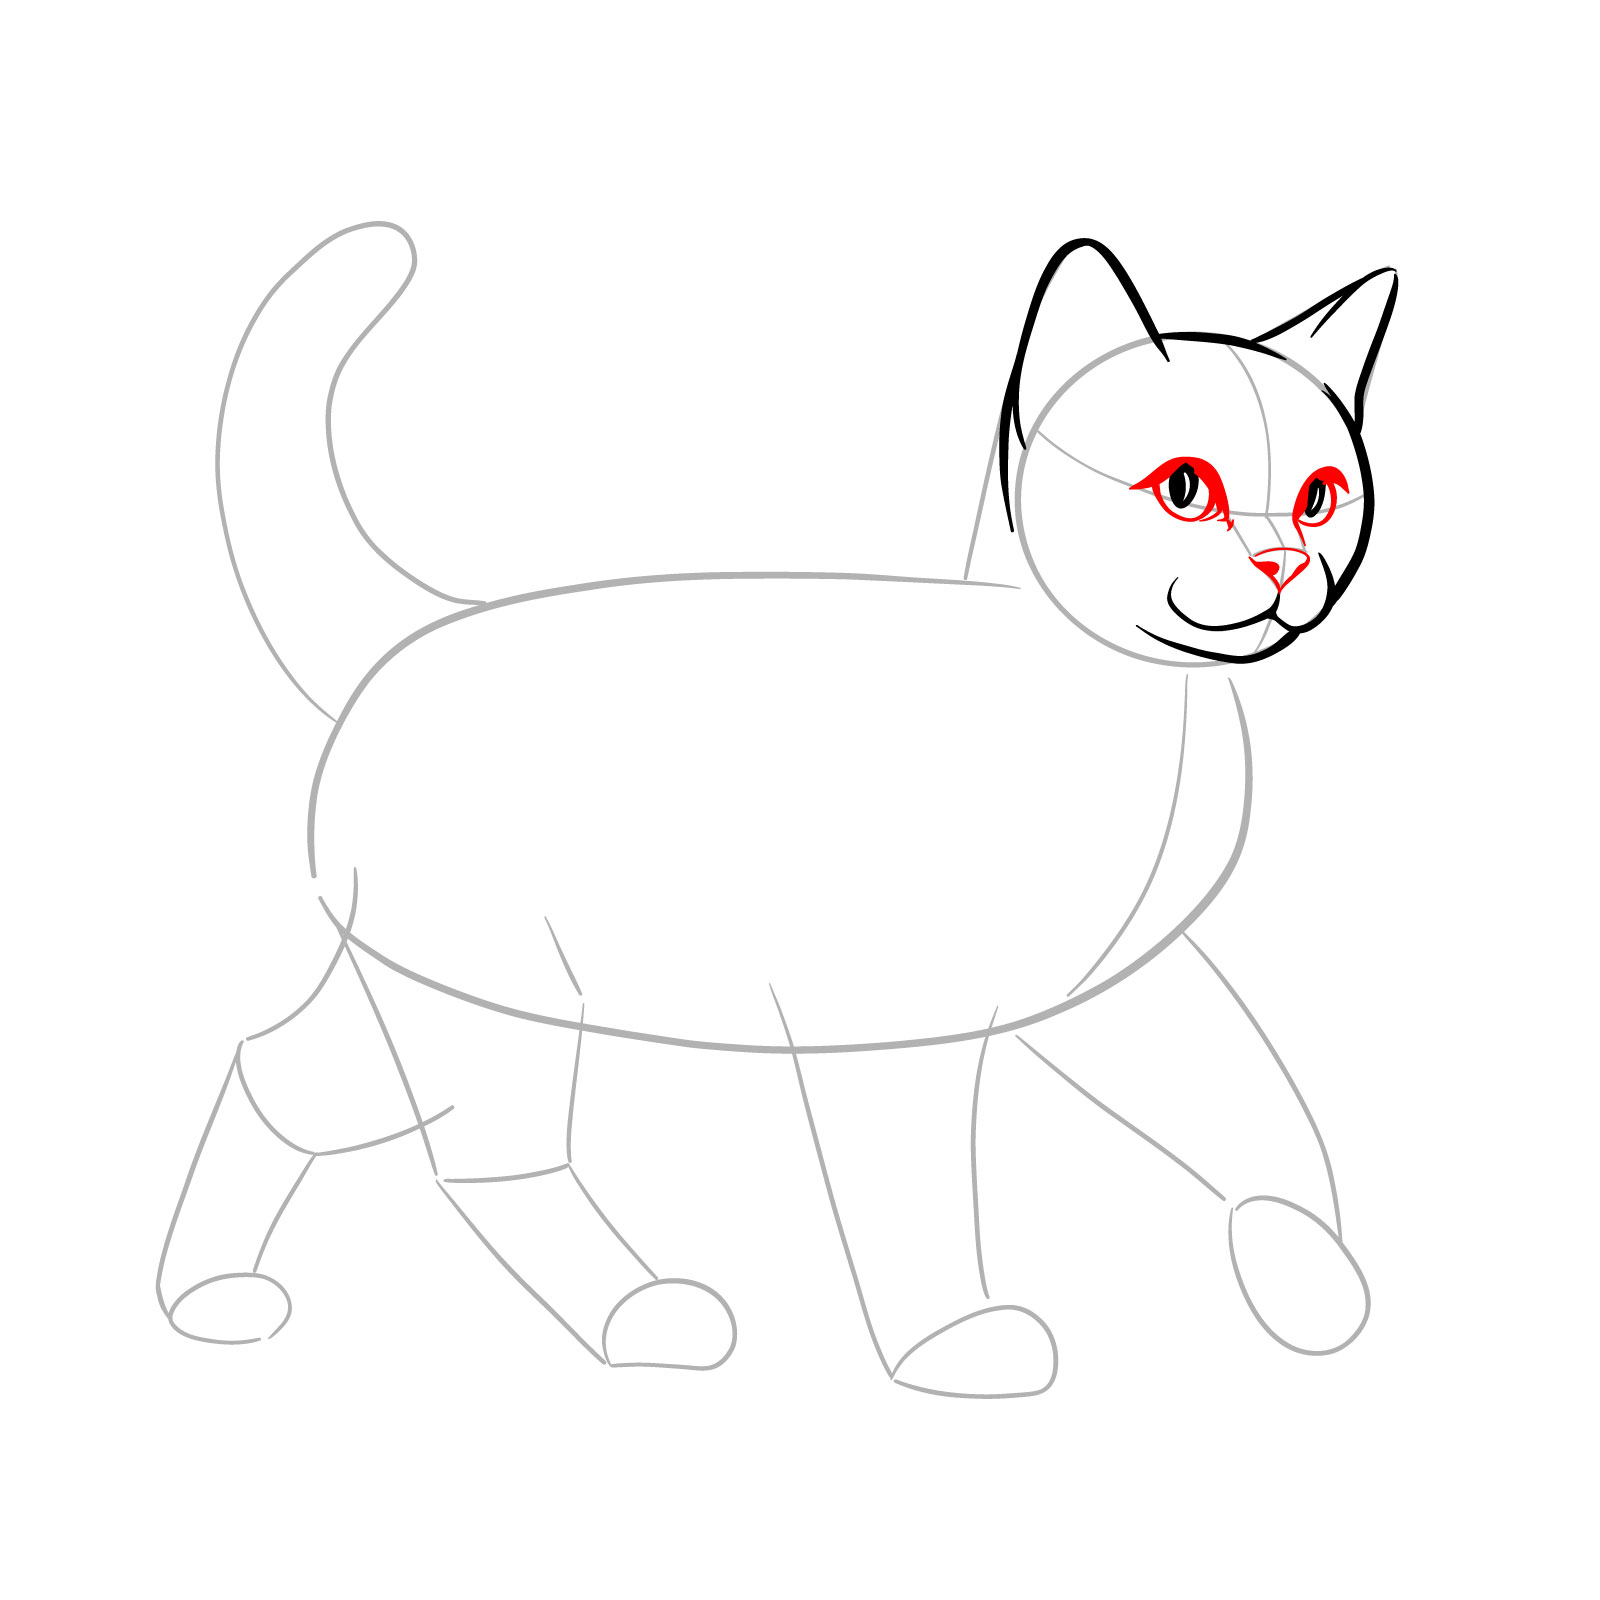
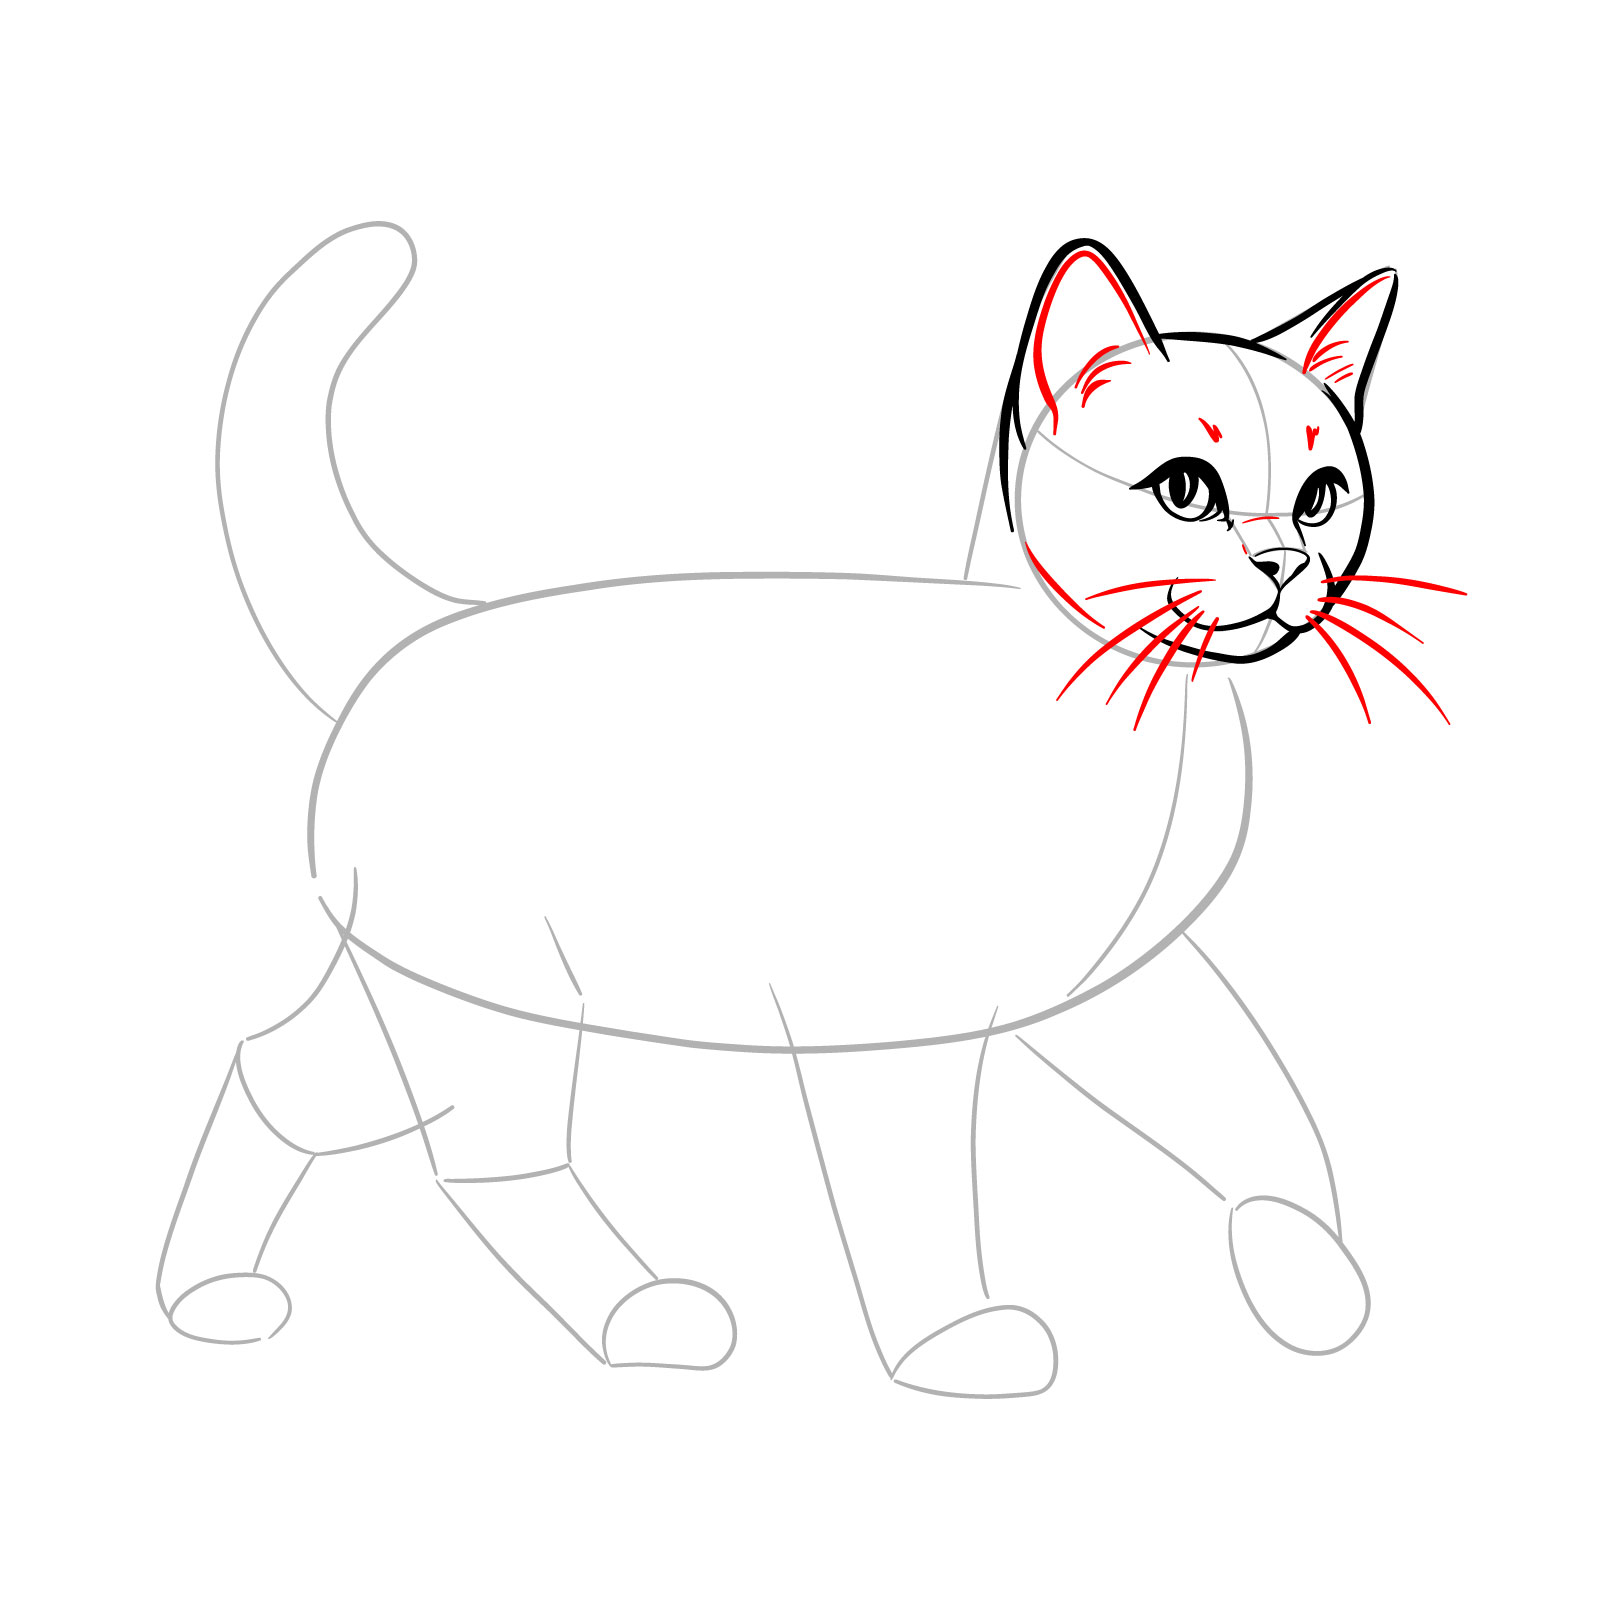
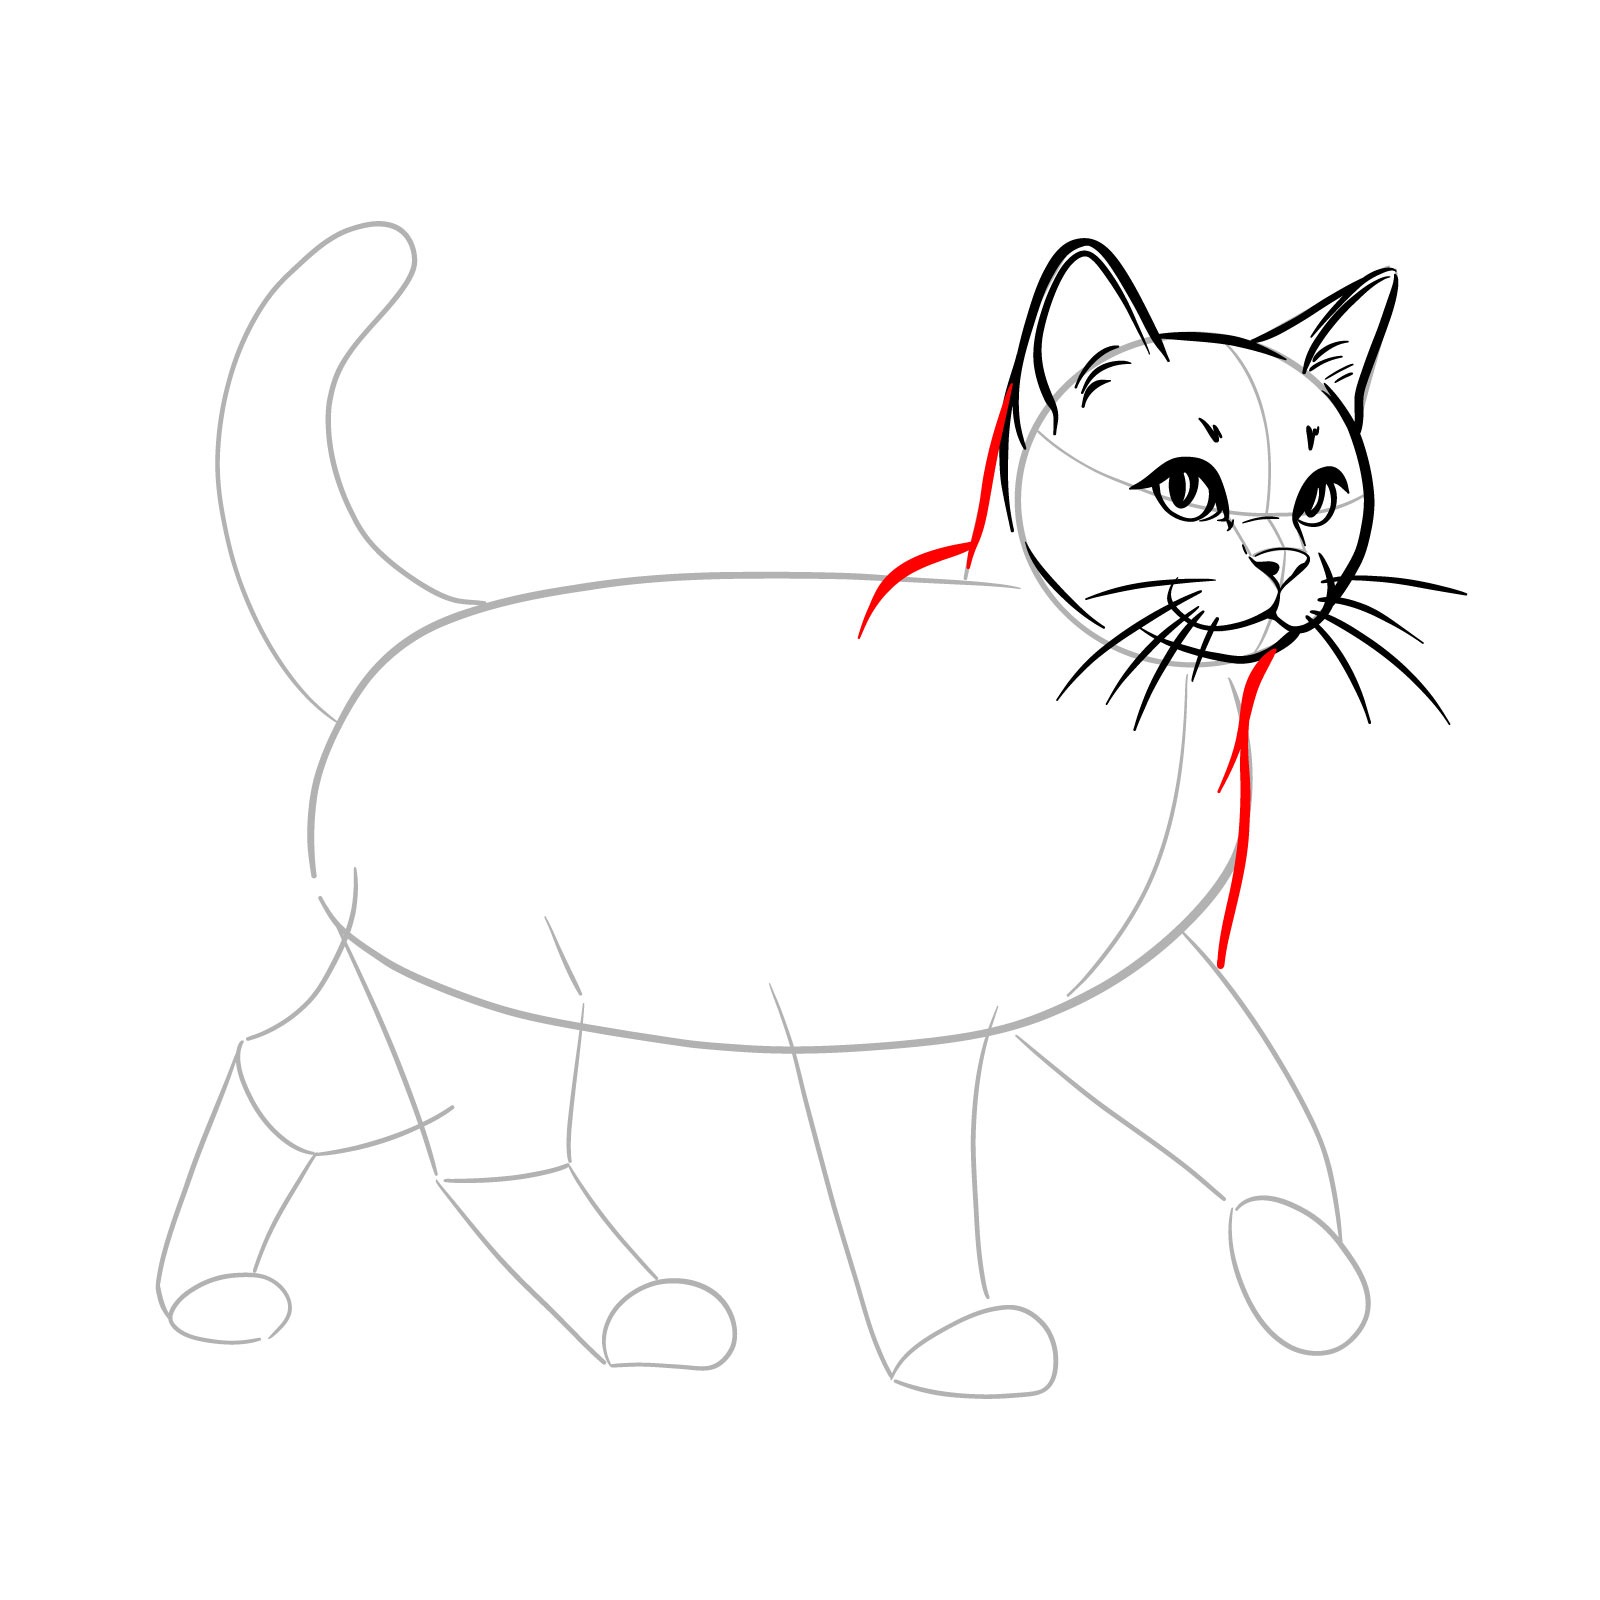
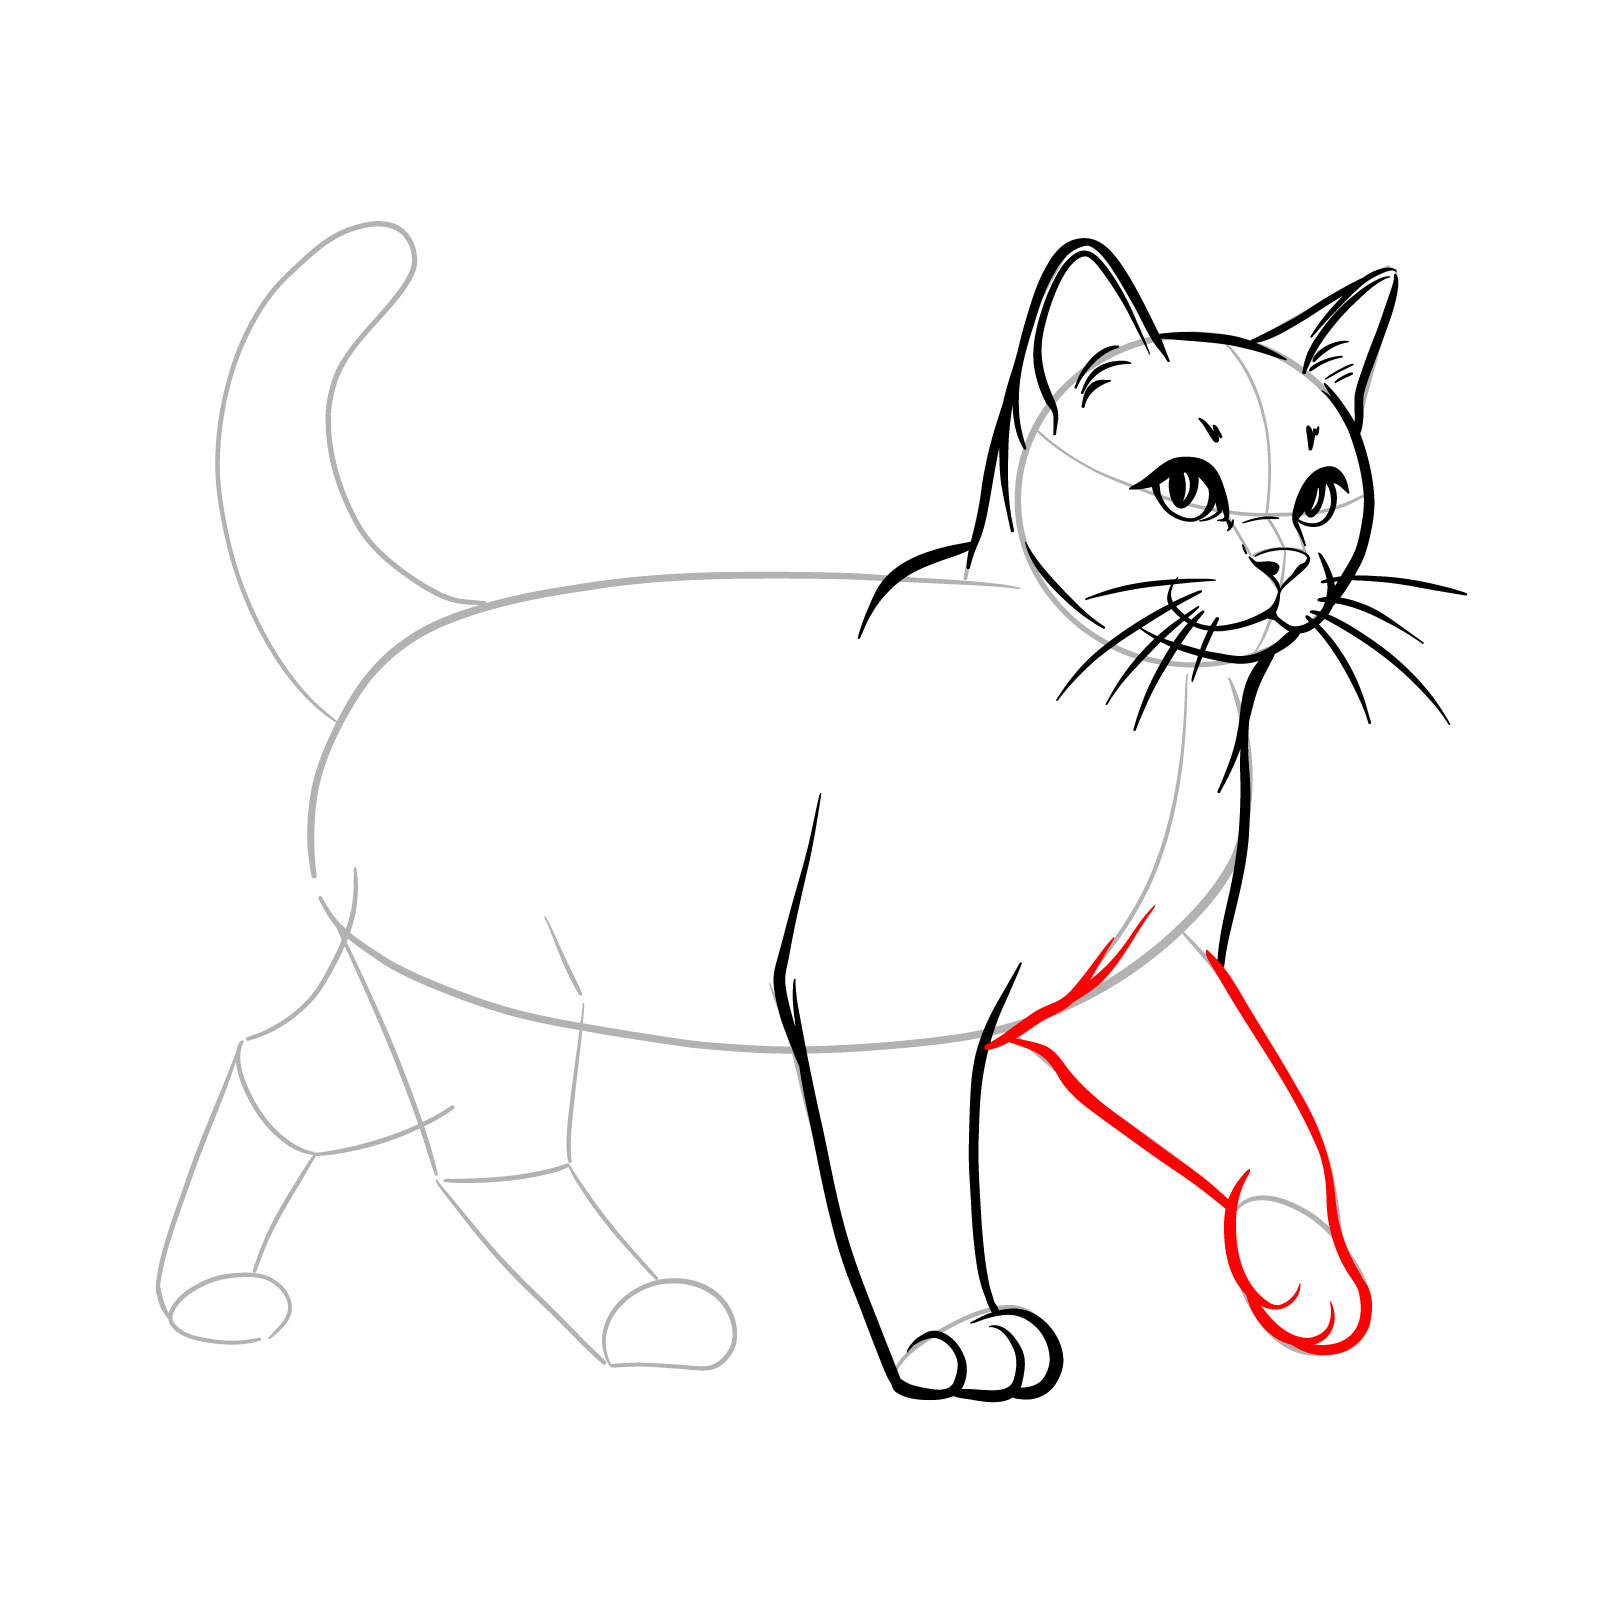
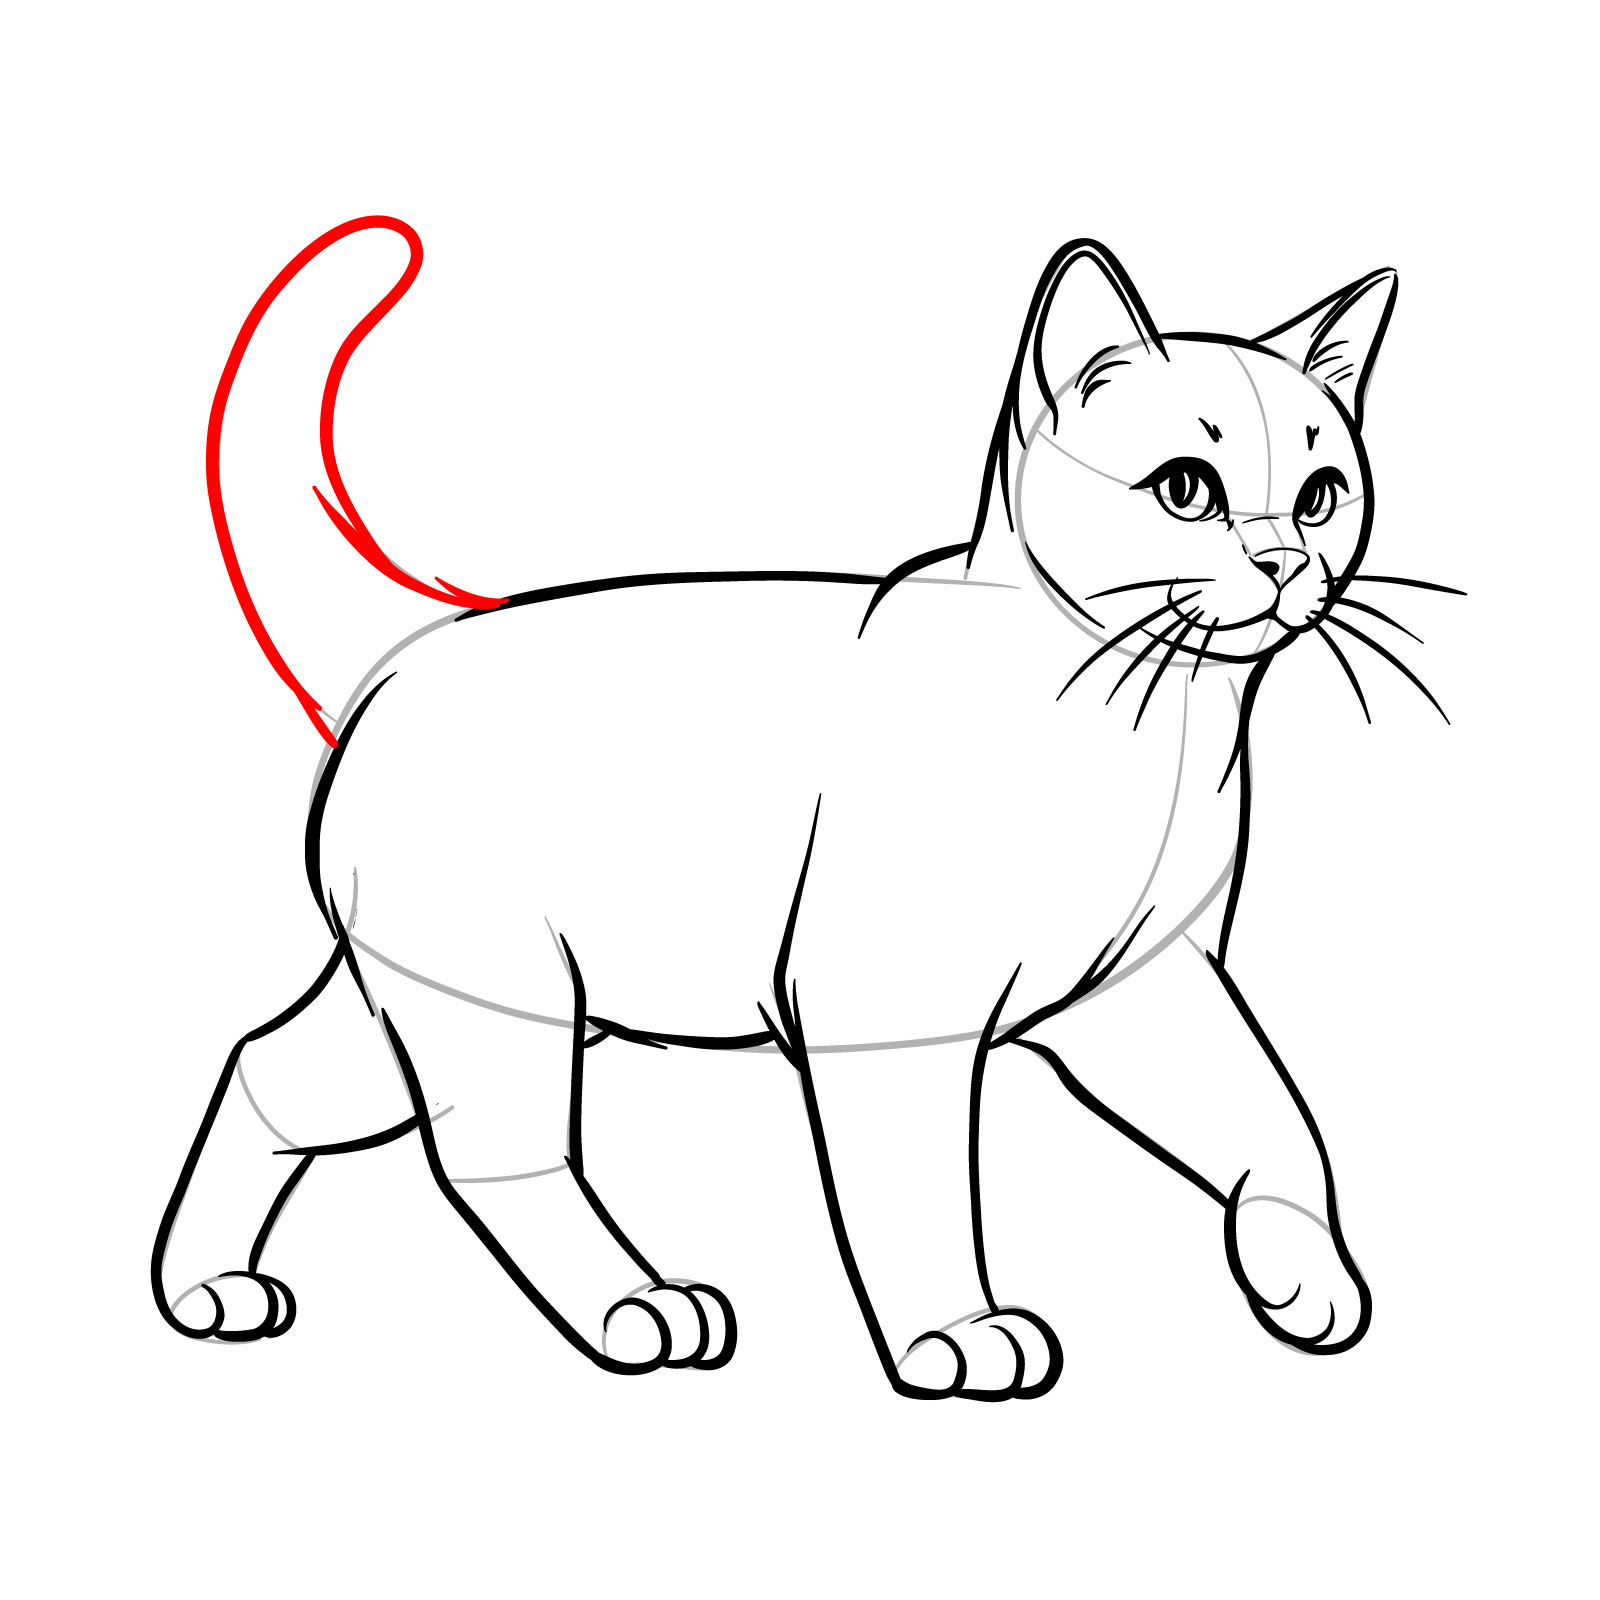
Guide 10 : How to Depict a Walking Cat – 15 Stairs
Measure into the next stage of our drawing journey with the tenth guide : how to draw a walking guy . This tutorial , set in a dynamic 3/4 scene , disclose down the cause and grace of a strolling guy into 15 achievable steps . Although the complexity is ordinary , it remain approachable , with each pace easy to adopt . This realistic representation avoids sweep over details , appropriate you to focus on the rhythm and flow of the cat ’ sec cause . The initial two footstep live essential as they assist you sketch a proportional structure that service as the canvas for your walk cat . Follow along , and you ’ ll shortly have a lifelike cat pace across your page .
Step 01 – Begin with a circle for the brain , add a erect melody for symmetry and a horizontal line for the eyes to establish the direction of the cat ’ s gaze . Form the muzzle with a slim protrusion at the bottom share of the band . For the body , attract an elongated oval to stand for the torso in motion
Pace 02 – Map out the guy ’ s eyes , nose , and mouth on the look , ensuring they follow the guidelines for proper alignment . Outline the ear with mere triangular shapes at the top of the chief . Lend a flowing course for the tail and basic shapes for the legs to seize the dynamic of a walk guy
Measure 03 – Outline the side of the cat ’ sec mind , arch the line to spring the cheek and jaw , which will later help situation the whisker pads . This step begins to lend more definition to the guy ’ sec look , contributing to a more realistic depiction
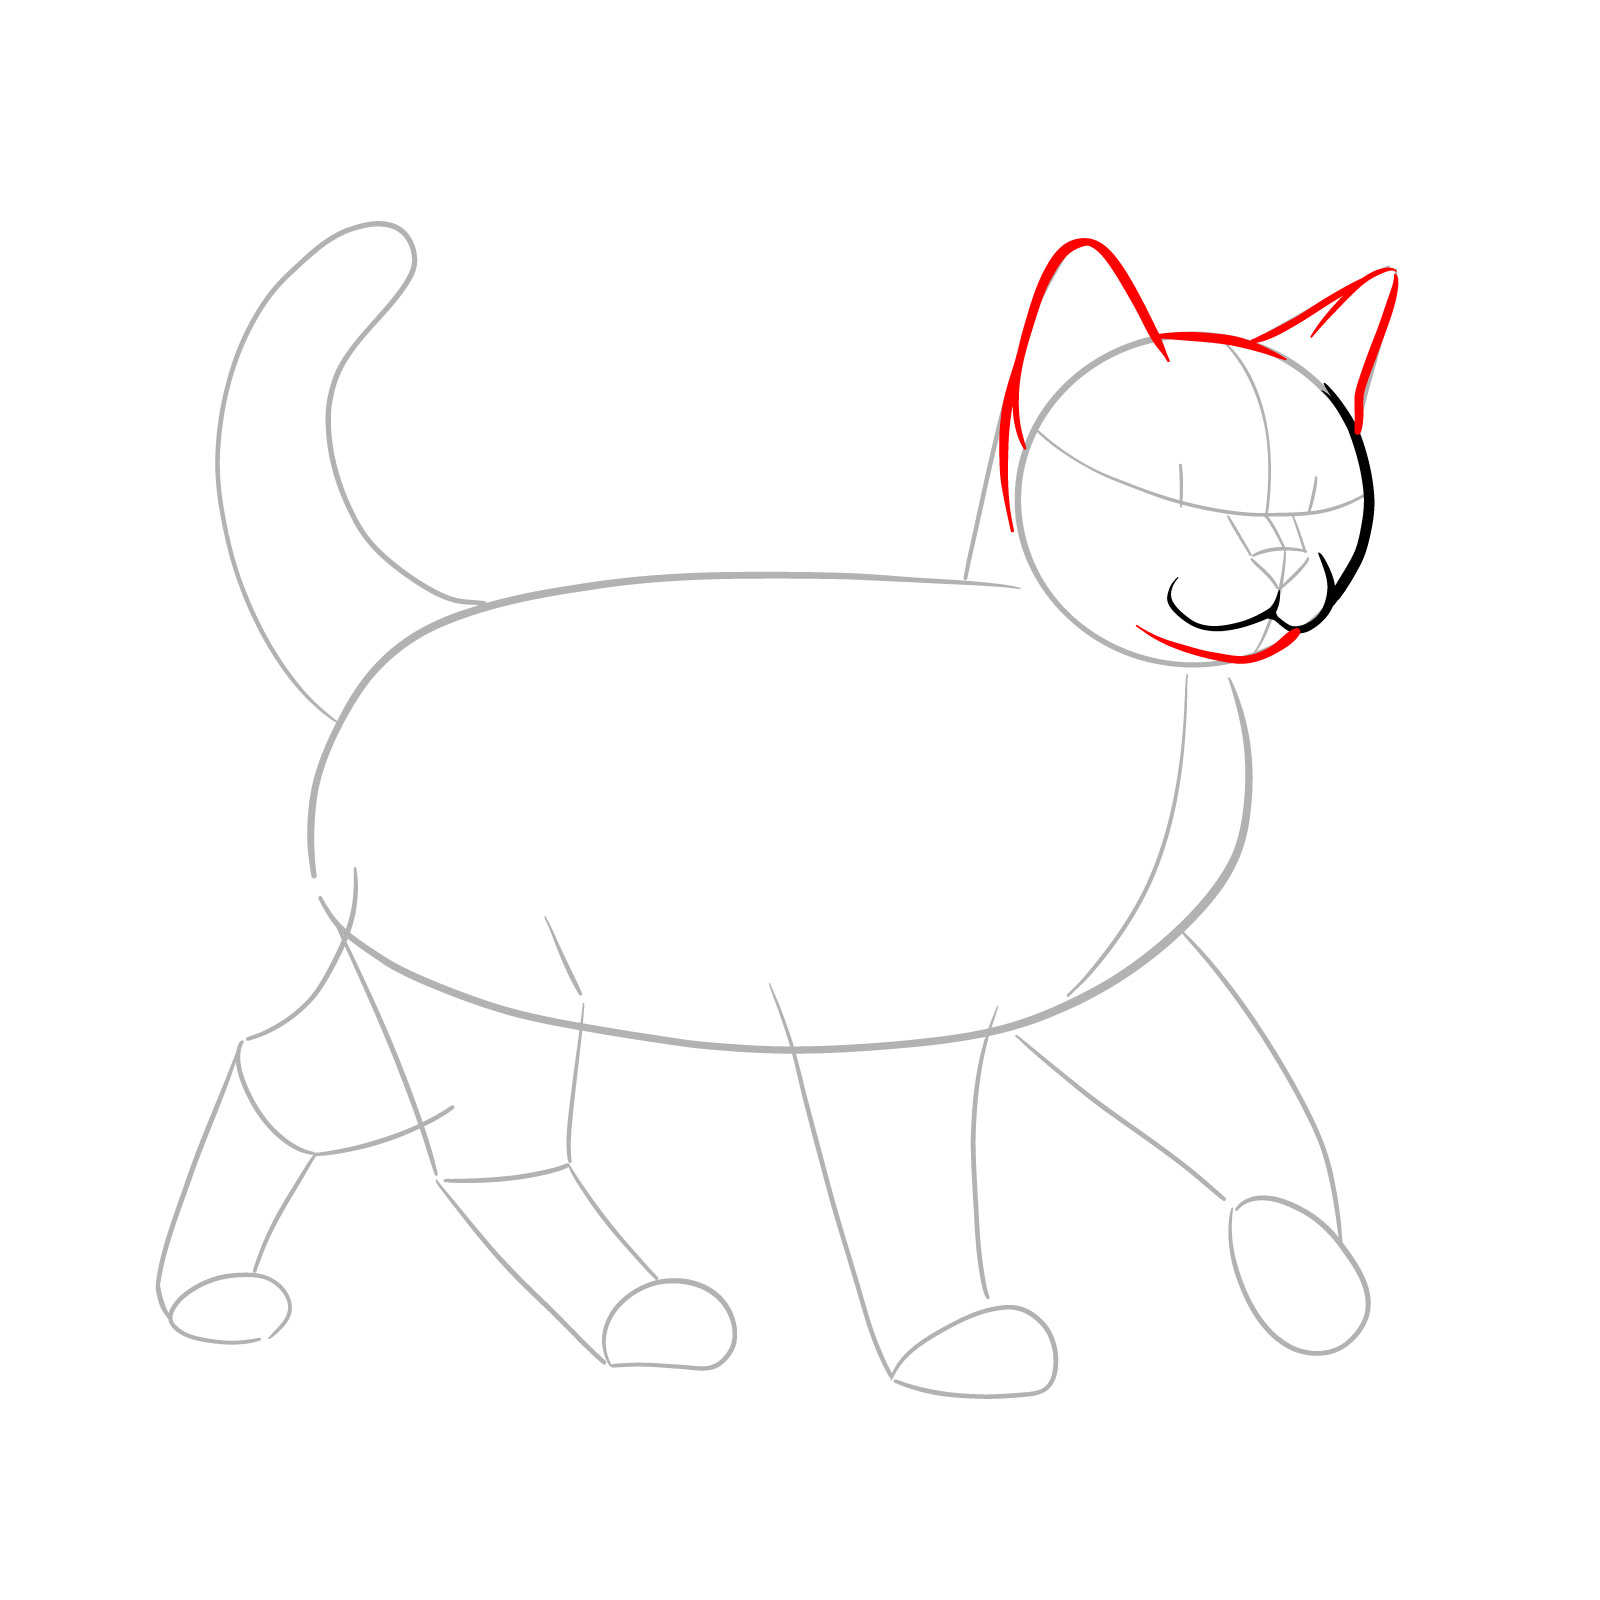
Pace 04 – Draw the chin with a gentle curve beneath the muzzle to fill out the lower region of the face . Lend the ears by polish the triangular shapes , and connect them with a curving line across the crest of the head . These details will enhance the cat ’ s realistic appearance and walk posture
Step 05 – Draw erect ovals to make the pupils , check to result thin erect blank spaces to represent highlights . This pay the eyes a sense of life and depth , enhancing the realism of your walk cat illustration
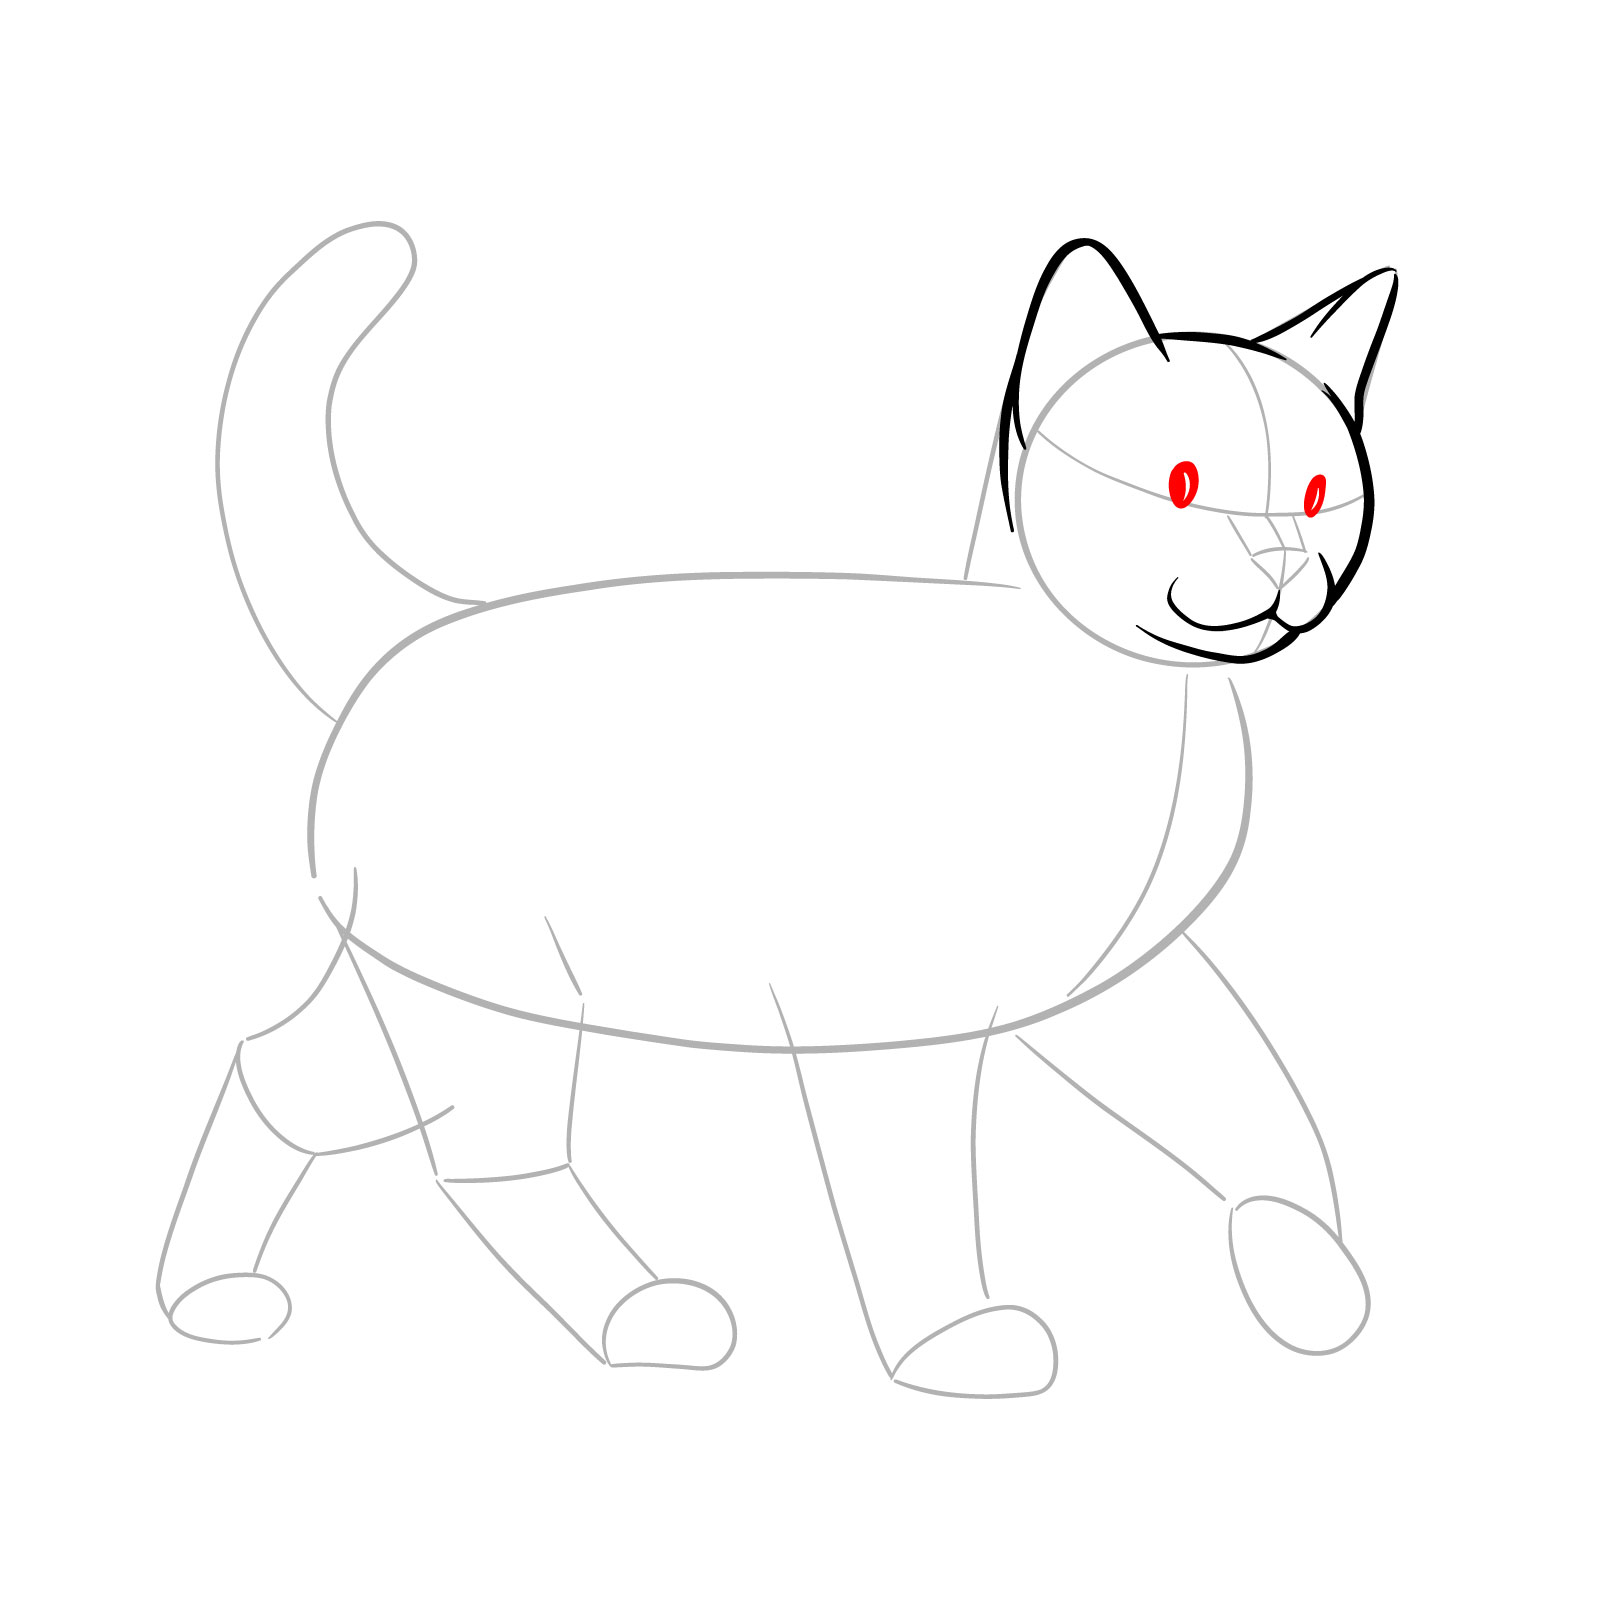
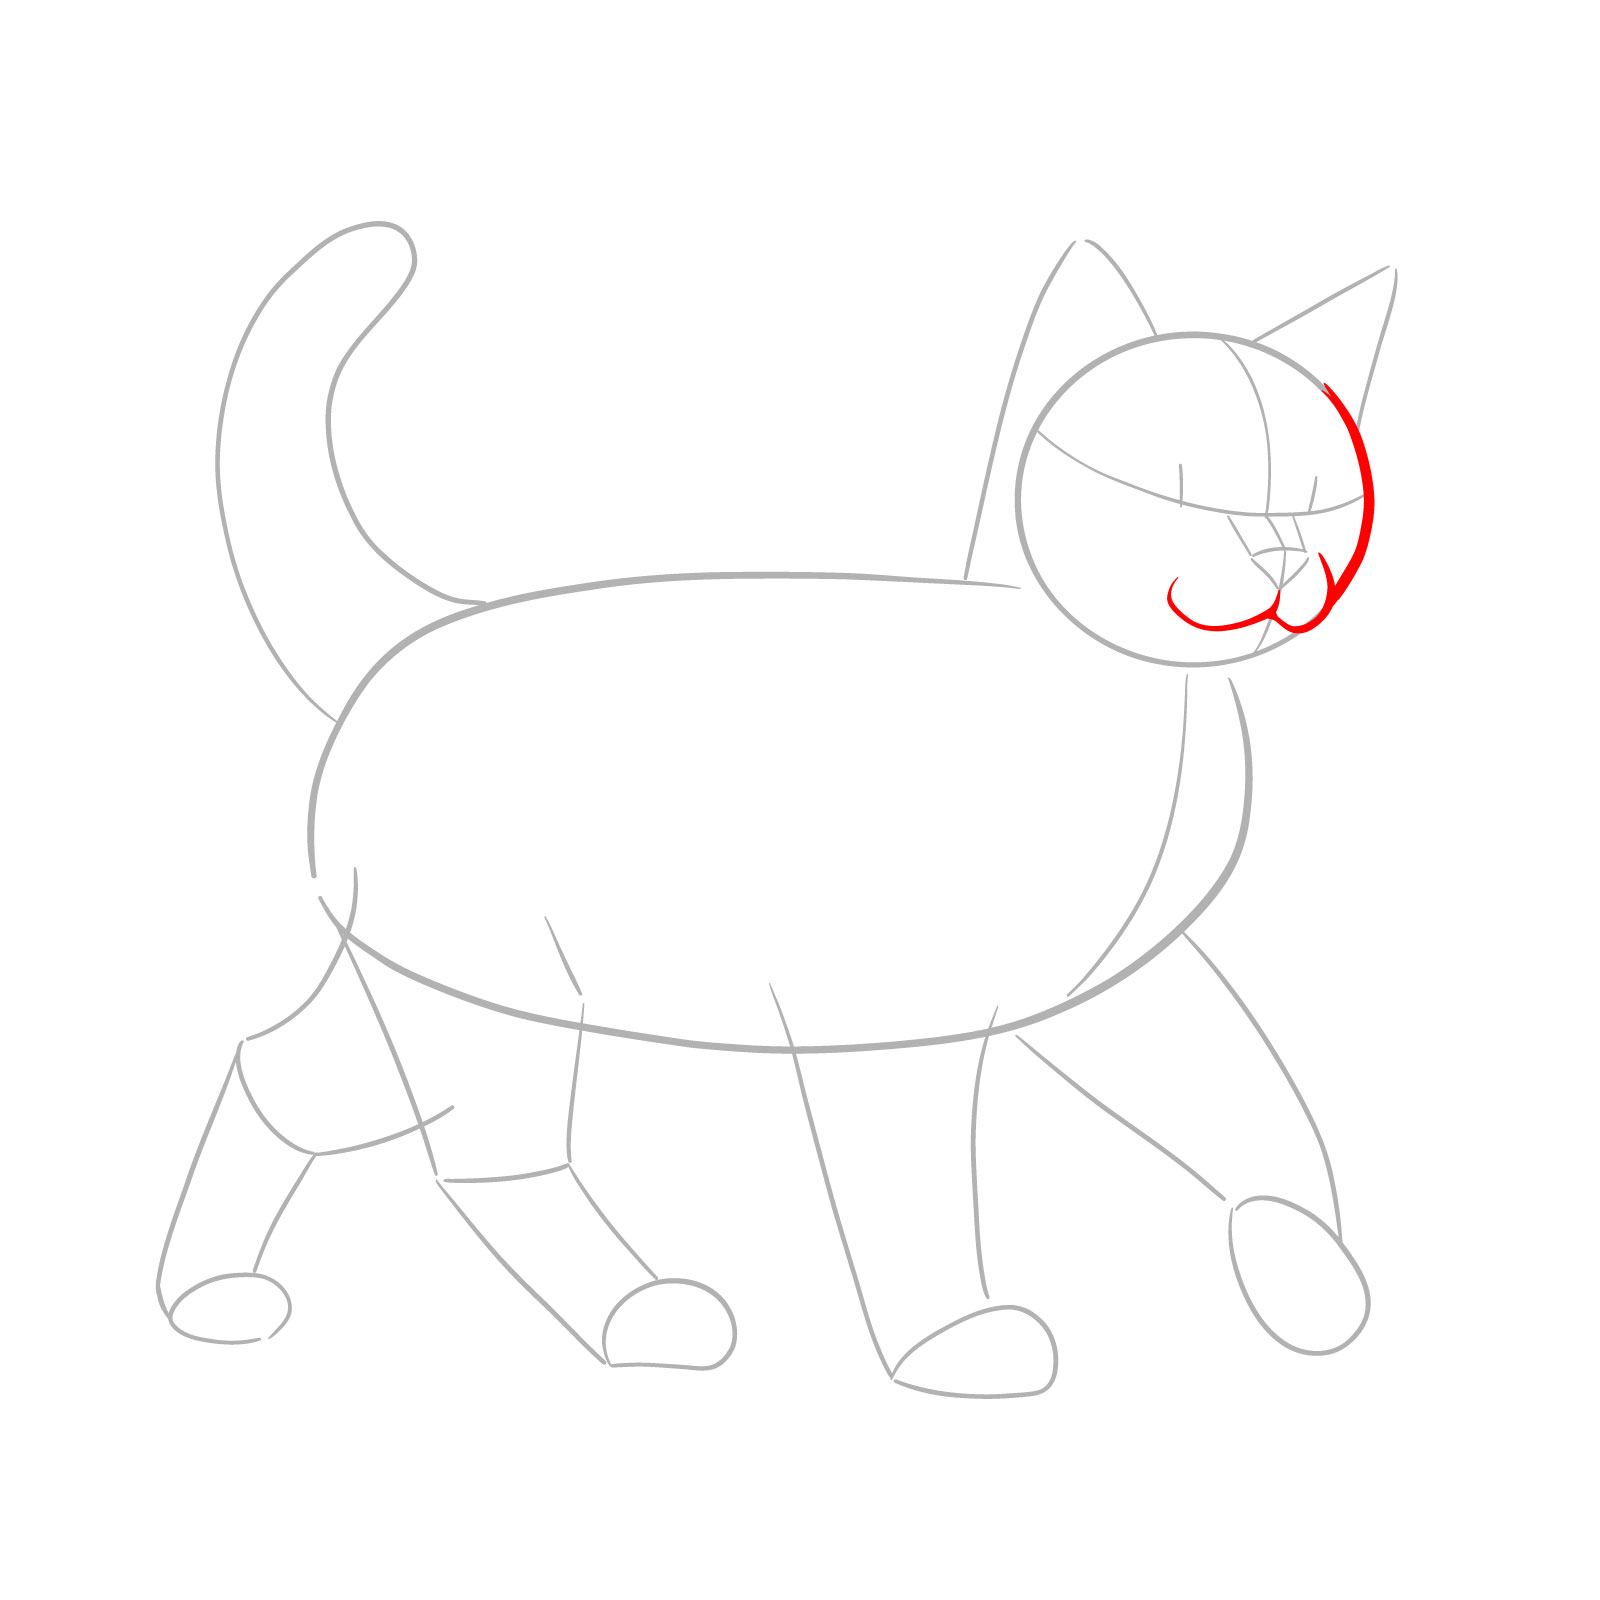
Step 06 – Refine the eye shapes , contouring around the pupils and add curvature to the bottom and top to mimic a guy ’ sec unique eye structure . Place a humble triangular shape to symbolize the nose , positioned centrally between the middle at the abject end of the vertical facial line
Step 07 – From the whisker trudge , draw various long , curl lines on each side to create beard . Fine-tune the ears ’ inner details for a more structured appearance and to devote the brain its finished figure
Pace 08 – Connect the head to the torso with two curving note for the neck , indicate the cat ’ s ahead motion
Measure 09 – To depict the walk motion , draw the front hand with care . Start by sketching the branch head down to the paw , then lend the individual toes . See the hand is angled somewhat outward to mimic the natural pace of a cat in stride
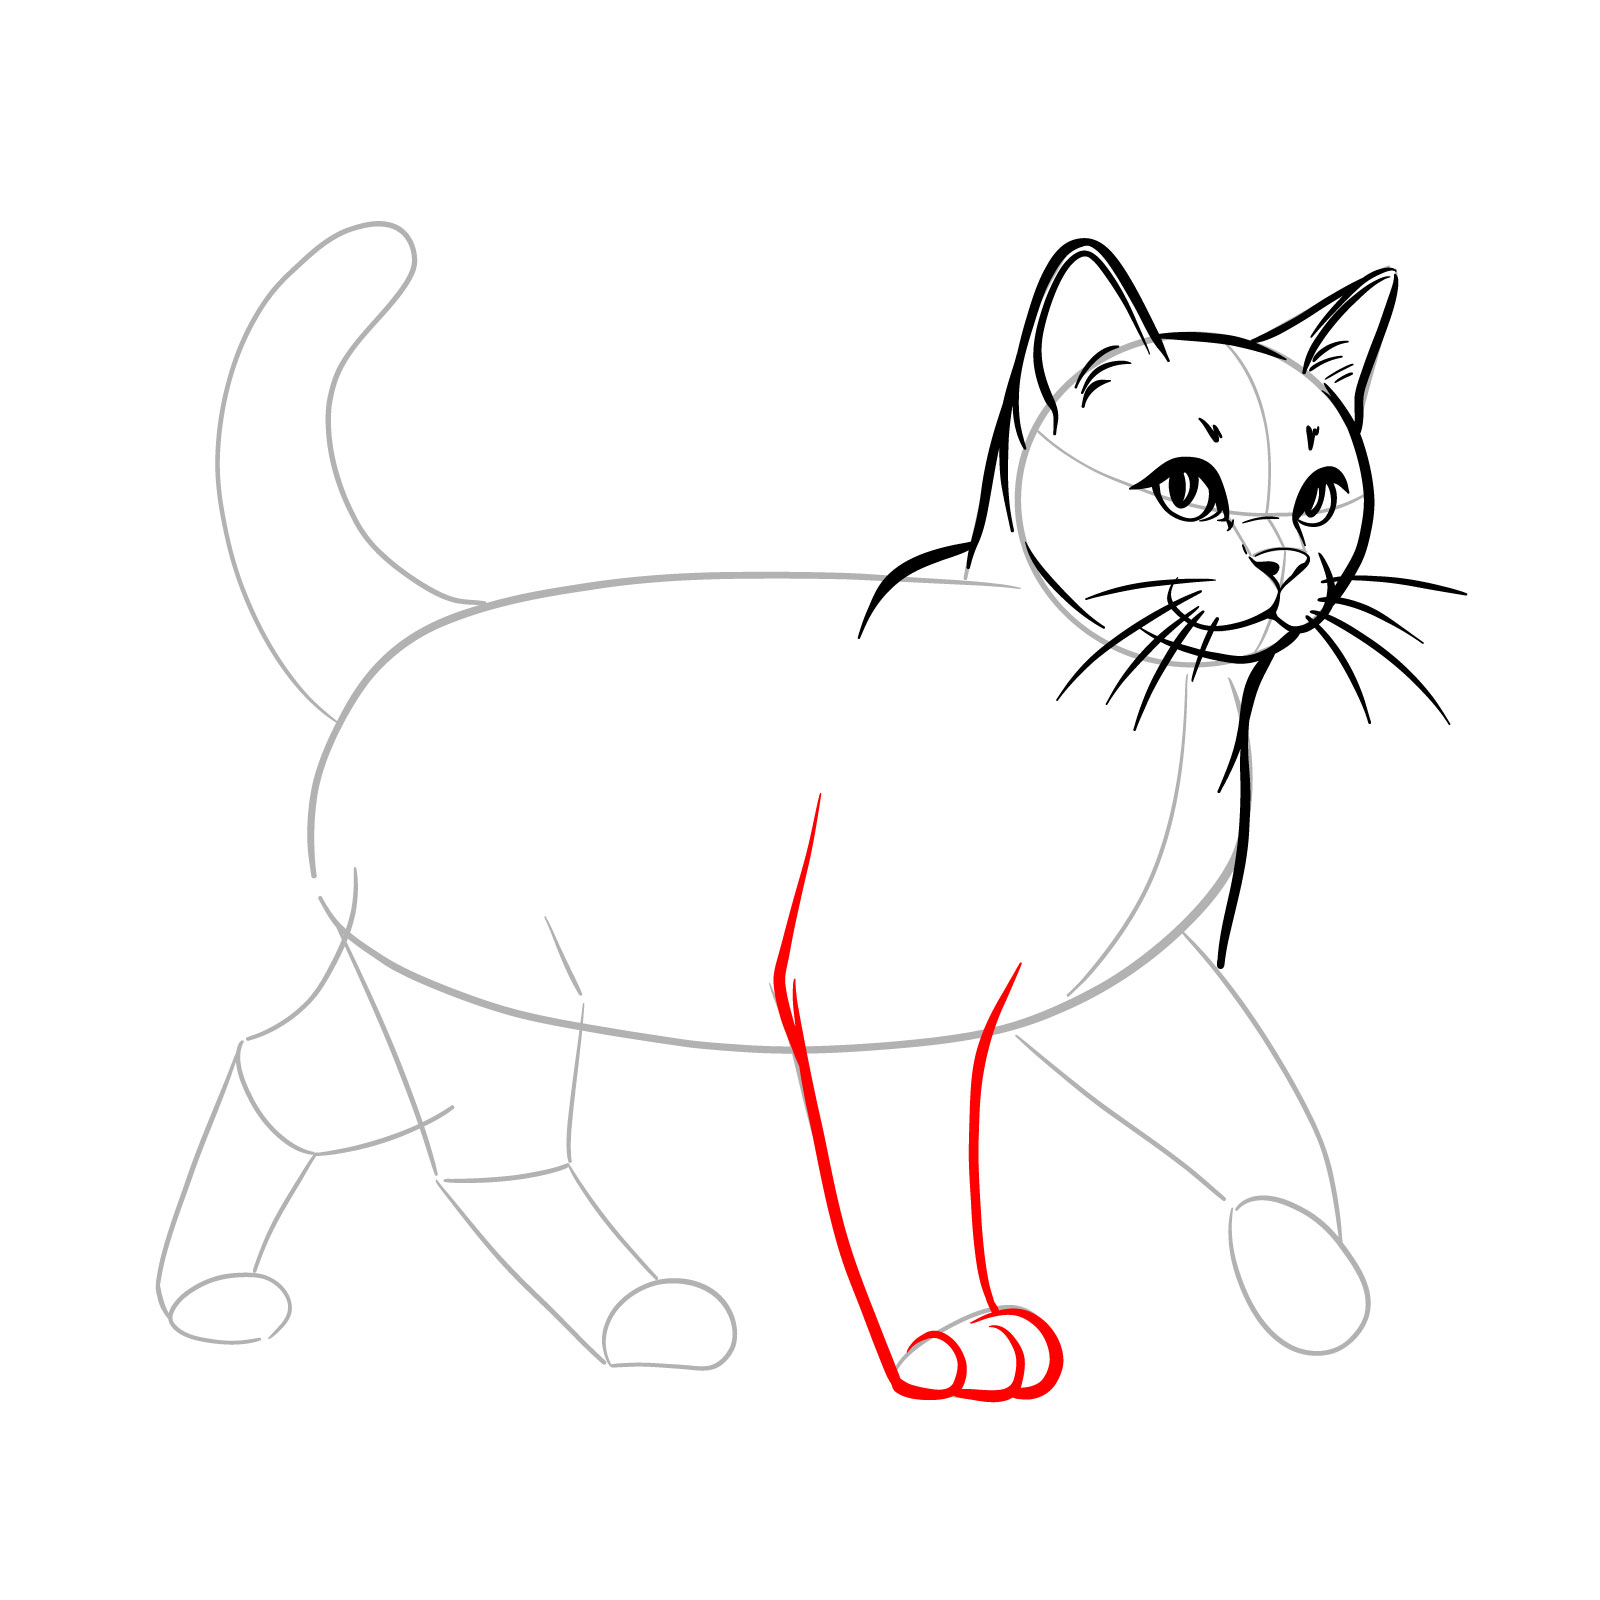
Measure 10 – Focus on the branch that ’ s stepping forward . Illustrate its gesture by drawing a still job from the torso to the hand , indicating the branch ’ s muscular kind . The leg should protrude forward , with the paw indicate towards the ground , ready to bring the next measure
Measure 11 – Create the backline set out from the neck , arching slightly upwards to represent the cat ’ s spine . Then sketch the seat branch that is supporting the guy ’ sec weight , indicate the thigh and humble leg bent in a walk situation
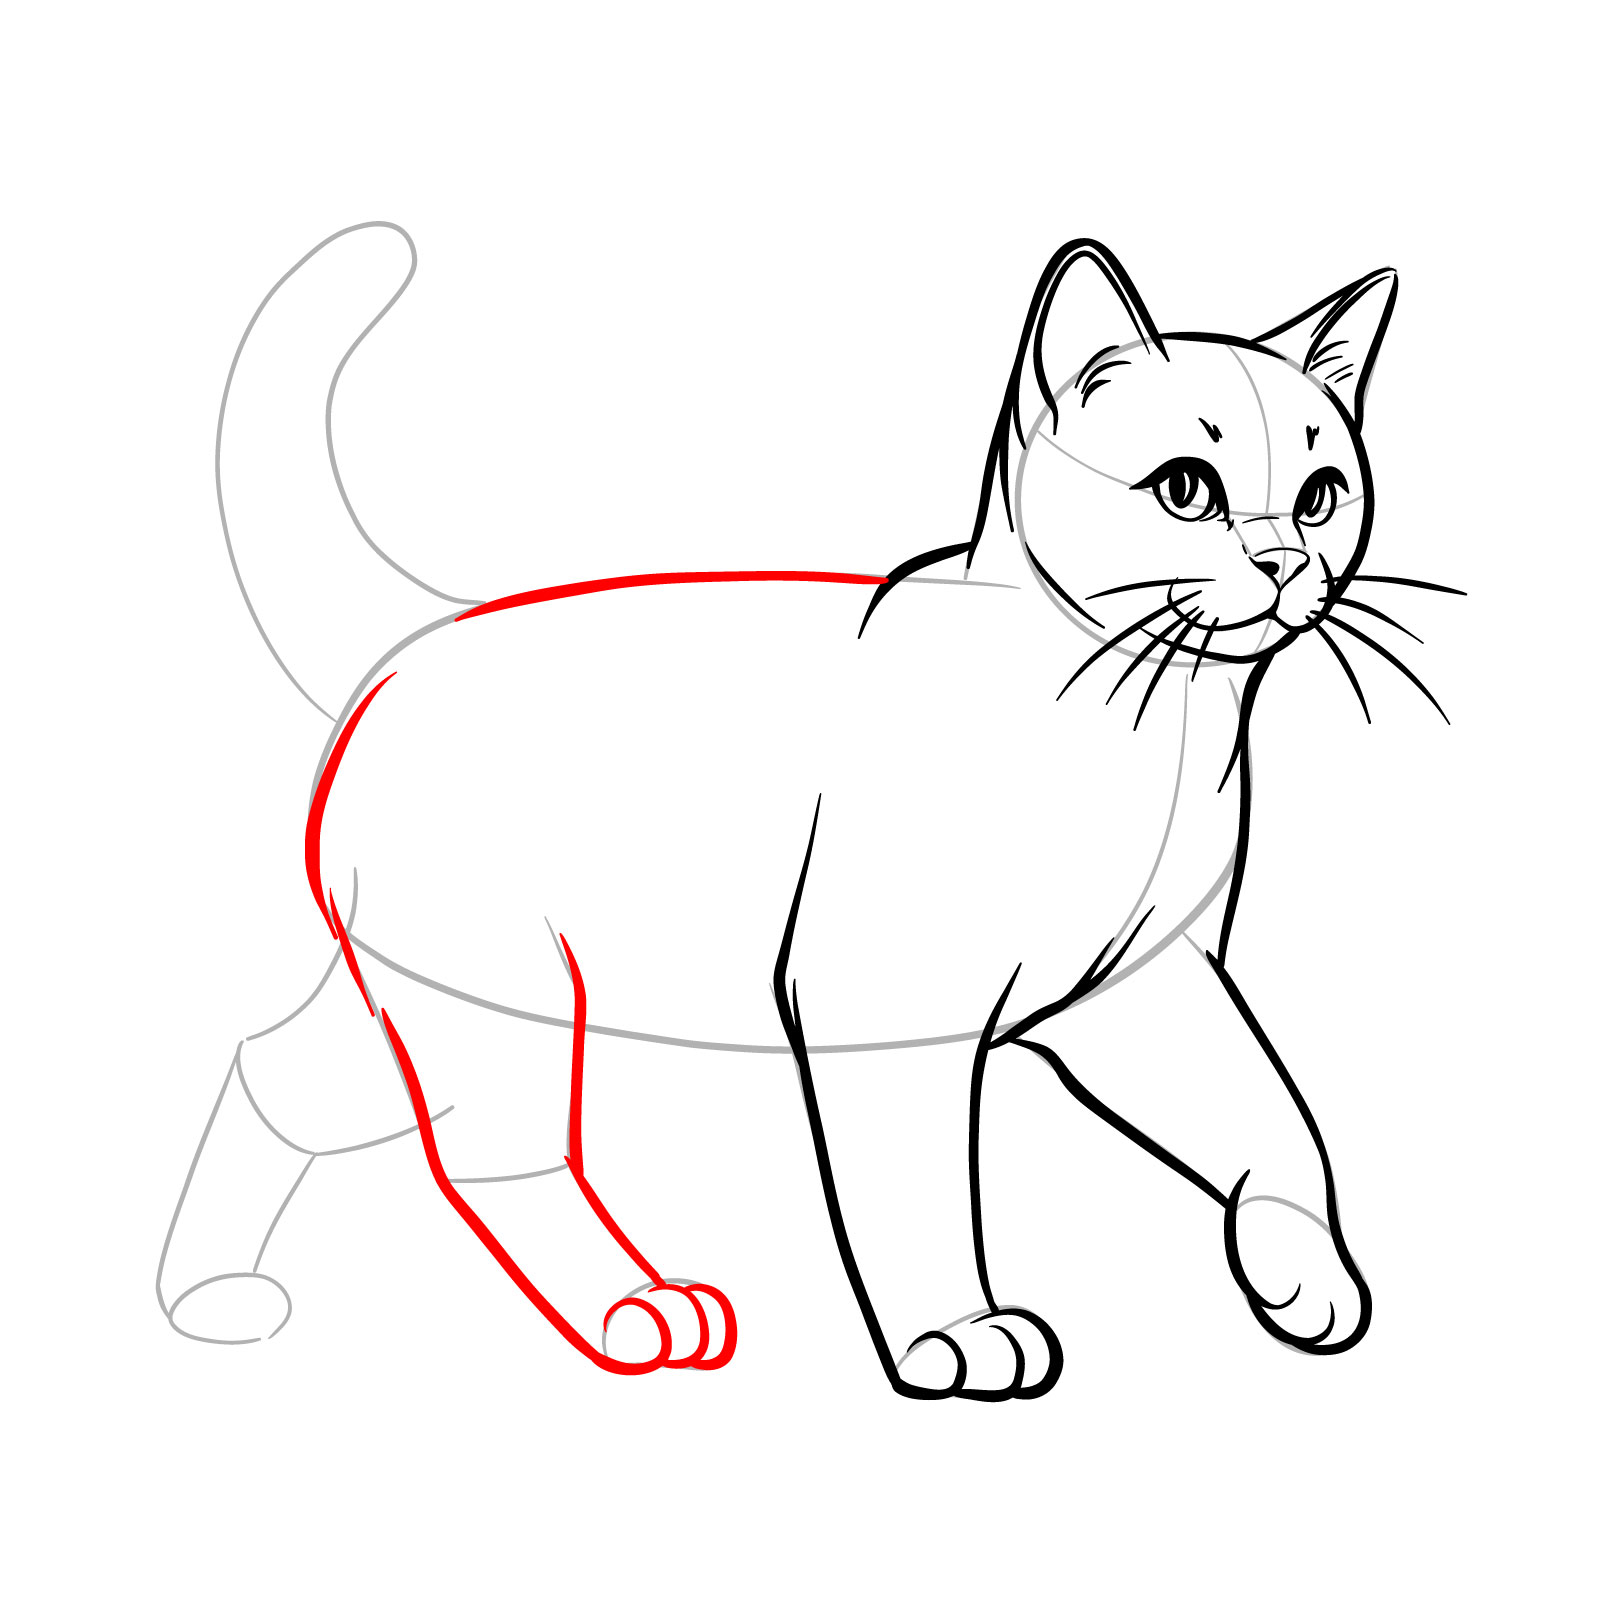
Pace 12 – For the second back branch , mimic the status of the first but with a little variation to depict the different phase of the walking cps . See the bottom part of the torso is drawn with a gentle curve to suggest the bottom and the belly of the guy
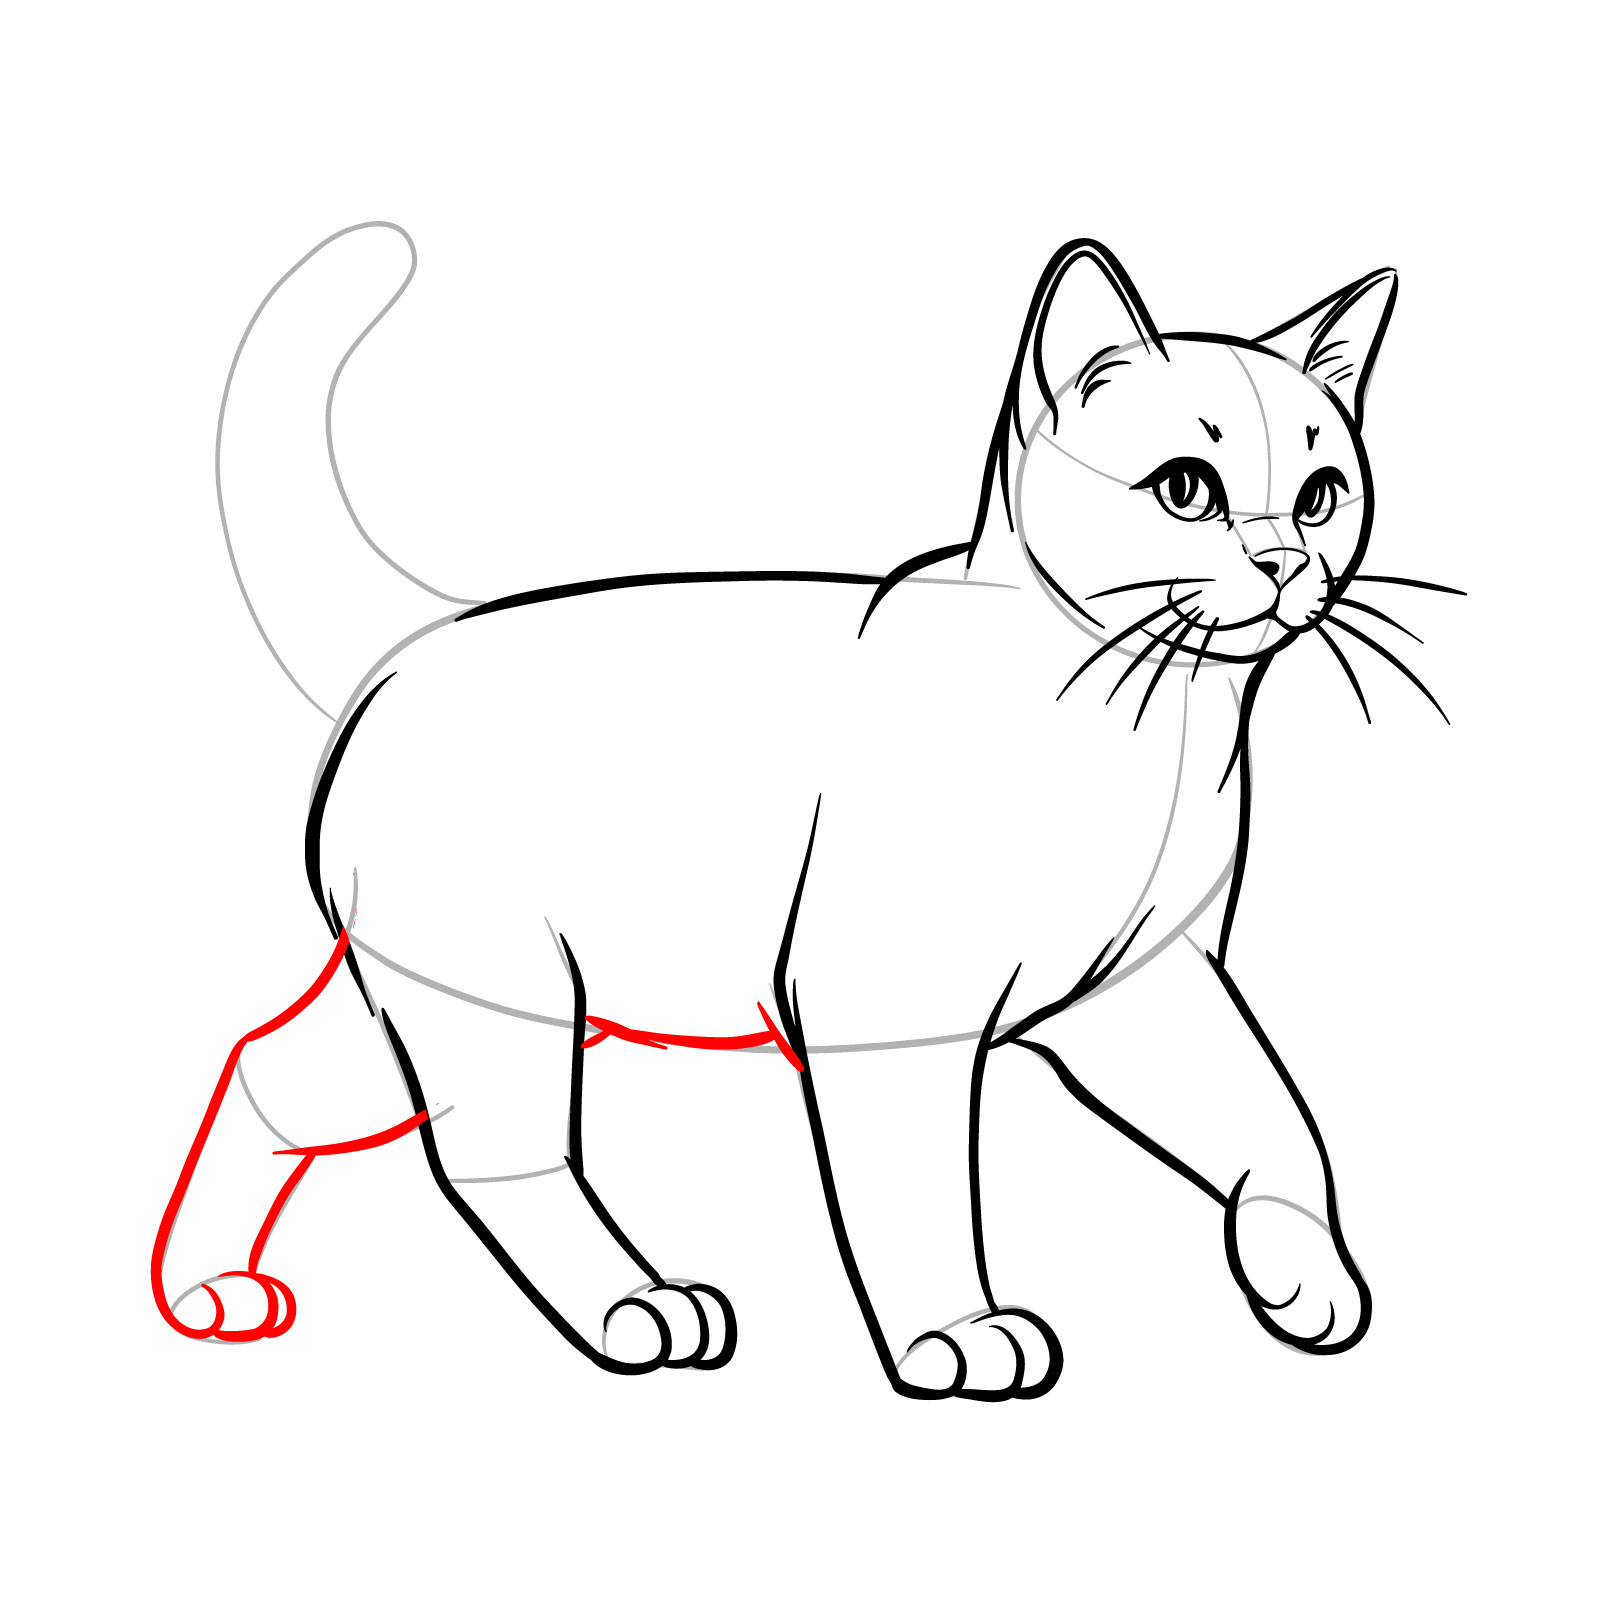
Step 13 – For the tail , trace a long , curved line that start from the rear and extends upwards , give a sense of movement and balance to the walk cat . The seat should be fluid and dynamic , contributing to the overall activity of the pose
Step 14 – Add some light fold to the front of the body to suggest the motion of the guy ’ sec muscles and fur as it walk . This includes a slight indentation where the branch meets the torso to indicate the natural shape of the feline form
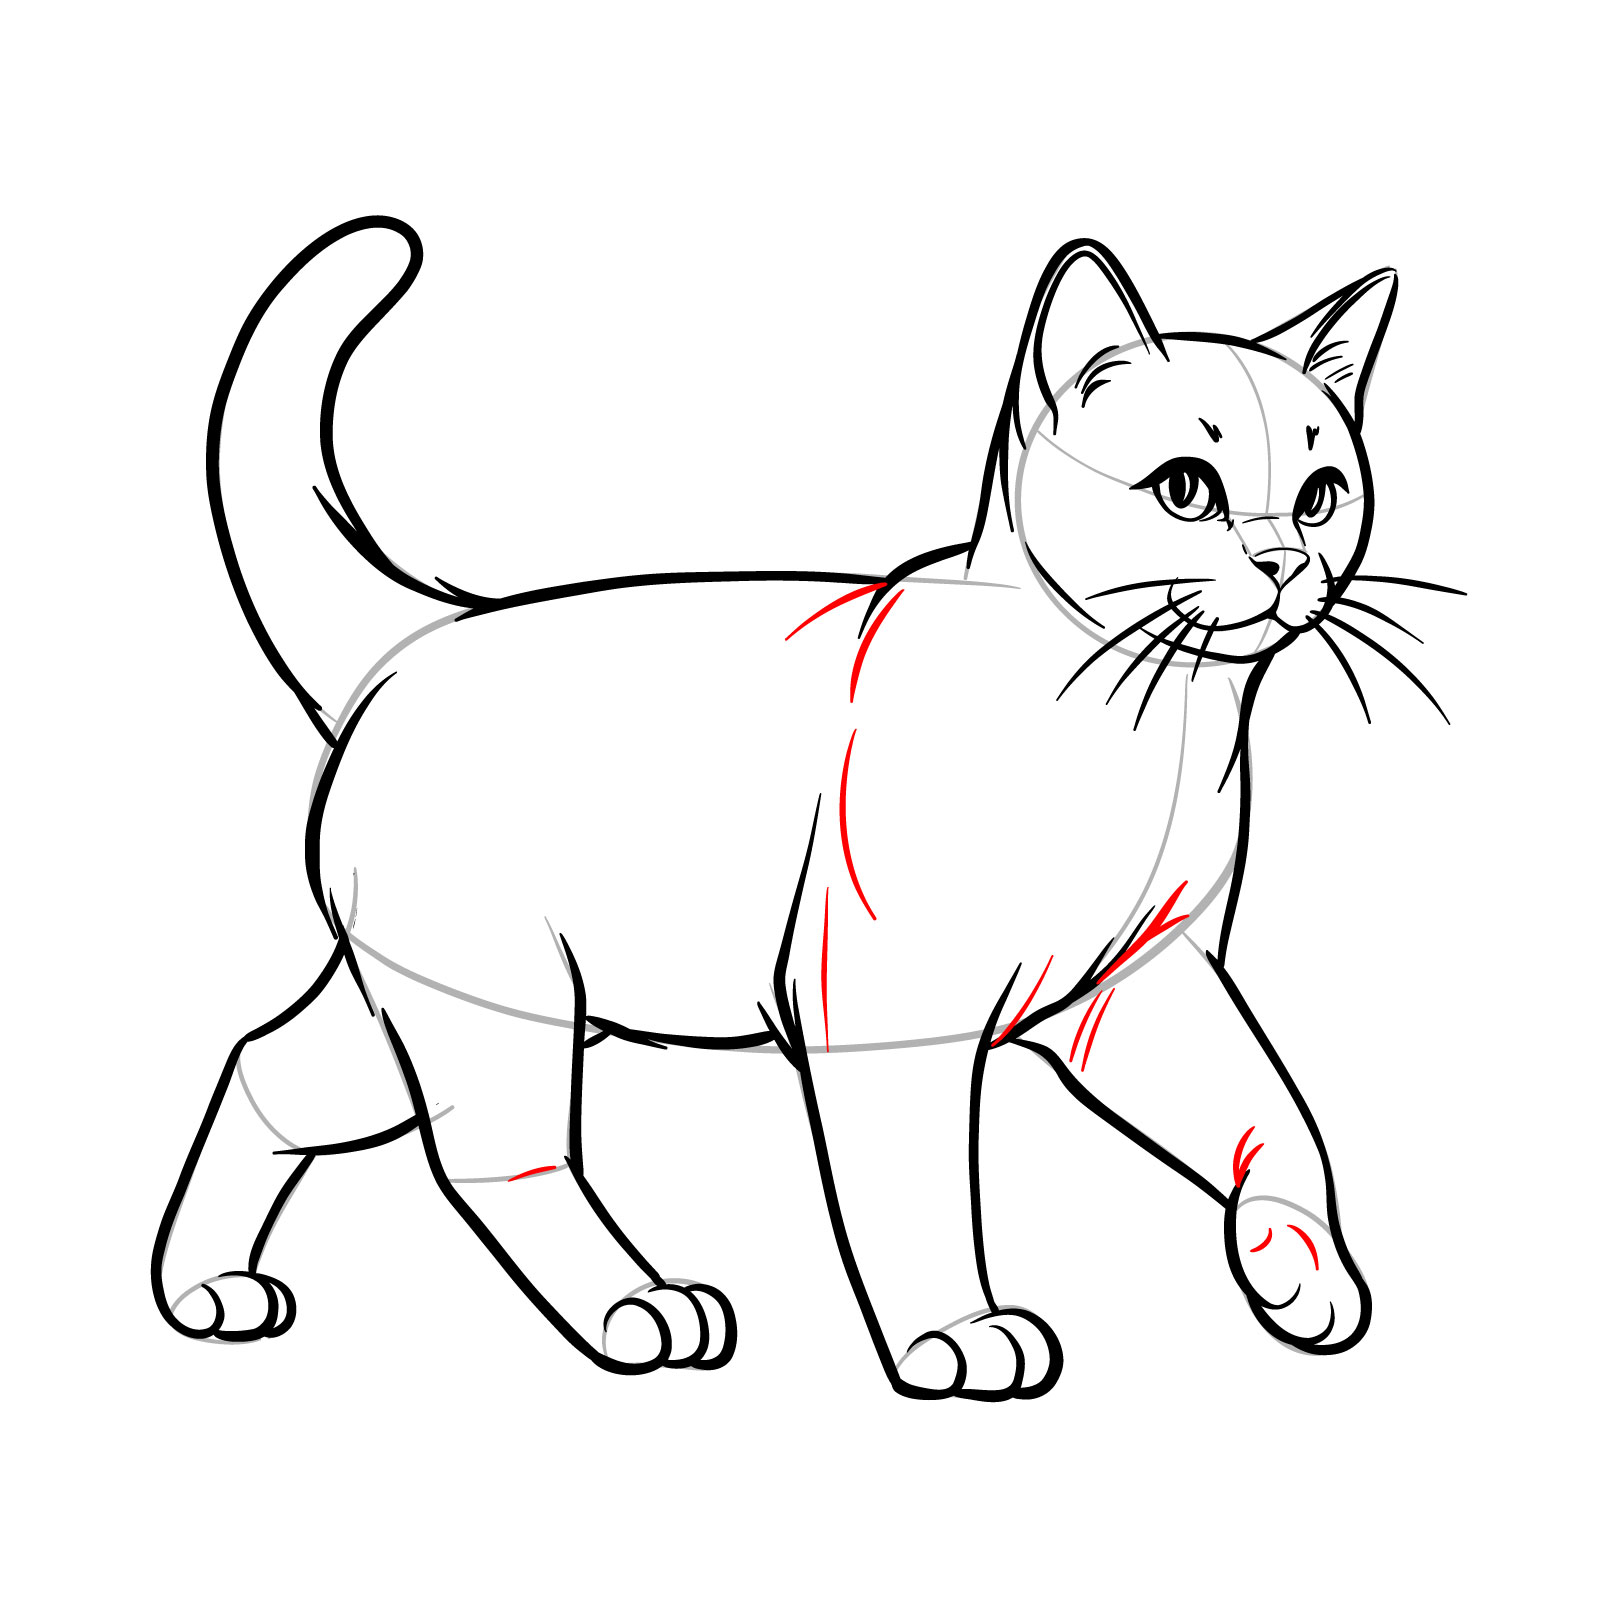
Step 15 – Your guide on how to make a walking cat culminates in this last illustration . With attention to proportion , motion , and realistic detailing , the cat ’ s walking pose be now complete . The draw captures the essence of a guy in gesture , making it an ideal mention for both beginners and those seem to refine their skill in capturing the subtleties of animal campaign
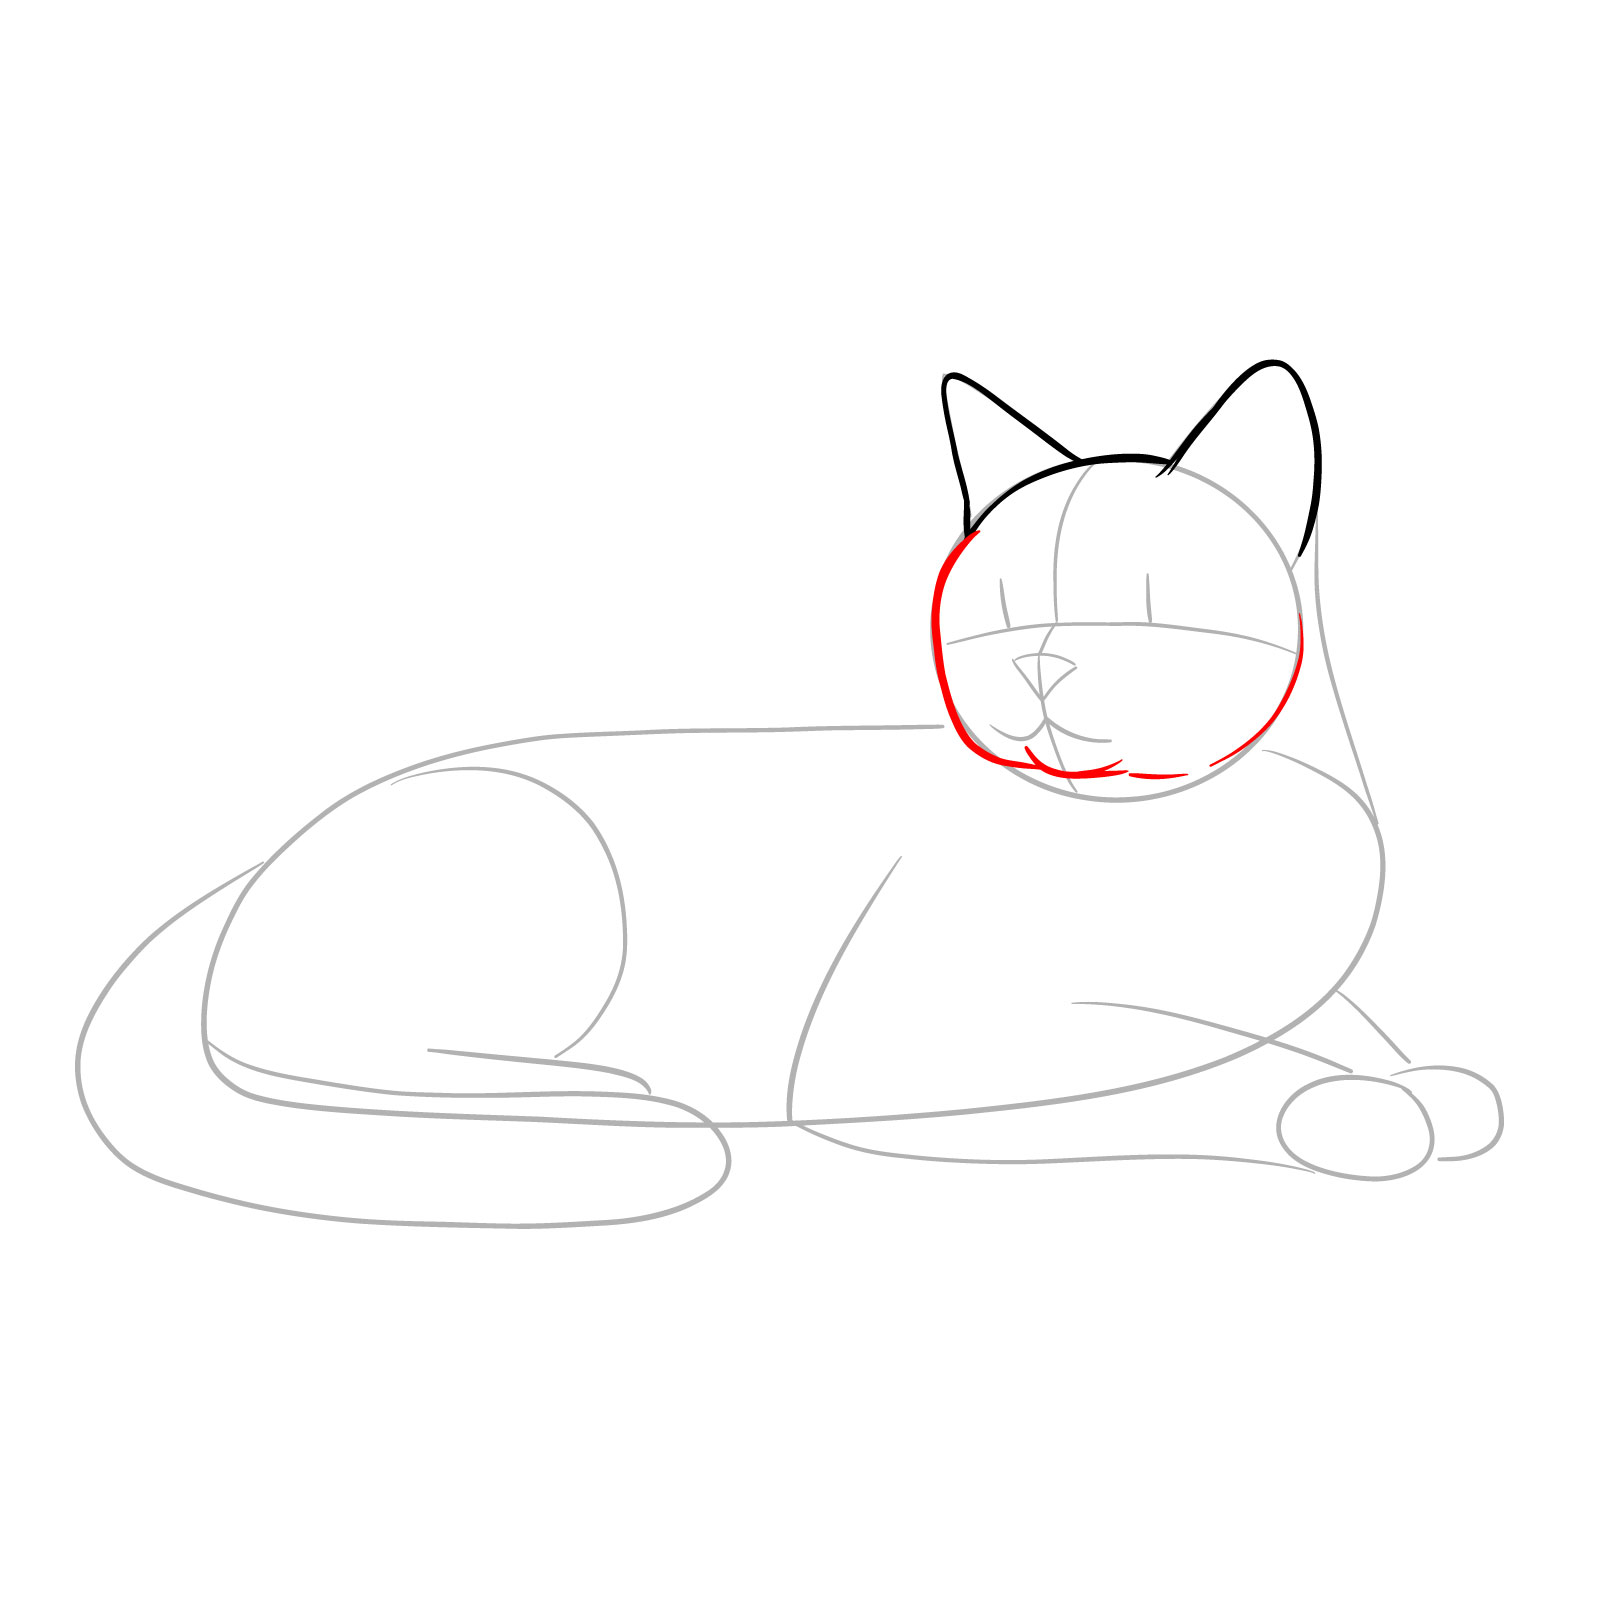
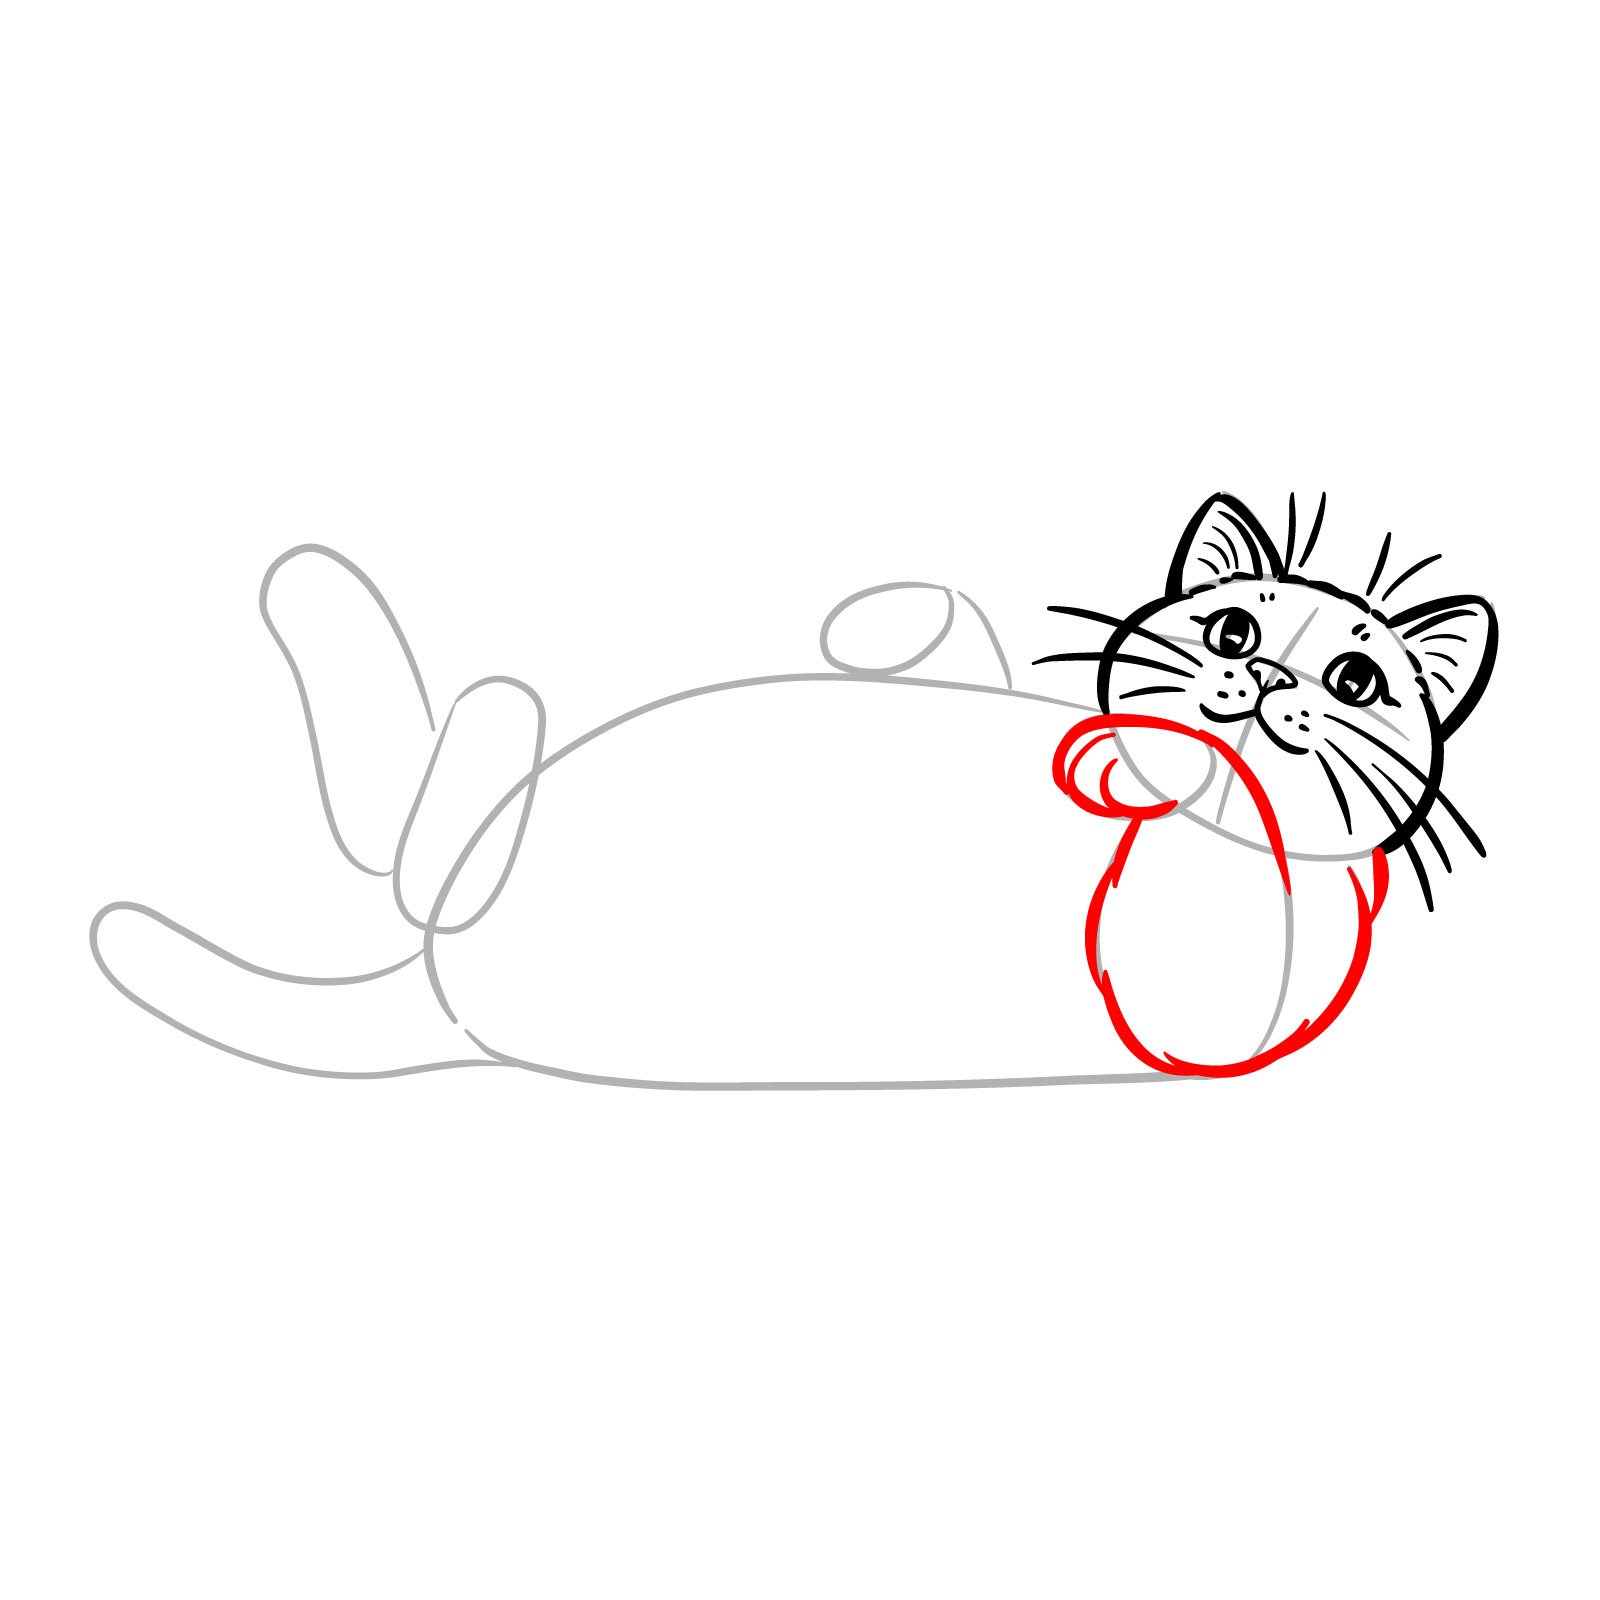
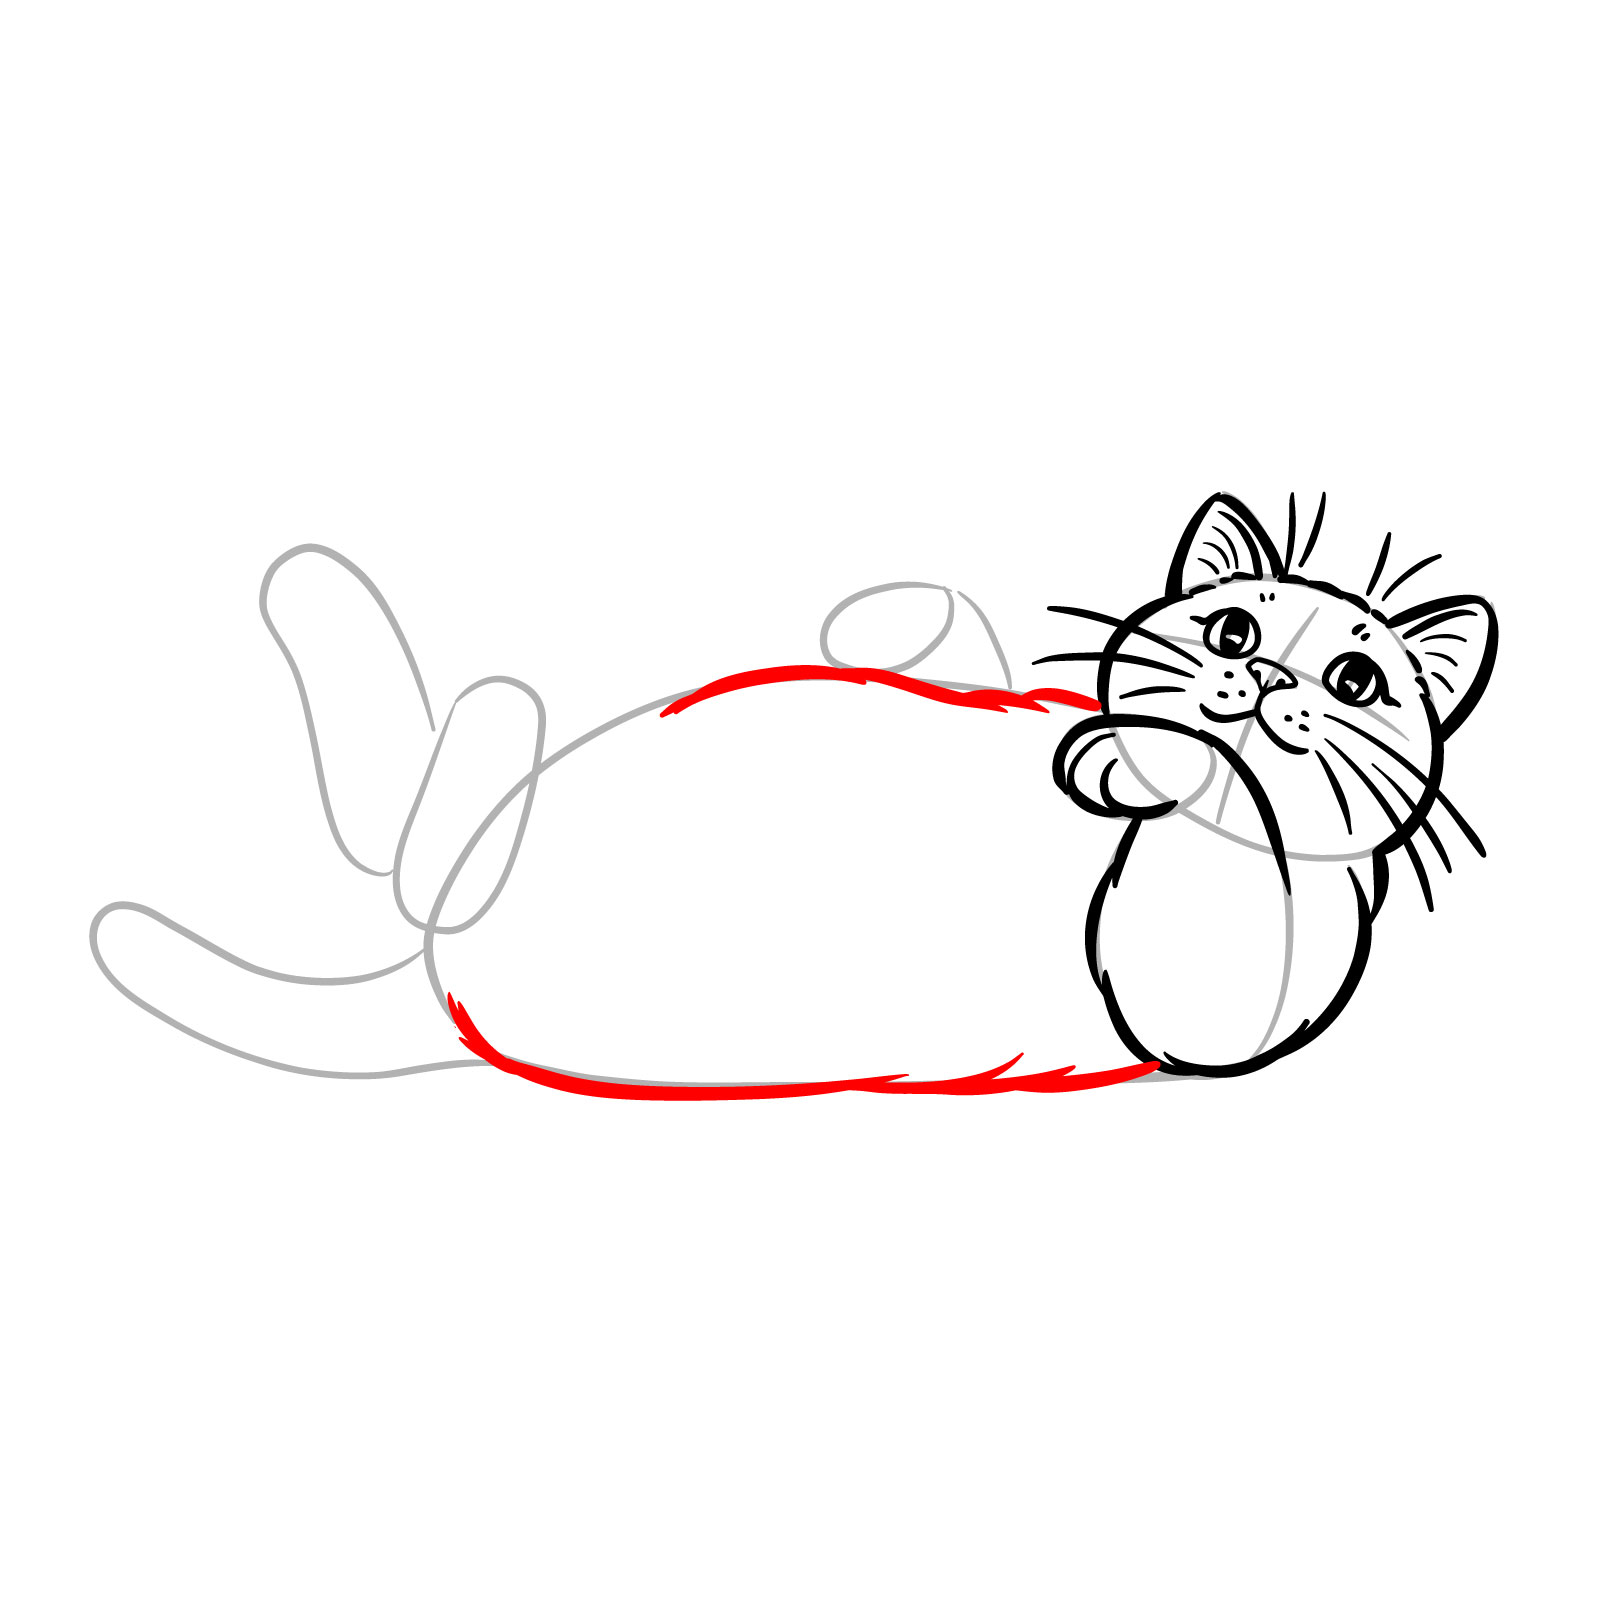
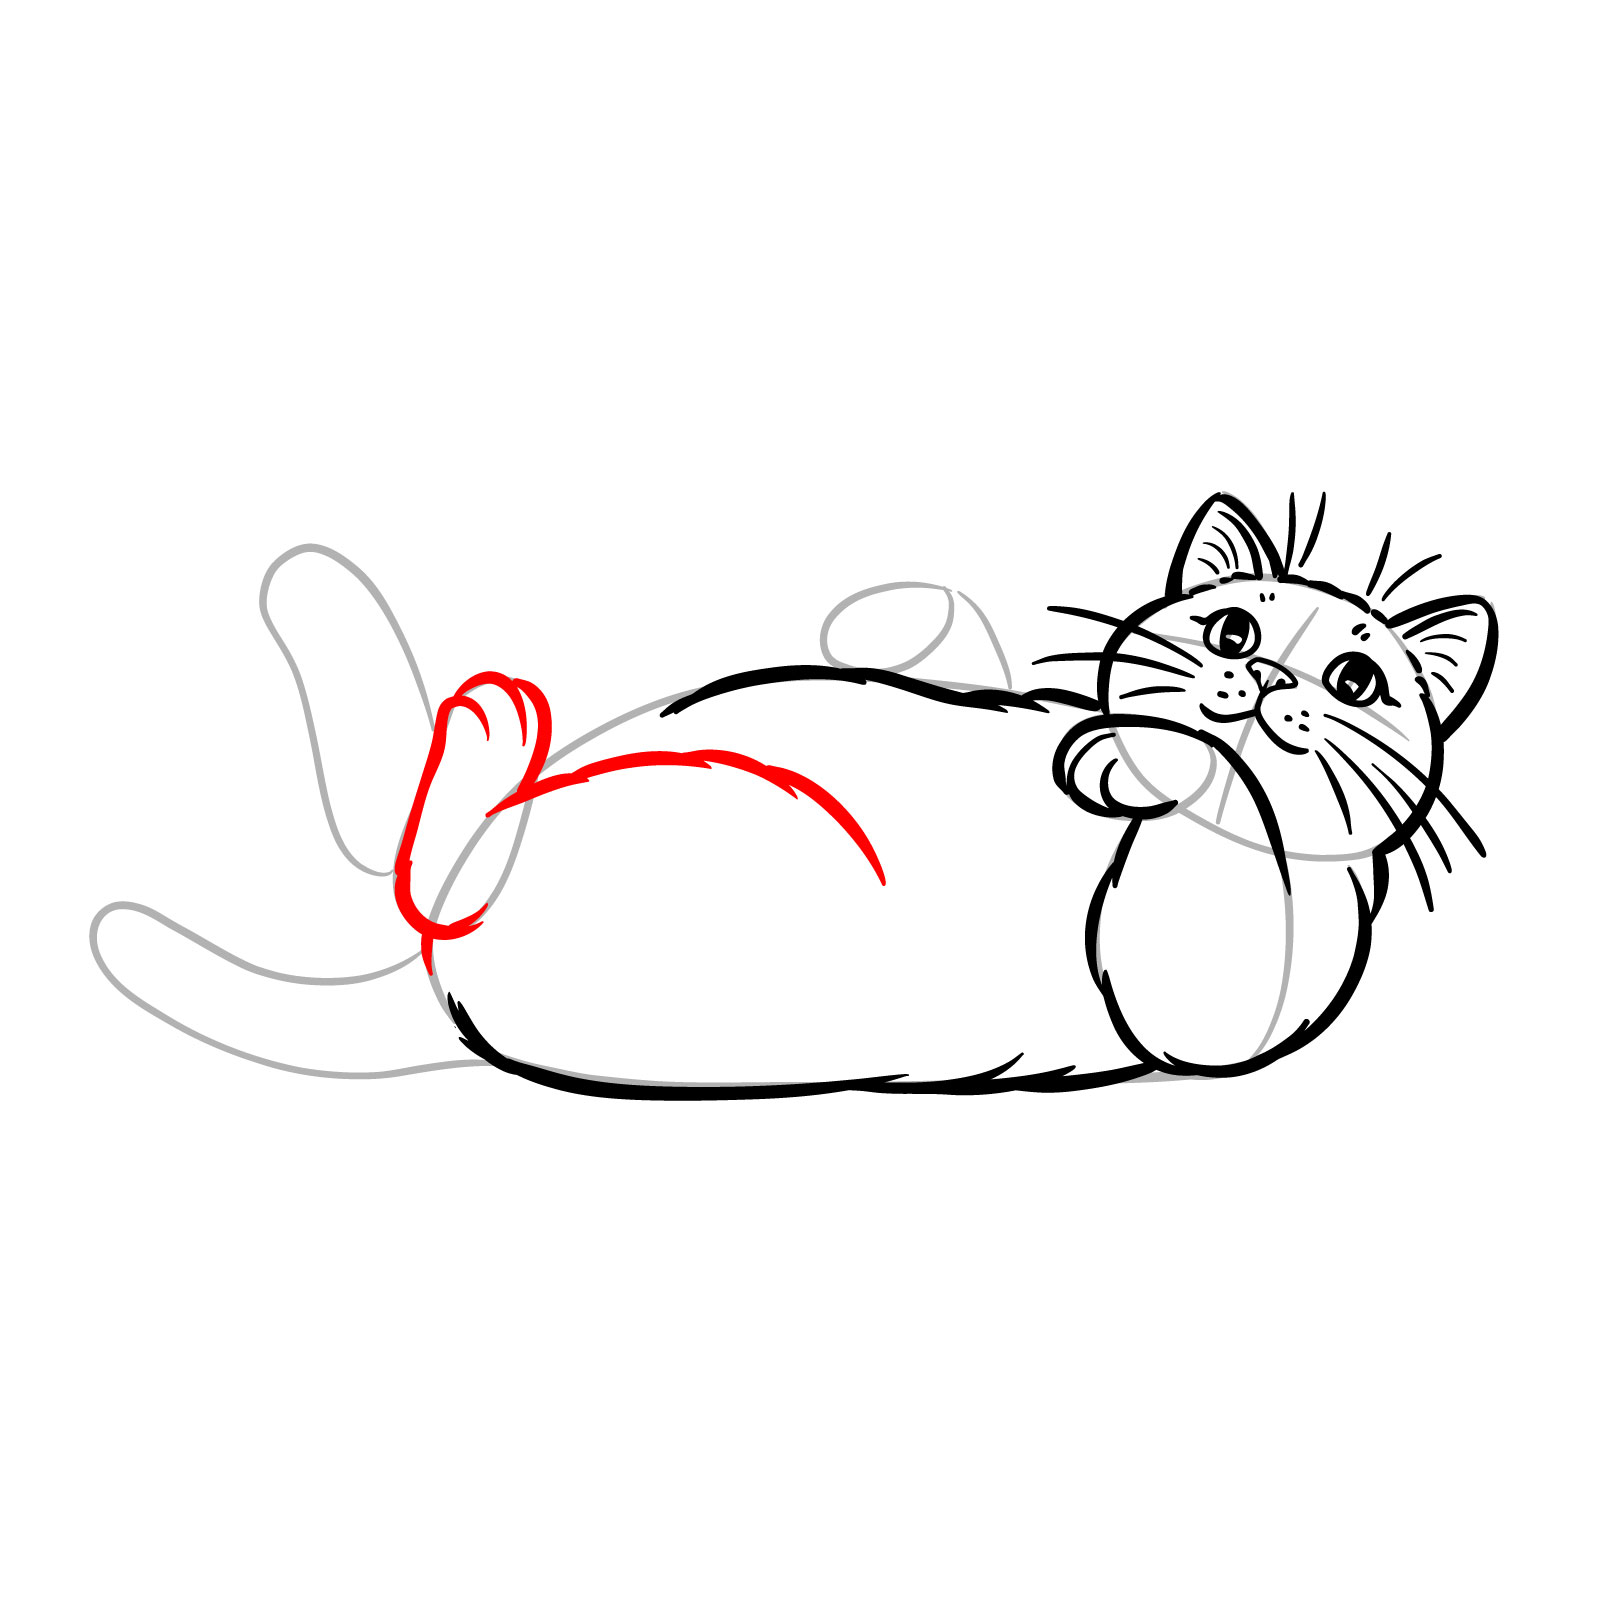
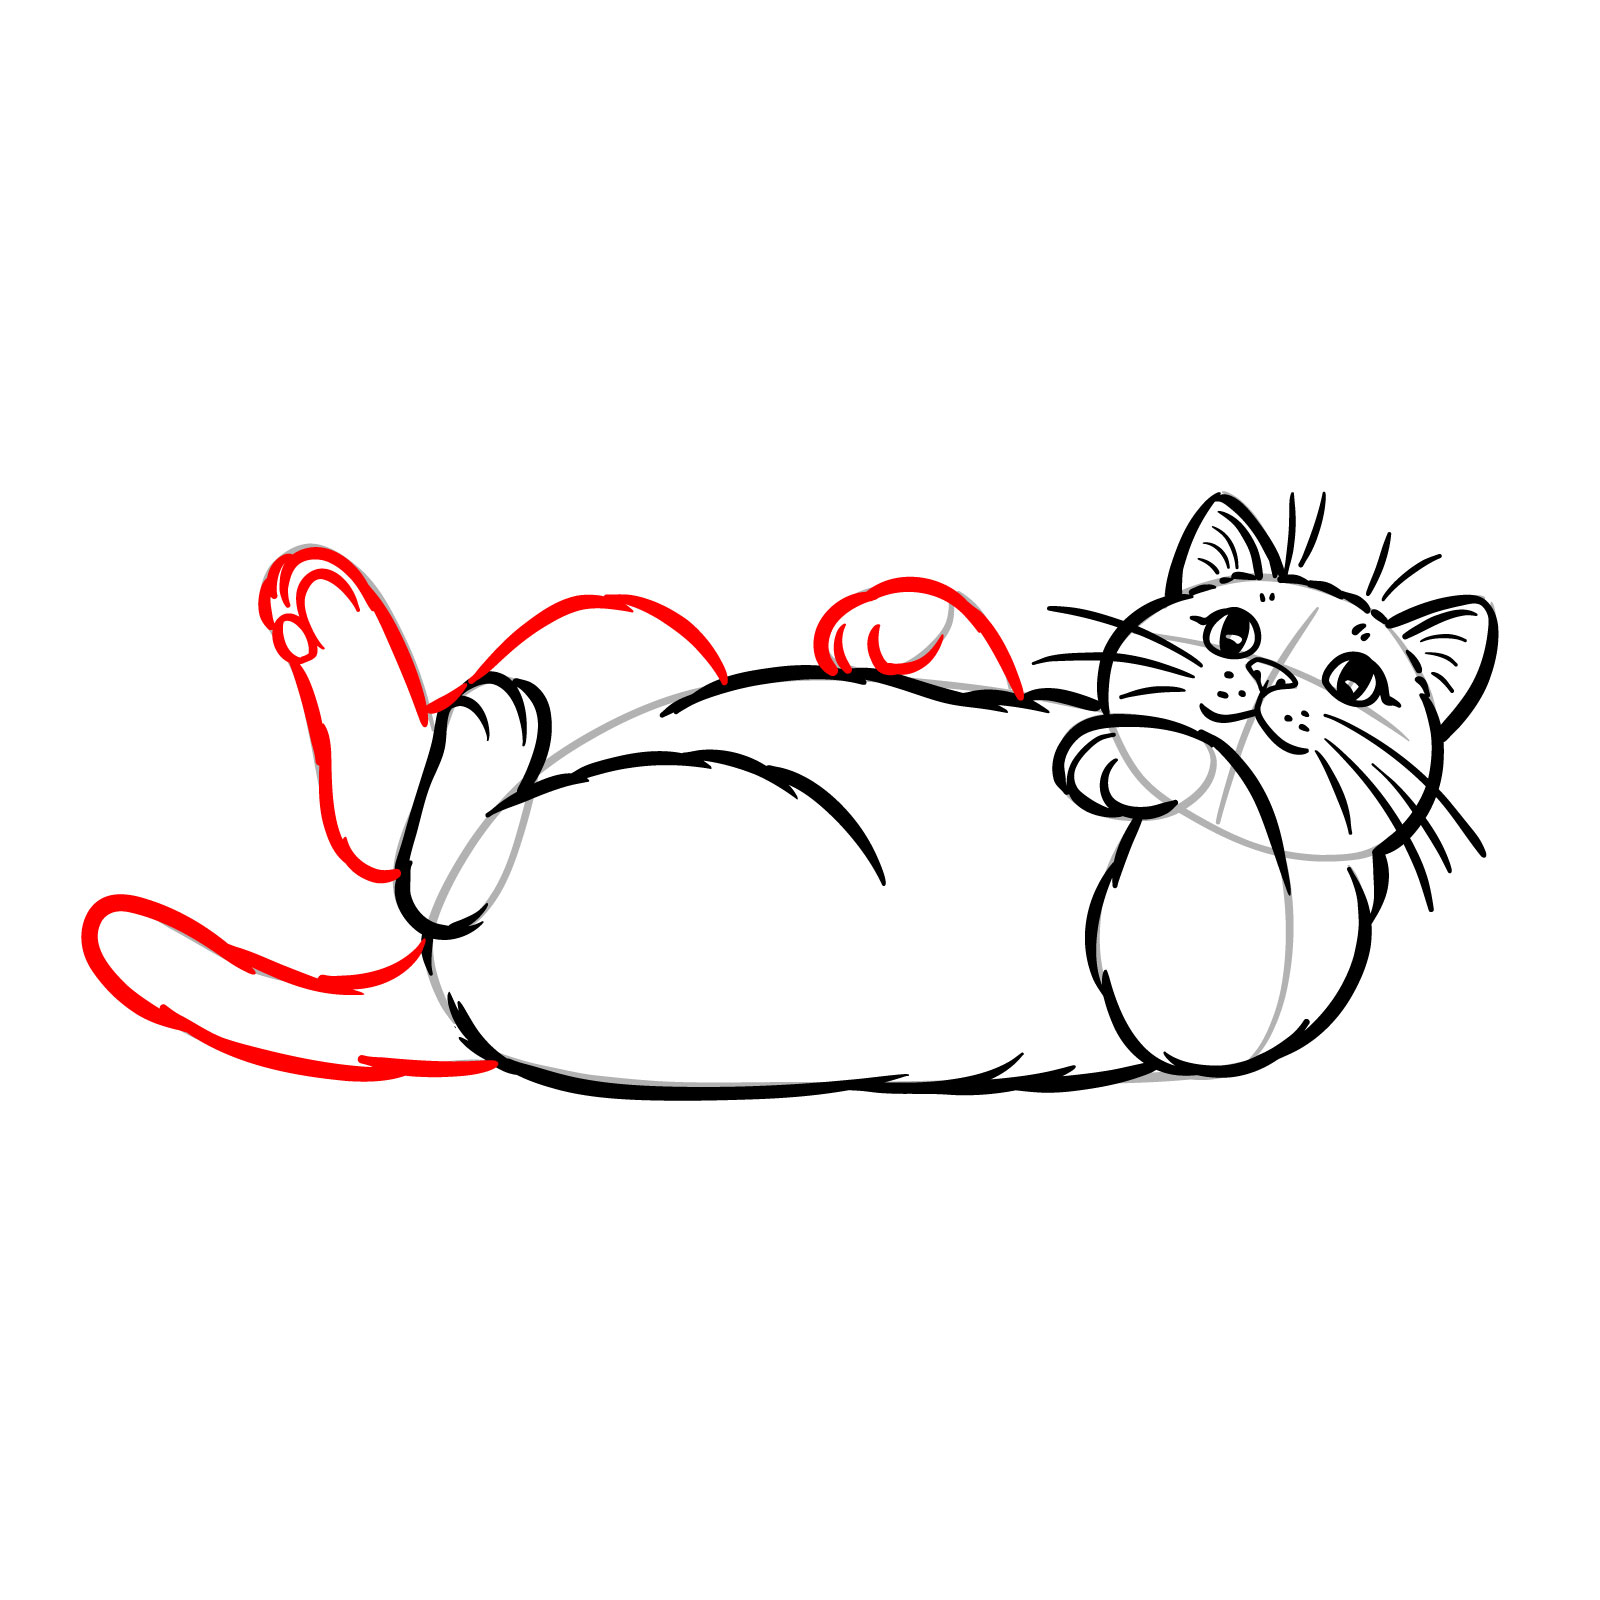
Guide 11 : How to Draw a Lying Cat – Side View – 14 Pace

Our eleventh guide eases you into depicting the calm posture of a lying cat , regard from the side . Within this 14-step tutorial , you ’ ll see how to draw a lying cat with an medium stage of complexity , suitable for beginners yet yet engaging for those with more drawing experience . We focus on a realistic depiction that simplifies the details to ensure a smooth drawing process . The guide start out by constructing a proportional framework in the first two footstep , which live key to achieving the relaxed and natural pose of a remain cat . With each step , you ’ ll regard your guy take form , capturing the subdued elegance of a cat at repose .
Pace 01 – Begin by draw a band for the cat ’ sec head , with a vertical line down to show the center and a horizontal melody across for middle placement , indicating the counseling of the face . Cover the bottom of the circle to advise the muzzle . Draw an elongated oval-like shape for the body to symbolize the guy ’ s relax position
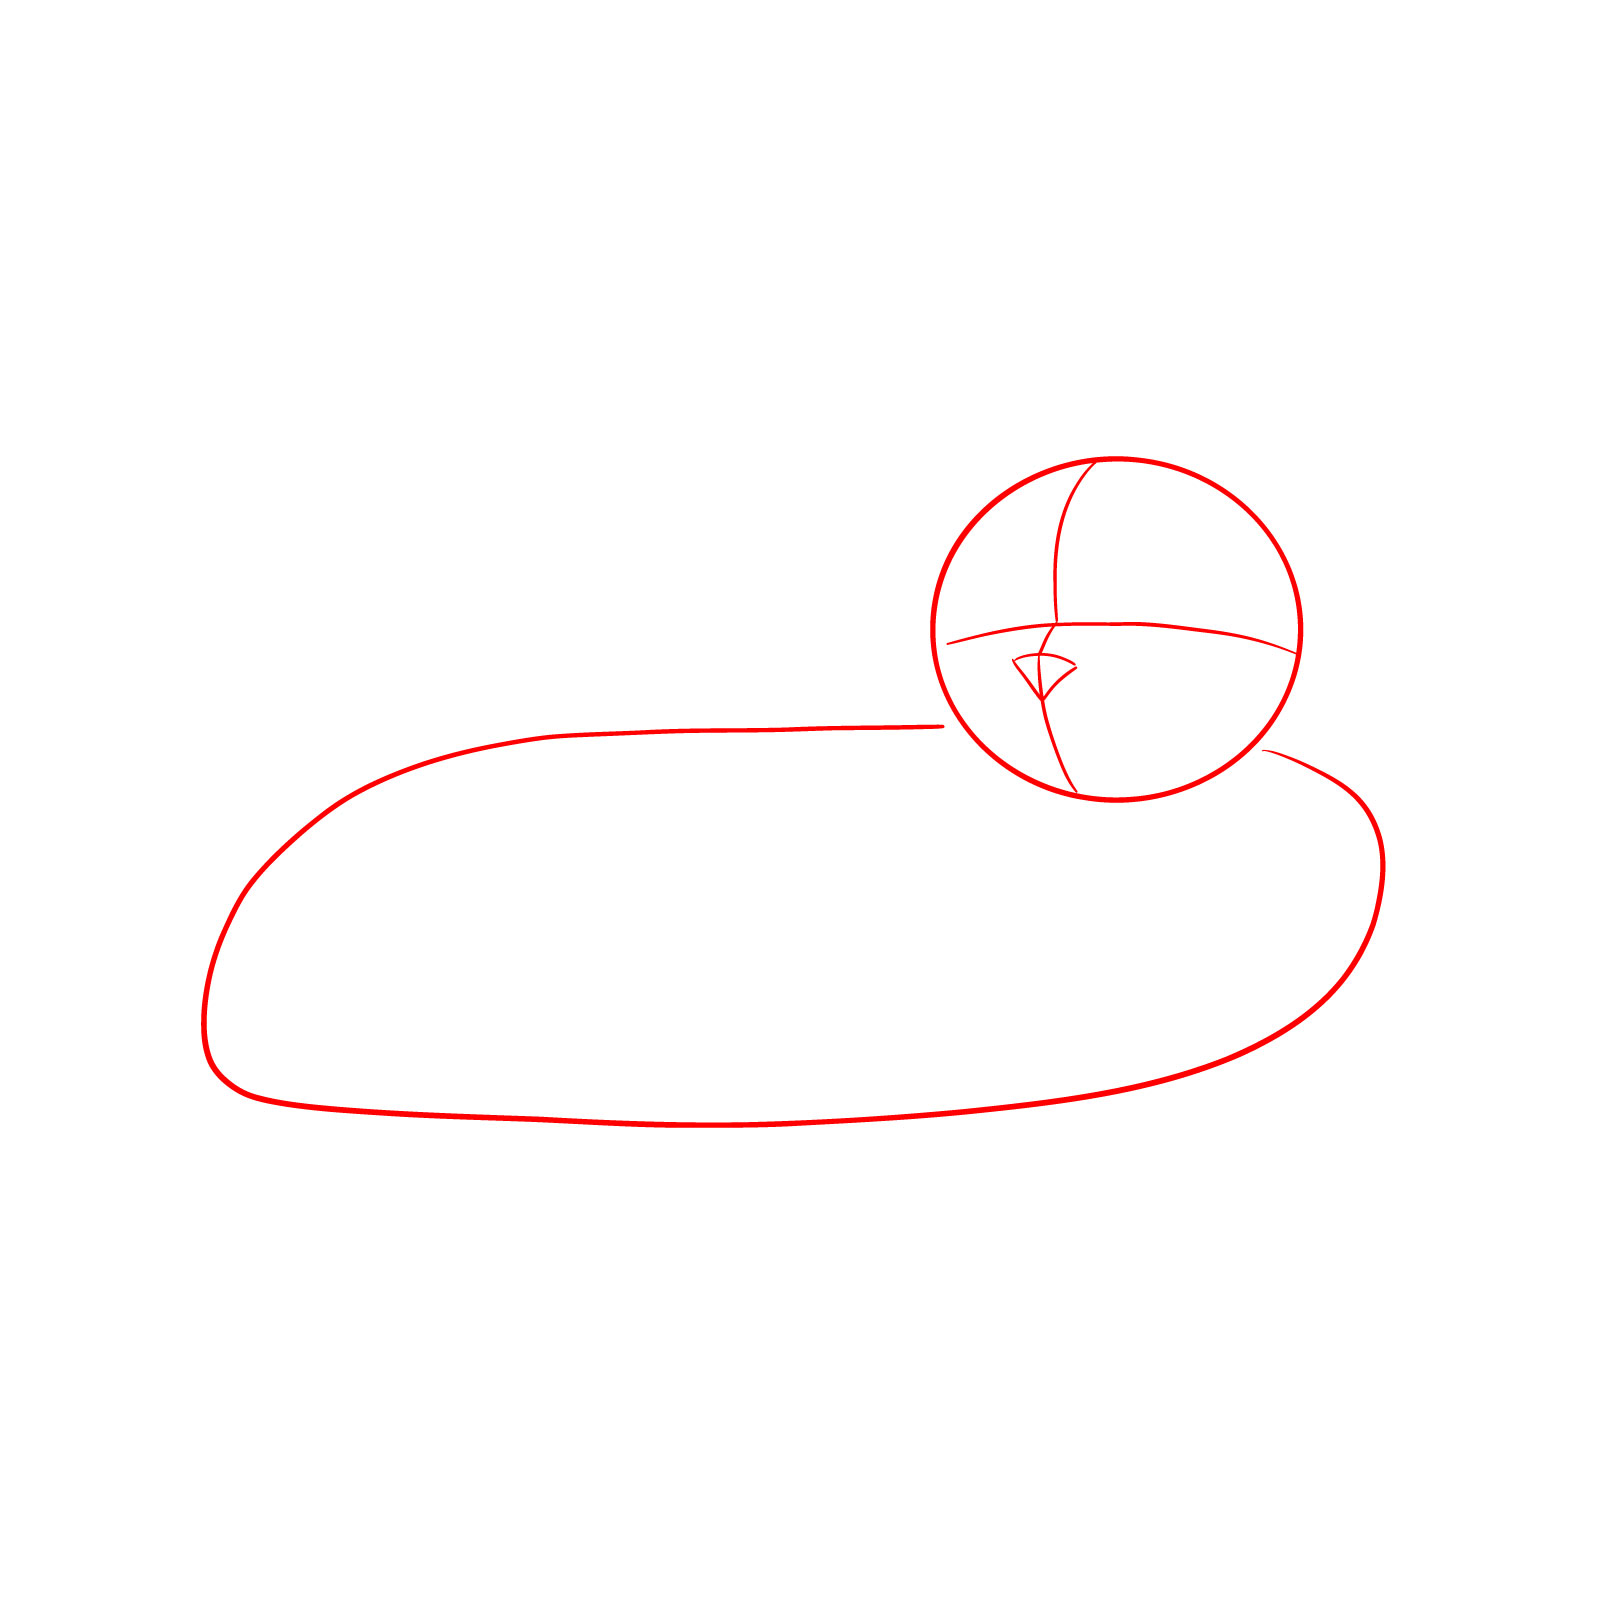
Step 02 – Within the head , mark the positions for the heart and mouth using the guidelines . Sketch simple shapes where the ear will live at the height of the head , a curve for the seat ’ sec alkali , and basic outlines for the leg

Pace 03 – Draw two triangular shapes for the ear , ensuring they cost appropriately sized for the head . Connect the ear with a gentle curve to represent the crest of the head
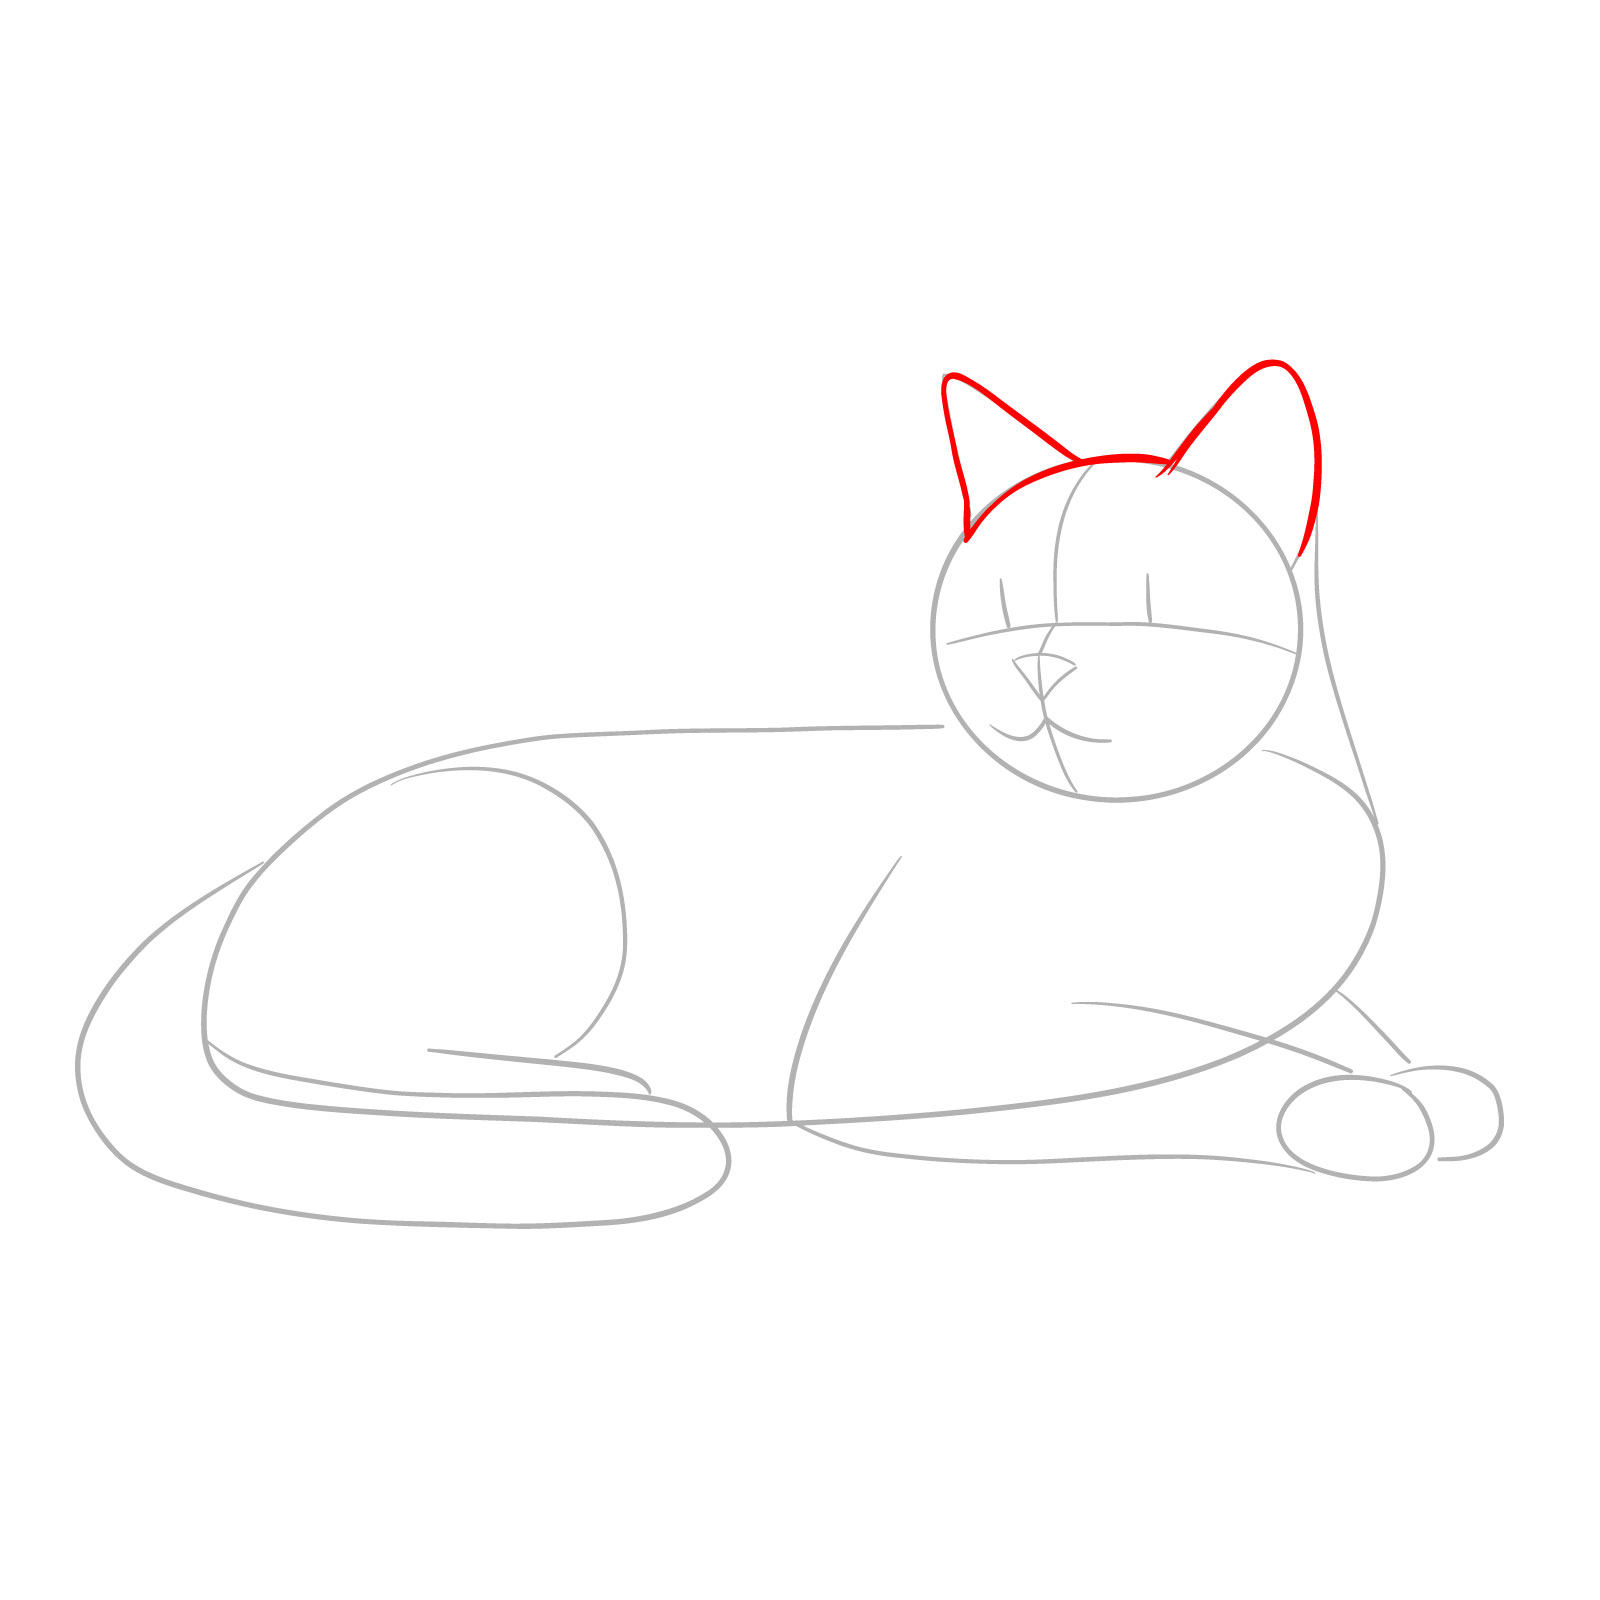
Measure 04 – From the ear , bring down two lines to form the side of the head , converging somewhat to draft the chin
Step 05 – Draw two oval for the pupil and get out a small blank space for the highlight to give the center a sense of life and dimension

Pace 06 – Above each student , outline the upper eyelid , giving them a slight curve to point the eyelid ’ s form and the cat ’ s peaceful formula
Step 07 – Detail the eyes by polish the frame around the student and adding any necessary lines to suggest the eye ’ s depth . Place a small triangular frame for the nose , aligning it with the guideline
Step 08 – Draw the mouth with gentle curves beneath the nose to specify the muzzle area . Then , lend the inner course of the ear to make a more detailed and realistic depiction of a guy lie in down in a side horizon
Step 09 – Begin by sketching fine job radiating from the muzzle to present whiskers , insure they change in length for a natural look . Add short strokes along the cheek and forehead to suggest a gentle fur texture
Step 10 – Trace a smooth , continuous course along the rear and neck , comply the initial guide . This defines the upper form of the cat ’ s torso , giving structure to the lying pose
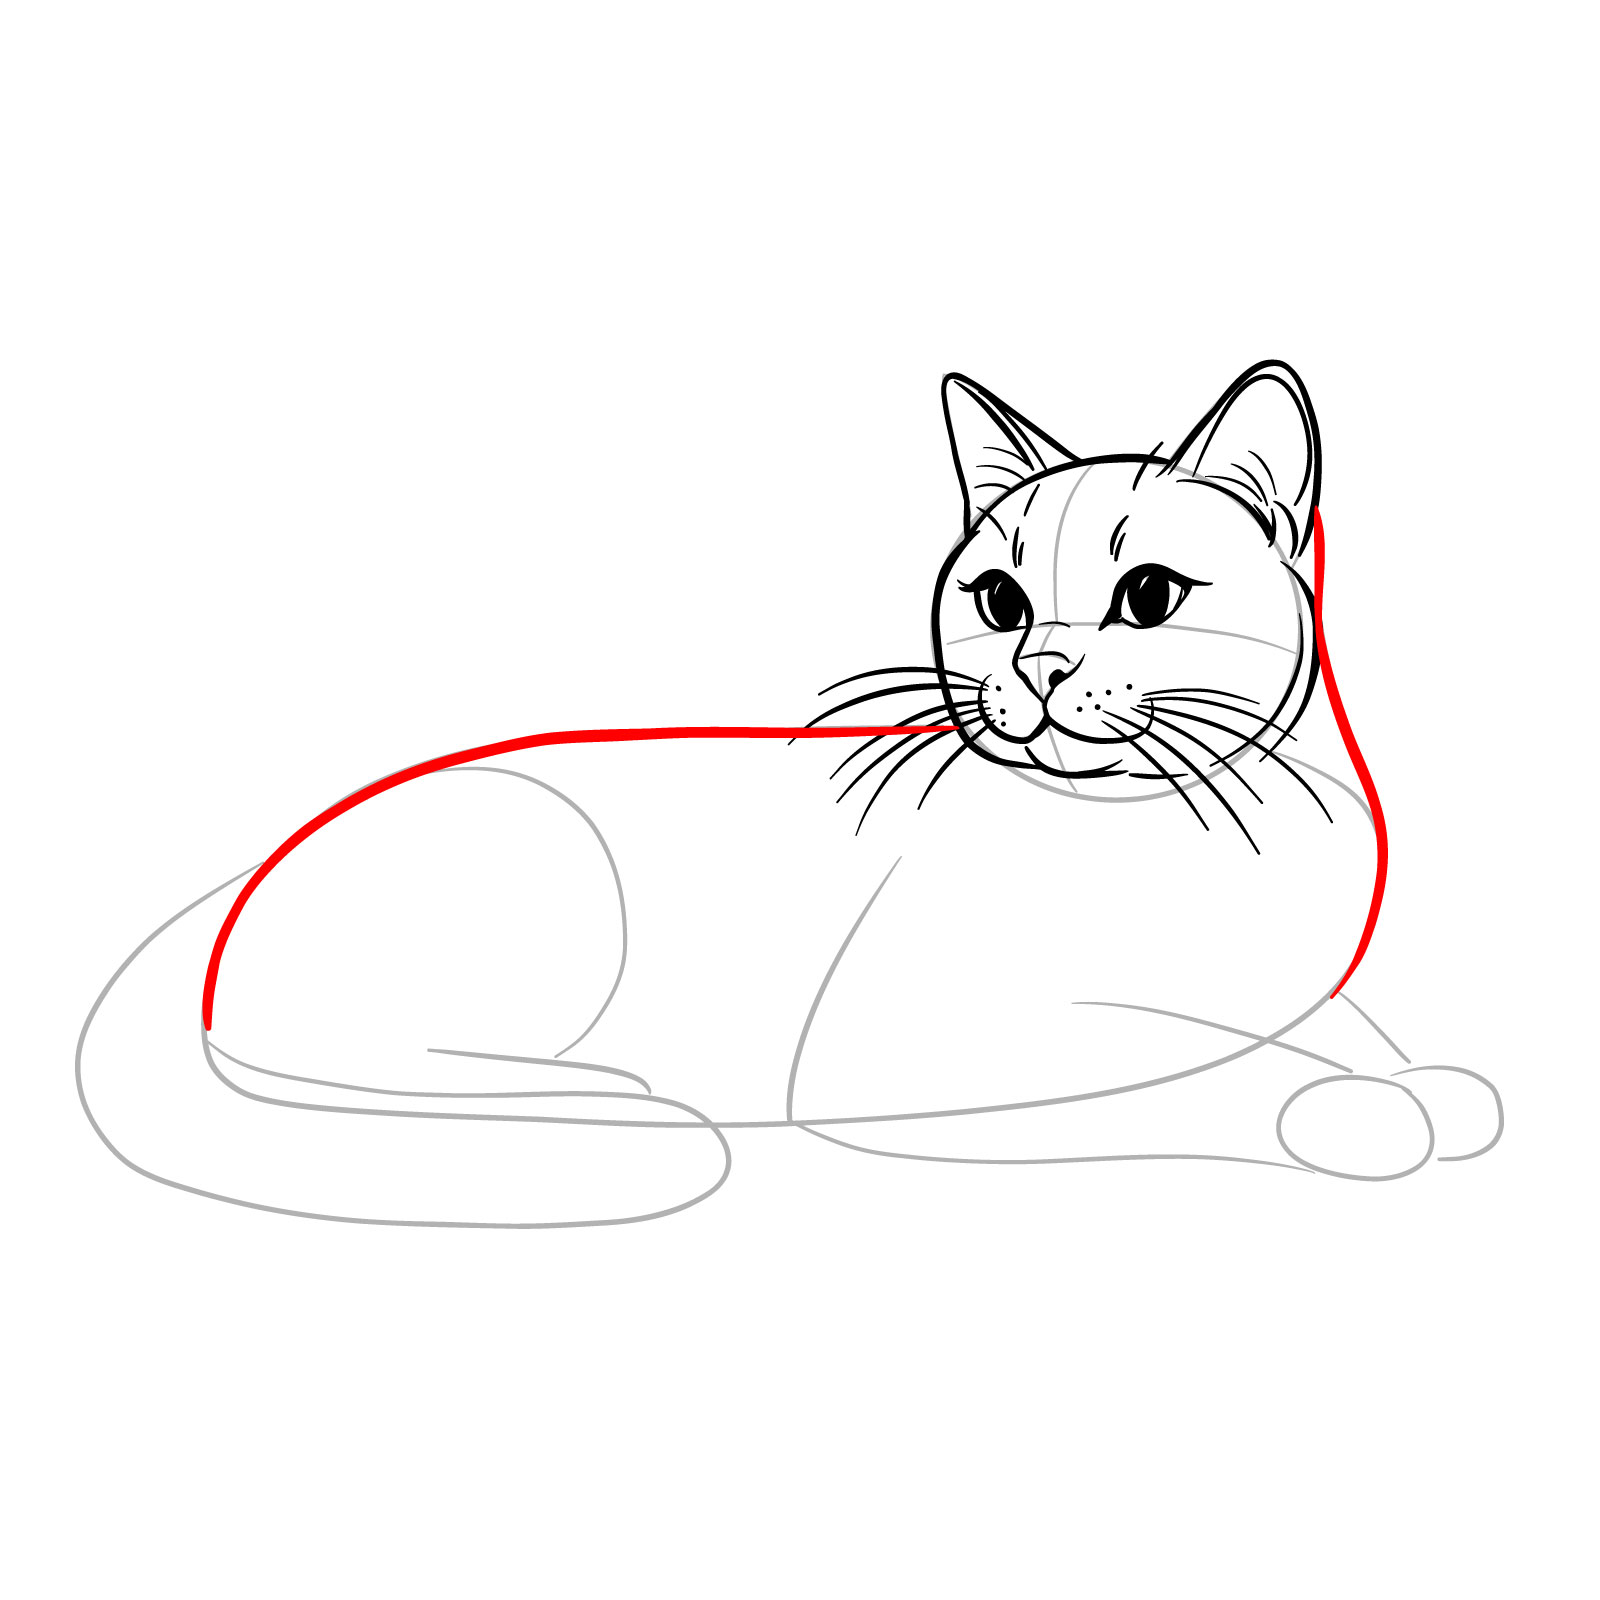
Pace 11 – Draw the ass starting from the basis , extending it with a gentle curve . Observe the tail ’ s width consistent for a realistic depiction
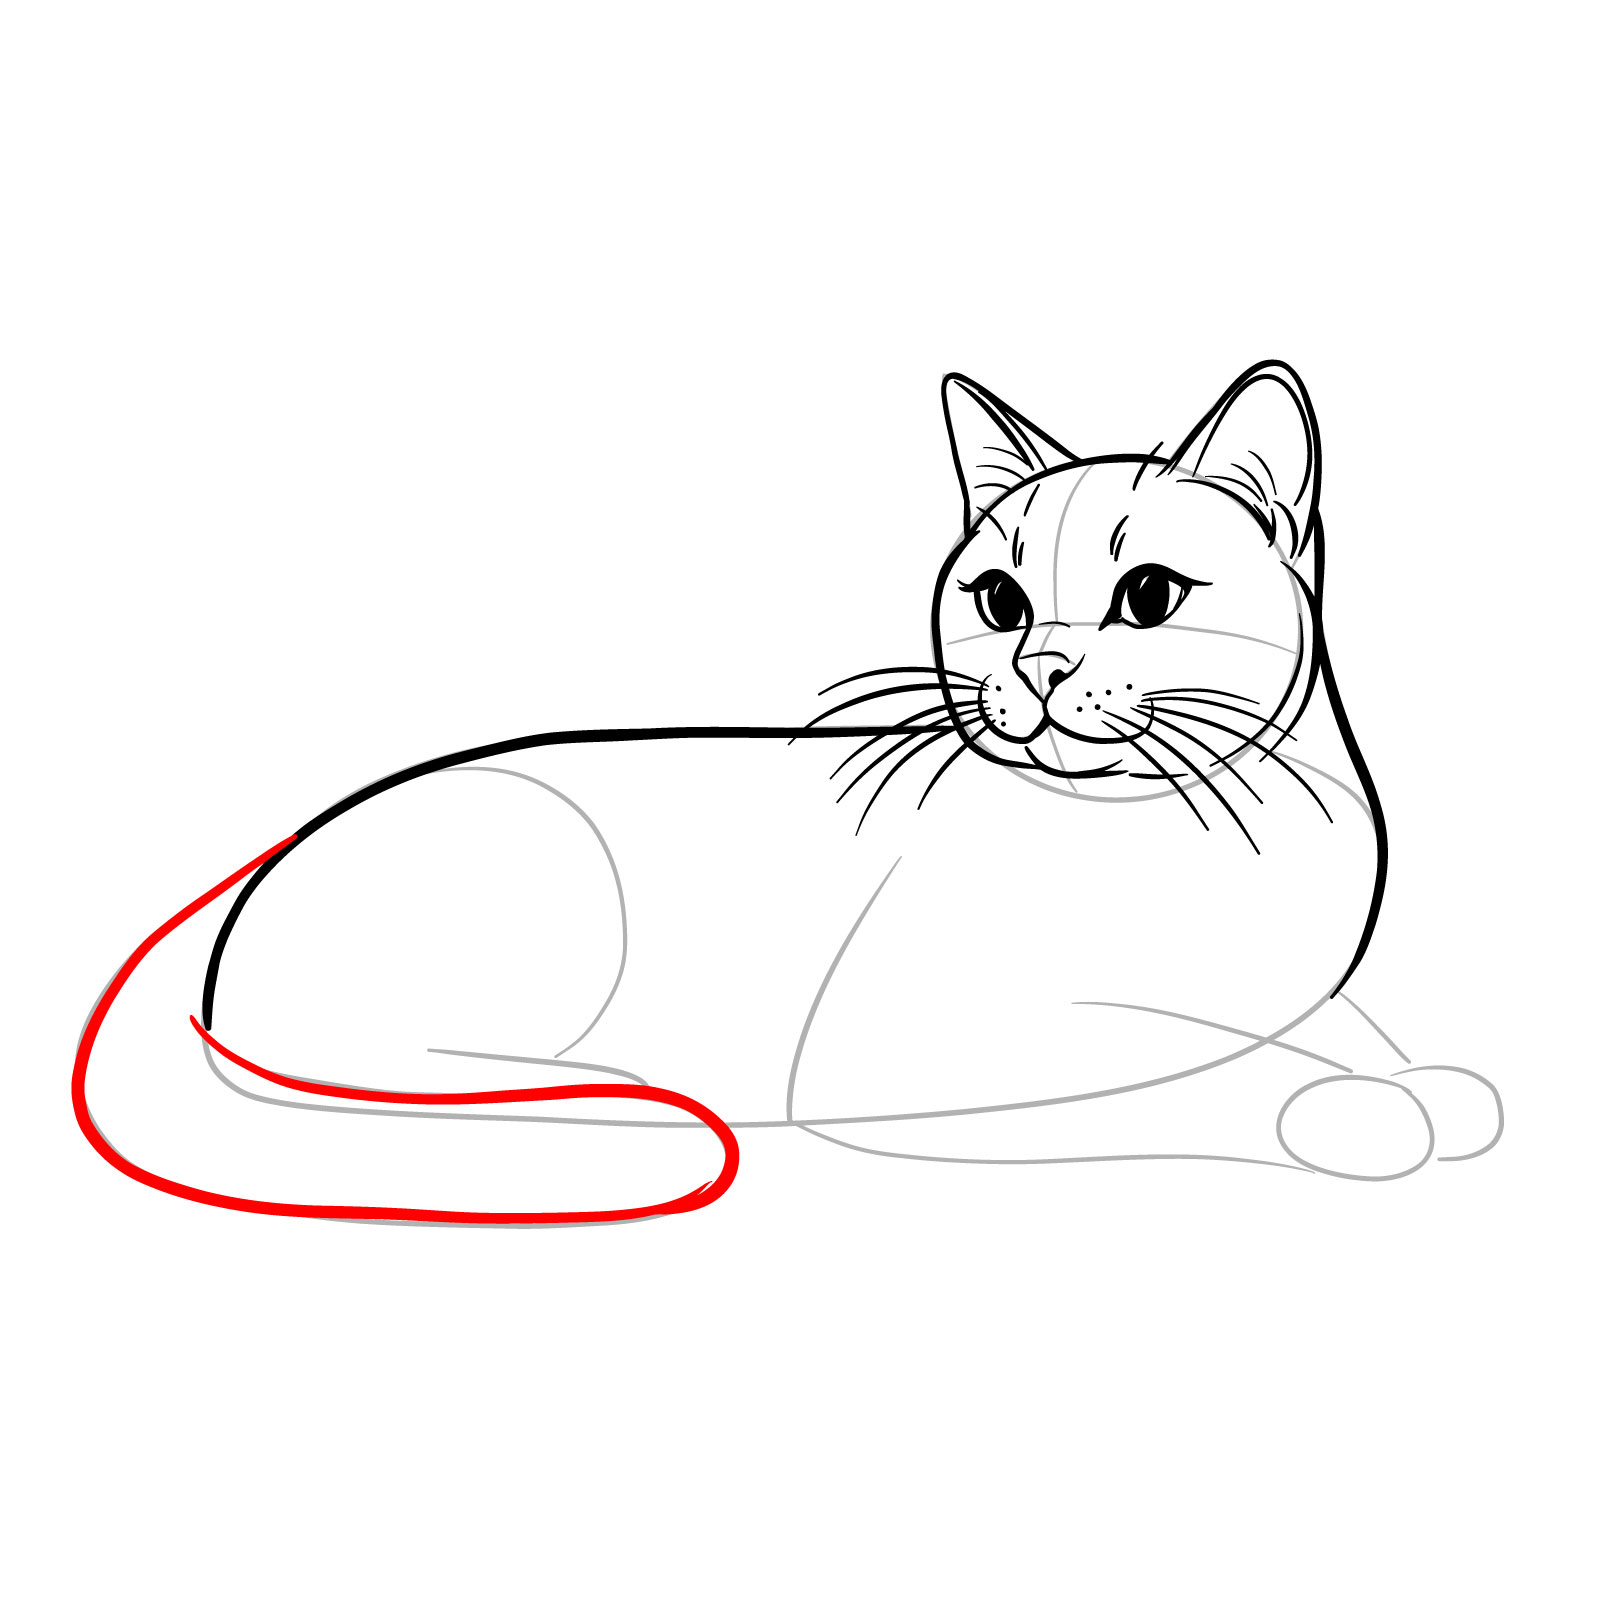
Measure 12 – Outline the movement leg , set out from the shoulder down to the paw . Sketch the paw ’ s structure with discrete toe pads and ensure the leg ’ s proportion cost exact to the rest of the torso
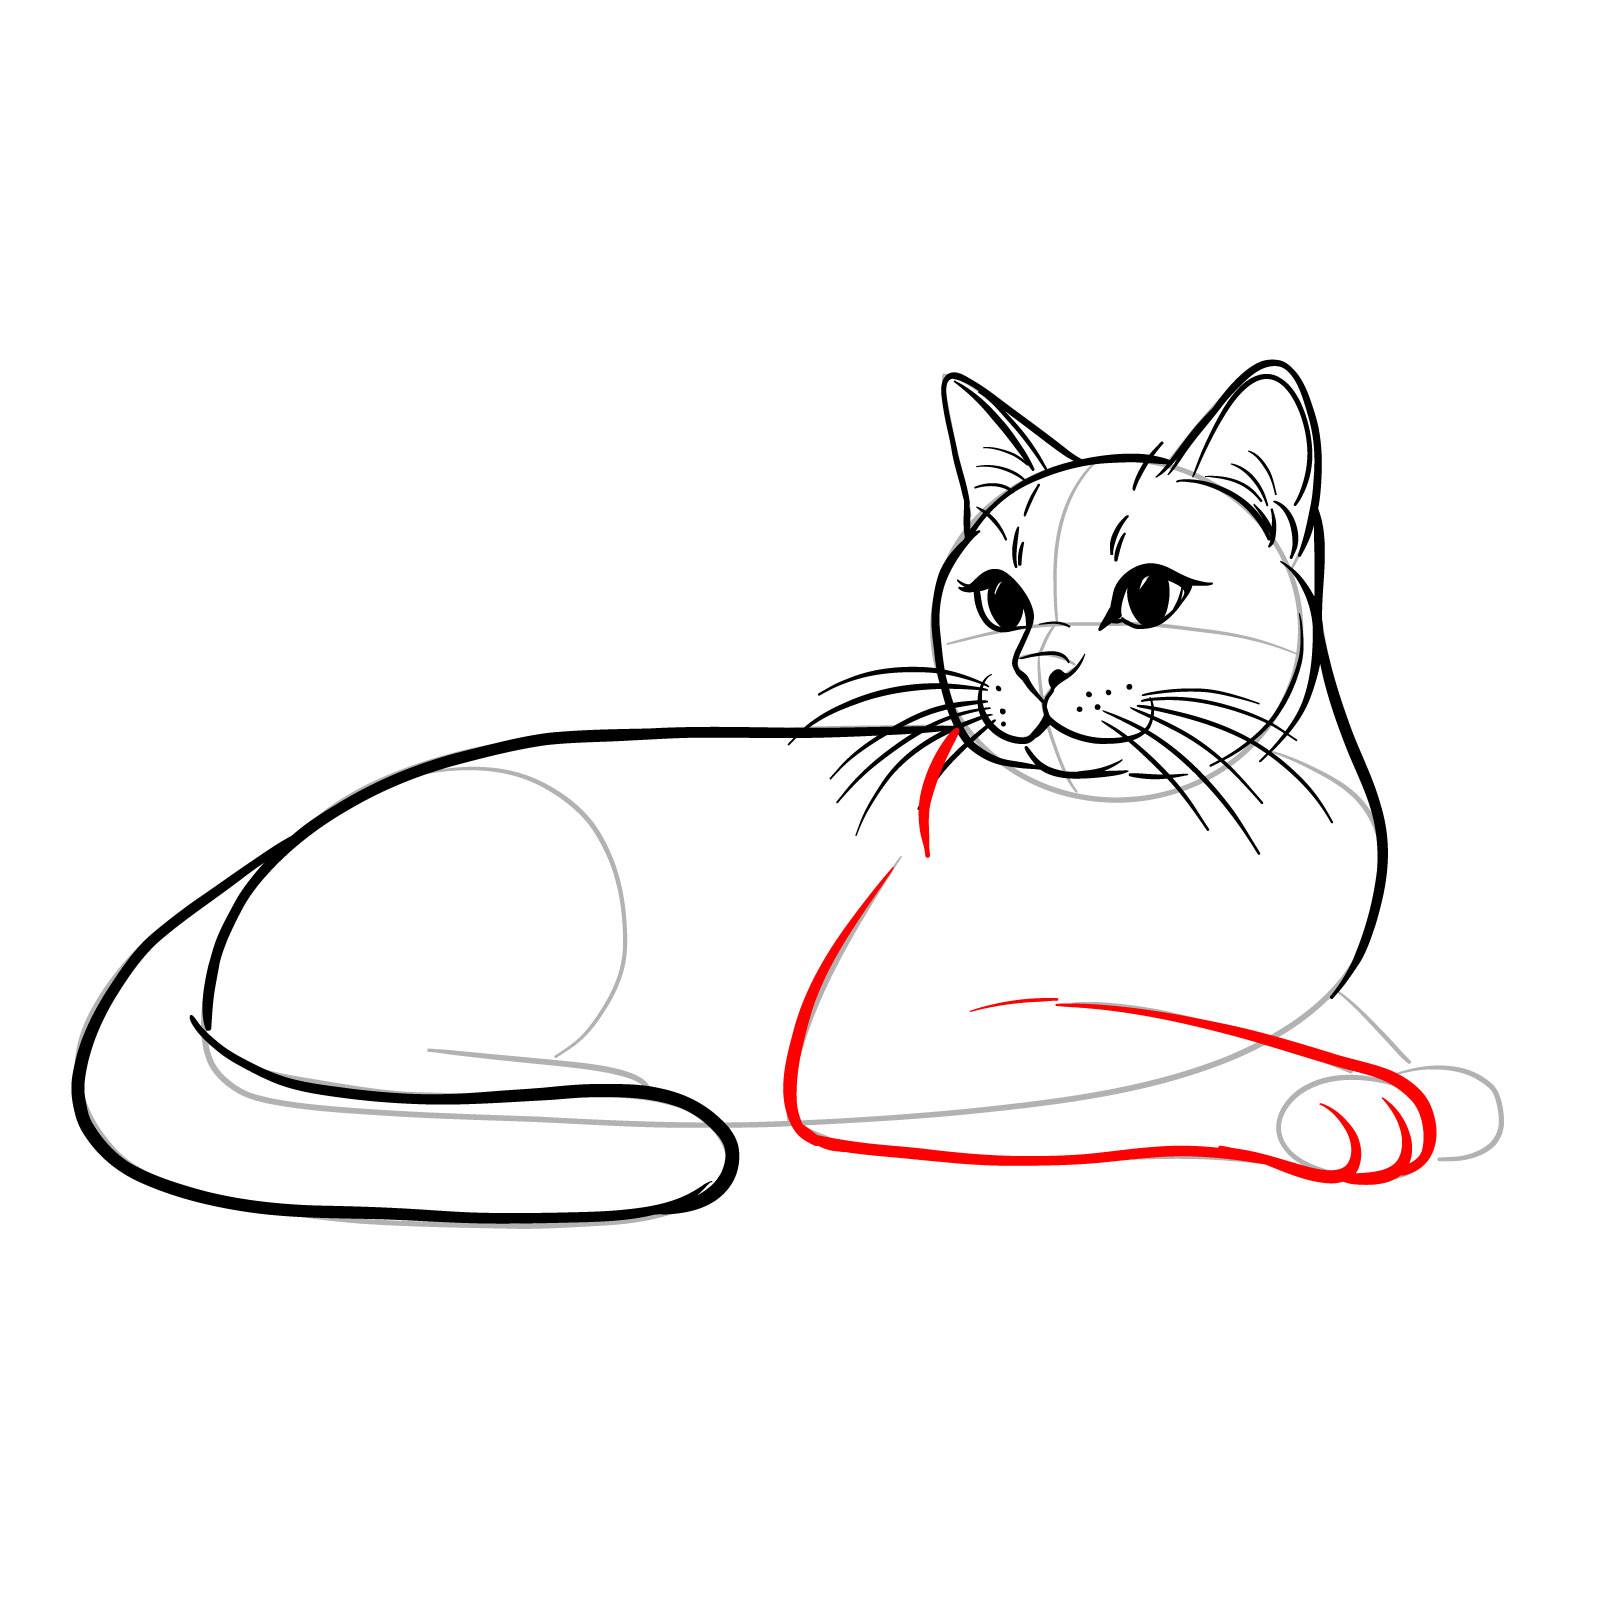
Pace 13 – Focus on the hindquarters , describe the back leg bent at the joint and tucked under the torso . Lend the far branch by hint at its presence with a subtle outline behind the movement branch
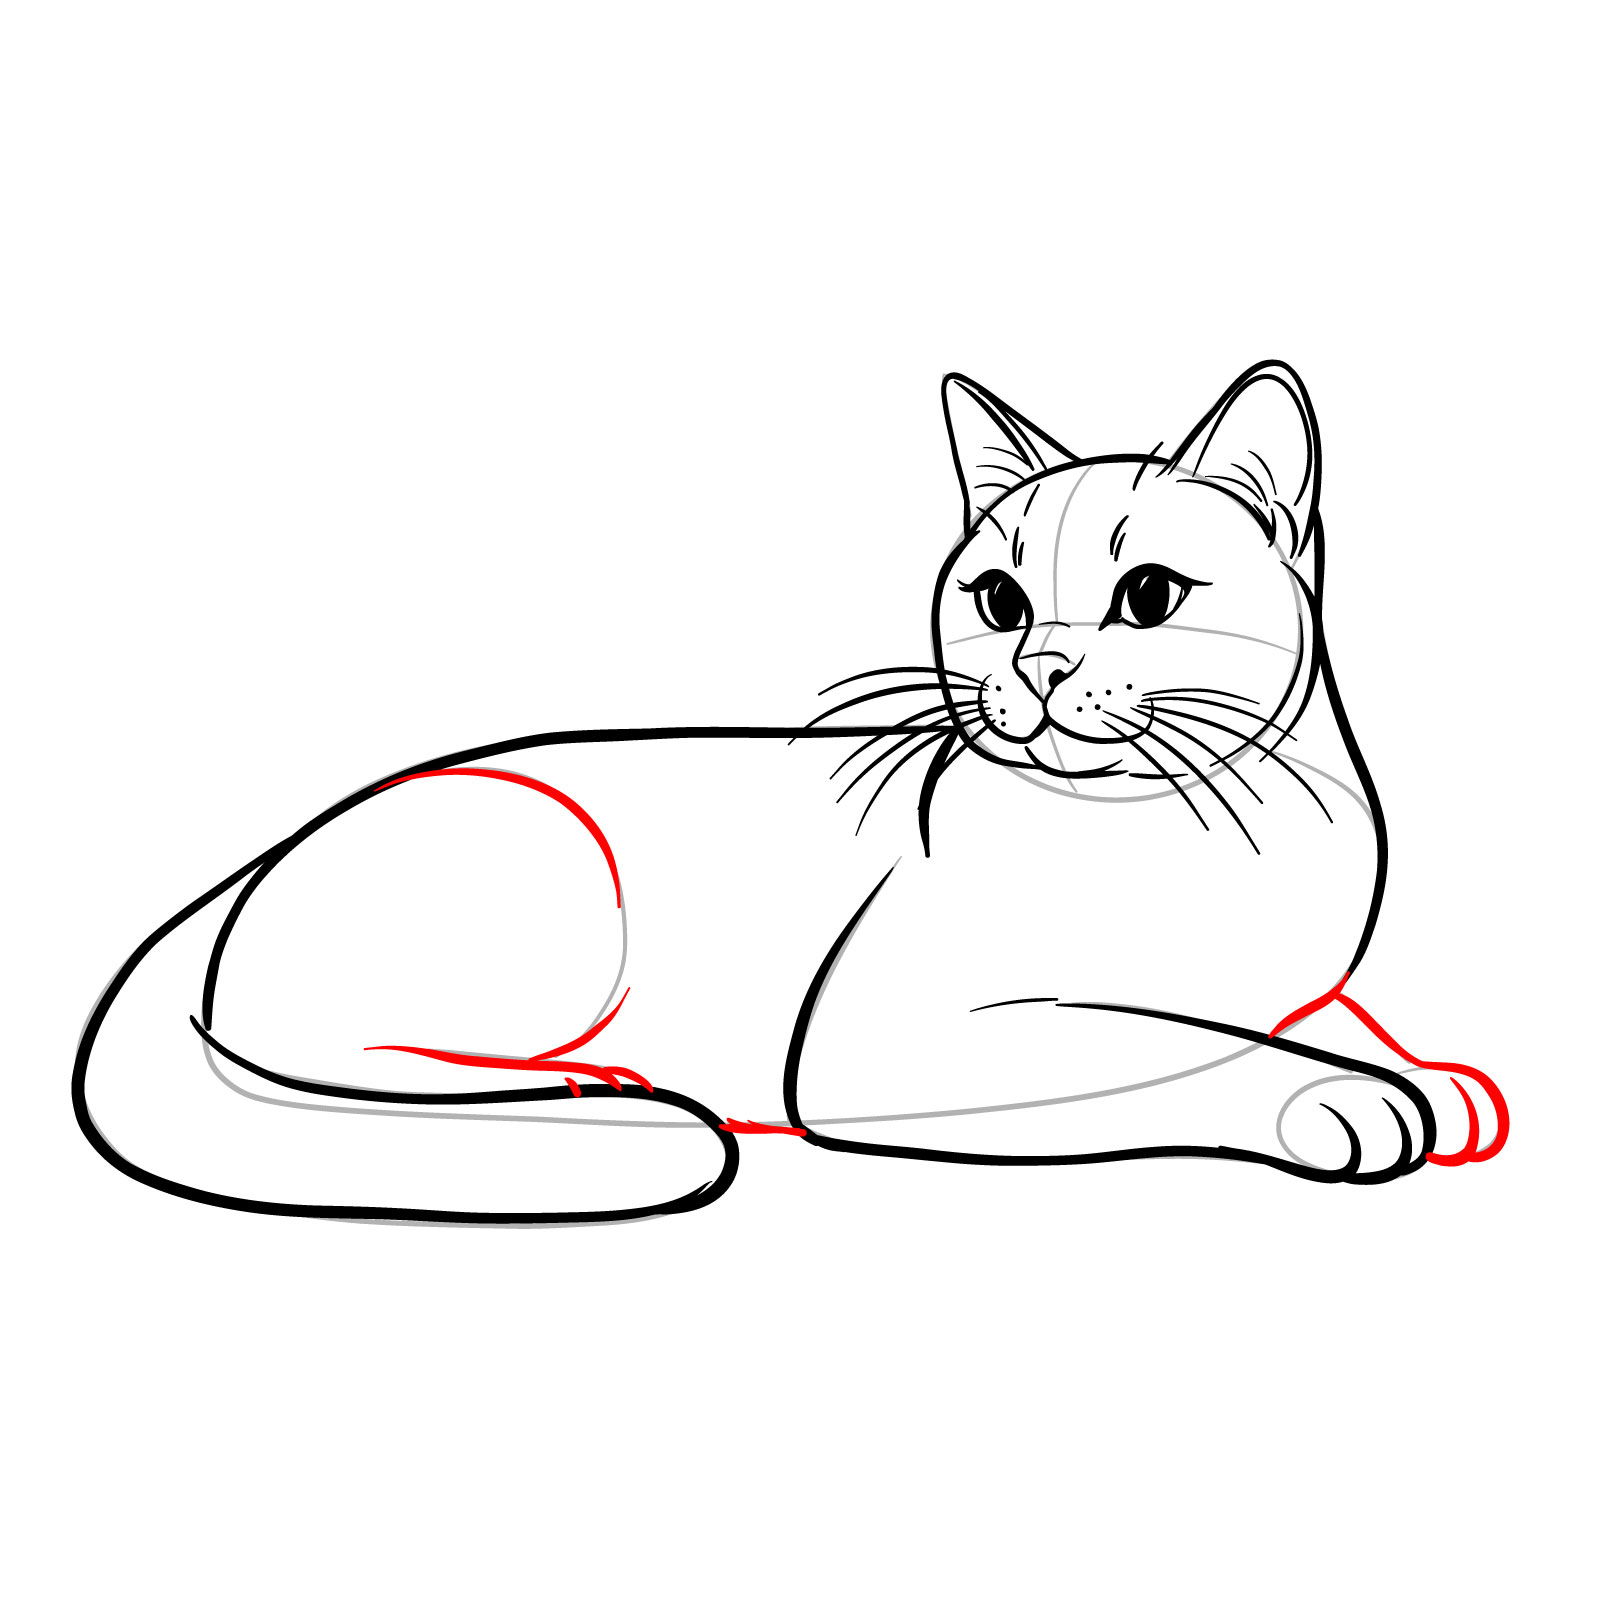
Step 14 – With all constituent in place , review your drawing for any needed refinements . Smooth out the note , adjust proportions if necessary , and erase any remaining guide score . Your depiction should capture the calm peace of a cat , express a balance between relaxed shape and alertness in the facial formula . This discharge illustration demonstrate the key aspects of how to make a lying guy in a slope scene , put up an exemplary guide for beginners seek to master the art of feline sketching
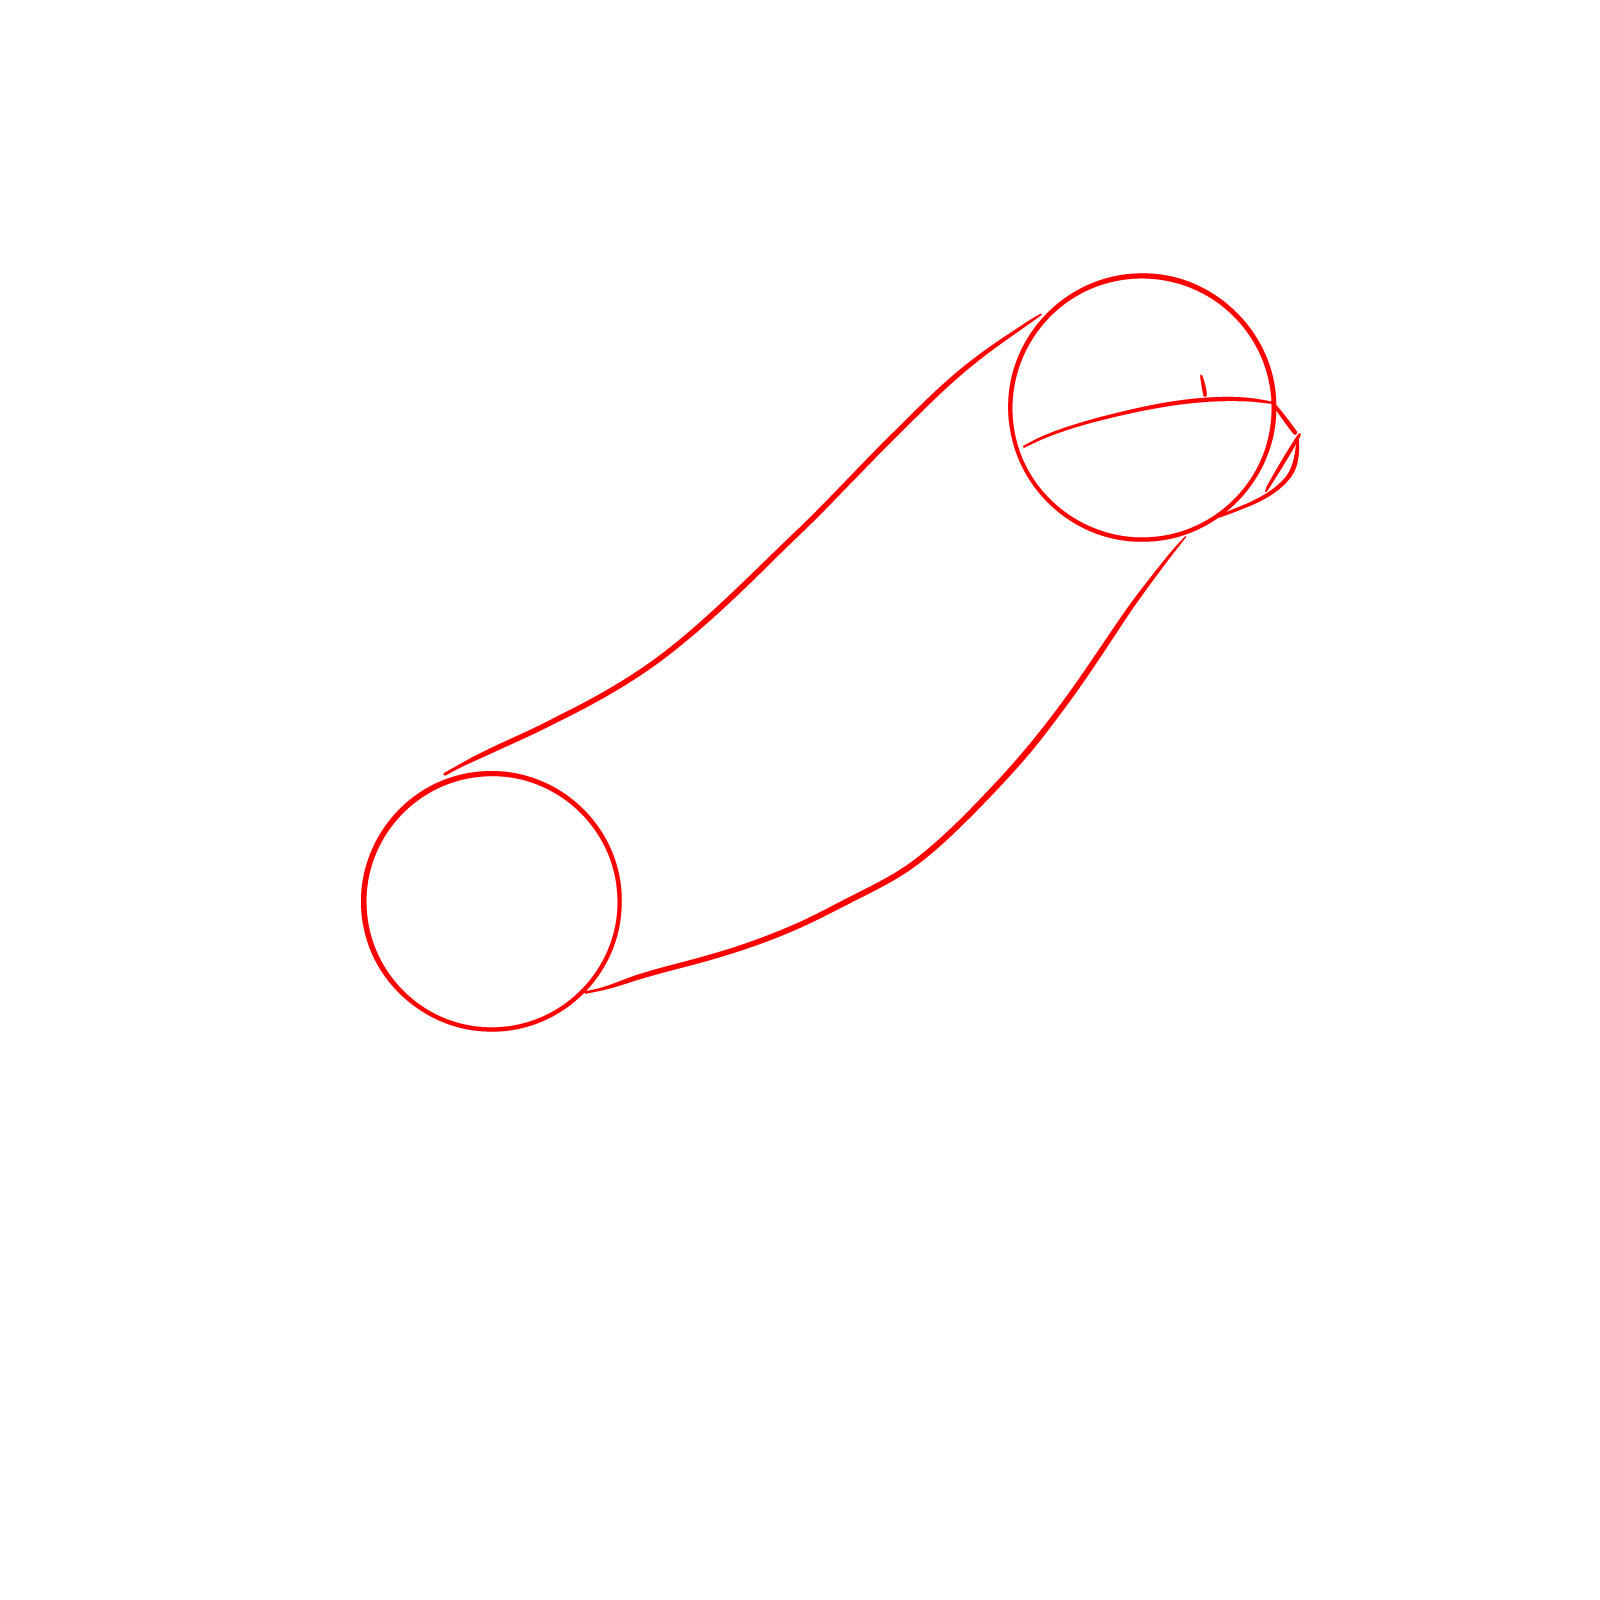
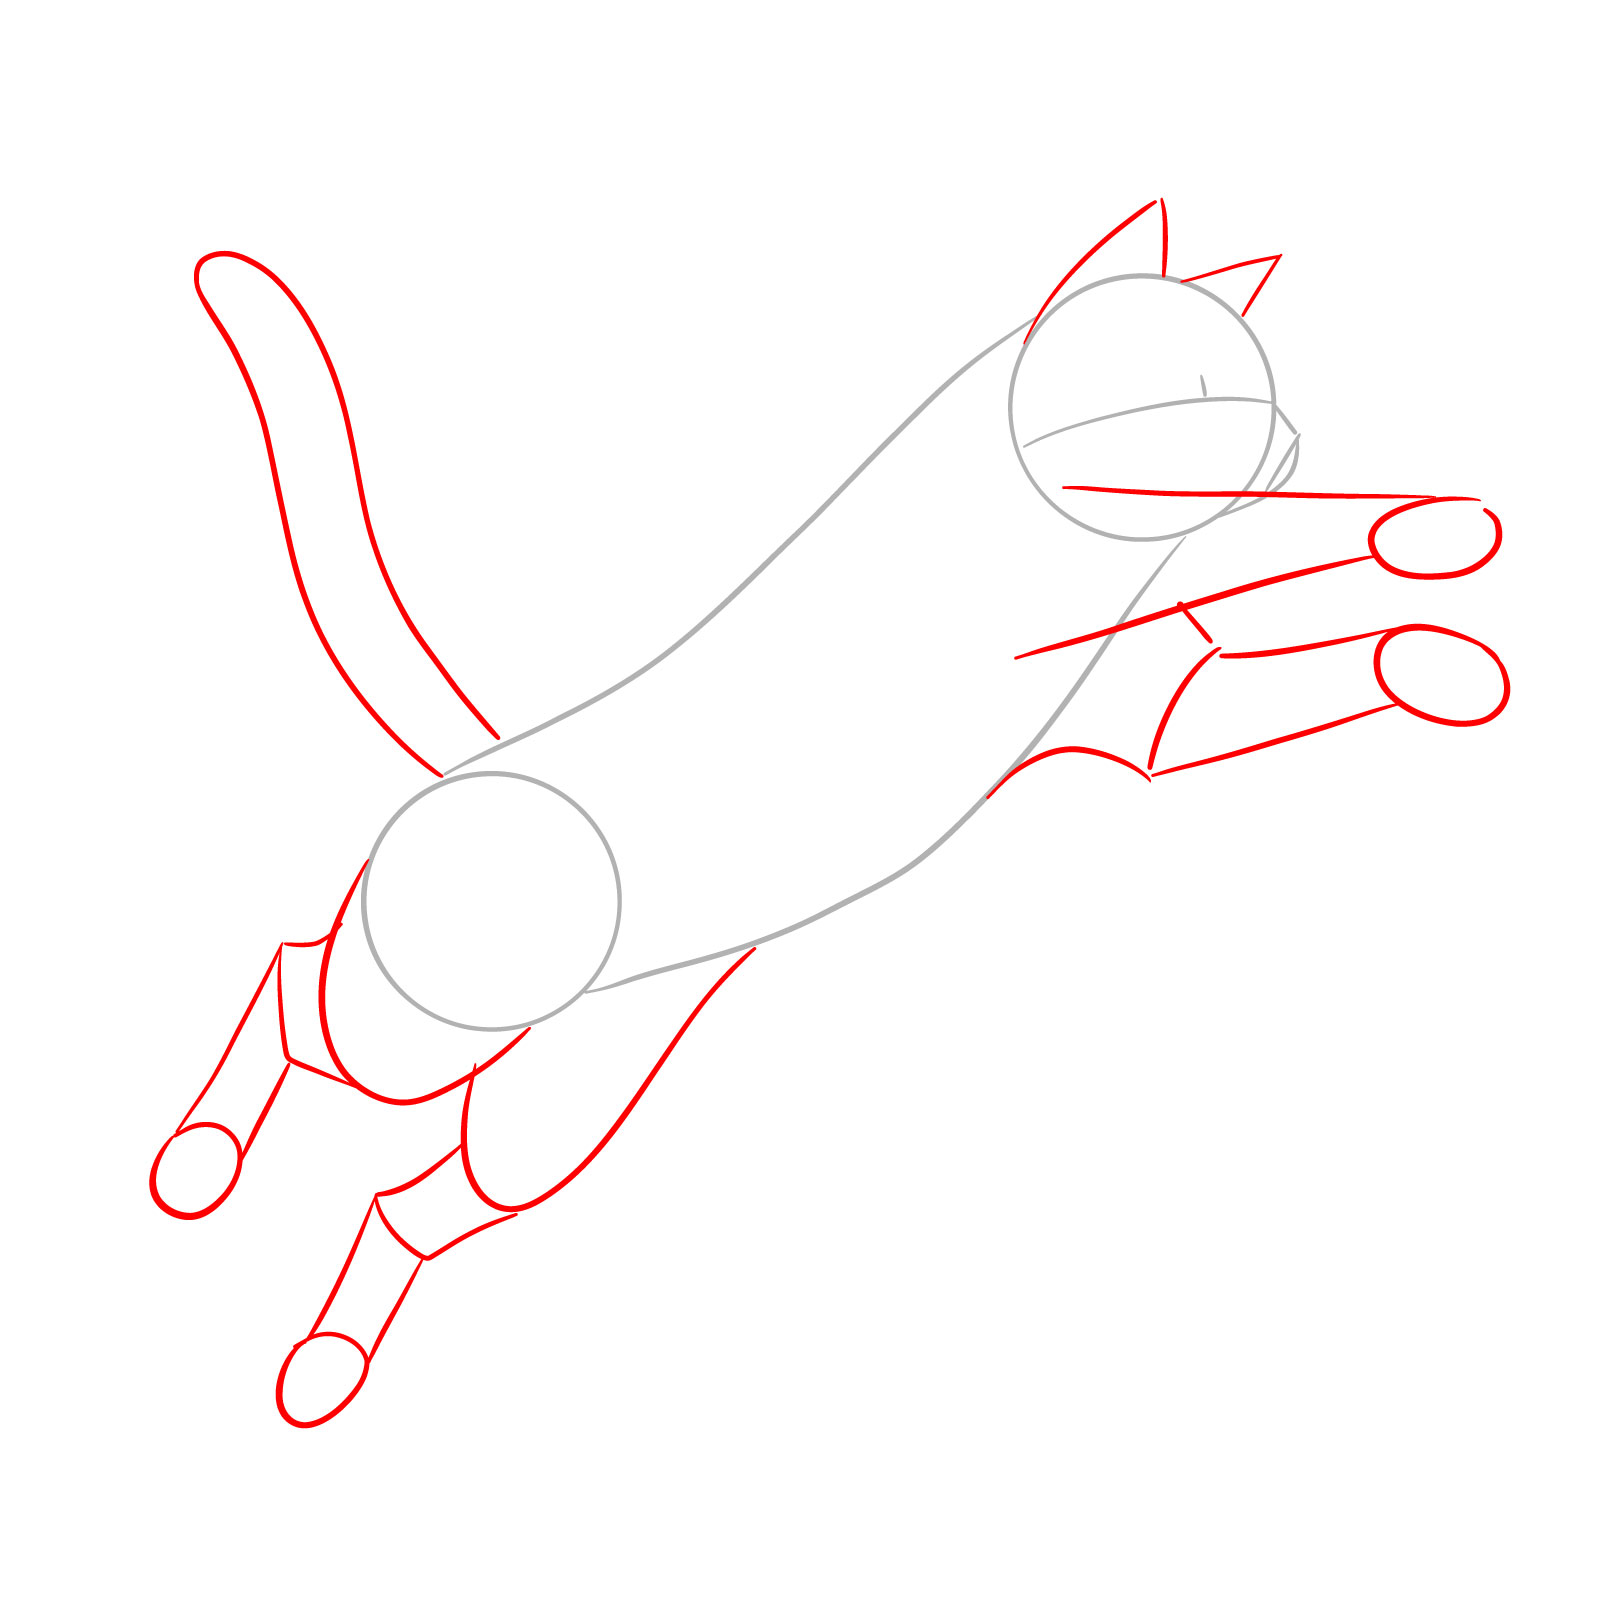
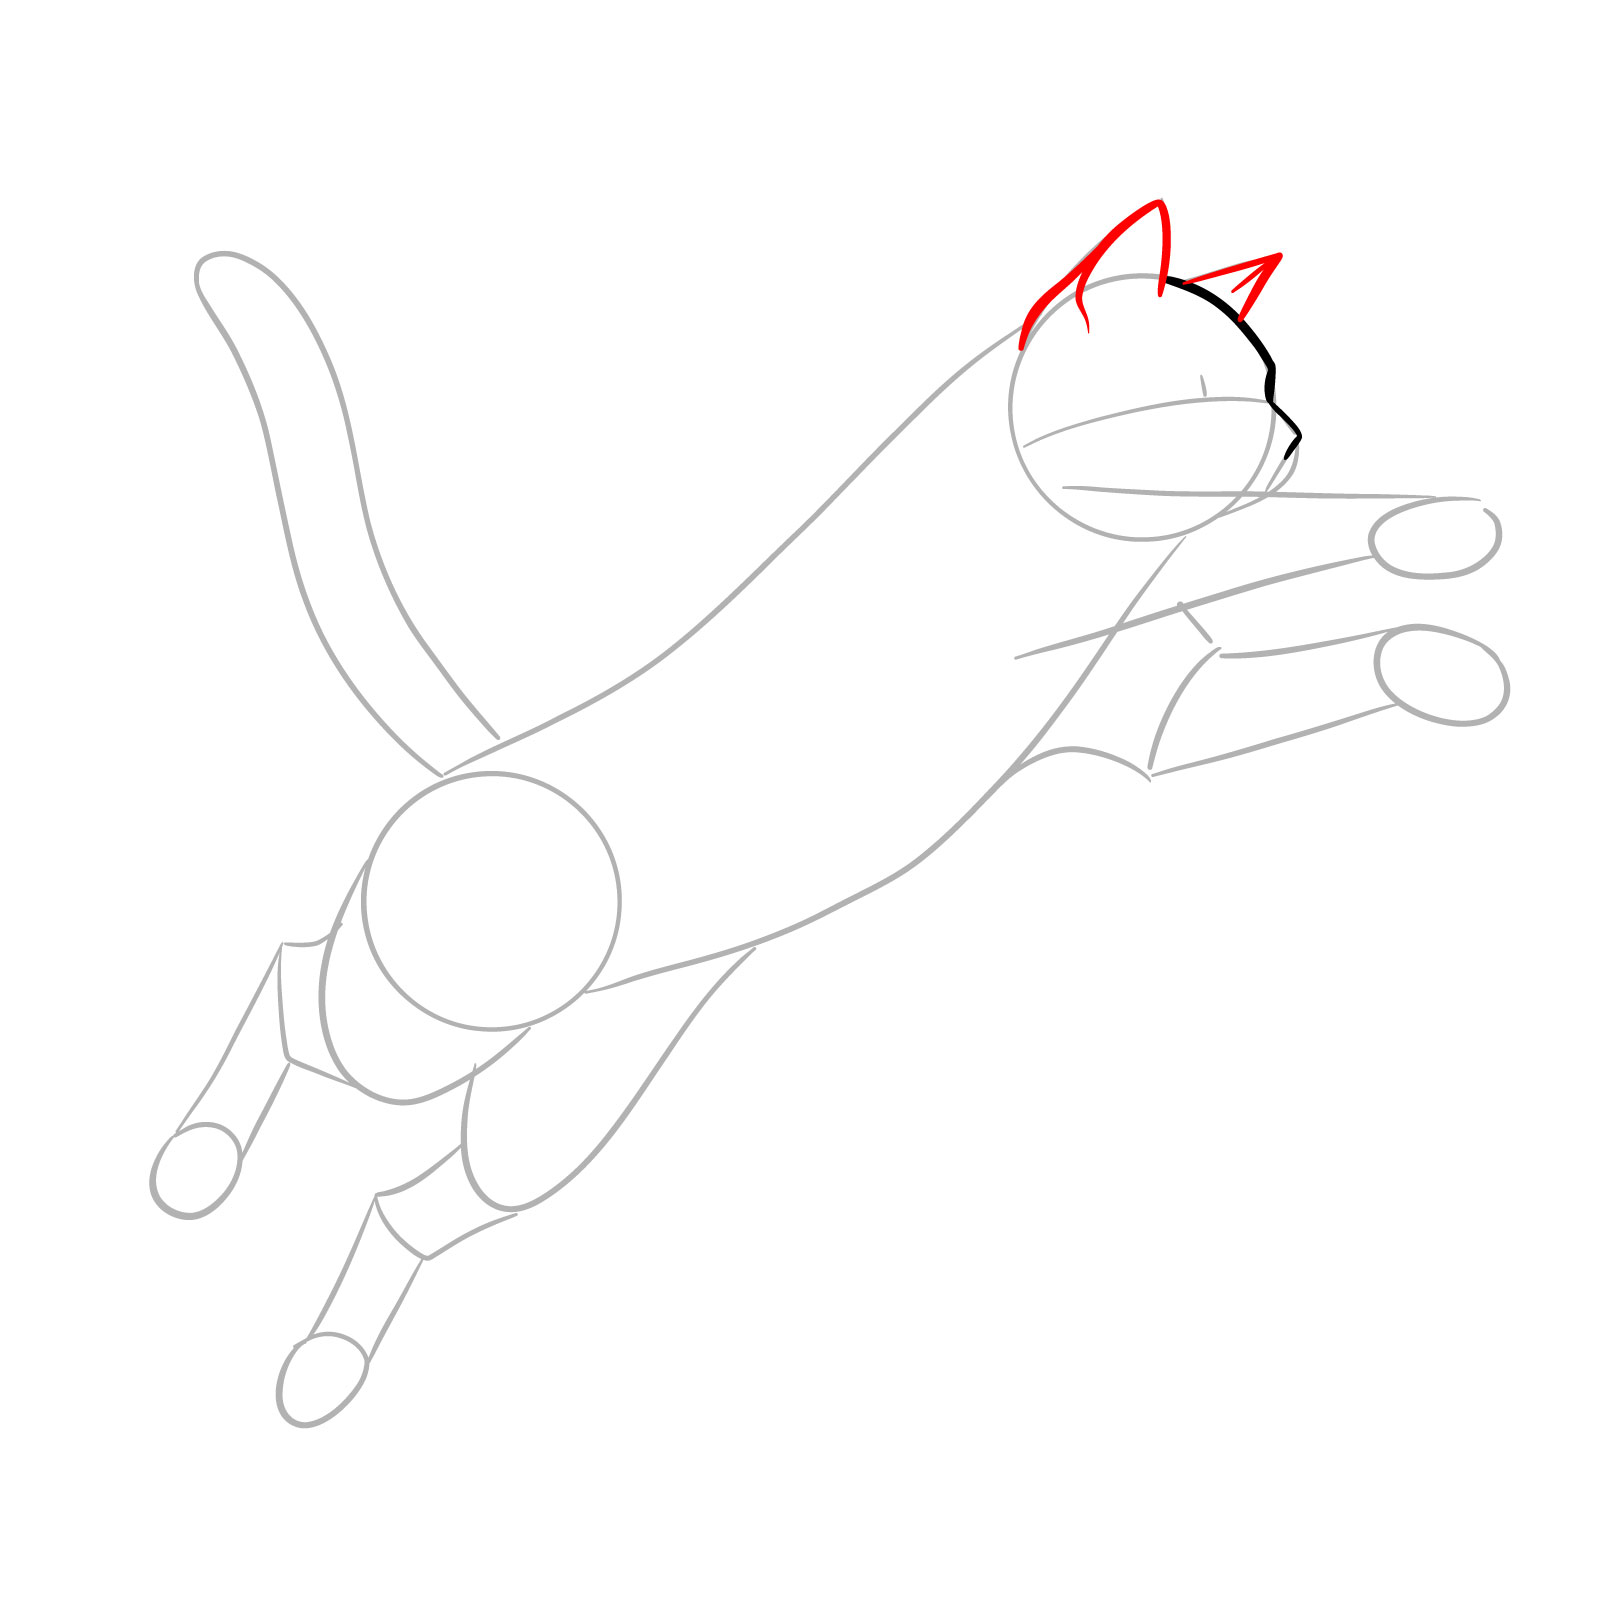
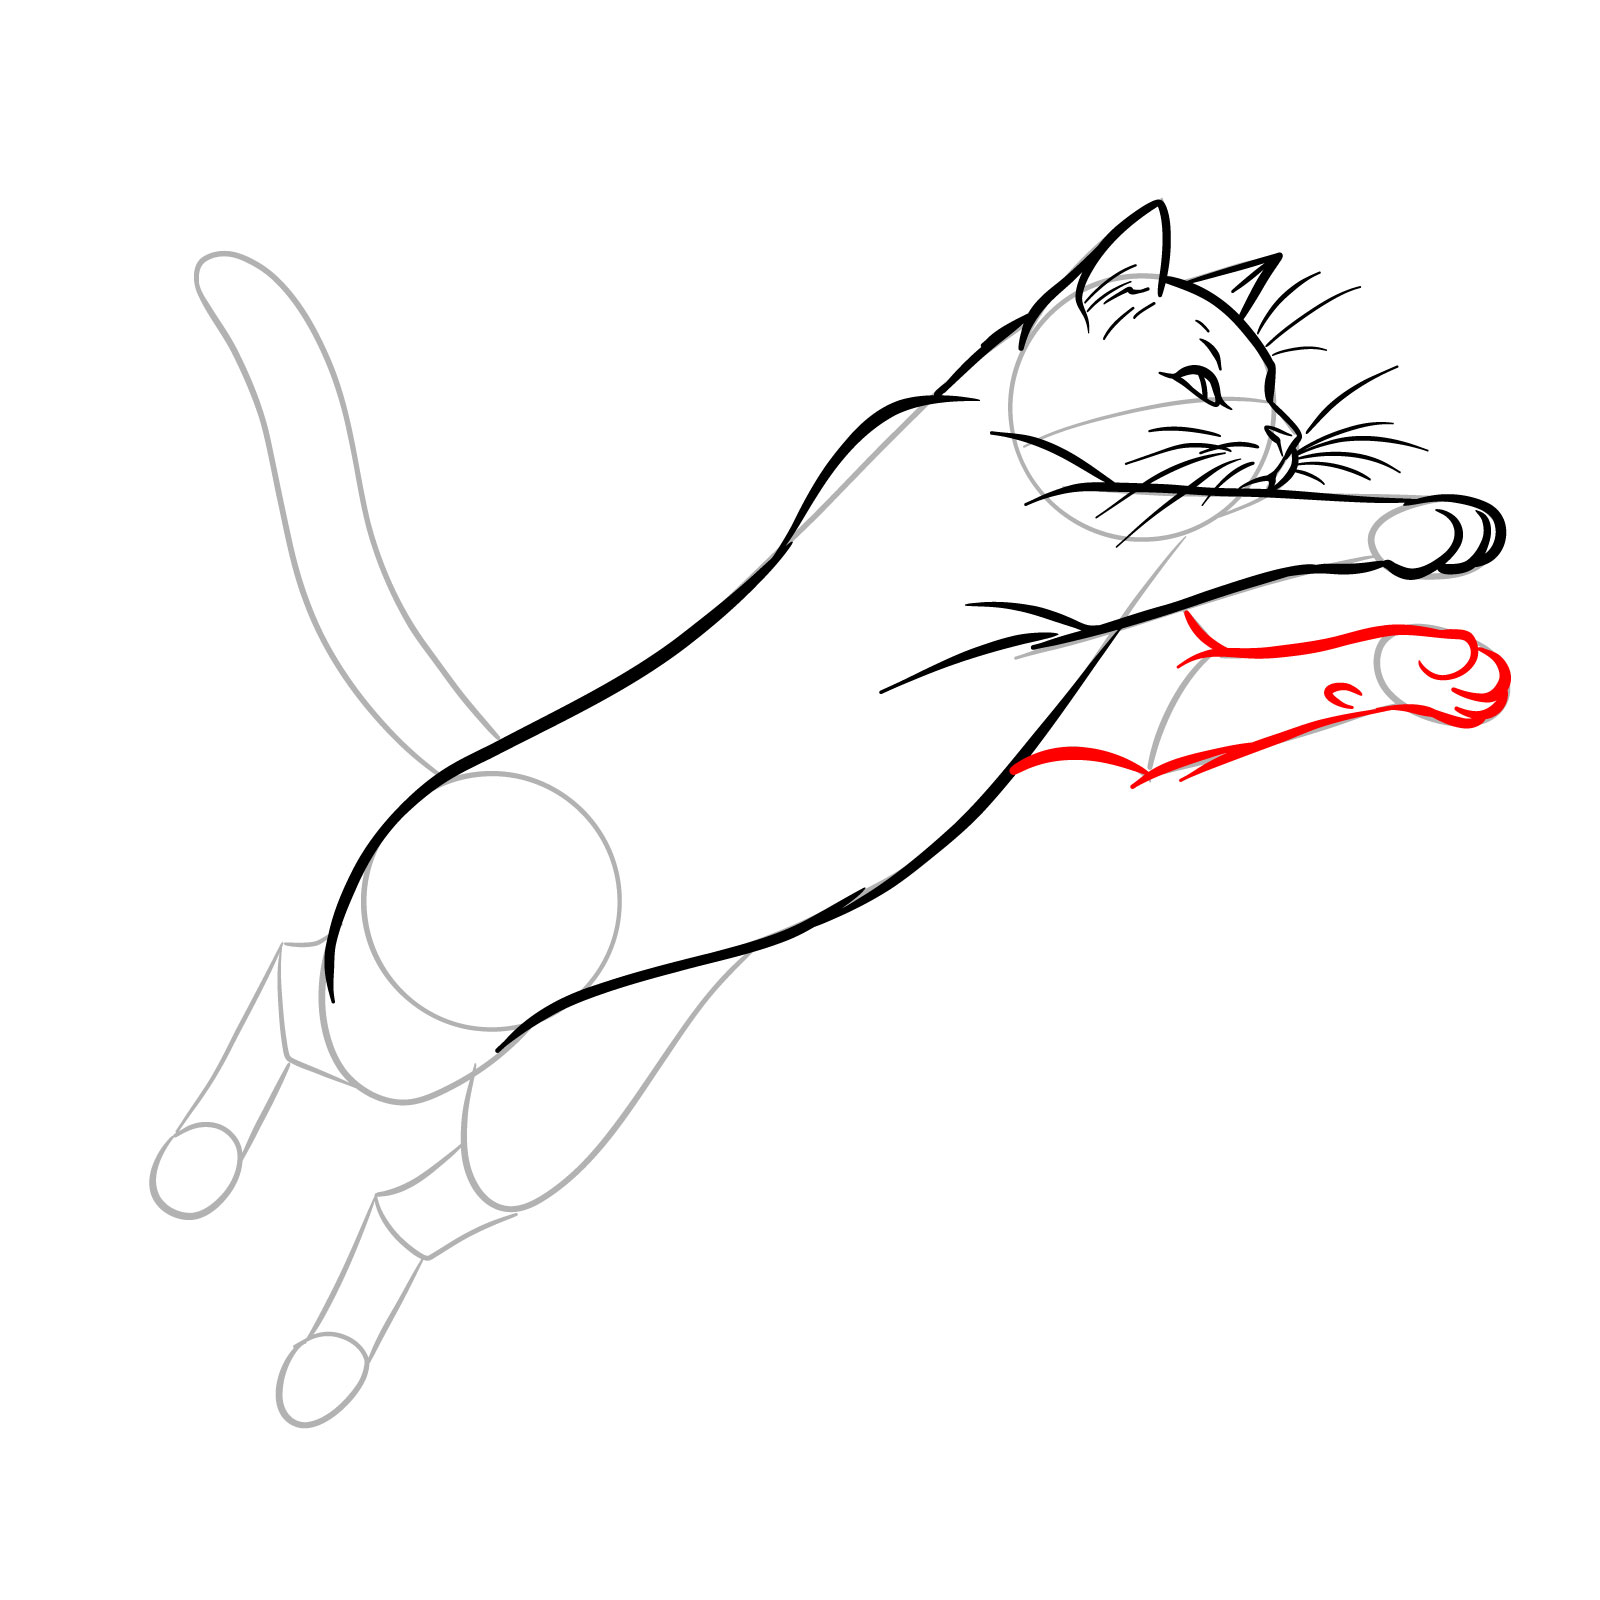
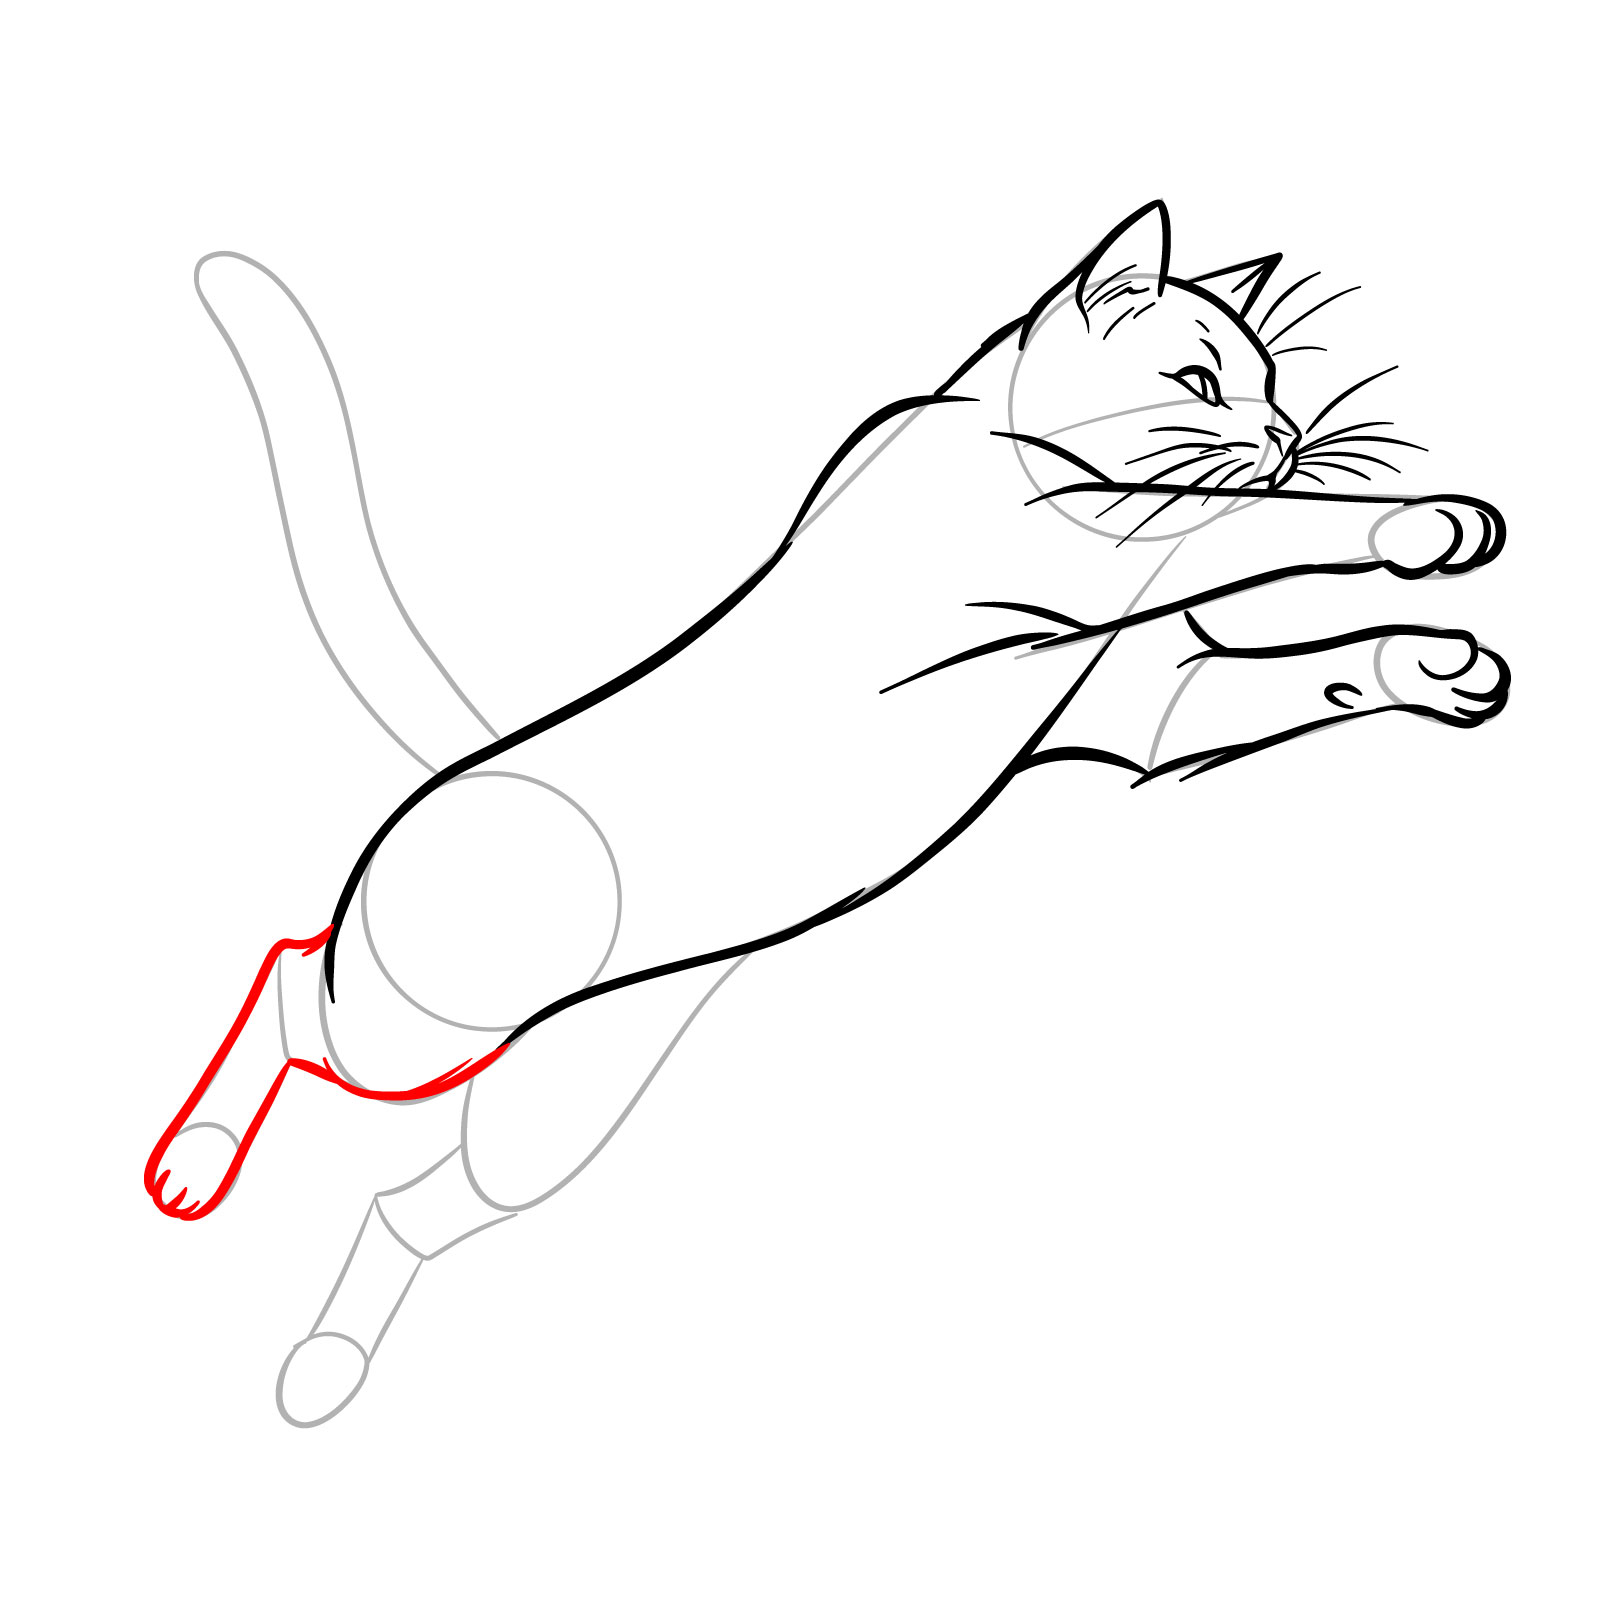
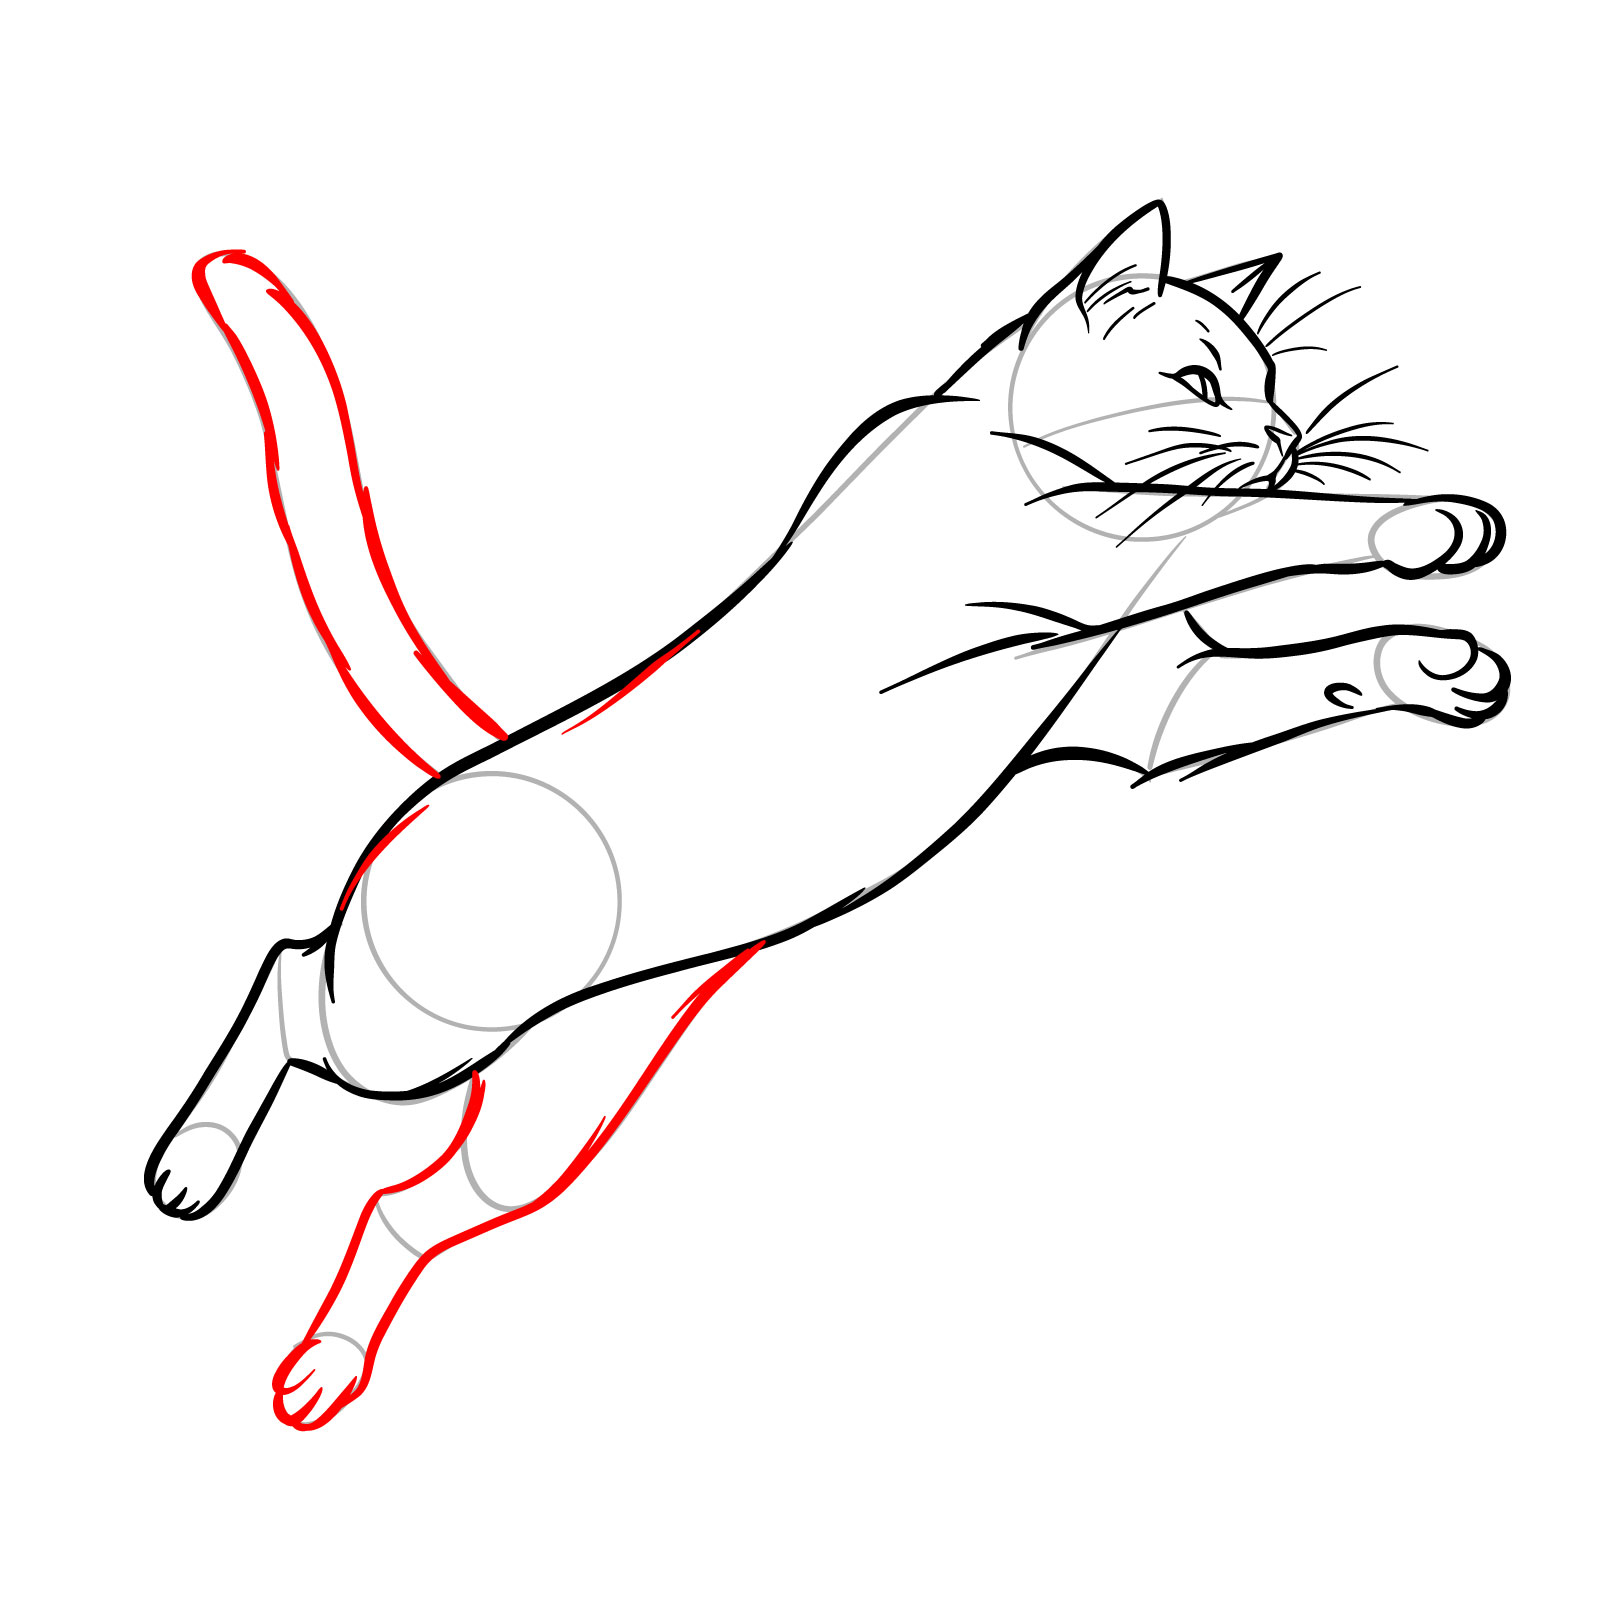
Guide 12 : How to Make a Cat in a Jump – 13 Steps
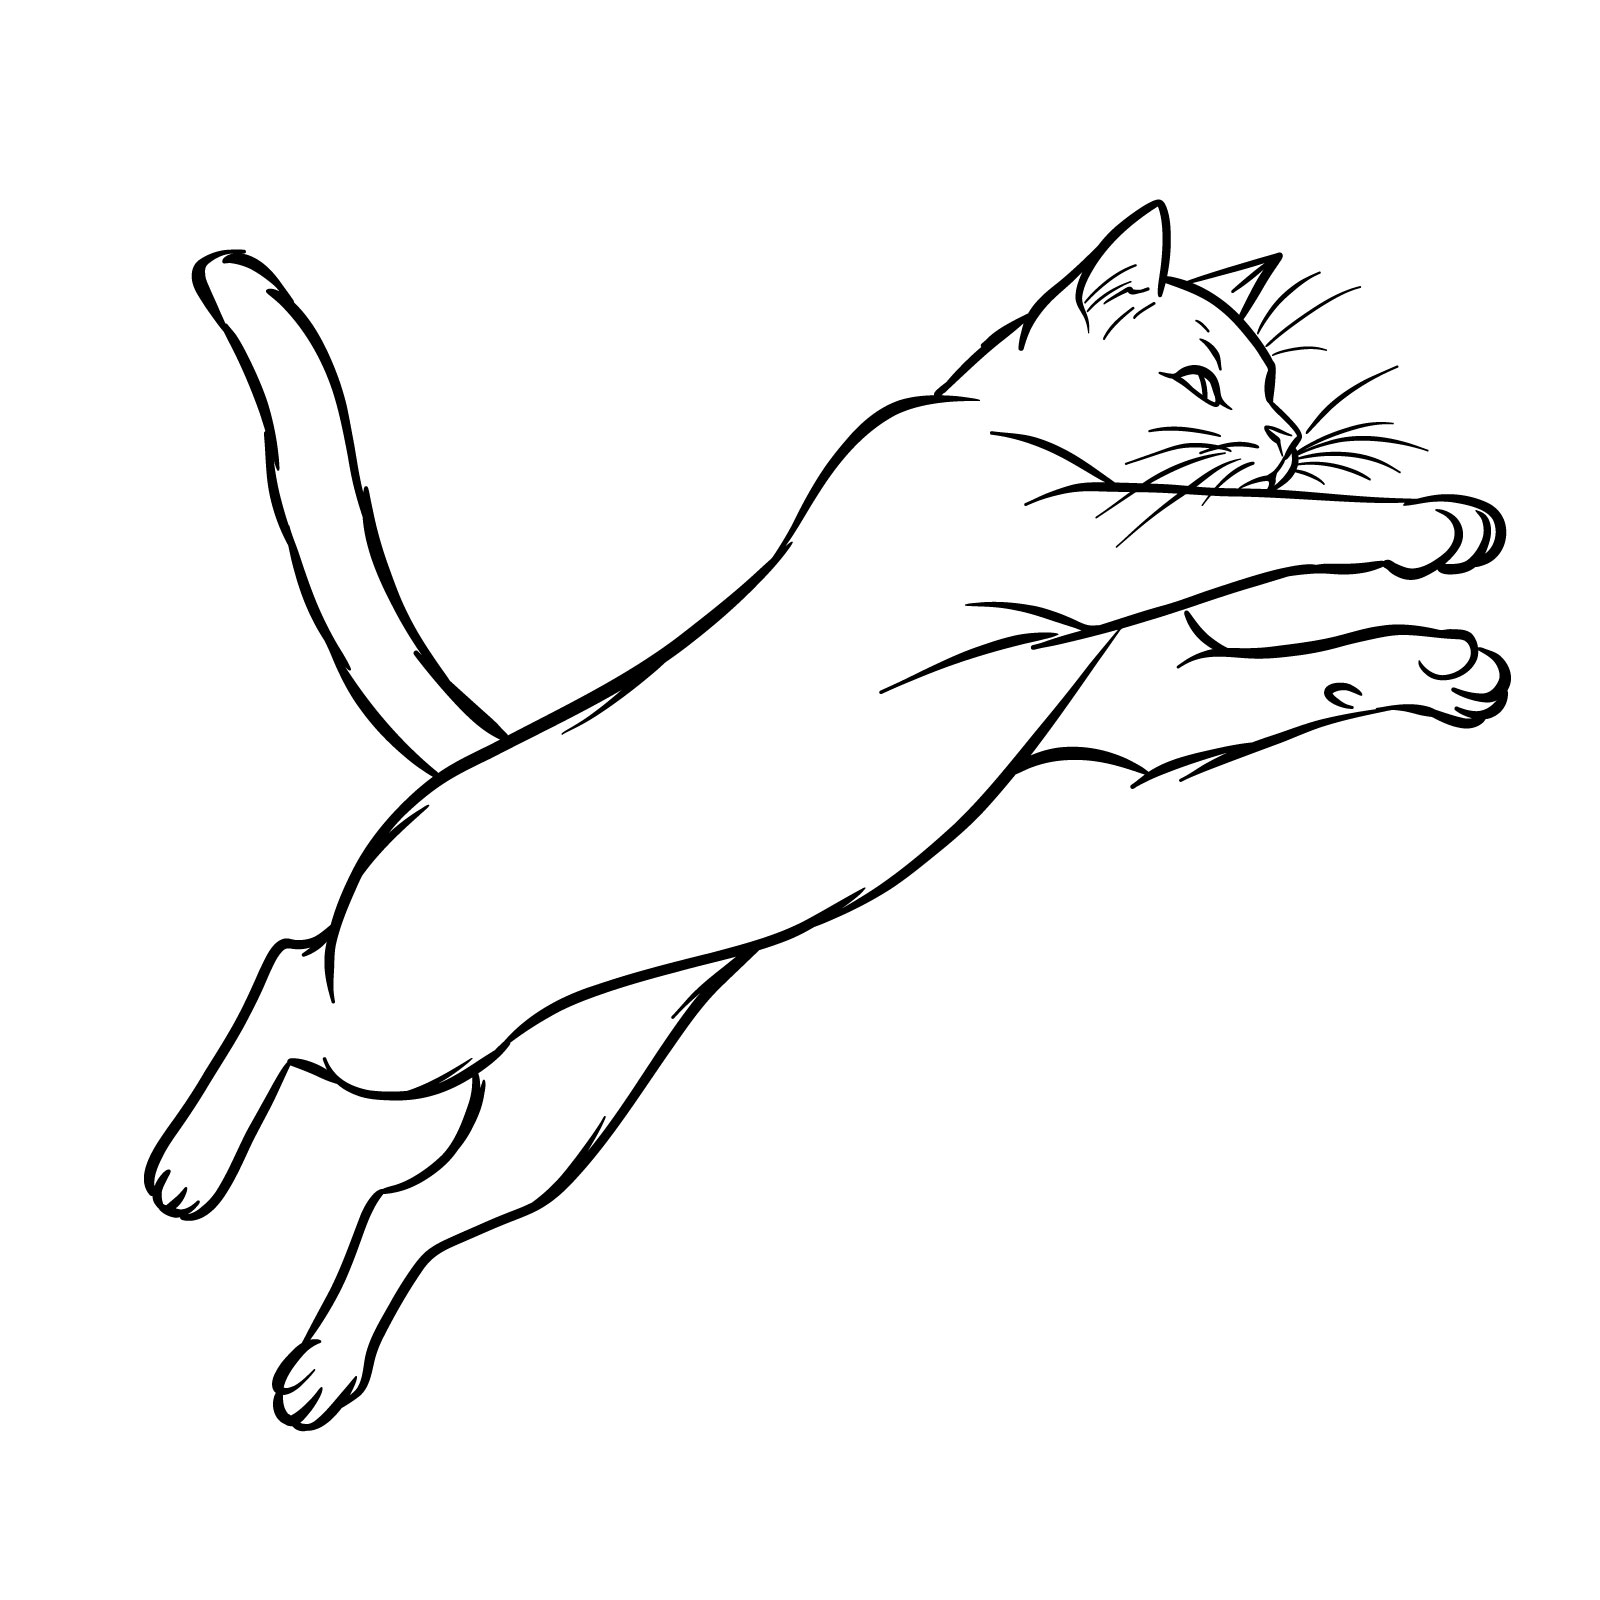
Leap into draw motion with our twelfth guide on how to depict a guy in a jump . This exciting tutorial consists of 13 steps , tailor to convey the average complexity of capturing a guy in mid-air . Suitable for beginners as yet intriguing for more practiced artists , this guide maintain the difficulty balanced and the make procedure straightforward . The depiction live realistic , yet not overburdened with details , making it approachable for all skill levels . Beginning with the cardinal two steps to set up a proportional structure , you ’ ll have a firm basis to animate your guy with the energy and grace of a natural jumper .
Step 01 – Start by drawing two circles : one for the mind with a horizontal line across for eye placement and a basic outline for the muzzle , and another for the low torso . Relate these circles with gently cut note to establish the fluid shape of the cat ’ s body in motion
Step 02 – Place the ears with simple triangular pattern atop the mind . Outline the seat and leg utilize basic lines and shapes to represent the directional stream and activity of the jump , ensuring the limbs suggest ahead momentum
Step 03 – Refine the front of the brain , drawing the nose and extending the line to form the muzzle , build certain these feature adjust with the horizontal guideline across the head for accurate positioning
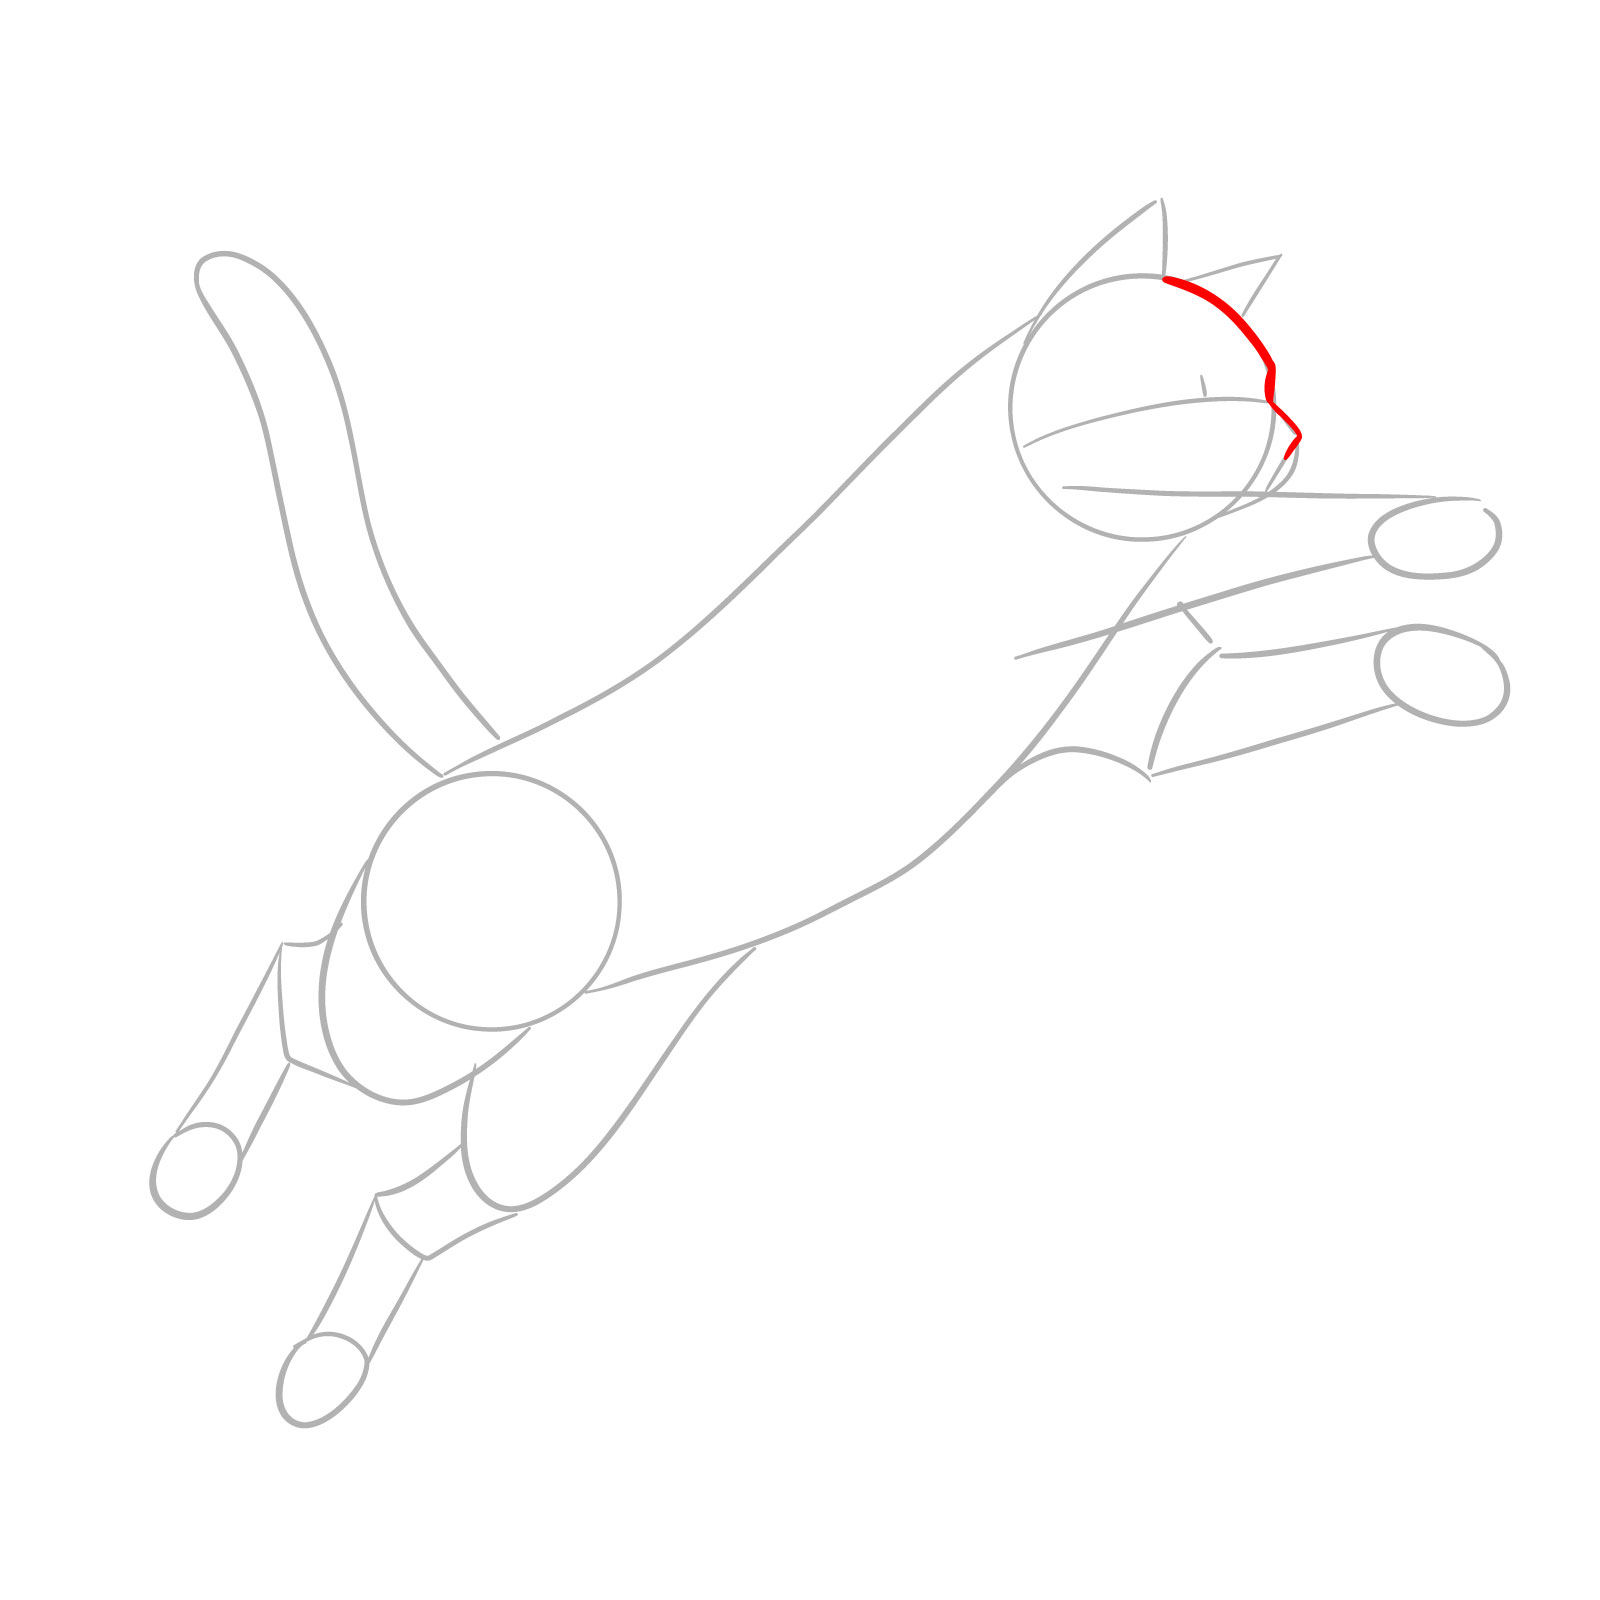
Measure 04 – Define the ear by polish the triangular flesh , adding depth and curvature
Step 05 – For the heart , outline a gentle curve for the upper lid . Just below the head , draw the initial tune for the upper part of the nearest front leg
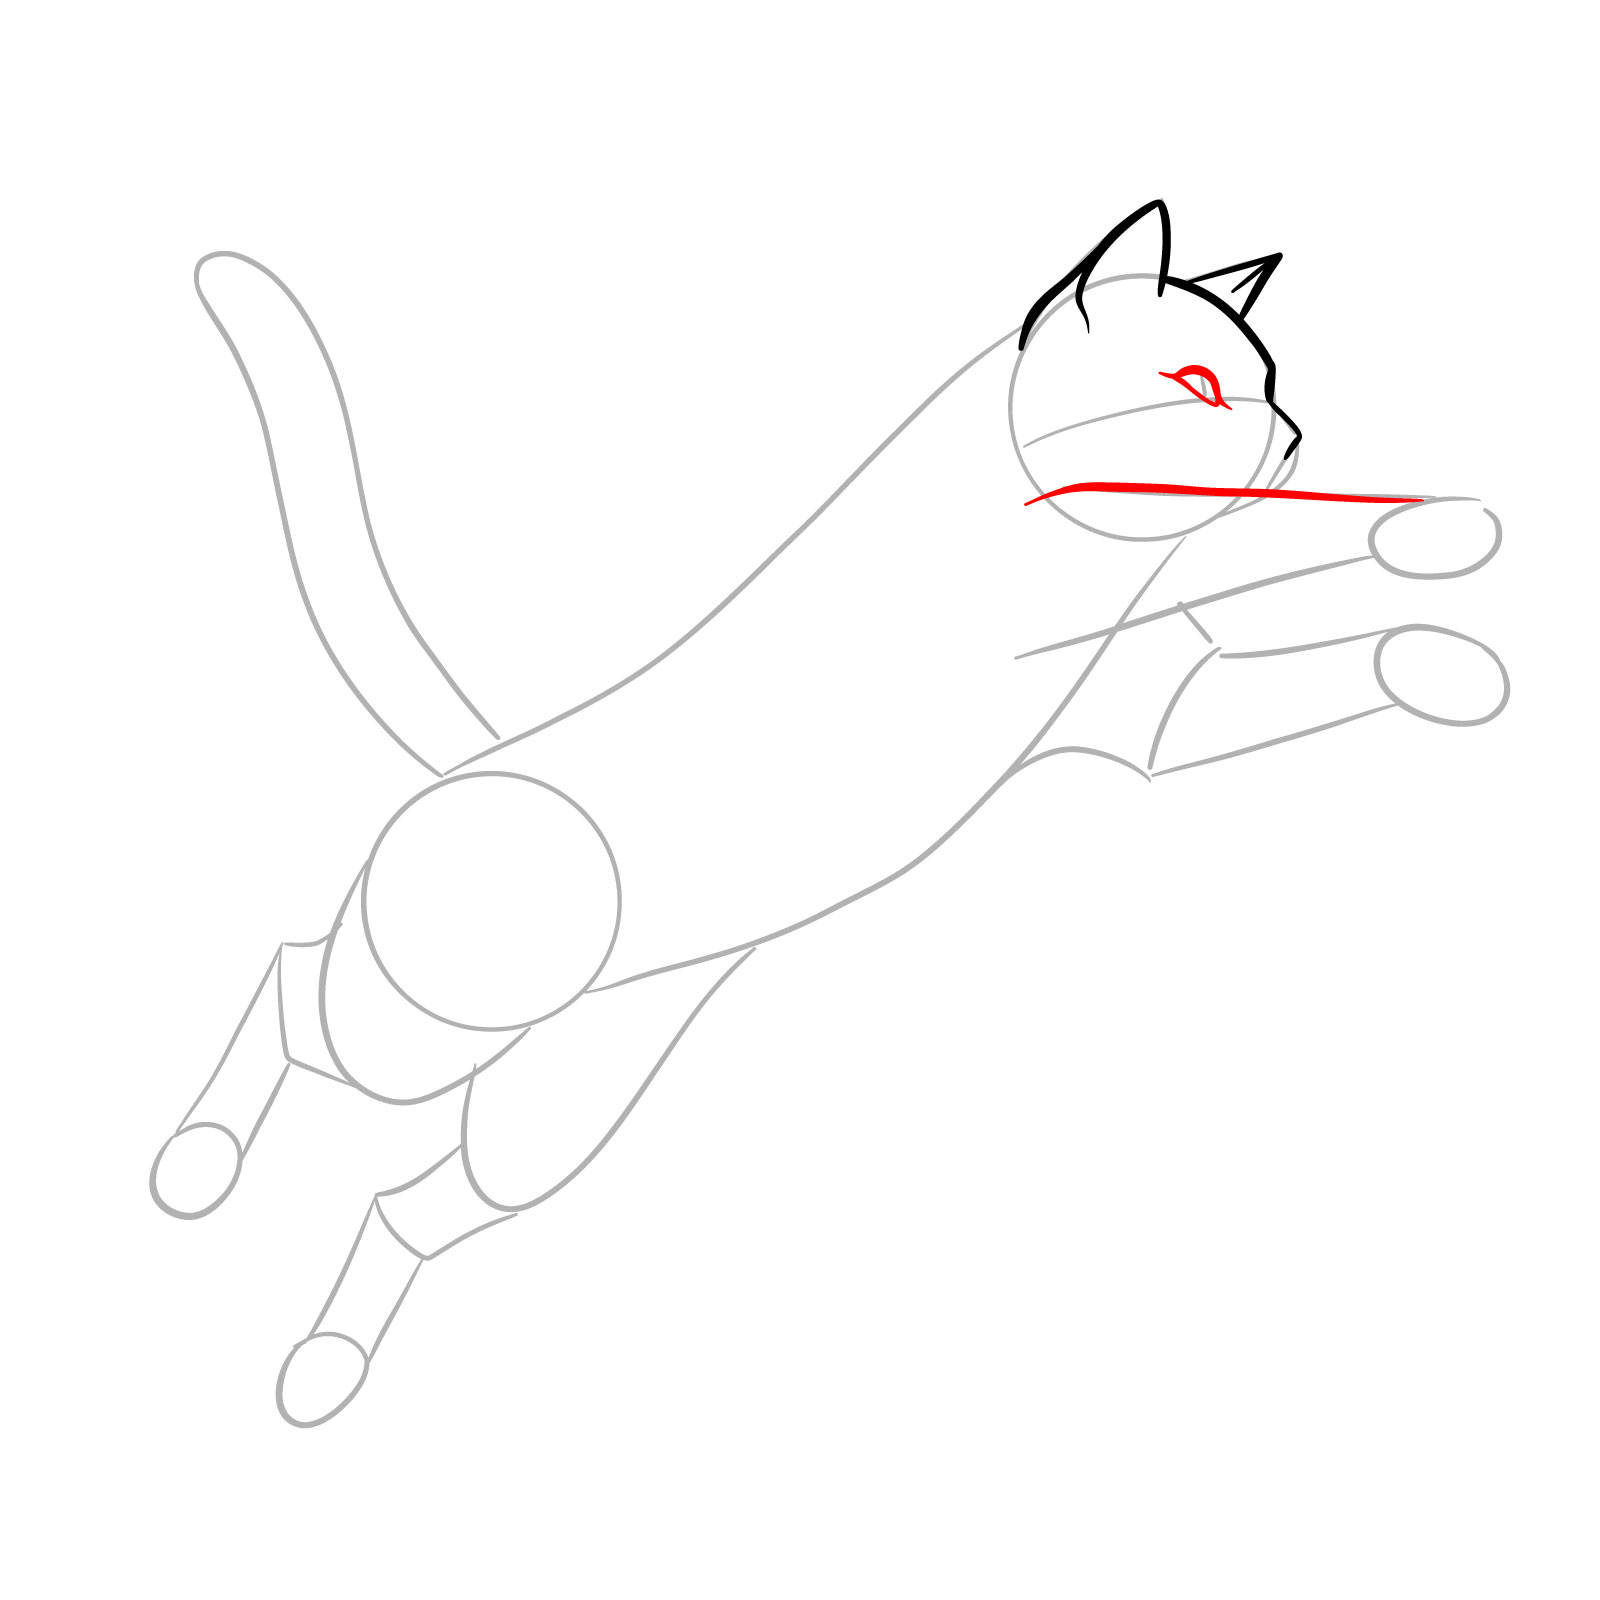
Measure 06 – Define the pupil within the eye , ensuring it reflects the cat ’ s stress and direction . Complete the nose and mouth detail , and draft the whisker trudge to leave the base for beard

Step 07 – From the whisker pads , attract several fine course to produce the whiskers , varying in distance . Add short accident around the mind to represent the fur texture , hold life to the cat ’ s expression
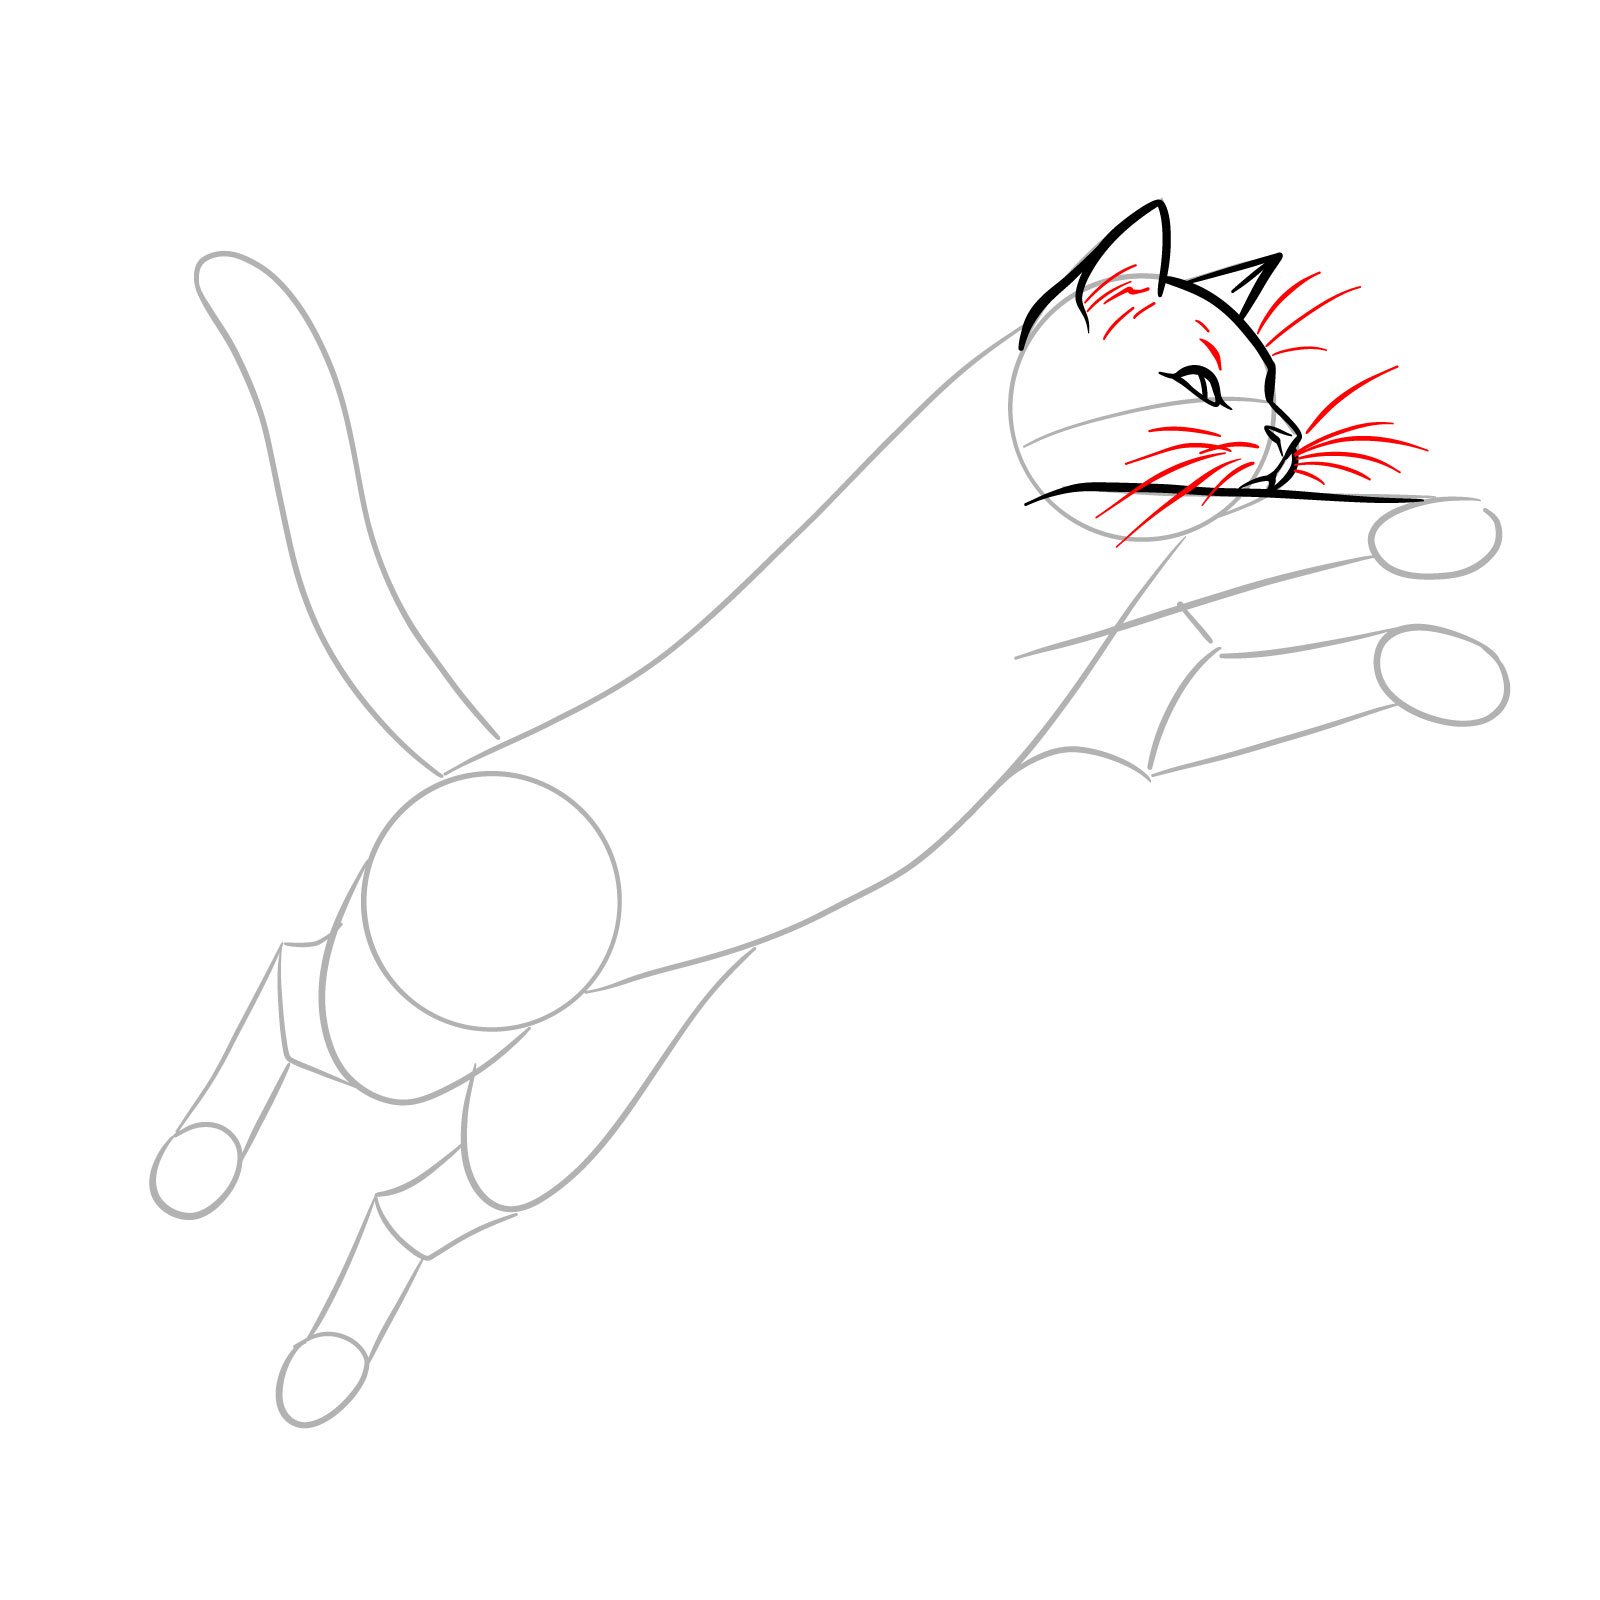
Pace 08 – Connect the mind to the torso with a line to form the neck , suggesting muscular stress . Extend the line from measure 5 to originate the lower portion of the front branch , indicating the arm ’ s extension during the jump

Step 09 – Detail the hand by split it into section to stand for the toes , ensuring it captures the gap hear in a cat ’ s leap . Then , draw a continuous line from the neck down the torso , curving gracefully to draft the thigh of the close hind branch
Measure 10 – On the opposite side of the torso , illustrate the second front branch extended forward , mimicking the action of the first . Depict the paw with defined toe , ready to land
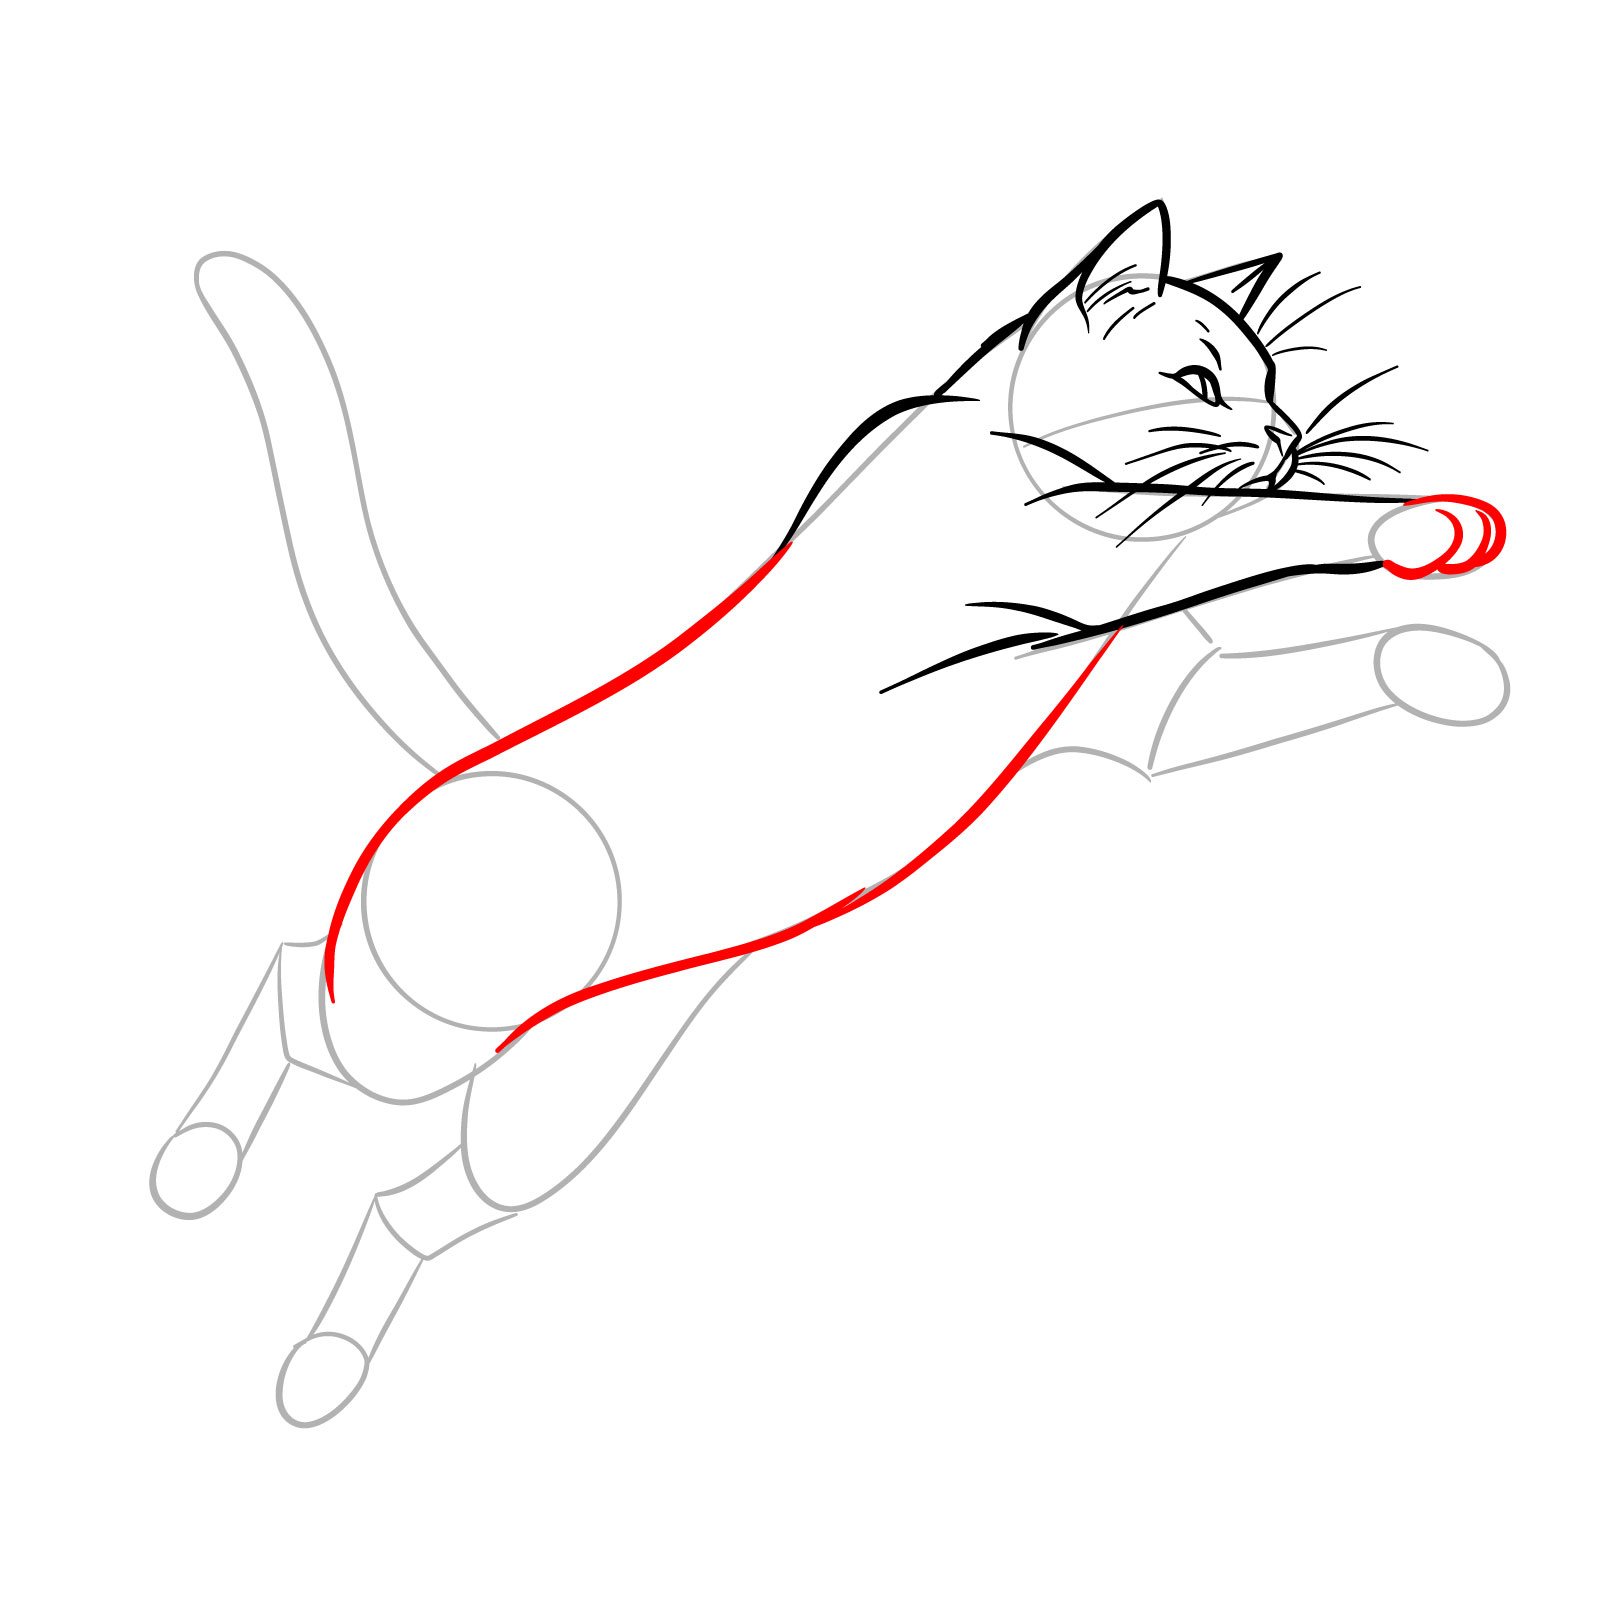
Measure 11 – Refine the first rear leg , adding contours to make up the muscular structure and joints . Check the hand is positioned to point the natural reference of the branch in the jump
Step 12 – Sketch the tail with a fluid motion to enhance the feeling of movement . Outline the second rear branch , assure it complements the angle and pattern of the first , to keep up the balance of the jump
Step 13 – With all elements in property , finalize your drawing by smooth out the note and ensuring the flesh be coherent . Your finished sketch should convey the energy and grace of a guy in mid-jump , service as a comprehensive case for those learning how to attract a cat in a jump . Reexamine the proportions and adapt as needed to seize the feline ’ s athletic shape in this dynamic pose and softly erase the basic survey
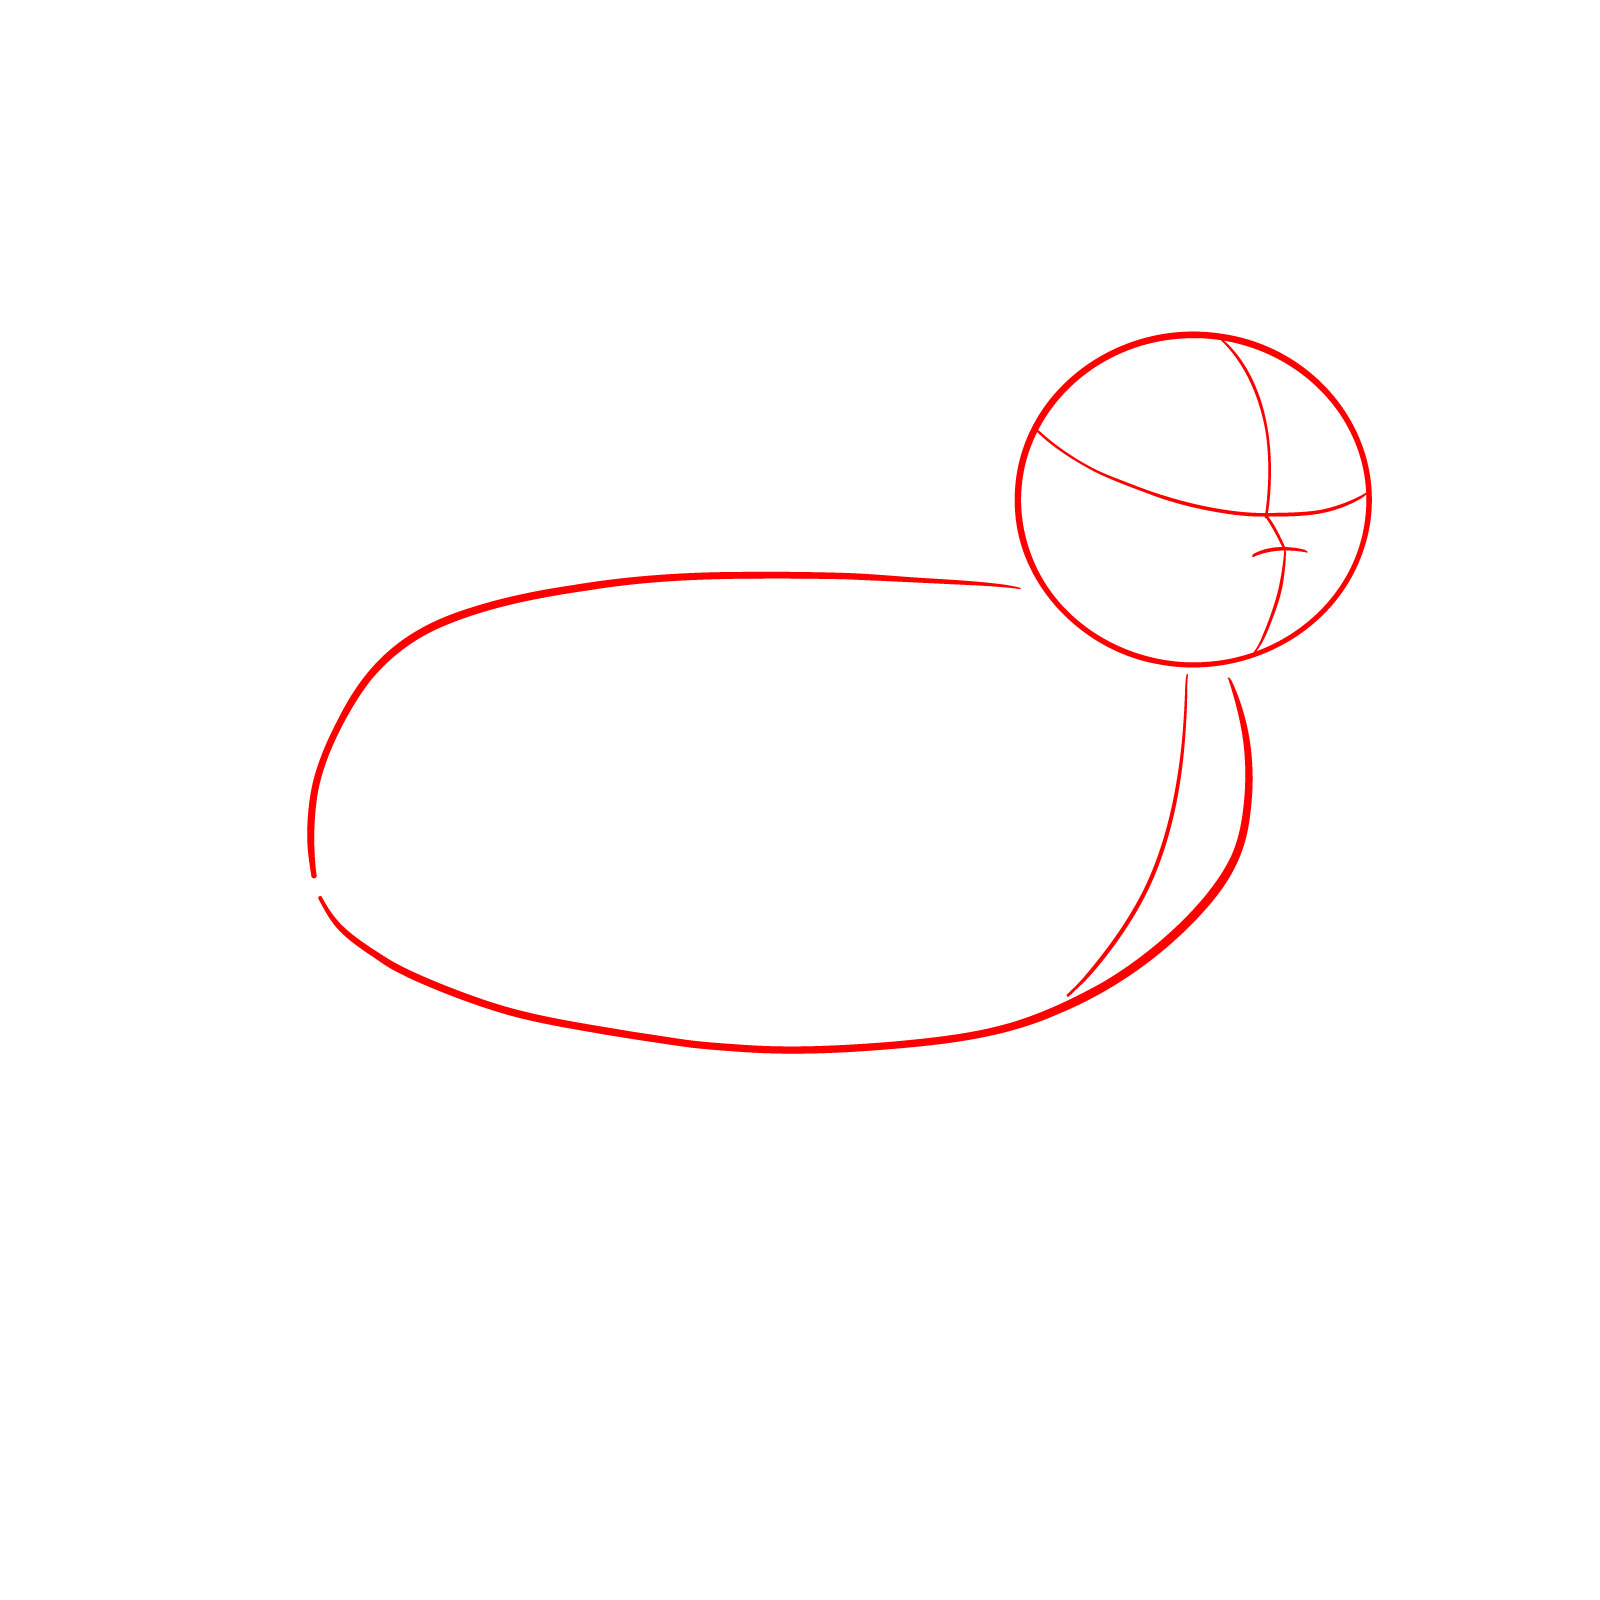
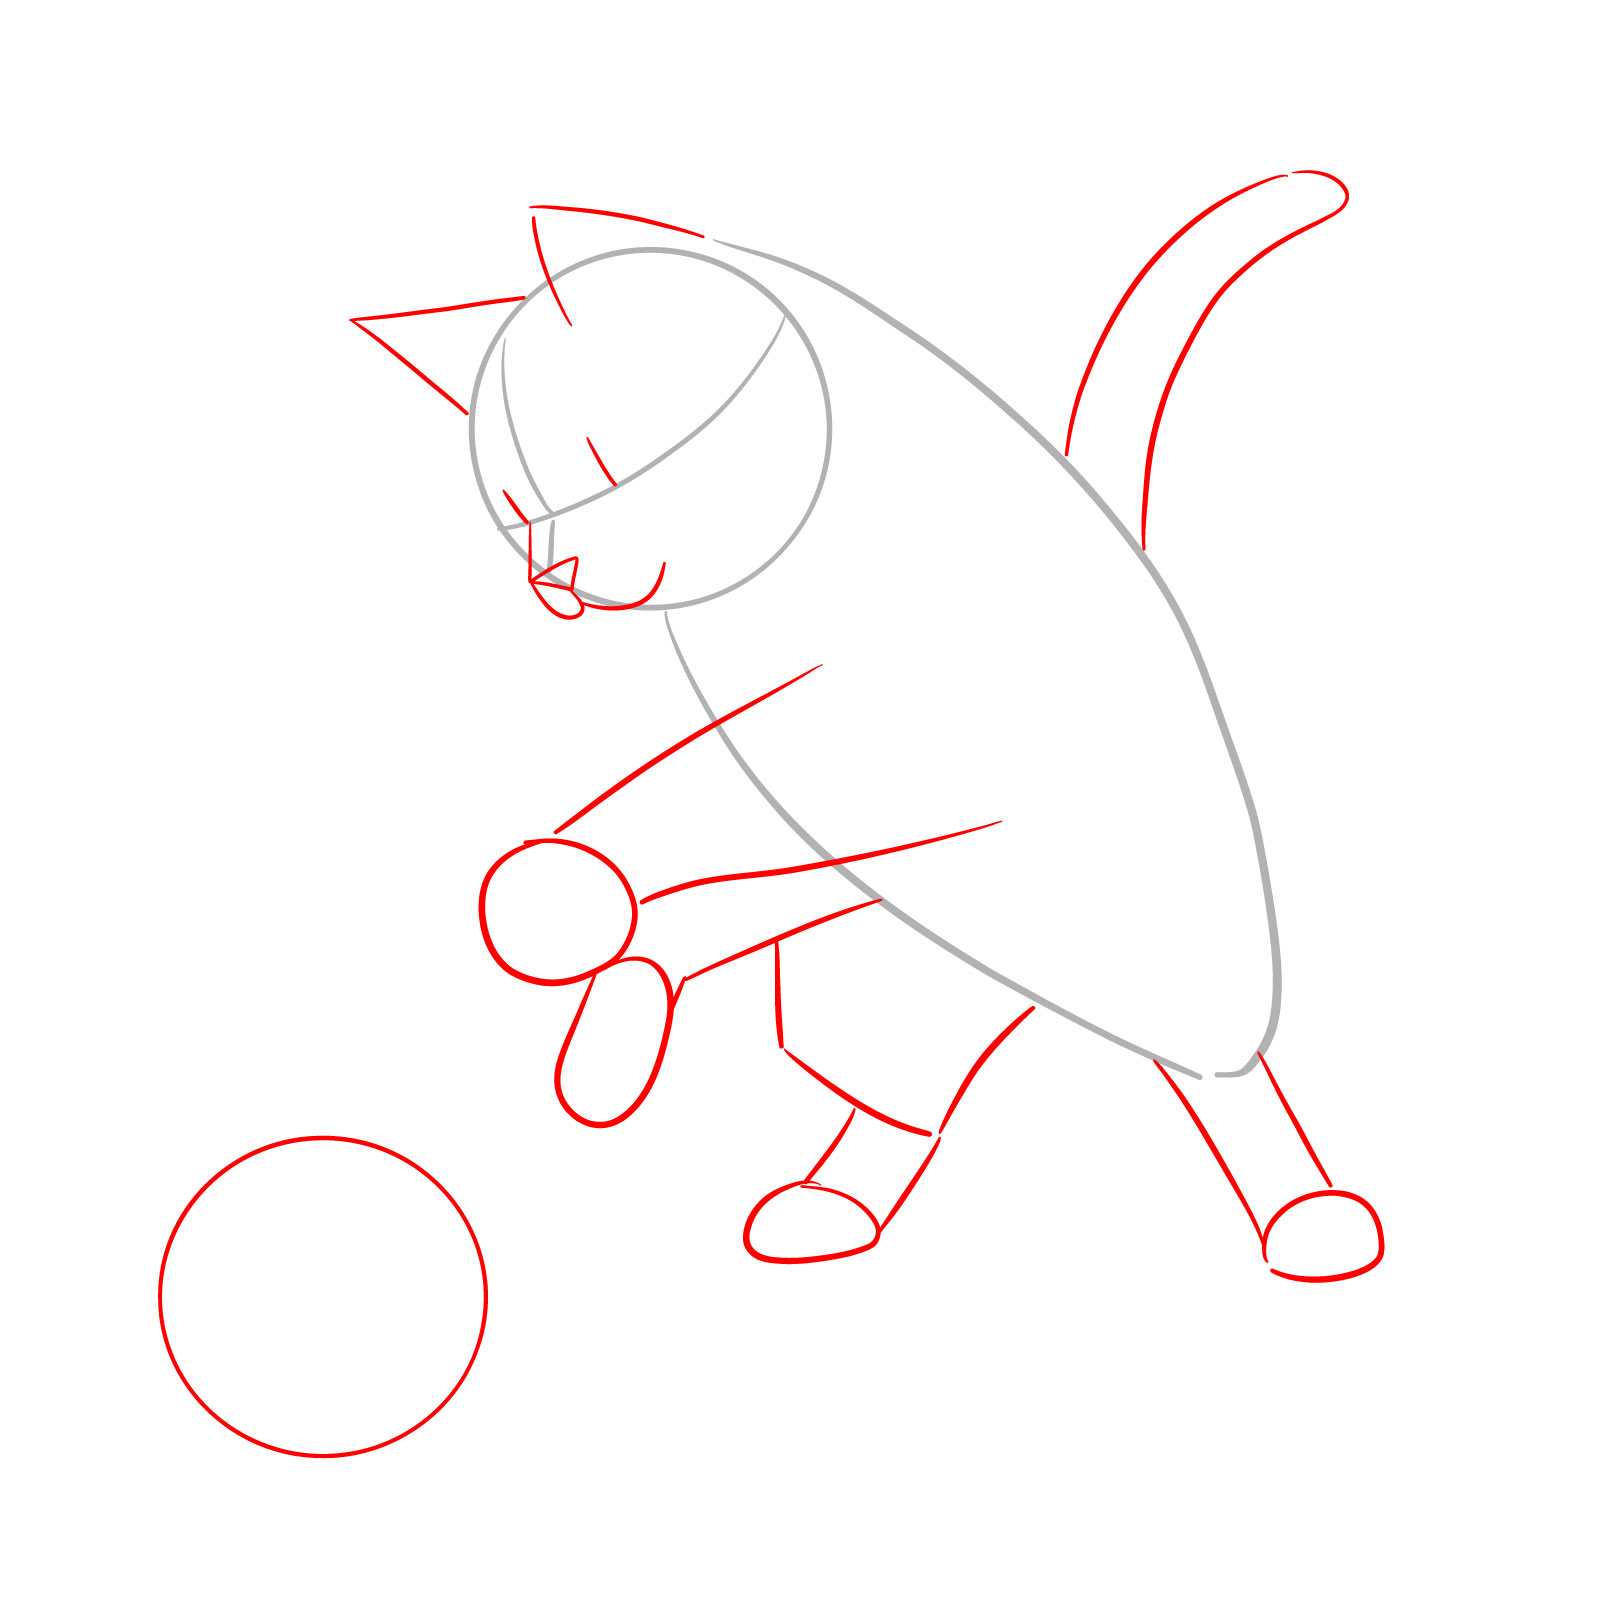
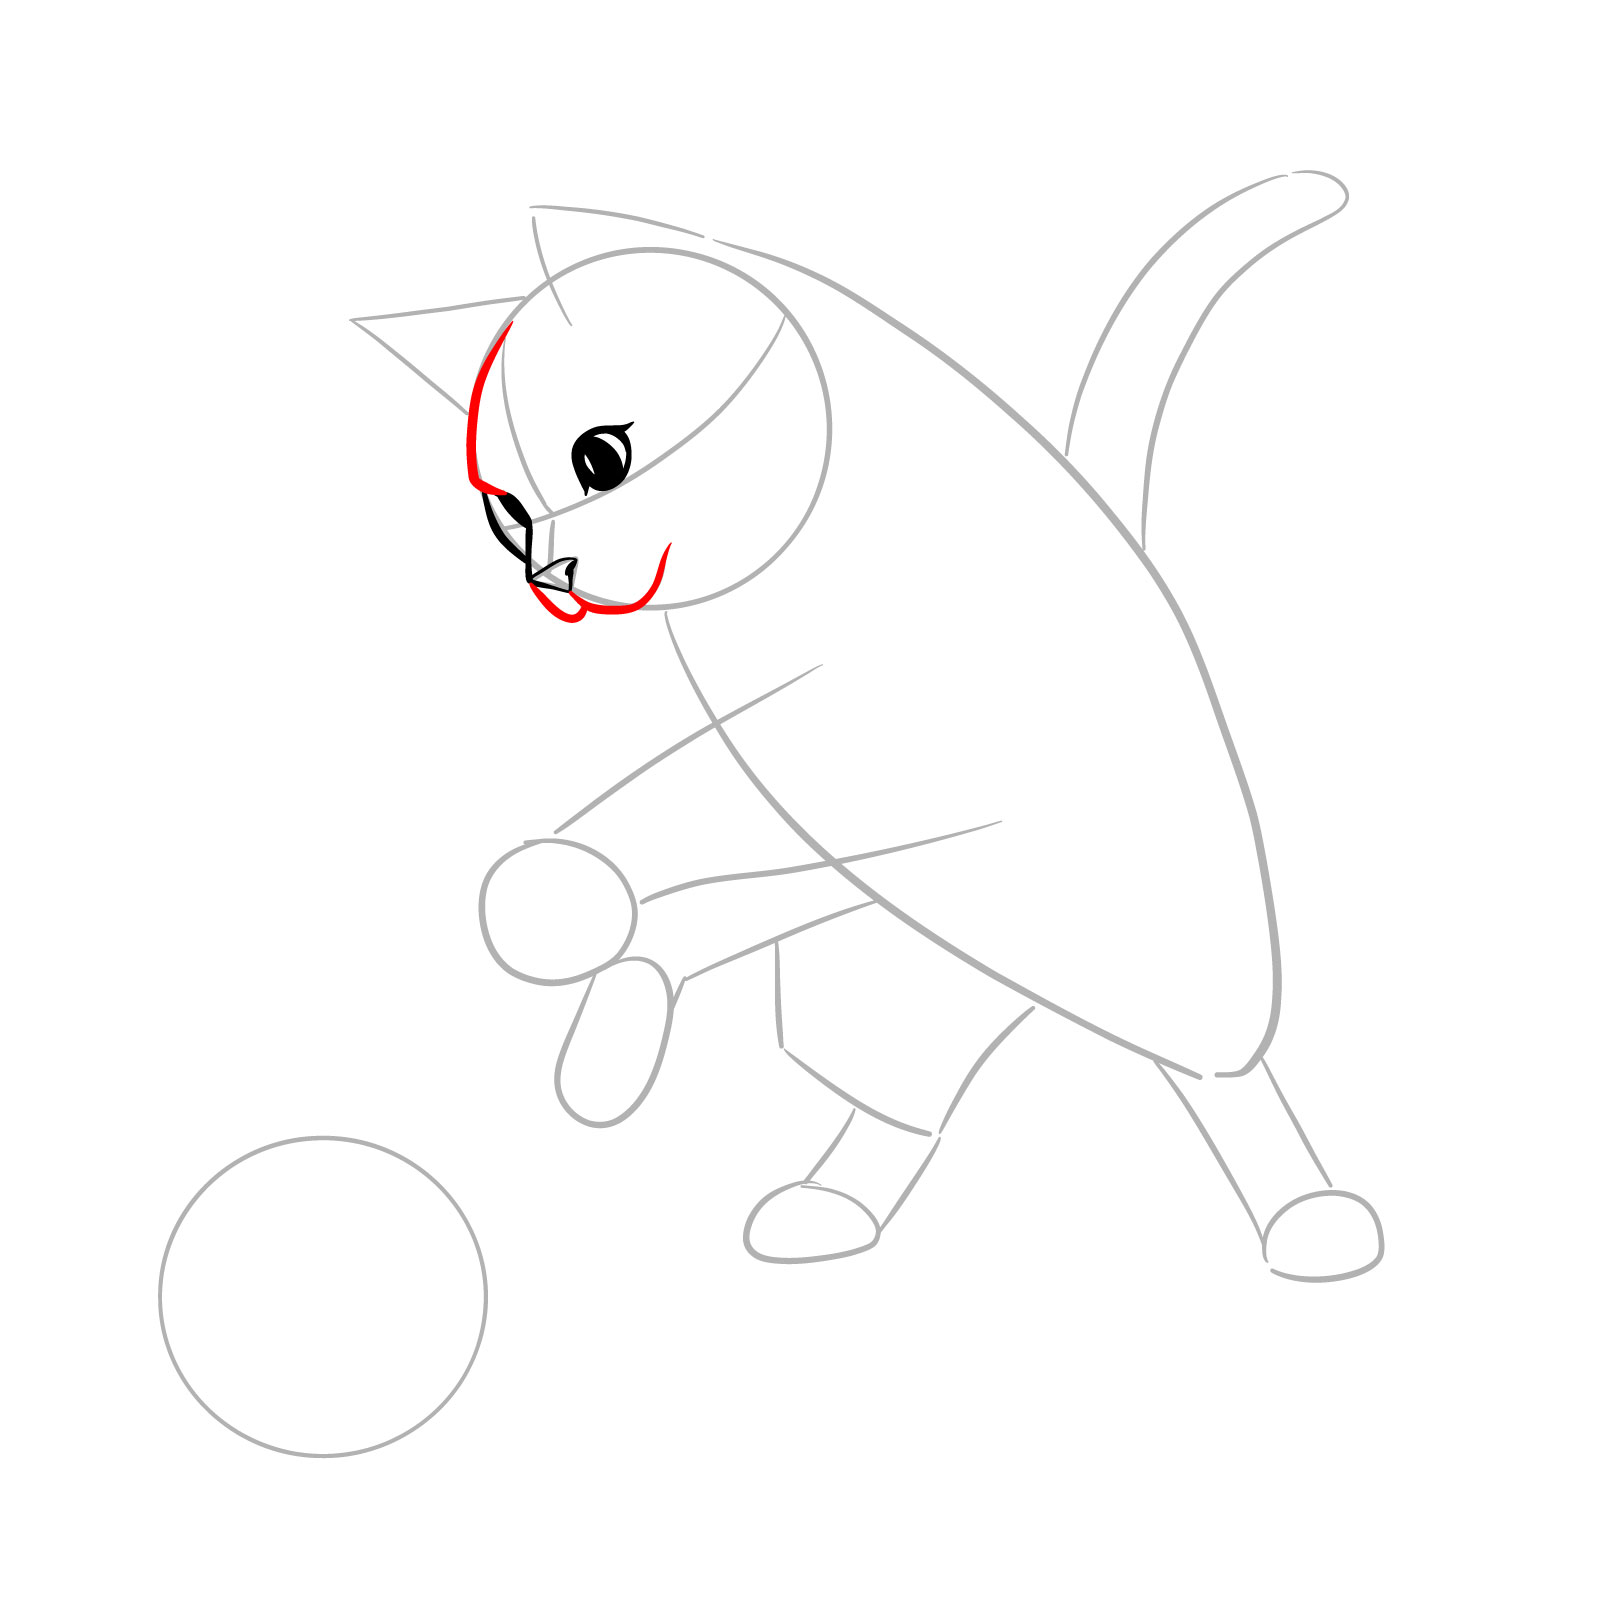
Guide 13 : How to Depict a Playing Cat – 13 Stairs
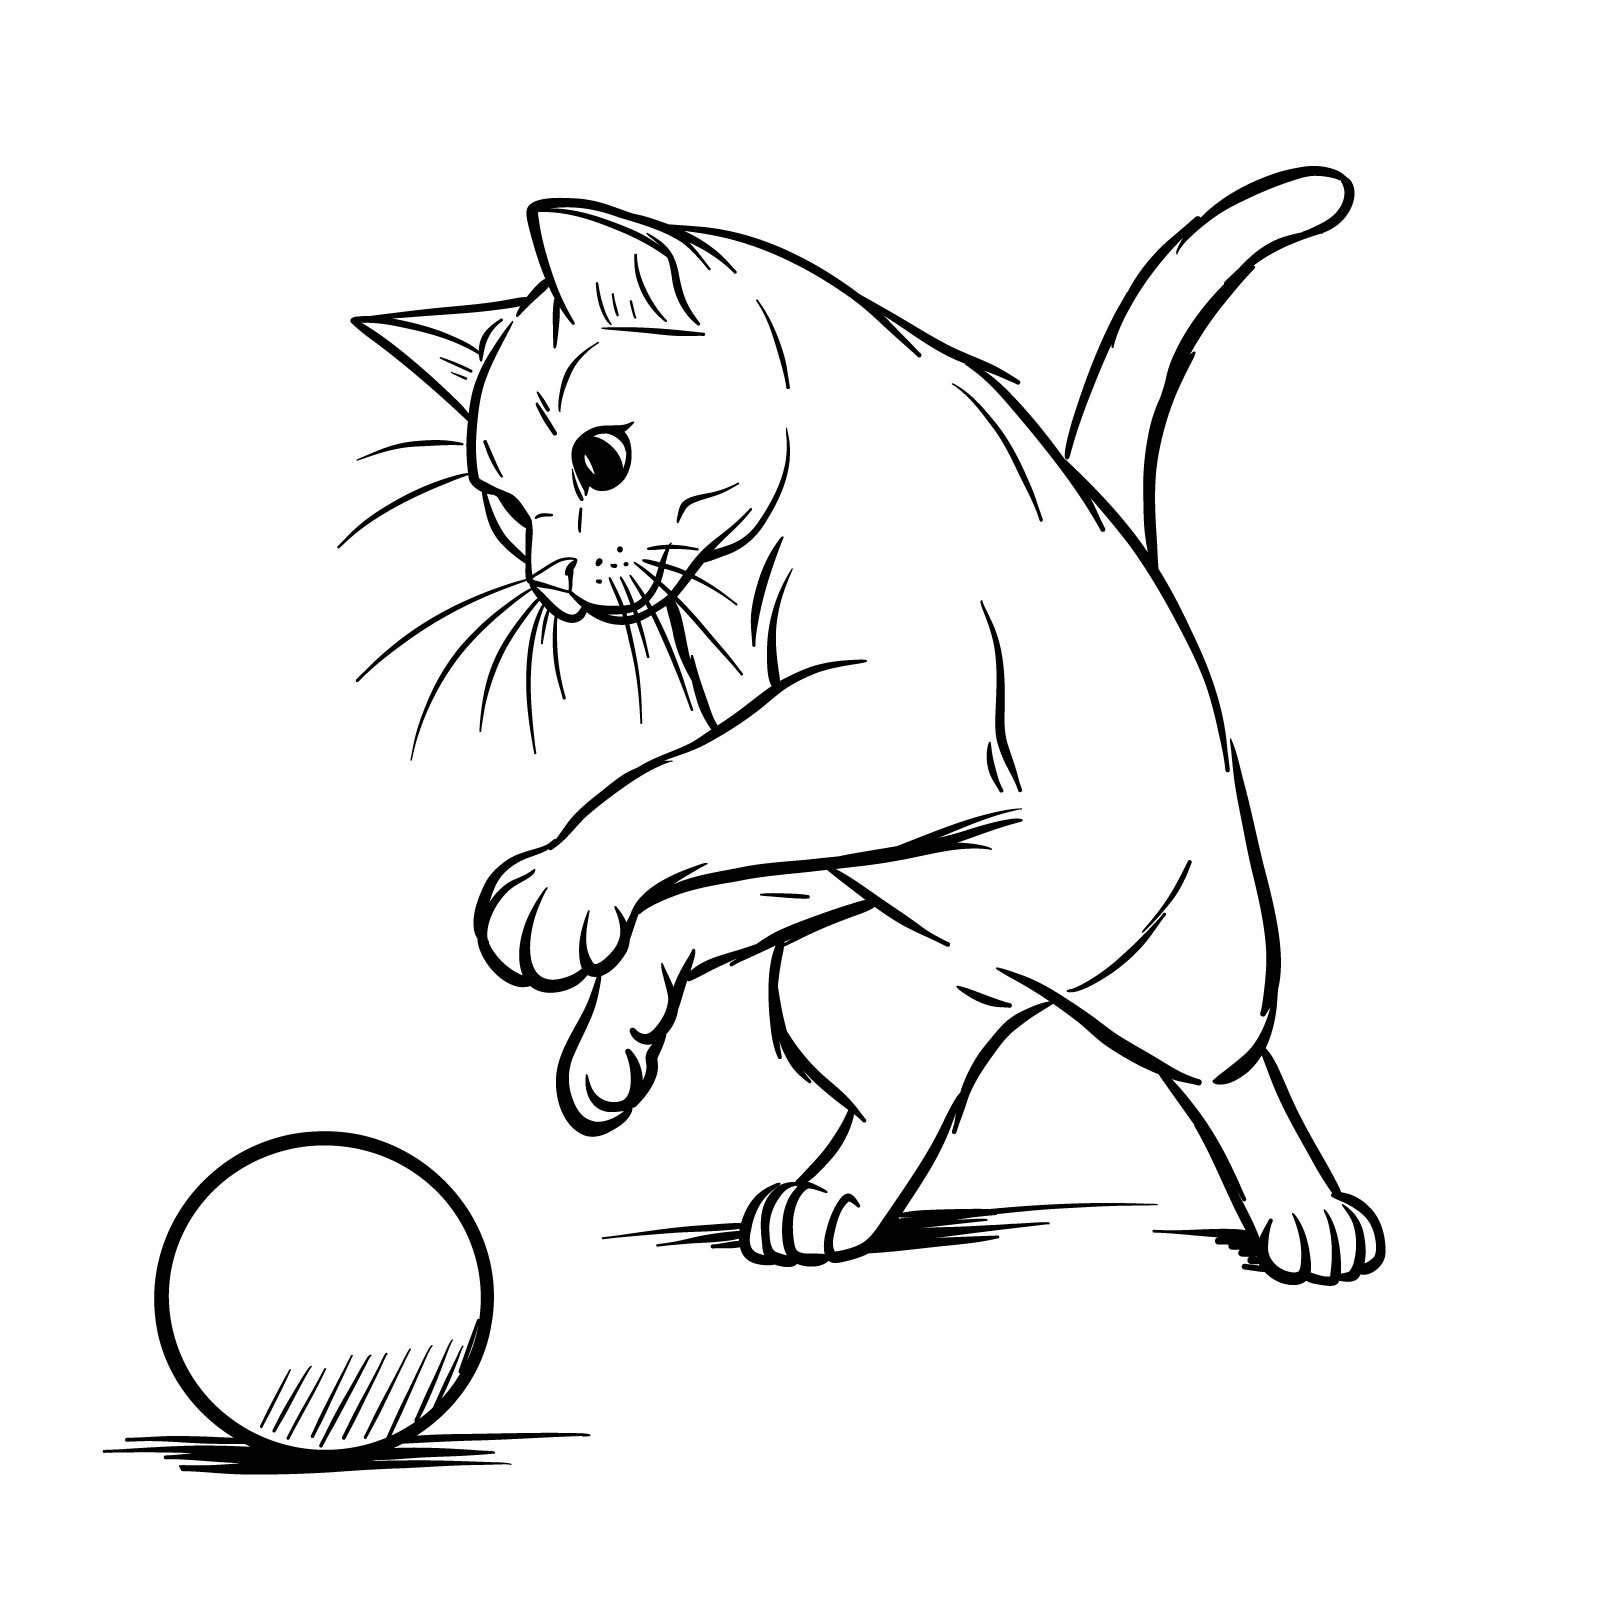
Engage in the delightful fit of outline with our thirteenth guide : how to depict a playing guy . This dynamic pose equal break down into 13 steps , offering a somewhat high complexity that remains friendly for beginners and a air for those with some drawing experience . The guide catch the playful feeling of a cat interacting with a chunk , rendered in a realistic figure yet simplified to center on the center of the movement . In the first two steps , you ’ ll create the proportional structure that ’ s crucial for a lively representation . While I apply only bold course for clarity and technical detail , sense free to enhance your artwork with additional shading and texture to the cat and the ball for a more vivid last .
Measure 01 – Draw a lot for the head , marked with a vertical and a horizontal job to point facial feature placement . Sketch a pointed oval shape for the torso to indicate the guy ’ s playful position
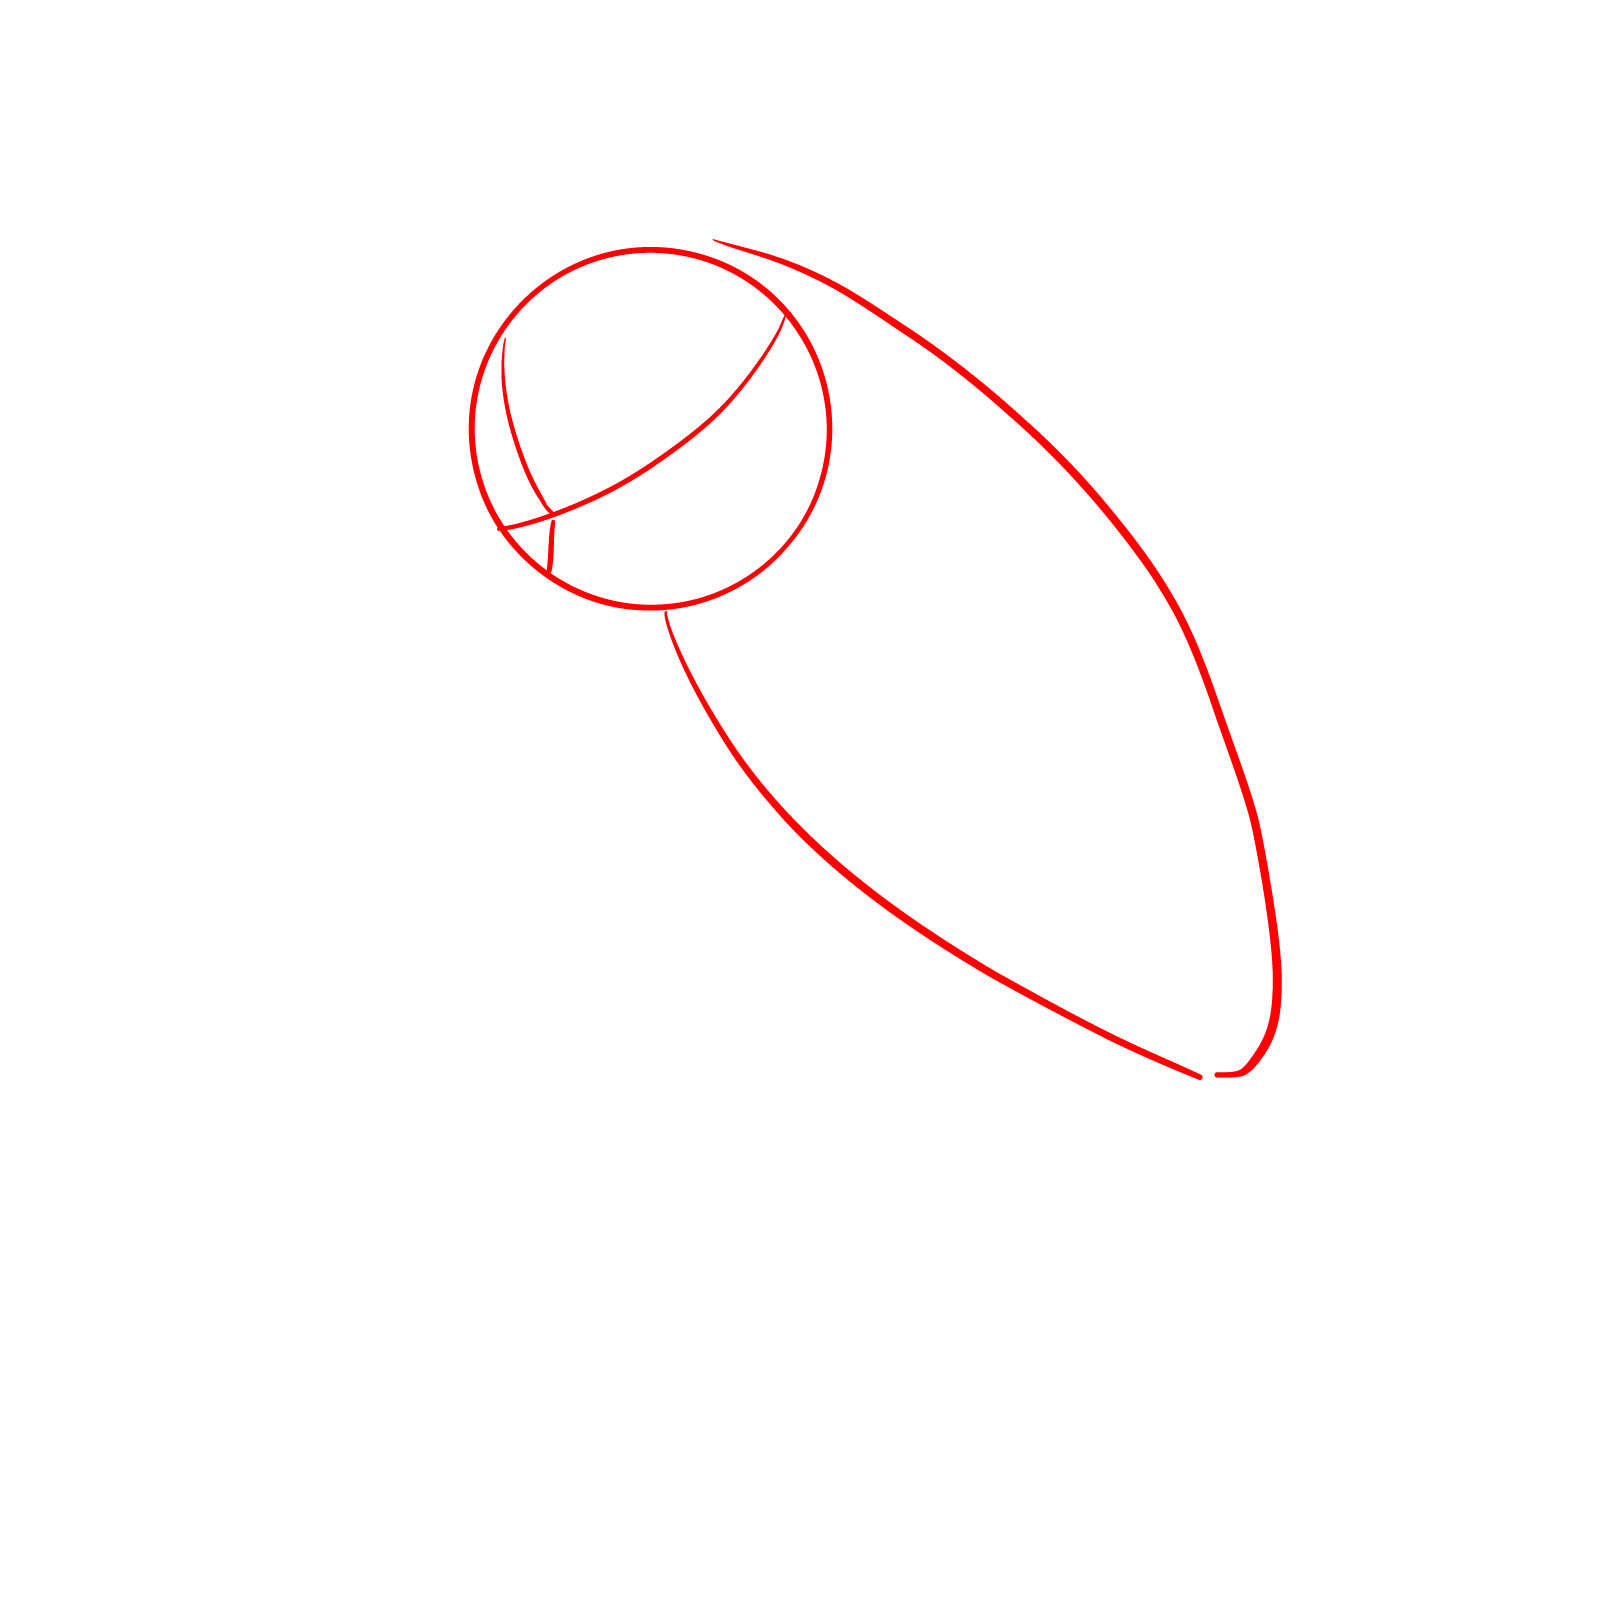
Step 02 – Outline basic pattern for the nose , muzzle , and ears on the mind , add job where the eyes will live drawn . Add elongated figure for the legs , a curving line for the ass , and a band to represent the chunk , establishing the playful interaction
Step 03 – Create oval fill in black for the student , leaving humble blank space for highlights to convey liveliness . Draw a job from the pupil towards the nose to set the facial structure

Step 04 – Carefully draft the eyes , ensuring they are symmetrical and expressive . Sketch the nose ’ s shape , keeping it simple and in proportion to the head
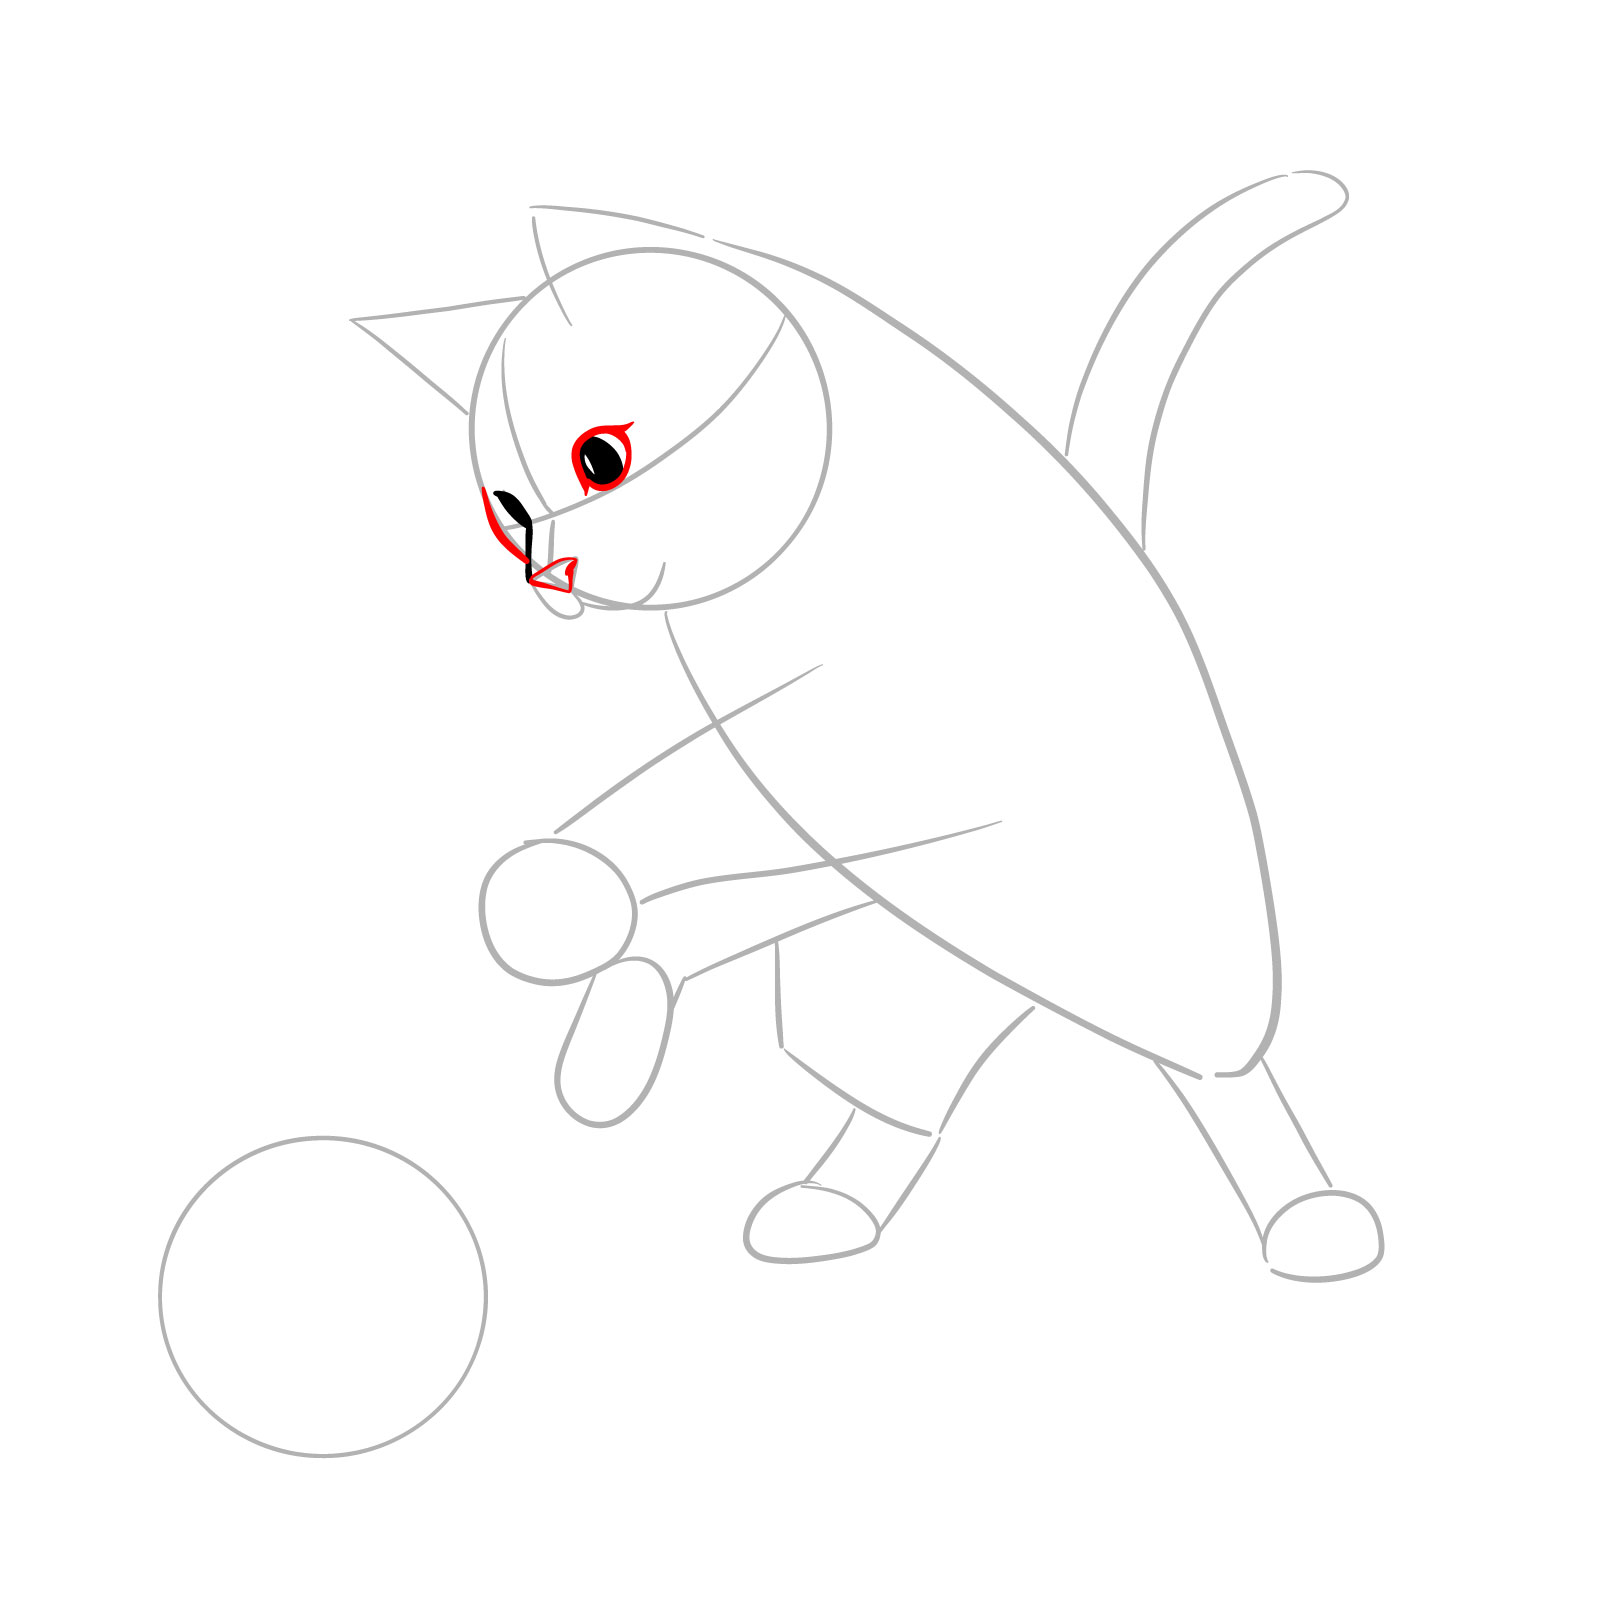
Pace 05 – Define the curve of the forehead between the ear . Add curved shapes on the muzzle to suggest the whisker pads , the starting point for next whisker details
Step 06 – Sketch the chin and complete the lower outline of the top dog for a rounded , natural figure . Refine the ears with inner course to propose depth and alertness
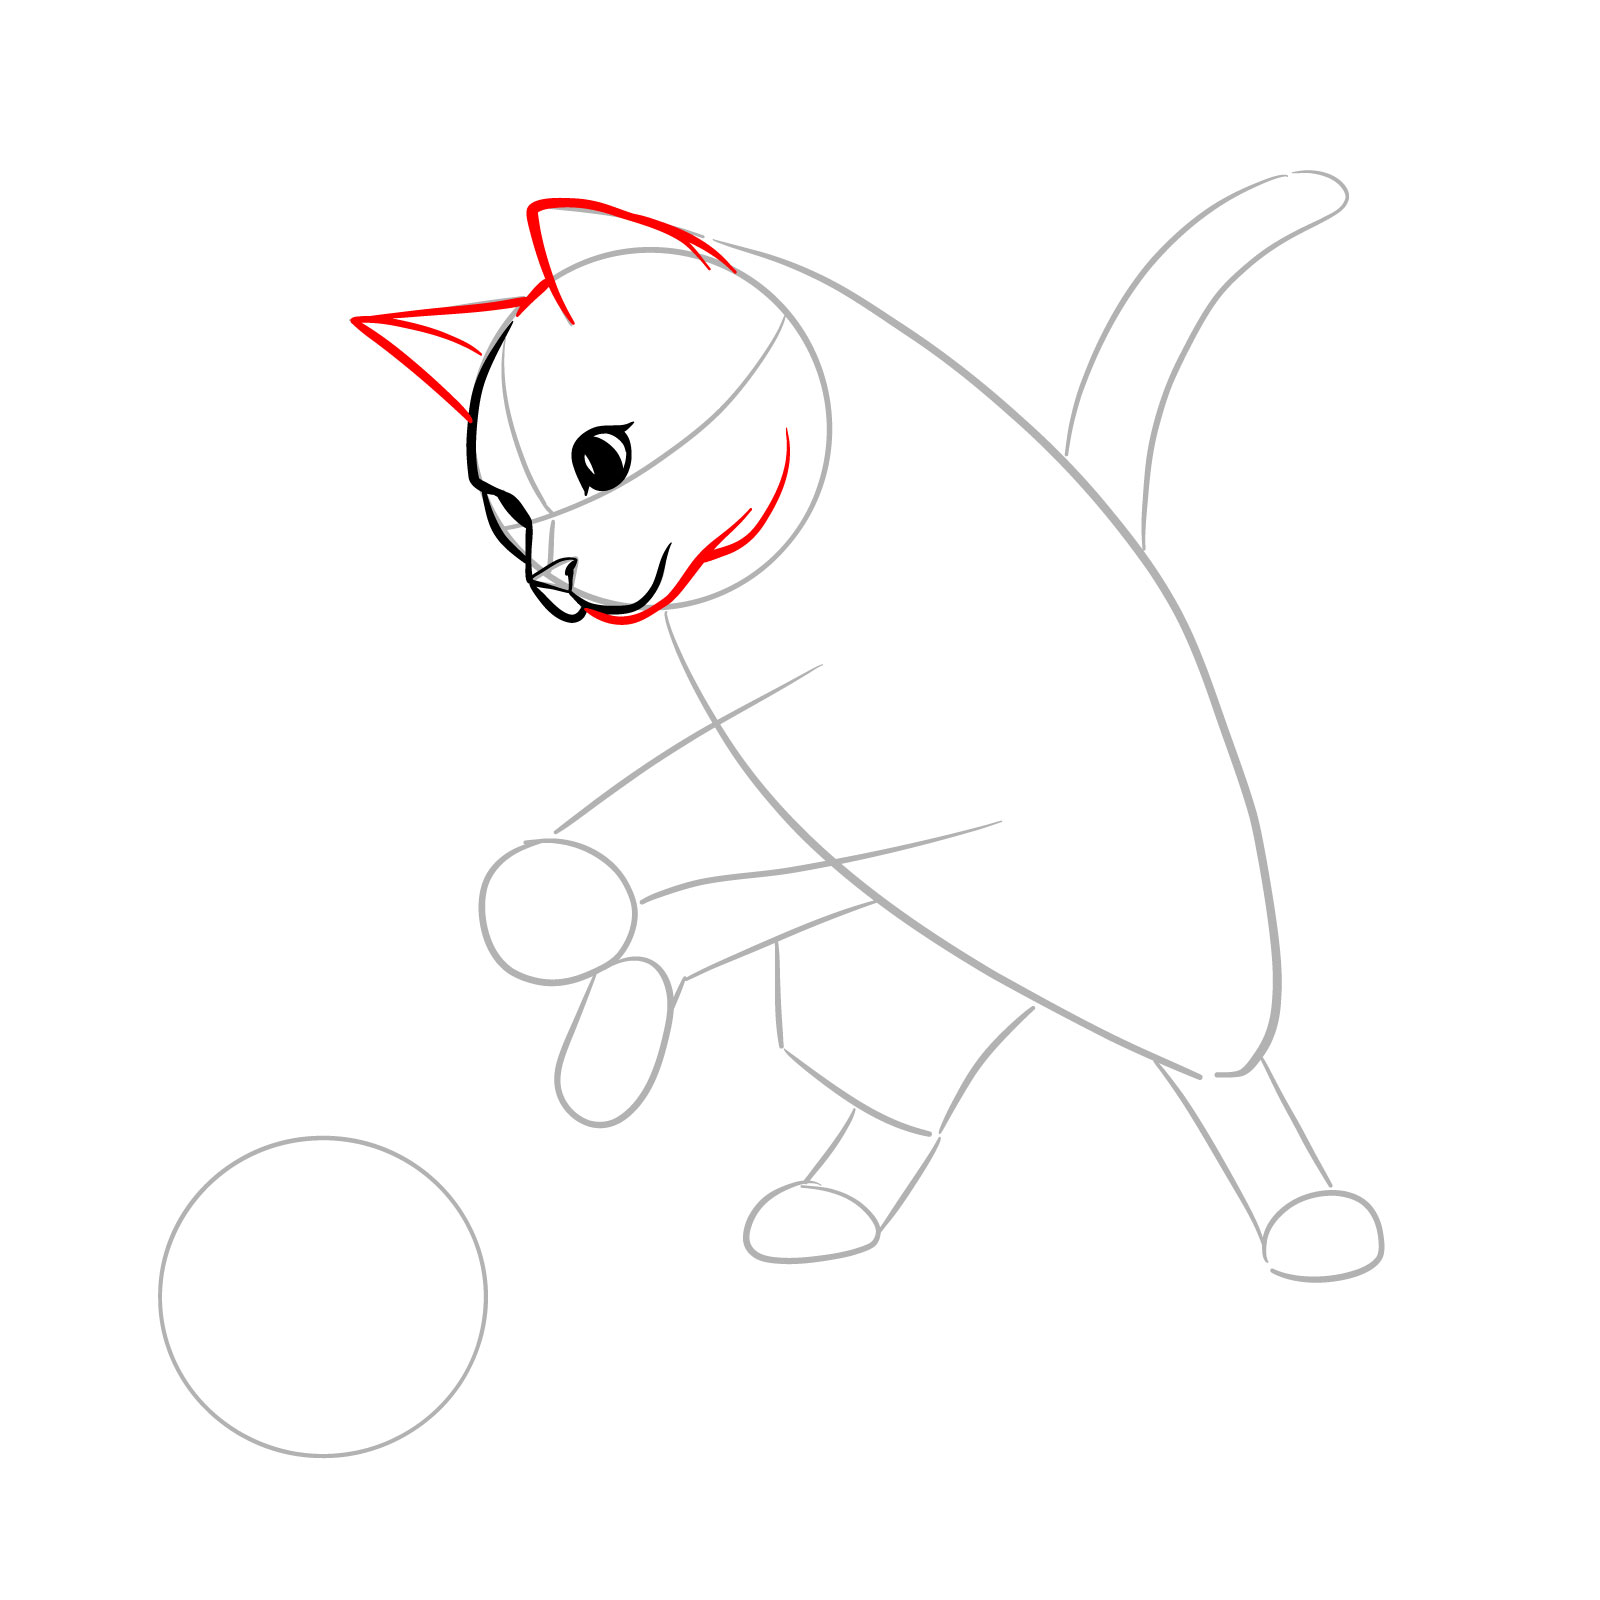
Step 07 – From the whisker pads , extend business outwards to form beard of depart lengths . Add details inside the ear and small strokes around the head for a furry texture
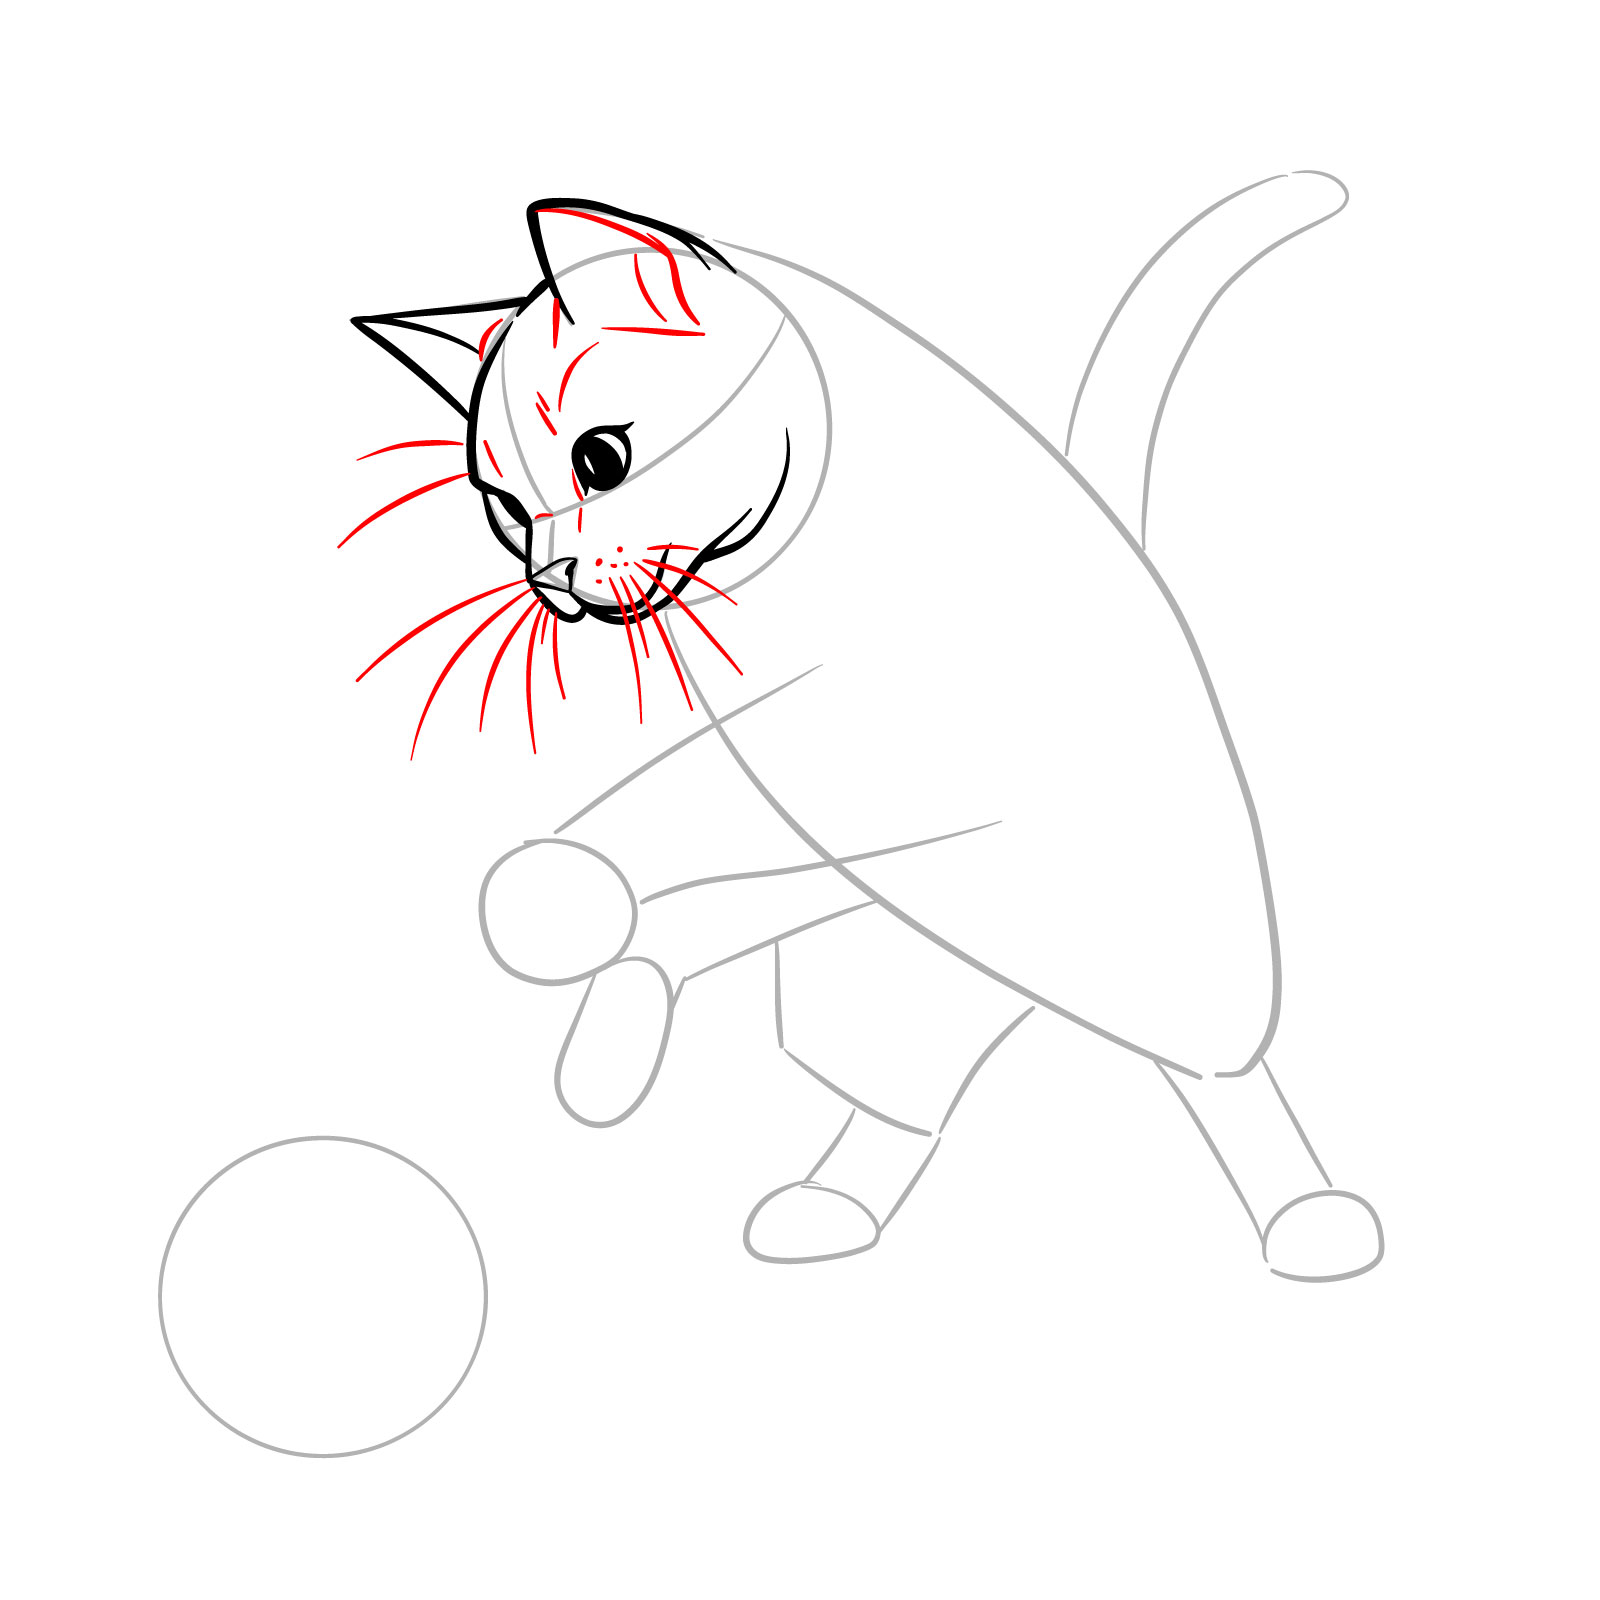
Measure 08 – Draw the backline with short strokes to suggest fur , curving it down to the ass ’ sec stand . For the front branch , expend similar short strokes to produce a furry appearance , determine the leg ’ s form and the paw reach out to touch the chunk
Step 09 – Extend the line from the presence leg to create the bottom of the cat ’ sec torso , veer it upwards to indicate the starting of the hind leg , bent in expectation of playful movement
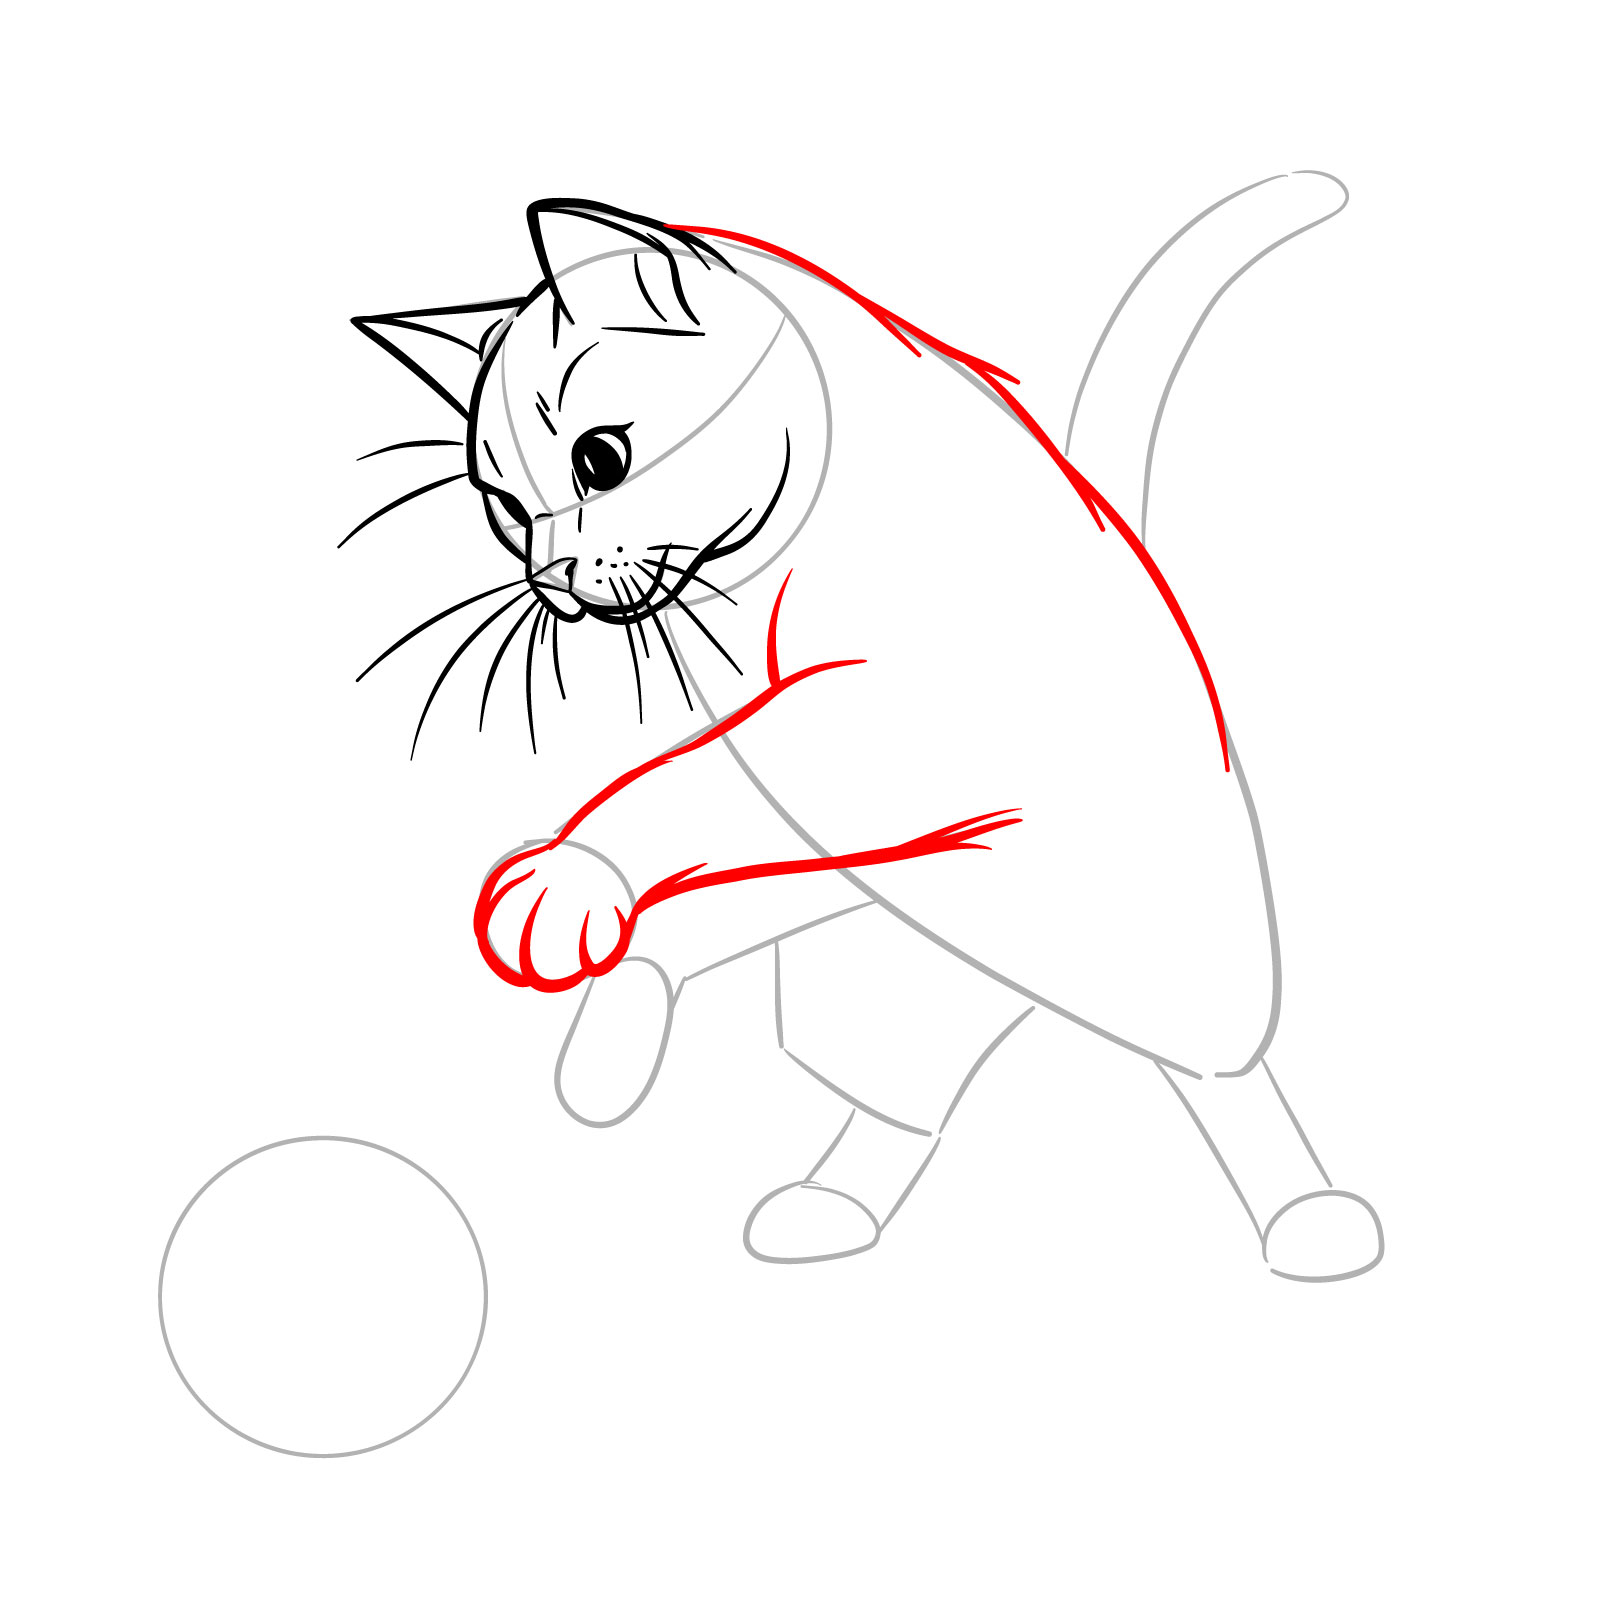
Step 10 – Detail the first hind branch ’ s shape , show the leg ’ s segment and paw . Set out sketch the second movement branch , erect and poise to interact with the ball
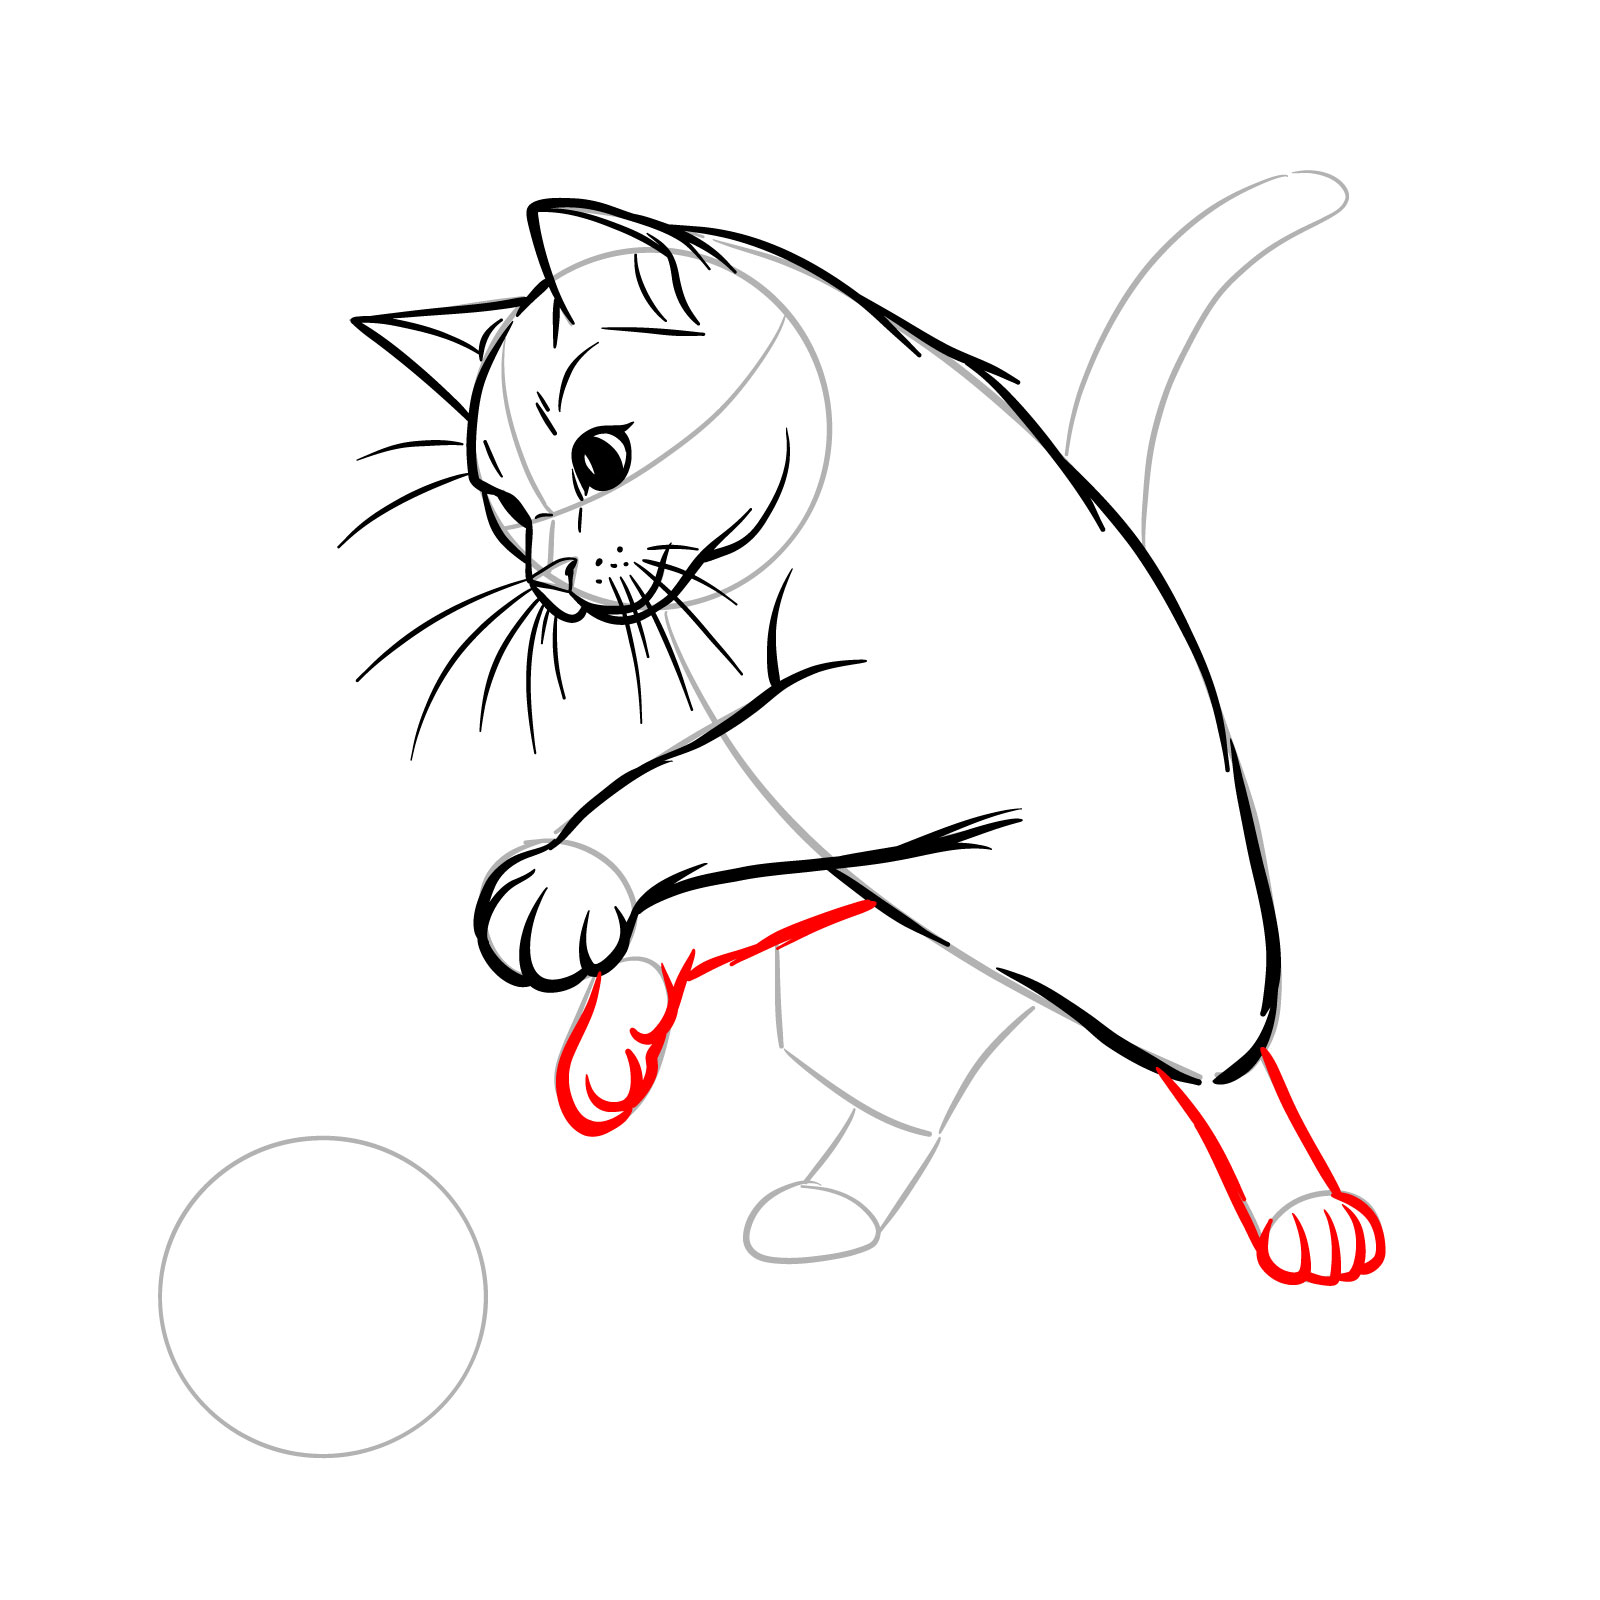
Step 11 – Smooth out the torso ’ s outline for a rounded appearance and finalize the second hind branch , ensure it mirrors the position and form of the first for a balanced face
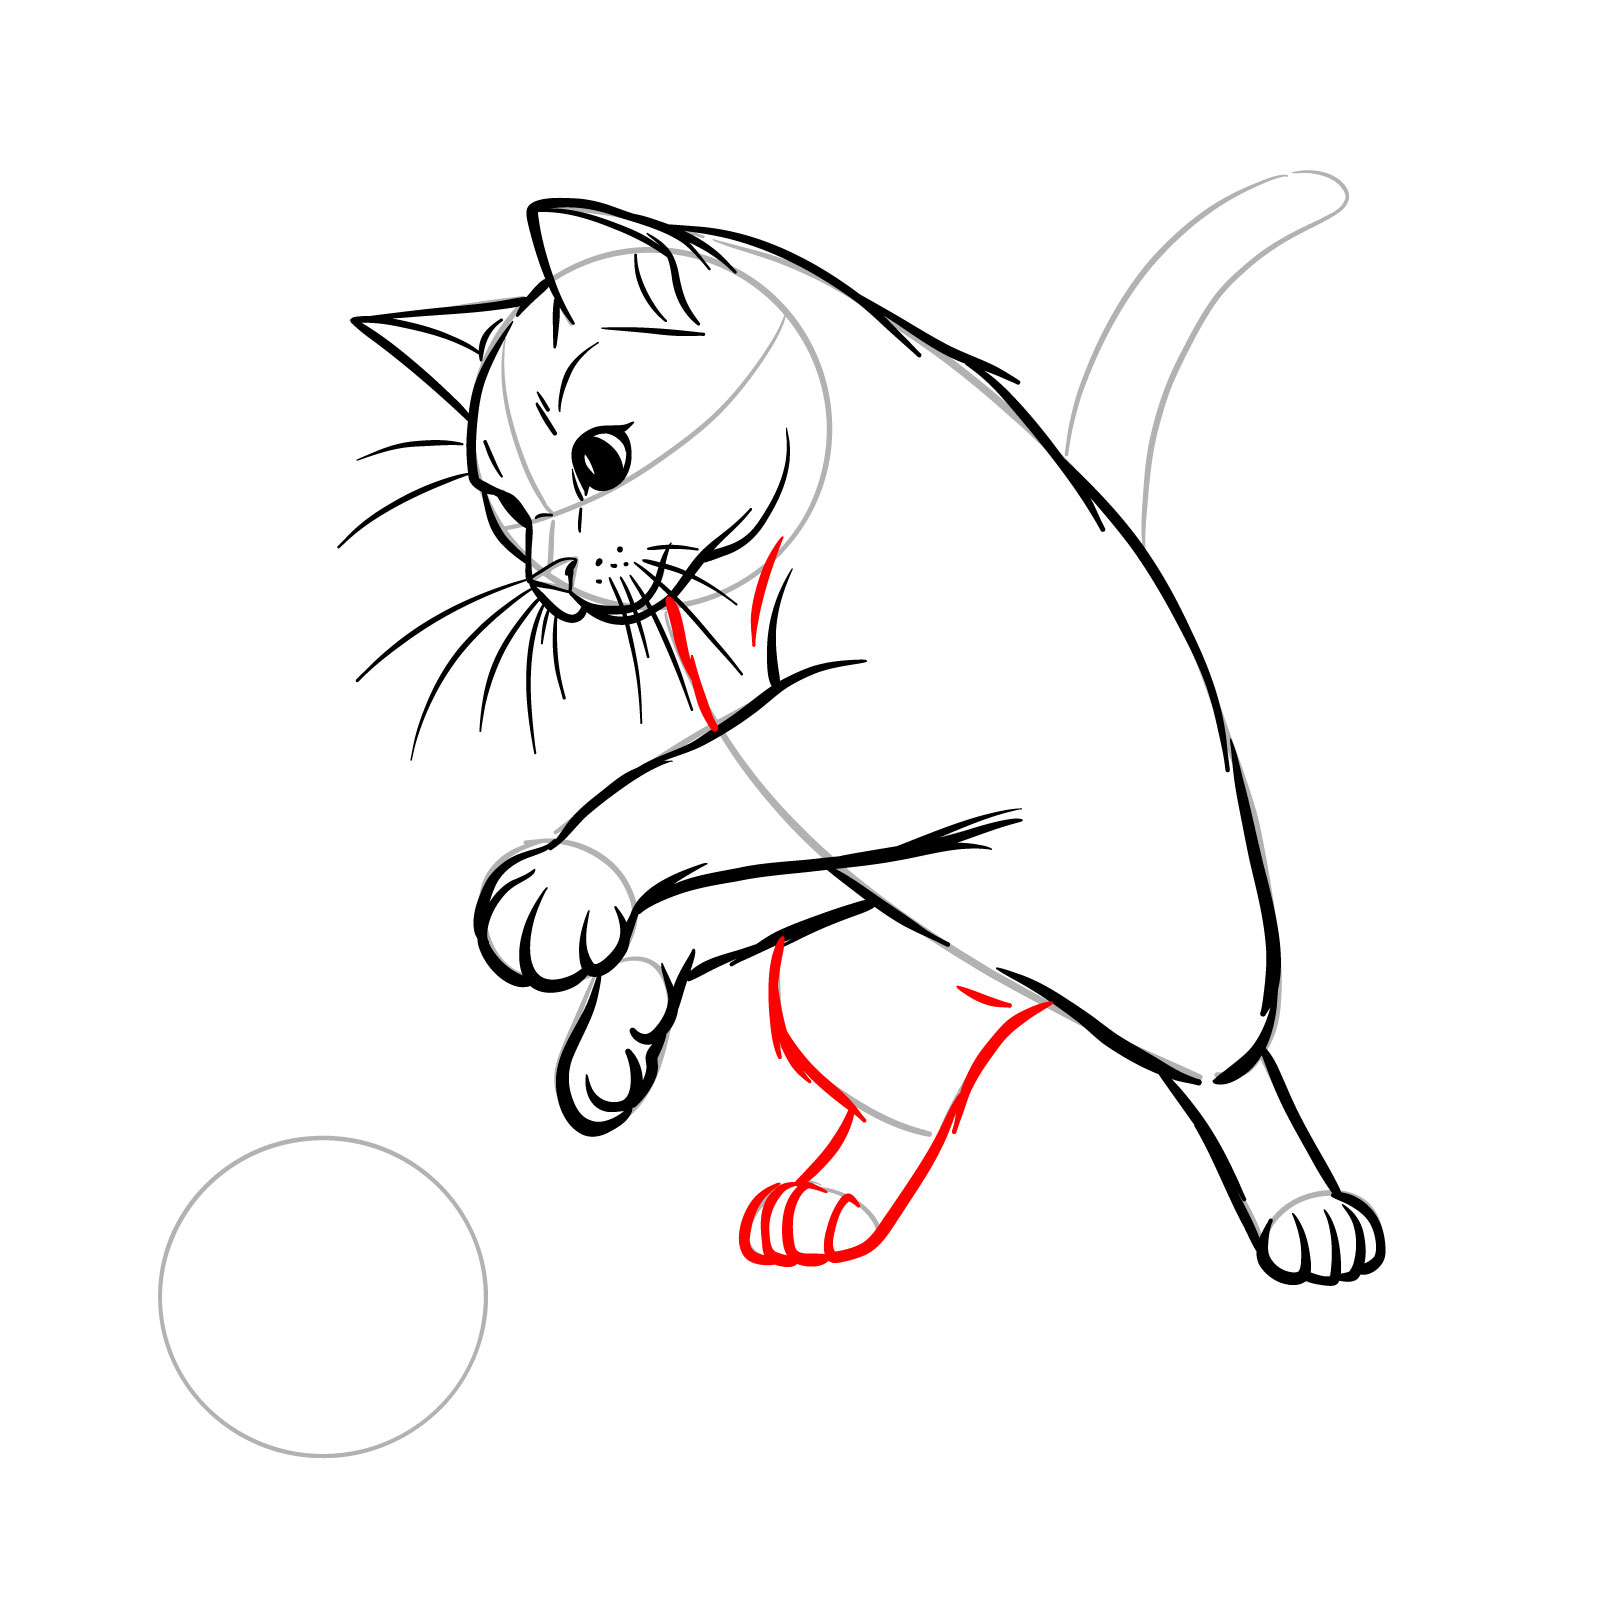
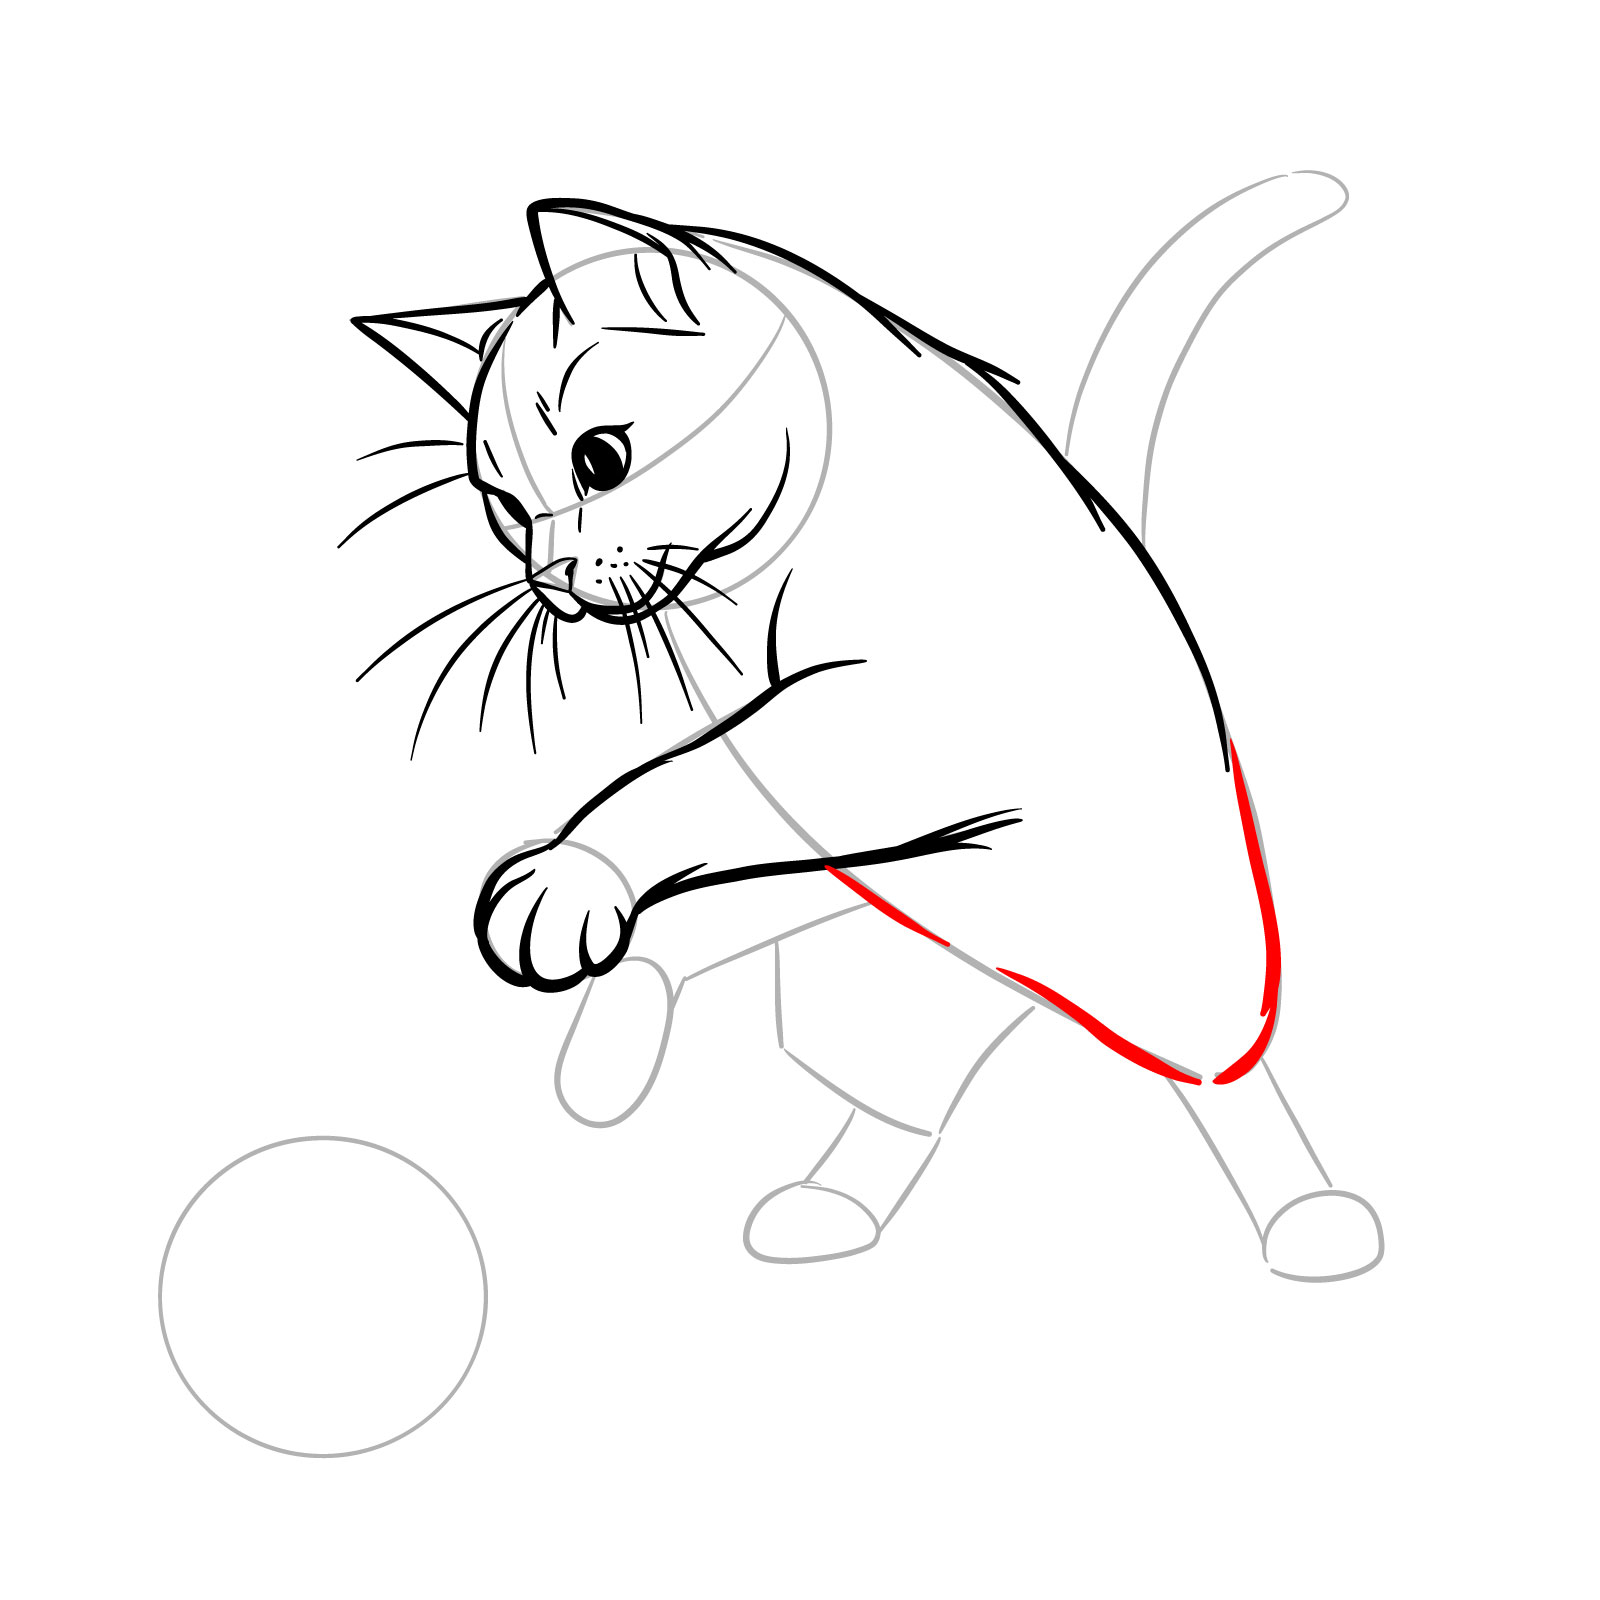
Measure 12 – Draw the ass with an expressive curve for added dynamic . Outline the ball with light shading to create depth , and add minimum line to the body for definition

Step 13 – With all details in property , remove any stay on guidelines and , if desired , ink the sketch for a polished face . This final picture serves as a all over guide for those search to learn how to attract a guy playing with a ball , capturing the playful spirit and dynamic attitude of a feline hire in play
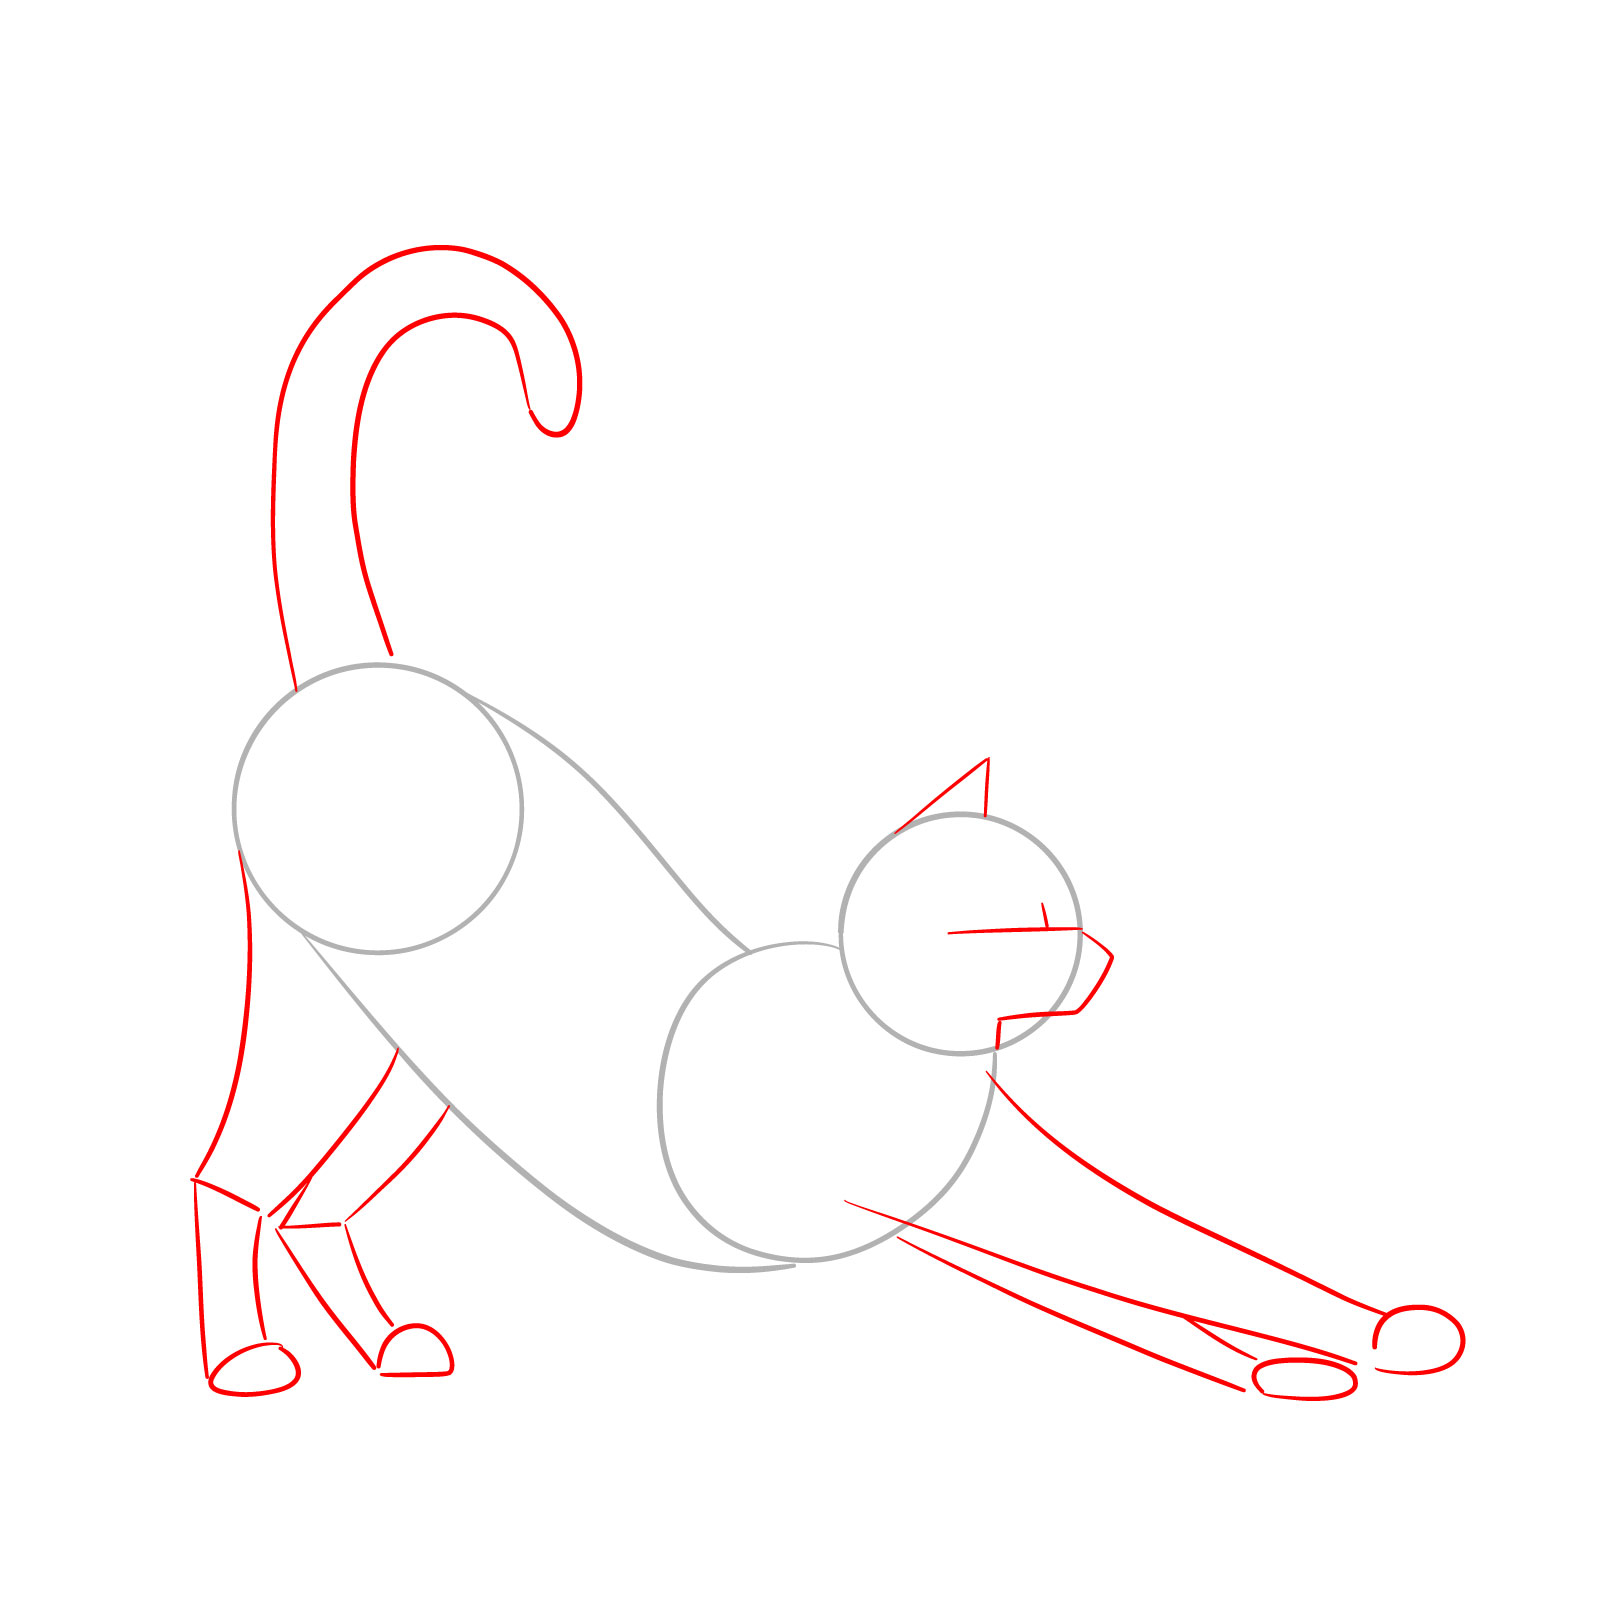
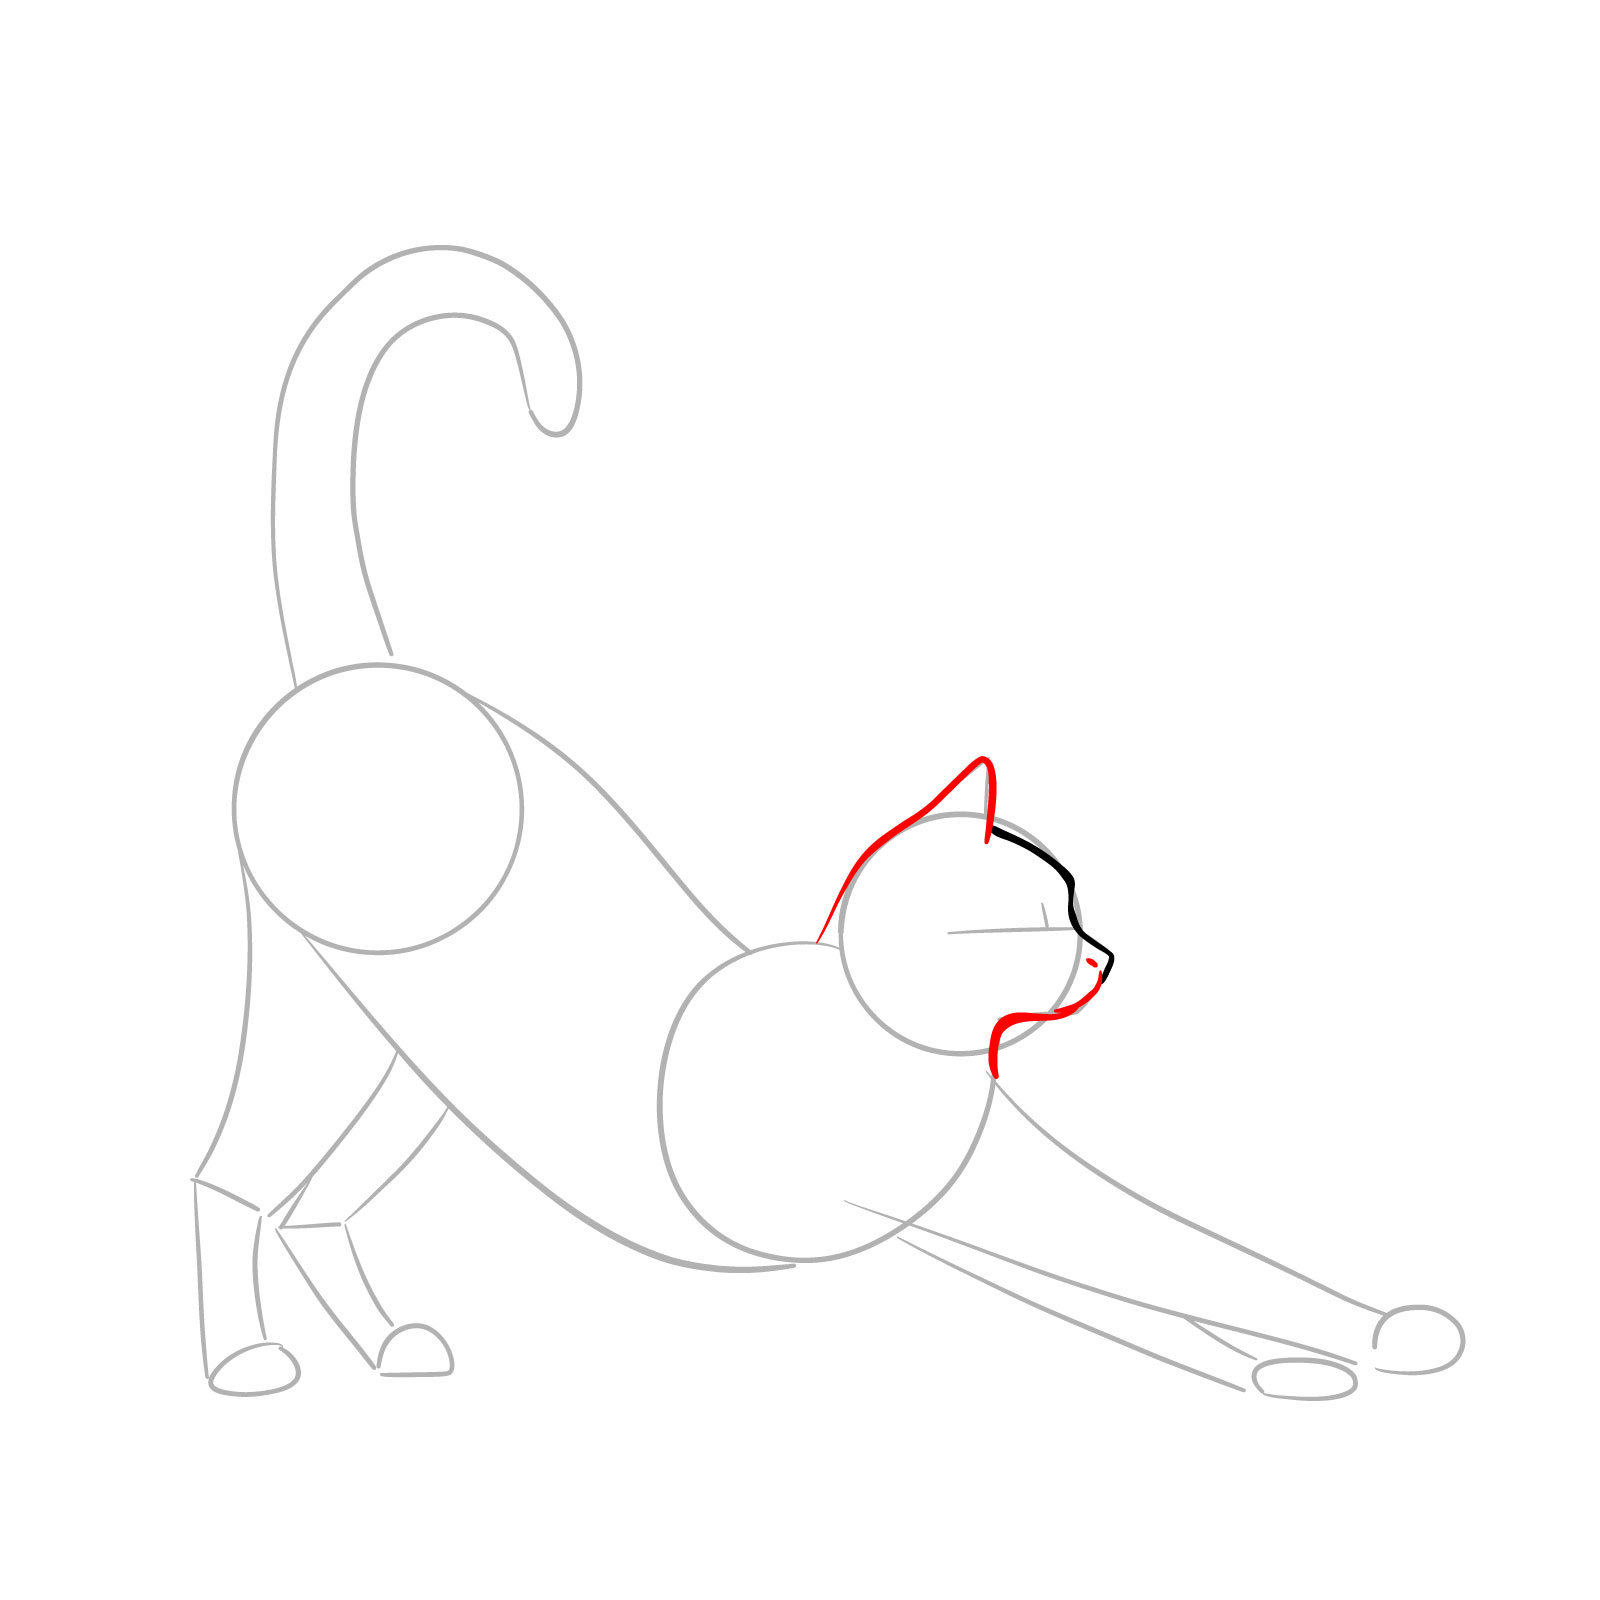
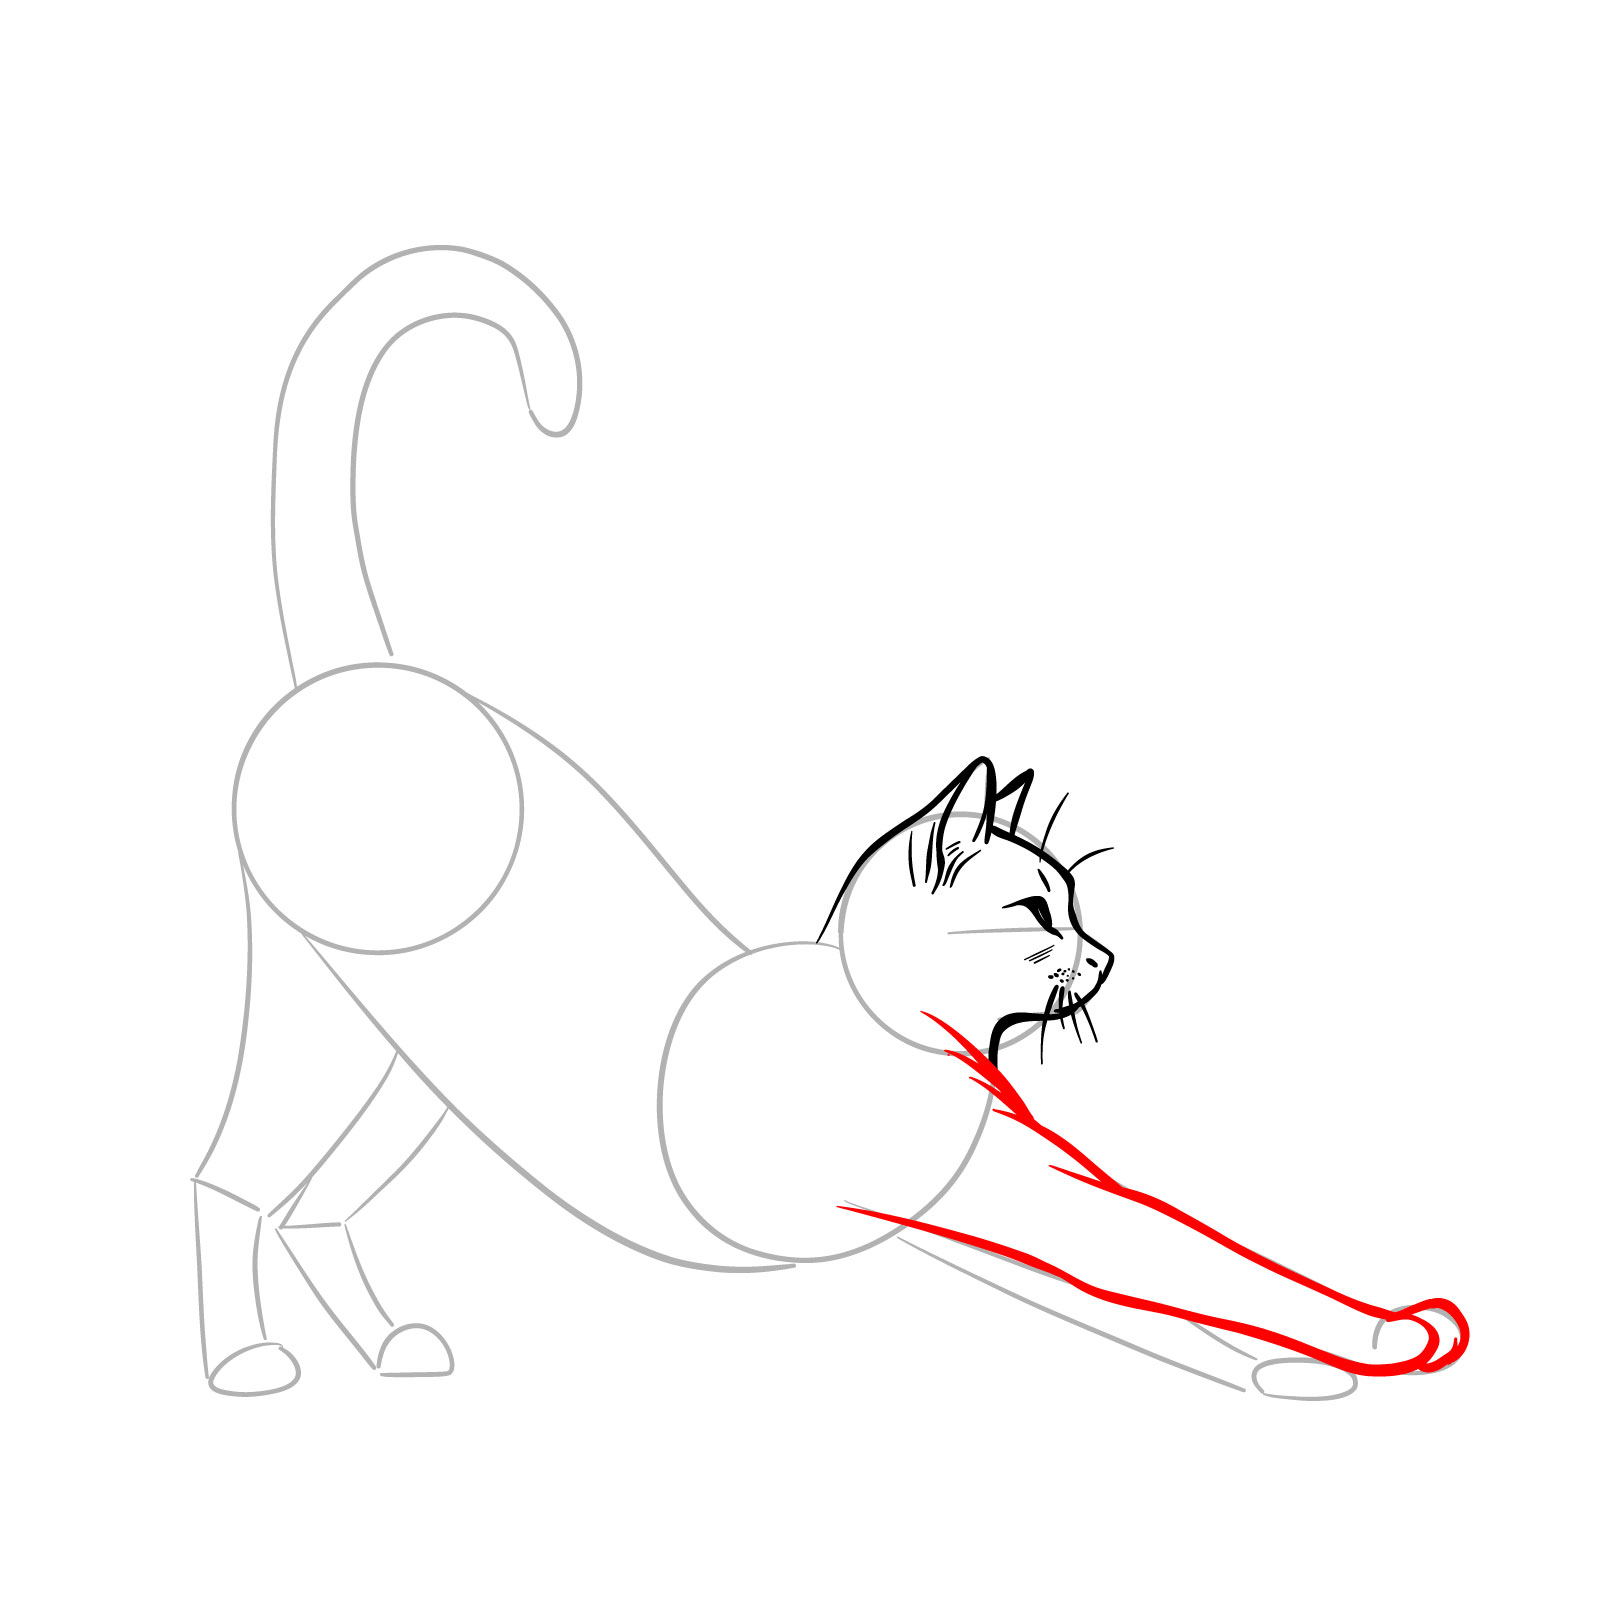
Guide 14 : How to Draw a Cat Stretching – 11 Stairs
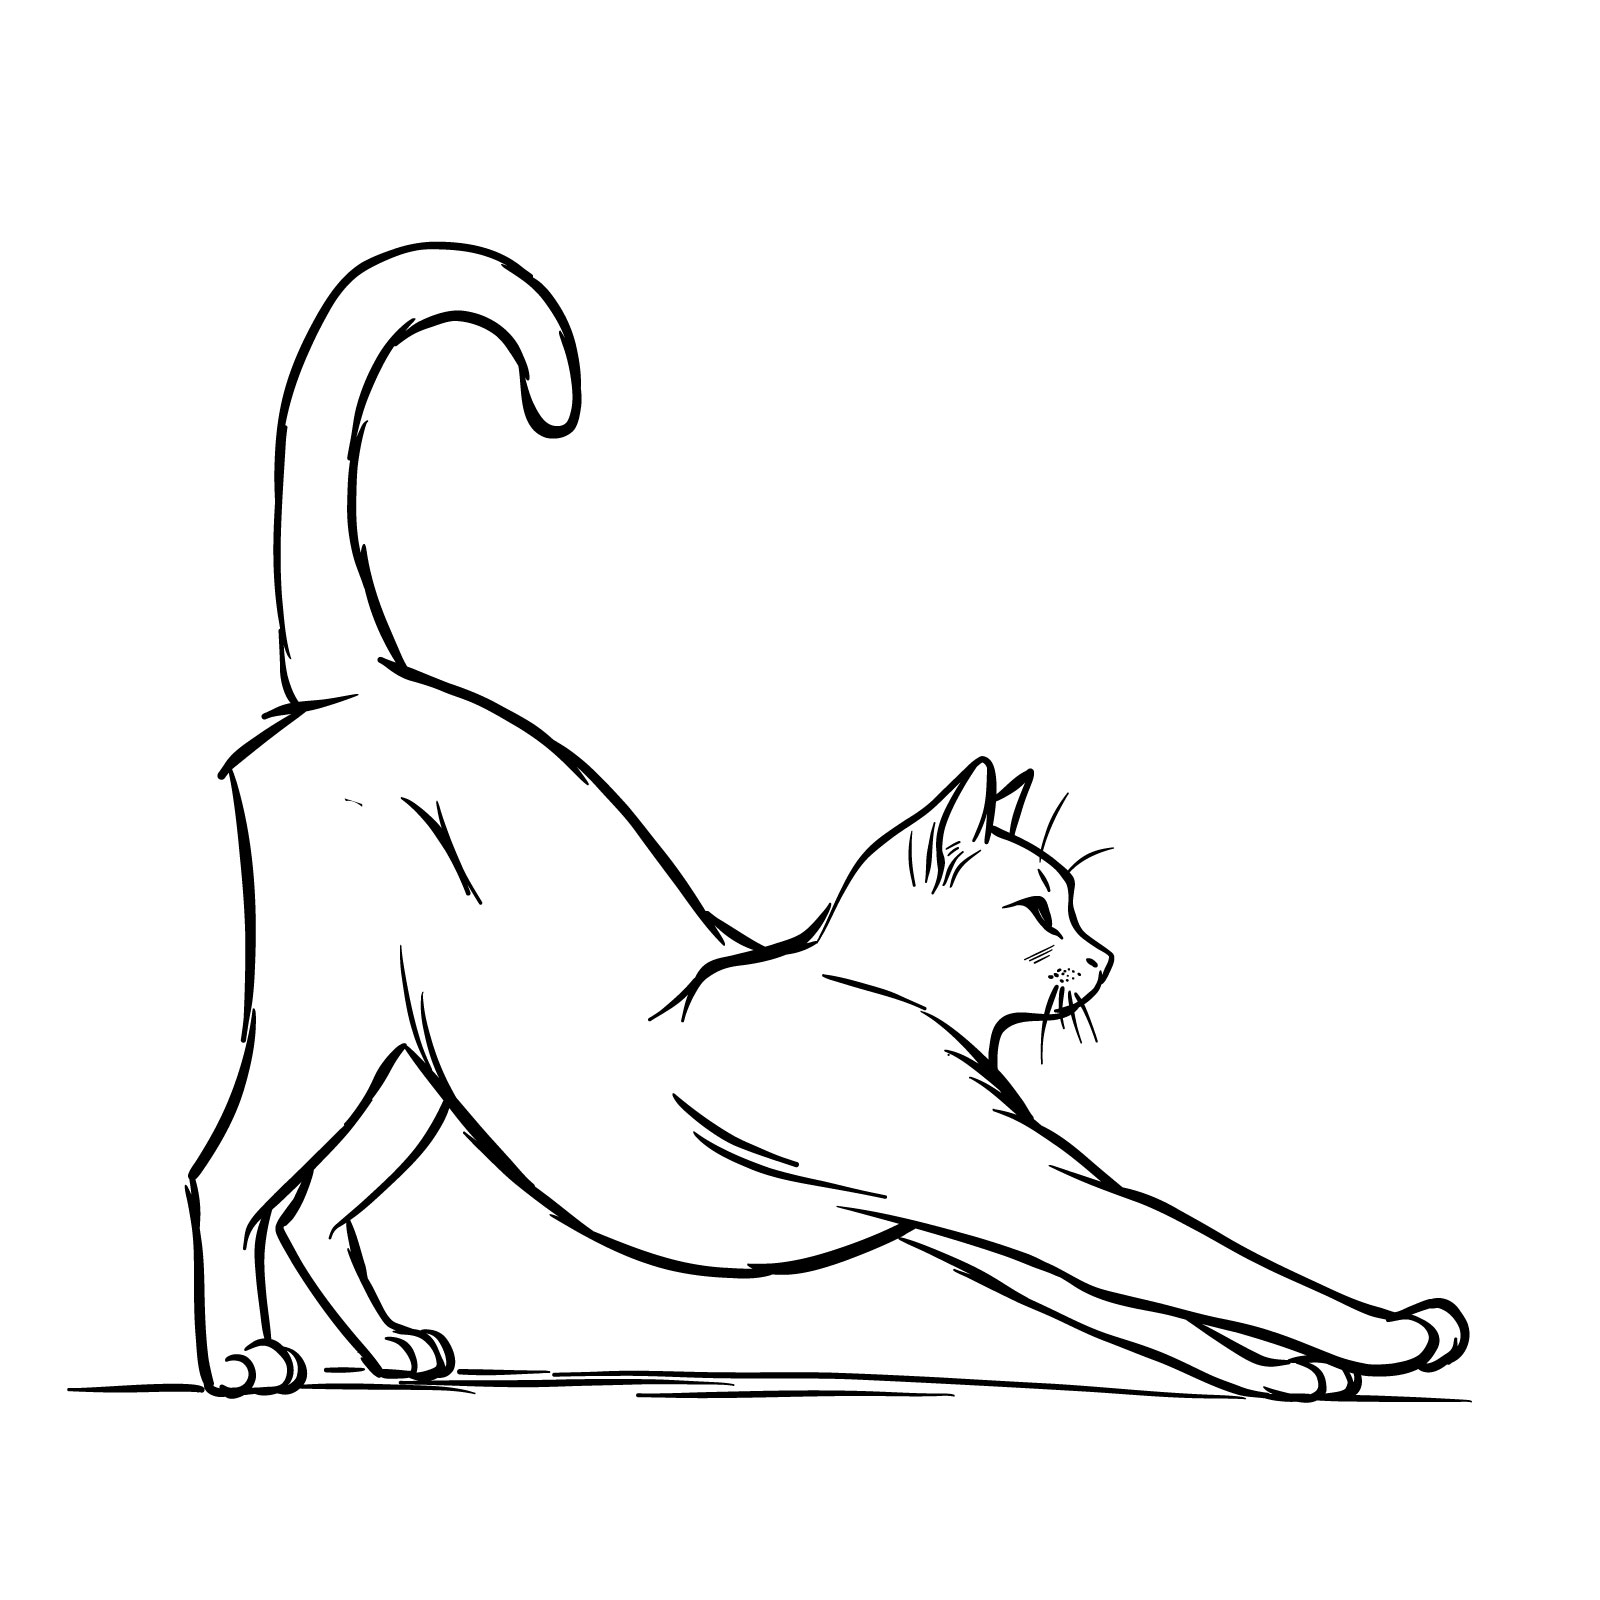
Embrace the elegance of feline flexibility with our fourteenth guide on how to depict a guy stretching . This relaxed as yet dynamic pose cost pause into 11 mere pace , check an enjoyable drawing process for artist of all floor . The realistic form of the guy exist depicted without an overwhelming quantity of detail , grant you to focus on capture the motion and grace of the stretch . Begin with the basic proportional structure , you ’ ll create the foundation for your cat ’ s stretch torso and limb . While my instruction employ only bold lines to underscore the technical face , you ’ re encourage to lend your personal touch with shading and texture to bring your guy to living .
Measure 01 – Start with a humble circle for the head , then a prominent circle below for the breast and a medium-sized unity for the hindquarters . Position the hindquarters ’ circle halfway above the chief ’ s level . Relate these with smooth , curved lines to draft the torso ’ s pattern
Measure 02 – Outline the eye and muzzle placement on the head band . Sketch simplify forms for the leg and paws , capturing the stretching strength . Add a curving job to represent the ass ’ s flow
Measure 03 – Define the forehead by sketching a line that cover from the top of the head circle , arch down to indicate the nose ’ s bridge . Ensure this note follows the natural curvature of a feline ’ s mind in profile

Step 04 – Draw the ear starting from the height of the mind lot , tapering to pointed tip . For the chin , stretch a course from the lower piece of the head circle to form the bottom contour of the cat ’ sec mind , completing its profile
Measure 05 – Refine the ears with additional lines to indicate inner ear point . Position the heart correctly within the guidelines on the top dog , give it a slightly almond shape
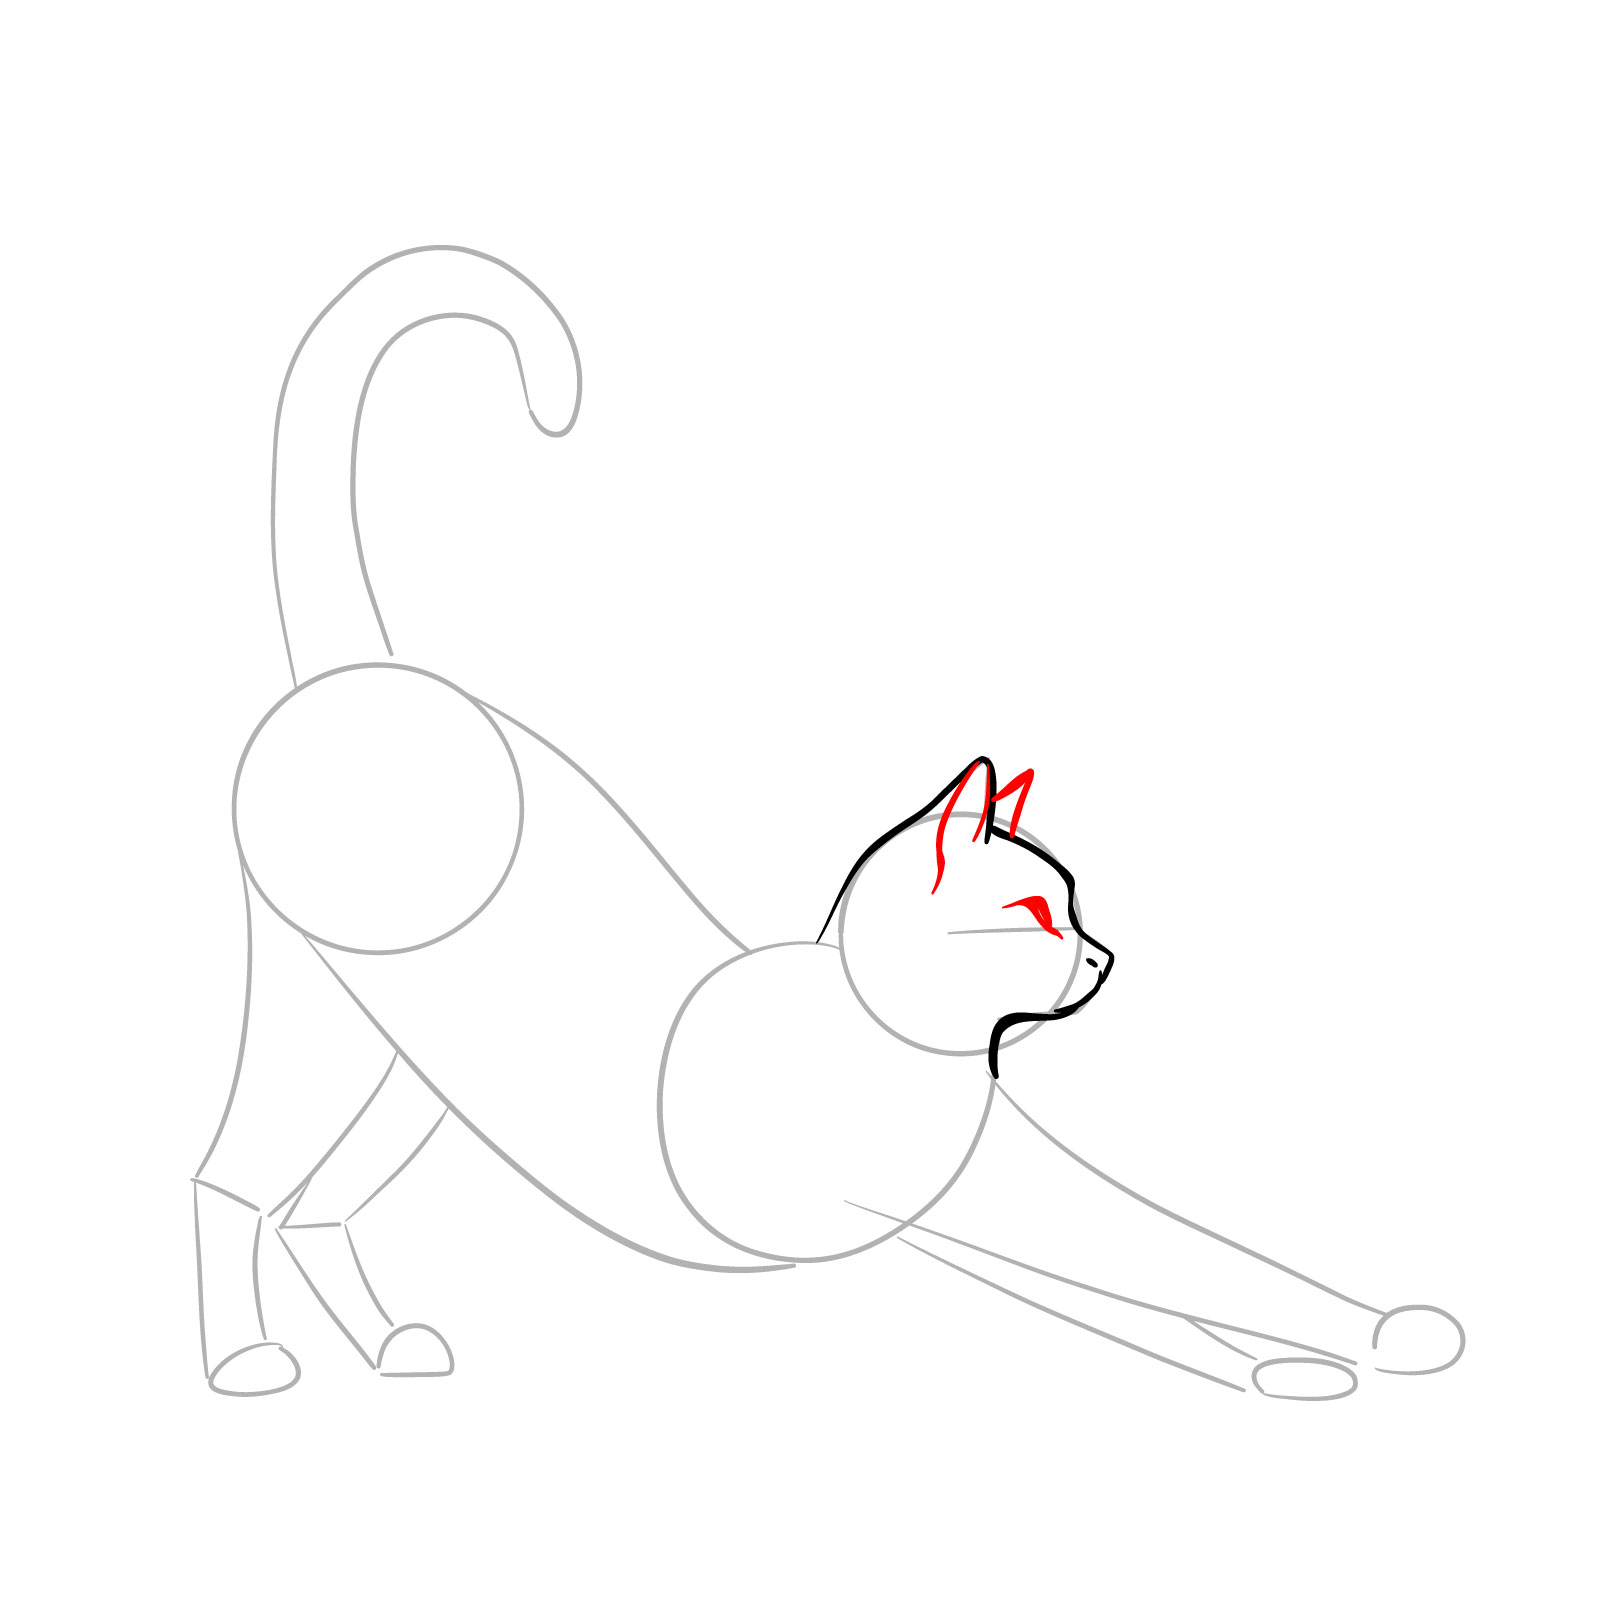
Measure 06 – Sketch thin , fragile beard protrude from the muzzle . For the ear , add fur texture using short job to represent the fine hairs within the cat ’ s inner ear

Step 07 – Depict the first front leg with the paw somewhat lifted off the basis . Use short , quick accident instead of smooth business to mimic the fur texture , hold spirit to the branch ’ s appearance
Measure 08 – Outline the rear and belly of the cat with short flow lines to present the stretching gesture . For the upper role of the rear branch , signal its form with lines that propose the muscle structure and fur texture
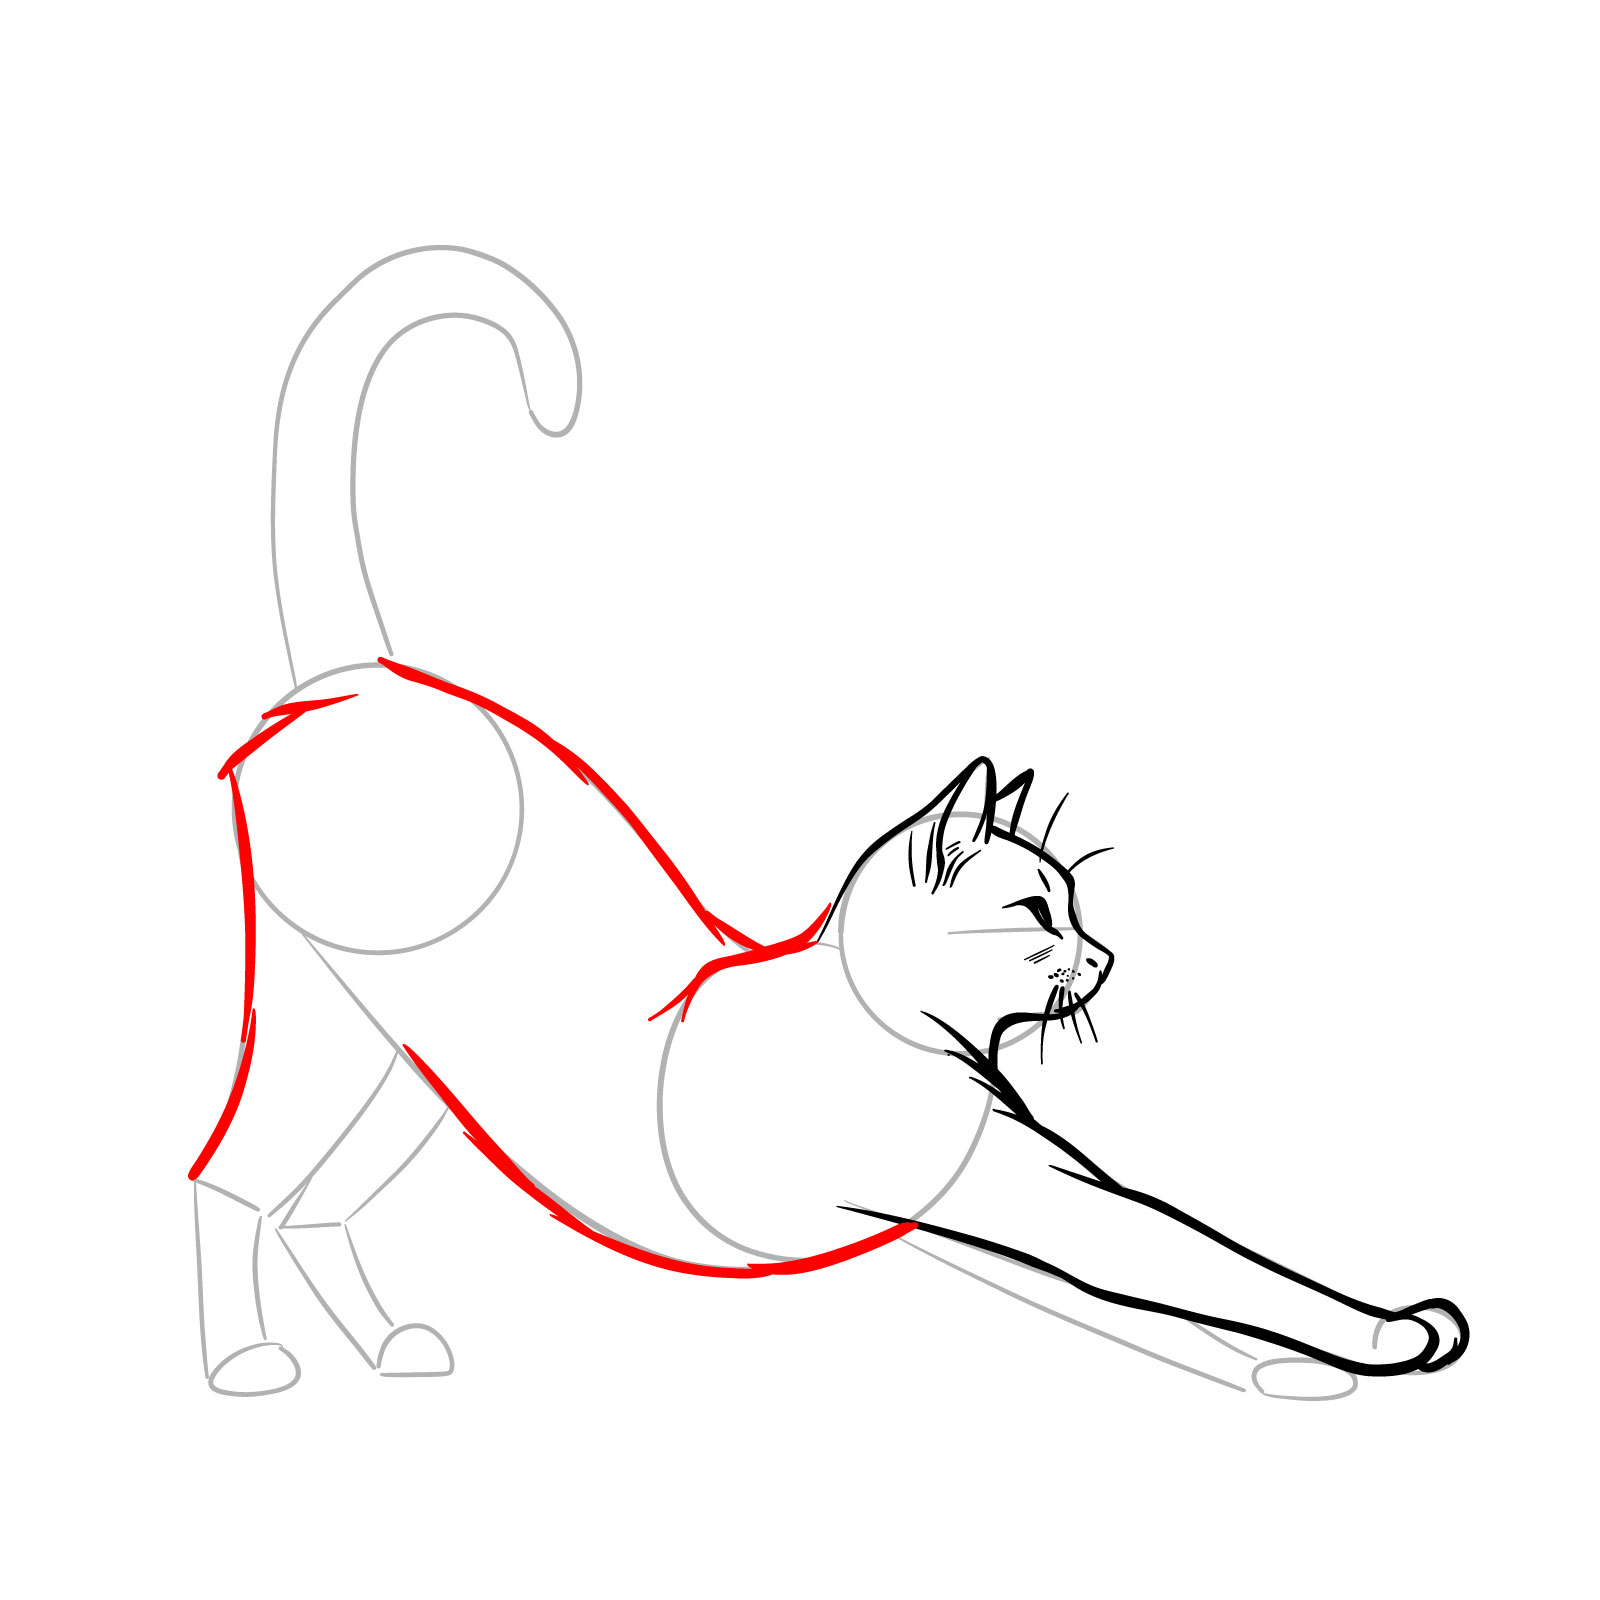
Step 09 – Draw the seat branch , ensuring it has a slight bend to signal the guy ’ sec stretch activity . Use short lines near the hand to advise fur texture and think of to define the paw pads
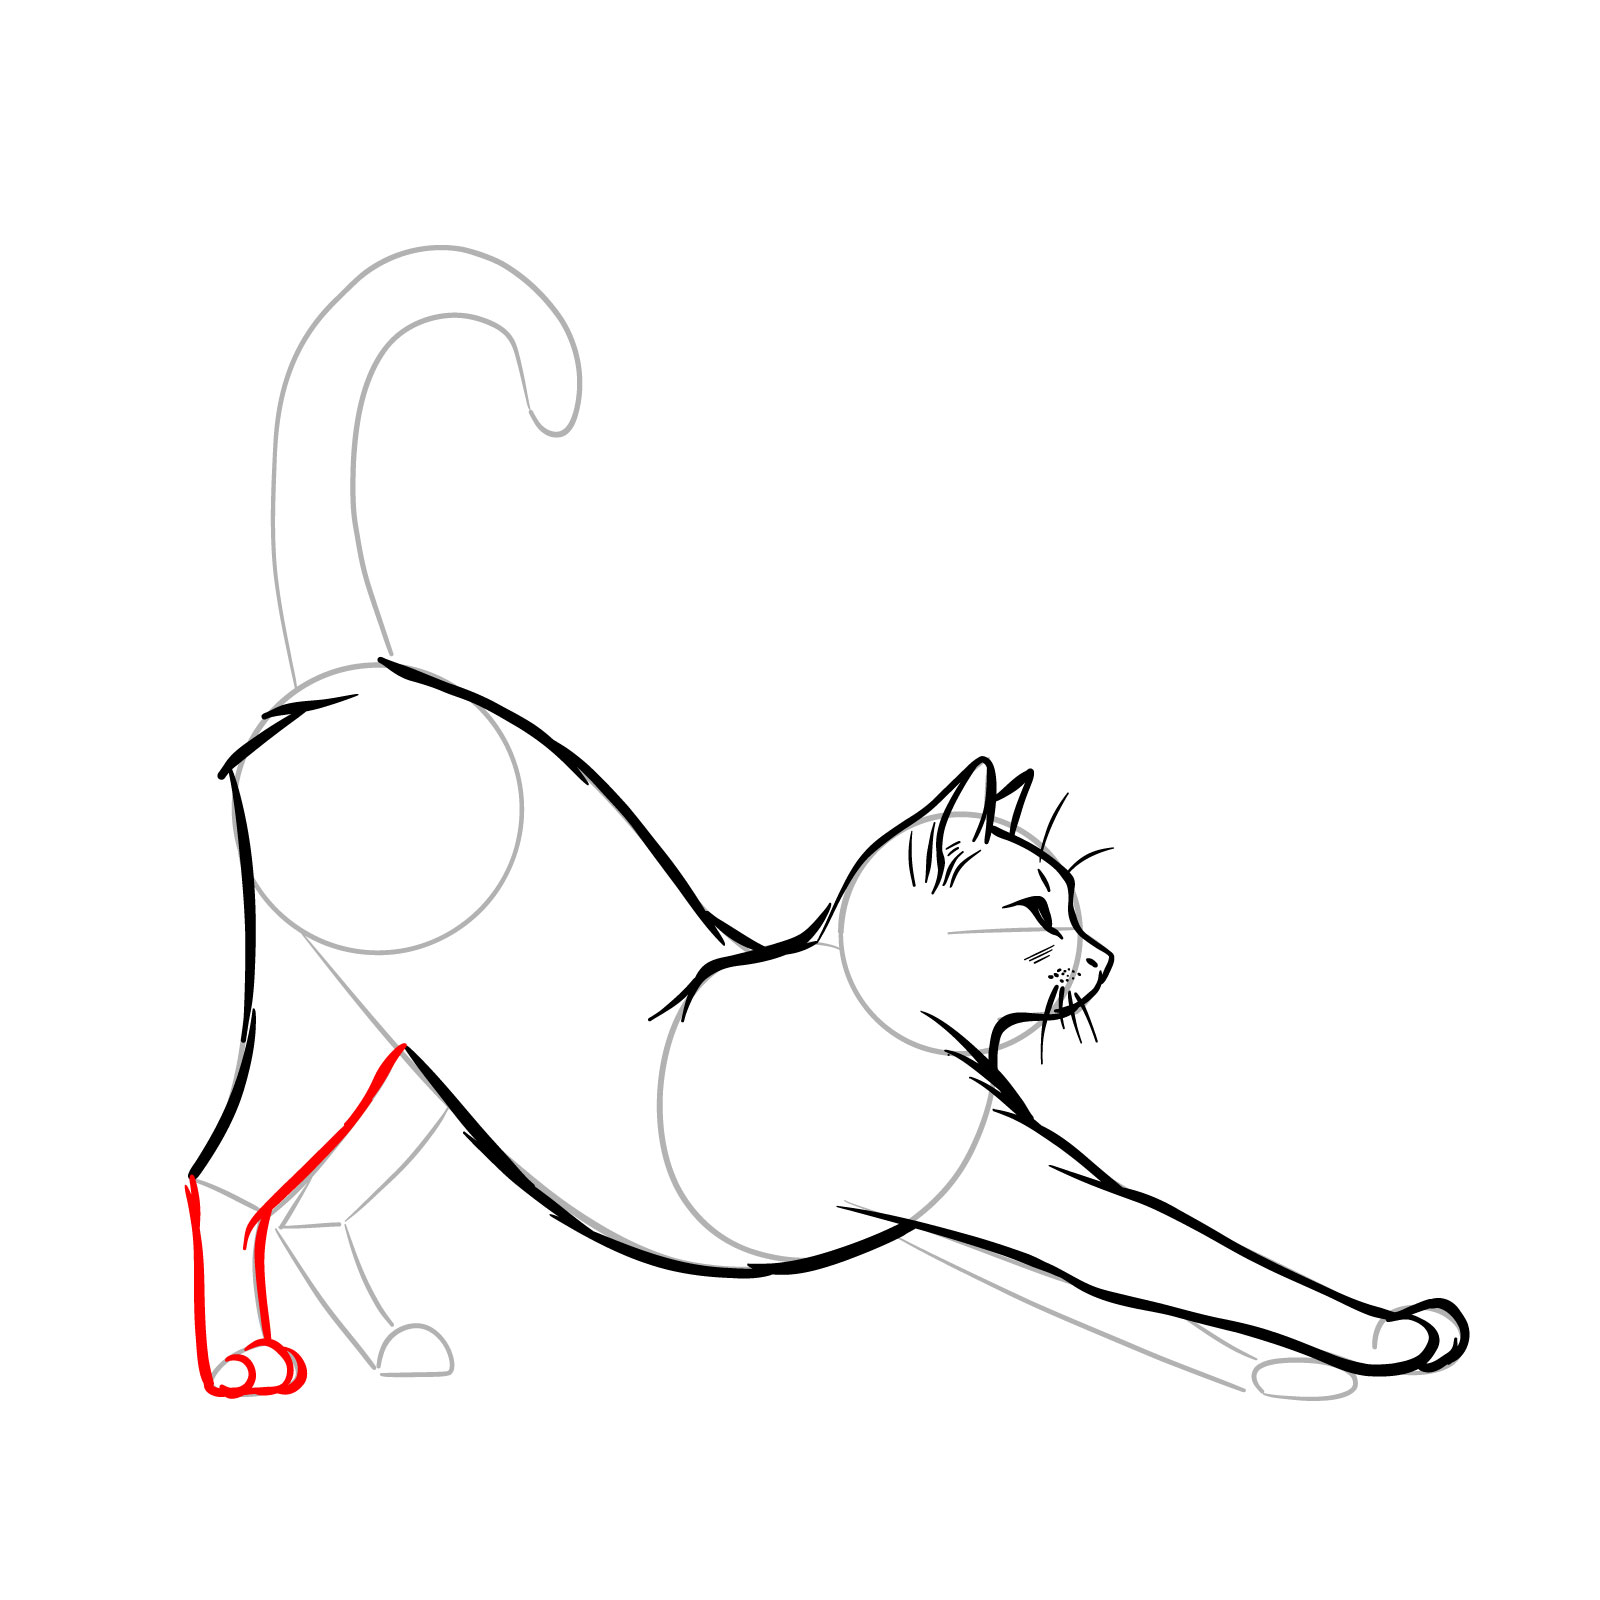
Step 10 – Sketch the second rear leg , mirror the first ’ s position . Add the tail with a smooth , curving shape . Put the second presence branch forward and add horizontal note to present the basis , providing context for the stretch
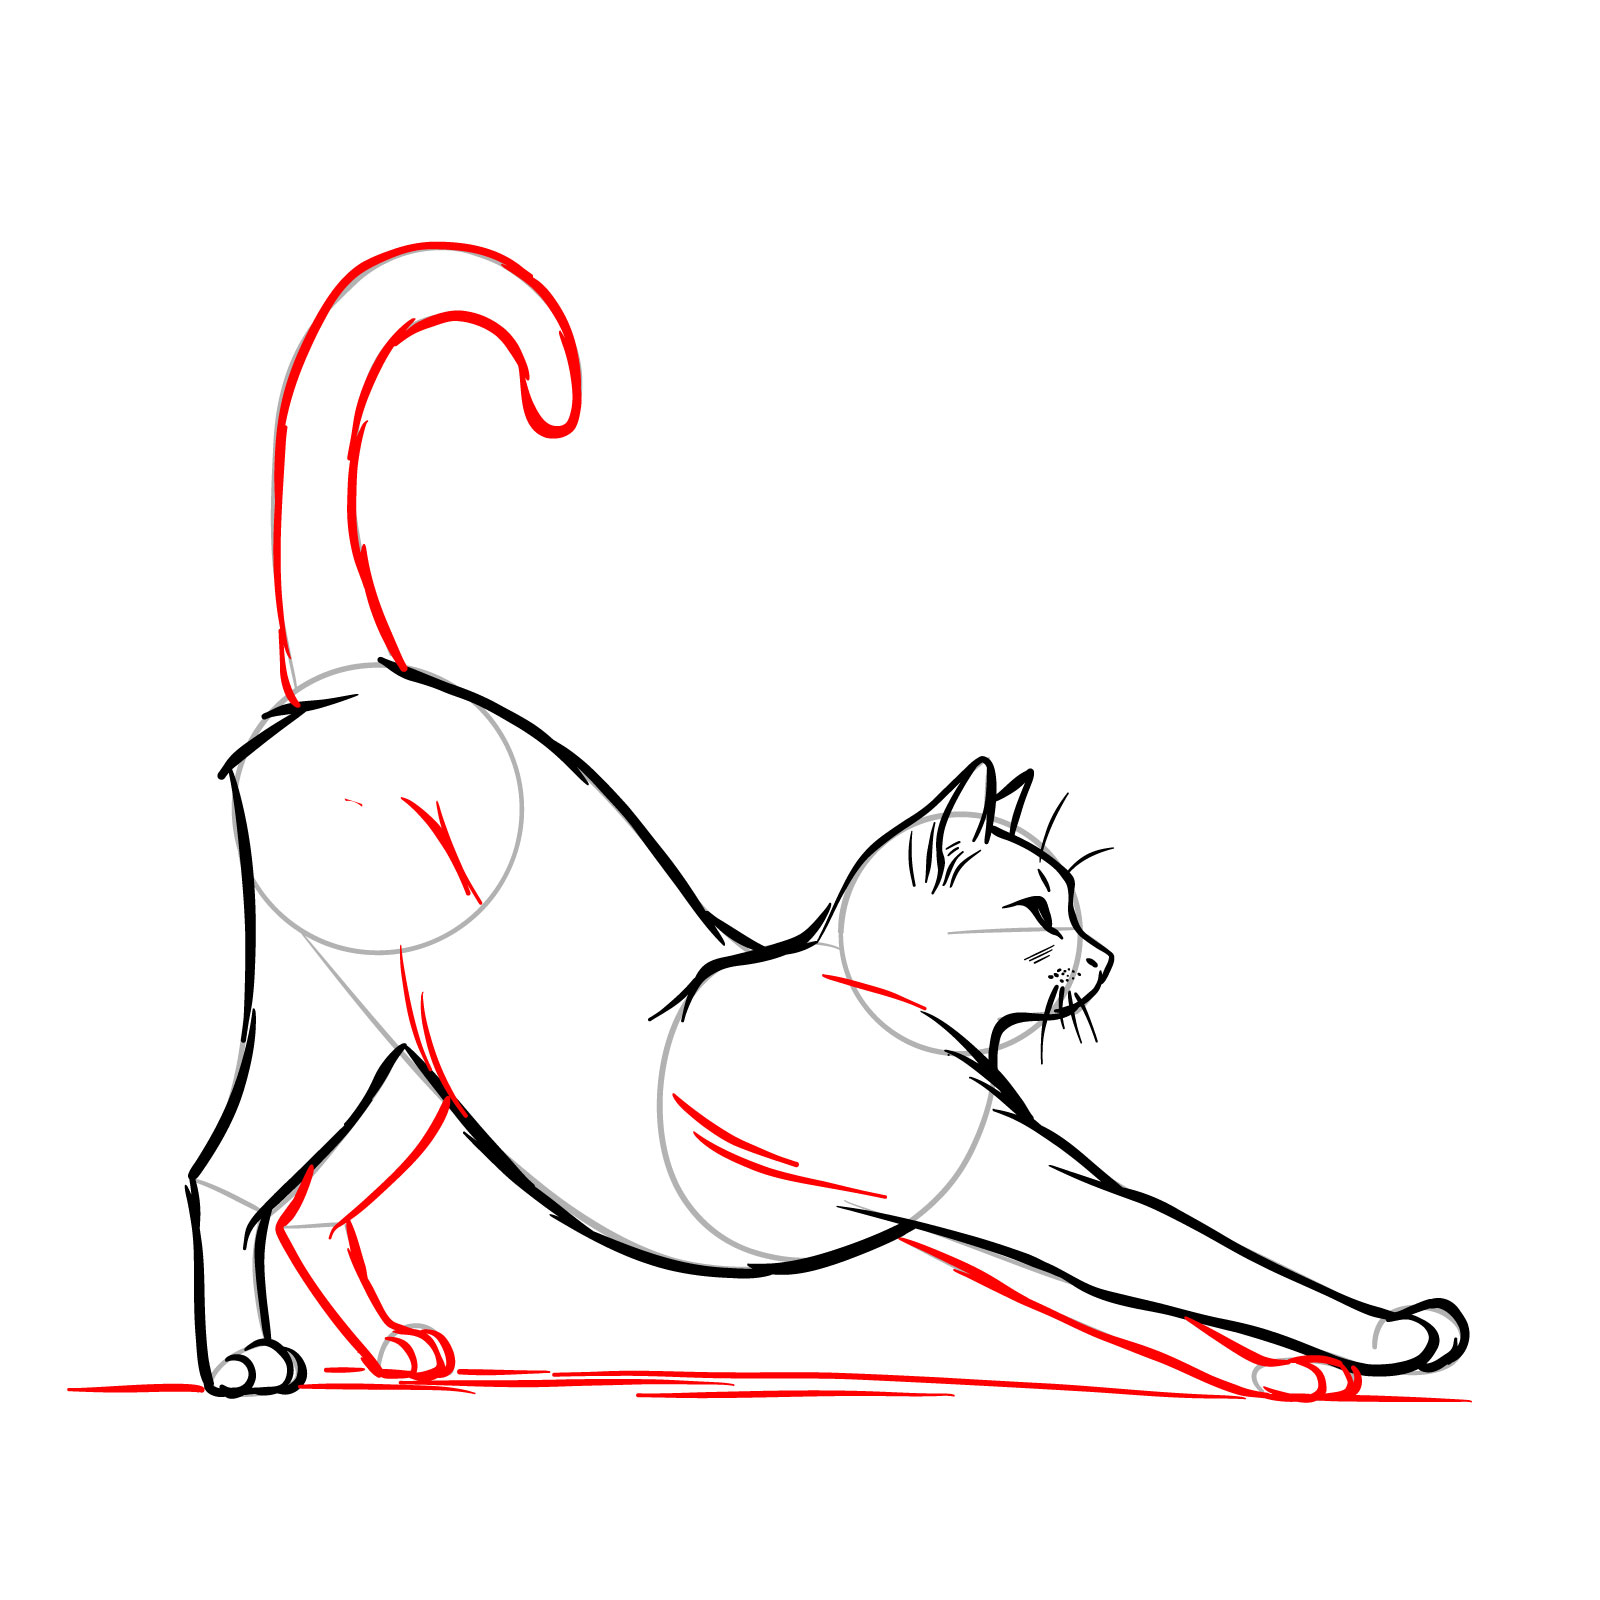
Step 11 – With the cat ’ s make full sketch , remove all the guideline target . If you like to finalize the drawing , live over the lines with ink to make them toast and clean . This results in a sporting , cease stretching guy drawing , ready to exist showcased or farther embellished with shading or color
Guide 15 : How to Trace a Cat Lying on Its Back – 10 Steps
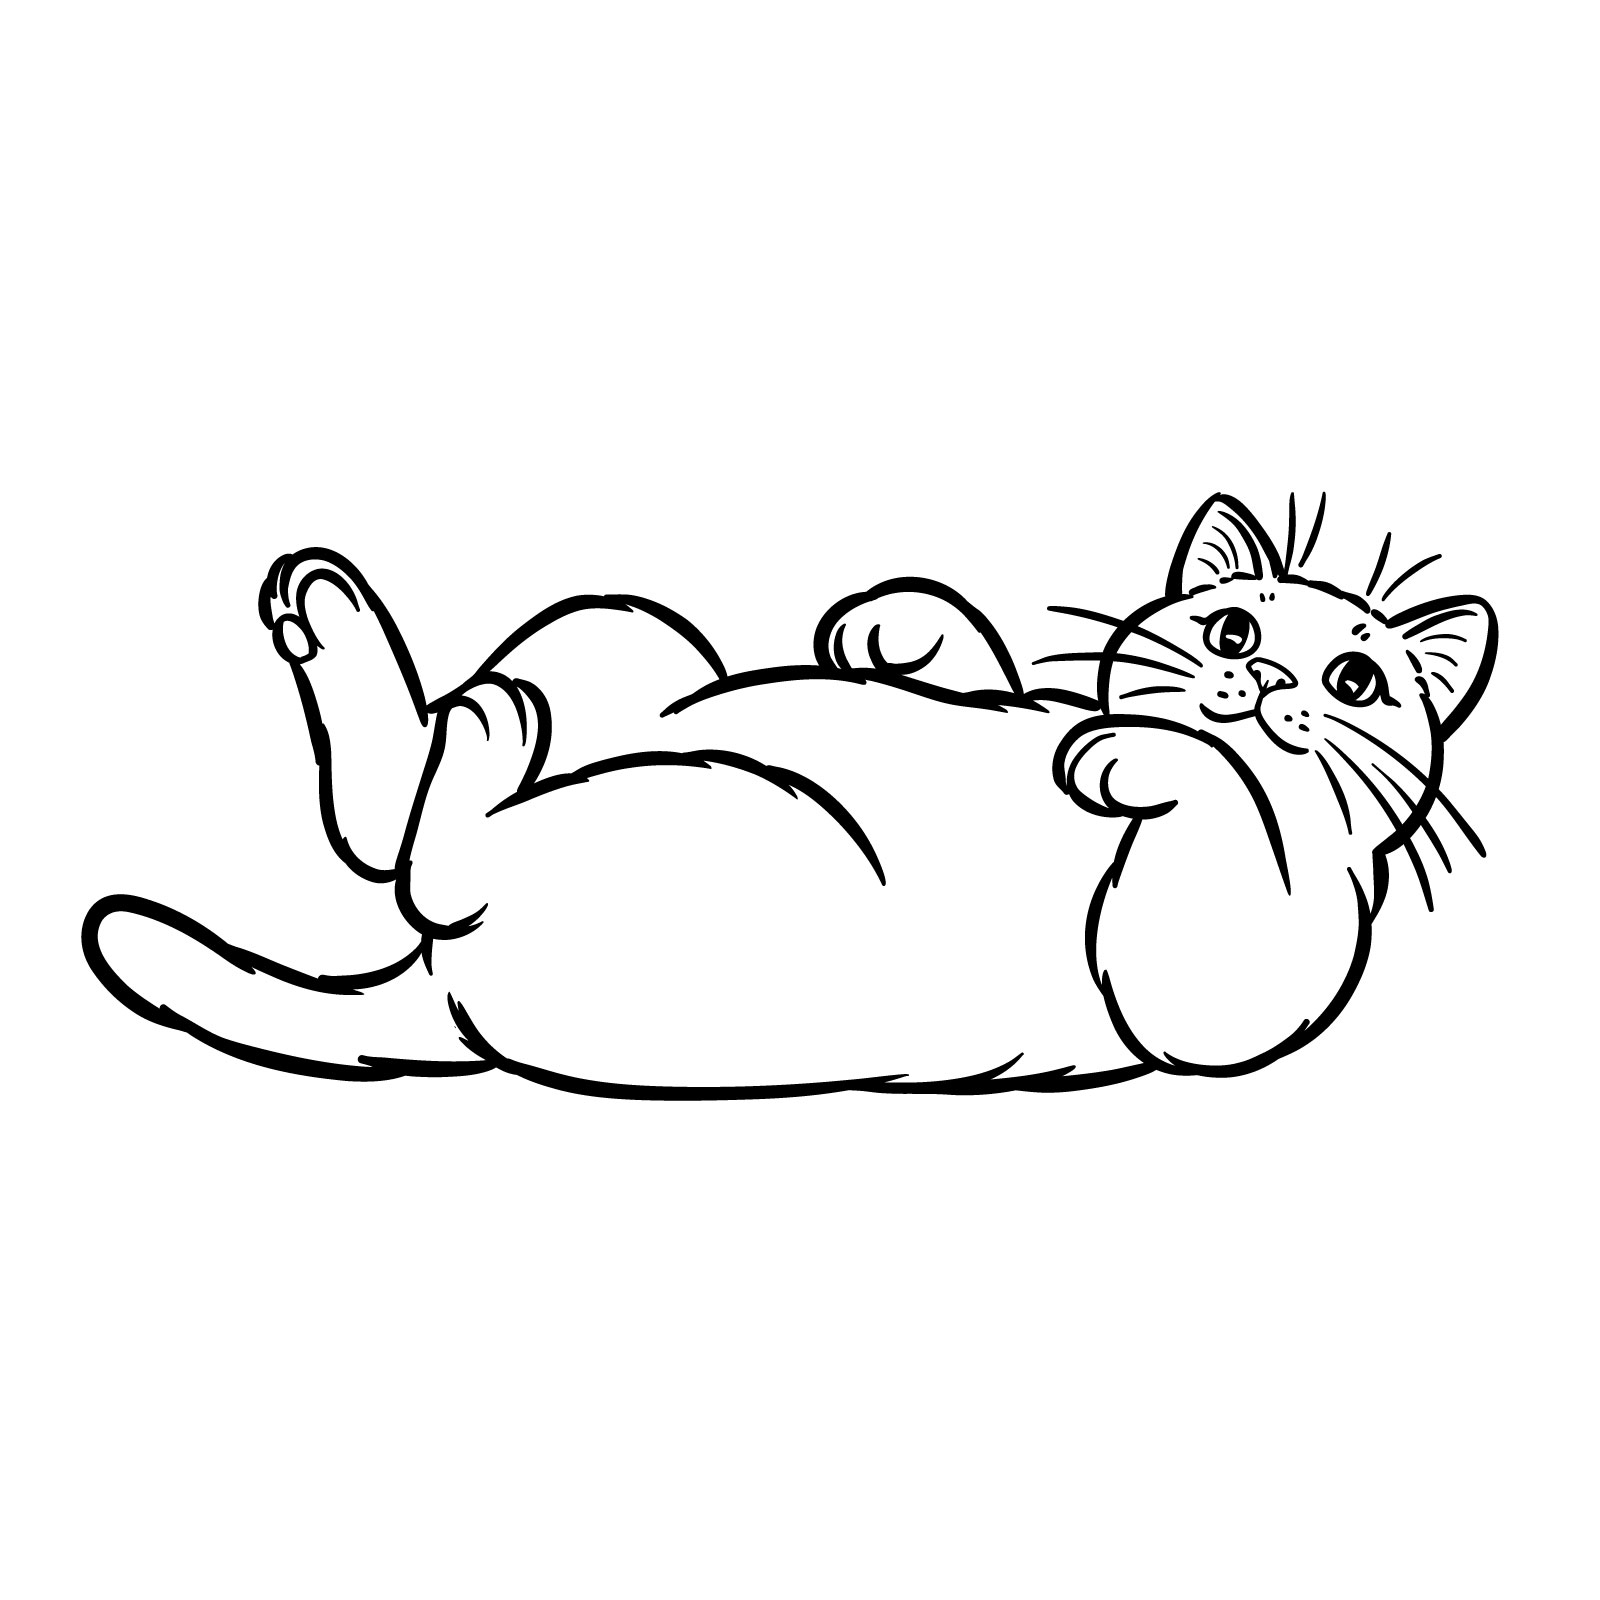
Get ready to capture the adorable position of a cat lounging in leisure with our fifteenth guide : how to draw a guy lie on its back . This pose , introduce in 10 easy footstep , is utter for all pull enthusiasts looking for a fun and simple task . The fashion come to a capture remainder between semi-realistic and cartoonish , avoiding intricate details to observe the drawing procedure straightforward . Take off with the first two steps , you ’ ll create a proportional alkali for your guy ’ sec playful form . Throughout this guide , I ’ ll use bold lines to outline the major feature , which let you to focus on the universal pattern without getting lose in the complexity . You ’ re advance to enhance your draw with personalized shading and texture to hand your cat its own unique character .
Measure 01 – Begin by draw an oval frame to represent the guy ’ s body . For the head , sketch another oval-like flesh and add a cross through it to suggest the guidance of the face and the angle at which it ’ s tilt
Measure 02 – Add triangular figure for the ear and simple line for the eye , nose , and mouth . Sketch the limbs ’ placement with oval shapes for the front leg hand , and a curving job for the ass
Pace 03 – Draw the contours of the chief , refining the top and sides , ensuring they adjust with the guide lines . Use short note to mimic the fur texture

Measure 04 – Fill in the pupil with black , leave small blank dots for highlights to give living to the gaze . Outline the eyes for definition . Draw the ear using short lines to suggest fur texture
Step 05 – Draw the nose and mouth with gentle curve to catch the guy ’ s relax reflection . Sketch a series of whiskers fanning out from the muzzle and add fluffier lines inside the ears for texture
Pace 06 – Illustrate the first front branch bent at a gentle angle , using short lines to imitate the fur . Form the hand distinctly , have it a relaxed , somewhat curled posture
Step 07 – Draw the guy ’ s back arching slightly with the belly project to emphasize the cat ’ s position rest on its back . Use smooth , rounded business to assert a gentle and organic tone
Step 08 – Detail the first rear branch , showing it bended and perch against the torso . Use short shot to give the impression of fur , specially around the thigh and paw domain
Step 09 – Draw the remain paws , capturing the playful nature of the guy ’ s pose with the legs in the air . Include the tail , ensuring it get a natural curve as it consist relax on the ground
Measure 10 – Review your drawing , removing any remain structure note to expose the cat ’ s fig . This completes the step-by-step guide on how to draw a cat lying on its back , creating a playful and endearing picture that ’ s both semi-realistic and stylized for ease of make
Bonus Drawing Guides for Kids
As a special increase to our comprehensive drawing series , I included four bonus guides that cost perfect for practice basic sketching techniques or for enjoying a describe session with children . These tutorials , design with simplicity , exist ideal for youthful artist and beginners alike . Each guide offers a unique and delightful way , from the whimsical to the whimsy , providing a fun and easy means to employ with art and creativity .
Whether you ’ re teaching the basics of drawing to kids or just look for a light-hearted artistic action , these guides offer a stress-free approach to drawing . With easy-to-follow pace , they are tailor to aid you and the little ones create adorable cat drawings with a touch of personal flair . Let ’ s explore these playful illustrations that are certain to make for smile and spark imagination .
Guide 16 : Chubby Cheeks Cat
This guide brings to life a magic cat with plump cheeks and broad , innocent eyes . It ’ s a tremendous starting stage for find out how to draw facial feature with simple form .

Guide 17 : Kawaii Cat
Embrace the cuteness of Japanese-inspired art with this kawaii cat drawing . Its exaggerated construction and body proportion exist certain to capture the heart of children and adult alike .

Guide 18 : Pudgy Paws Cat
Learn to attract a guy that ’ s all curve and cuddles . This pudgy-pawed friend exist sitting up and ready for a gentle pat , with each stroke of the pencil contribute its soft figure to spirit .


Guide 19 : Anime Cat
Dive into the world of anime with this stylized cat . Its large center and sleek lines are characteristic of the genre , create it an enjoyable draw for aspiring youthful anime artist .


Decision : Your Journey to Mastering Cat Sketches
With the comprehensive array of guides render , you ’ re now equipped to sketch cat in virtually any pose and style , making this tutorial perfect for amateur and drawing enthusiasts alike . We ’ ve cut across through mere outline to more dynamic and playful depictions , each designed to make your assurance and skill in drawing our feline friends .
If these guides get trigger your interest and you see yourself craving a deep dive into the feline form , with a focus on anatomy and more intricate item , let me know . Your interest and request could lead to the world of an advanced tutorial tailor to those looking to refine their technique even farther .
In the meantime , put on ’ t forget to explore my other guy draw tutorials , which have different breeds like Siamese , Maine Coon , and British Shorthair etc . While simpler , they are equally fascinating and a joy to depict . This guide was a massive undertaking , and I would greatly appreciate your support . Please come and share if you ’ ve find it helpful !
Stay connected and share your advance with the community on social medium :
- YouTube : https : //www.youtube.com/ @ sketchok
- Facebook :
- Instagram :
- Pinterest : https : //www.pinterest.com/sketchok/
- Tik Tok : https : //www.tiktok.com/ @ sketchok
Thank you for connect me on this artistic journey . Whether you ’ re scribbling a quick survey or cautiously crafting a detailed portrait , remember that each stroke brings you closer to master the art of cat drawing . Prevent creating , go on communion , and above all , prevent delight the process of institute your artistic visions to spirit . Until next time , happy drawing !
Did you like the tutorial ?
You can bear the writer of this website and also indicate your own ideas for new drawings by make a humble donation hither :
