Step-by-Step Guide to Drawing a Cartoon Cat
Step-by-Step Guide to Drawing a Simple Cartoon Cat
Mastering the art of drawing a cartoon cat is simple and enjoyable. Follow our detailed guide to sketch, outline, and bring your cartoon cat illustrations to life using markers.
Anyone can master drawing and artistic creation. These are simply abilities that improve with consistent practice. The more you dedicate yourself, the more your skills will grow.
The ideal strategy is to maintain a calm and pleasurable experience. Avoid stressing about comparisons with others. The greater your enjoyment, the more eager you’ll be to continue.
Gather your materials and prepare for an enjoyable experience as we explore how to sketch a cartoon cat.
Certain links within this post could be affiliate links. As a result, I earn minor commissions when purchases are completed via these links, with no additional expense to you.
Art Materials
- Paper or cardboard stock
- Marker
- Pencil
- Click Eraser, Pink Pearl Eraser
- White Gel Rollerball pen
Practicing Cartoon Cat Sketches
Creating your cartoon cat offers endless possibilities, with numerous styles to explore, even developing your unique approach.
A cartoon cat sketch session is an excellent method to loosen up your drawing skills and explore rough concepts for your artwork. It can be finished in just a few minutes.
Practice sketching a cartoon cat with this step-by-step exercise…
- Grab a sheet of paper and a drawing tool, such as a pencil, pen, or marker.
- Find a few reference images of cats to use as inspiration.
- Set a timer for either three minutes or five minutes
Keep creating rapid sketches until the timer signals the end.
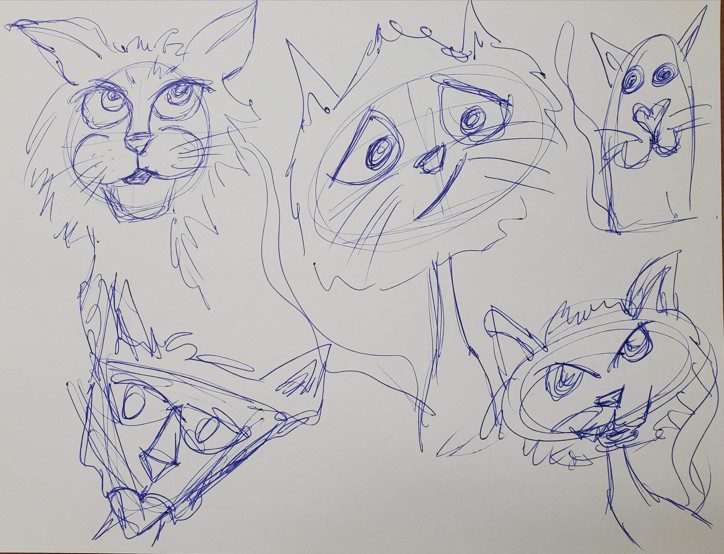
An alternative approach is to draw until you fill the entire page. Both methods work well. Simply maintain a fast and relaxed style when sketching your cartoon cats.
Step-by-Step Guide to Drawing a Cartoon Cat
Mastering the art of drawing a cartoon cat becomes effortless when you deconstruct the process into basic shapes and manageable steps.
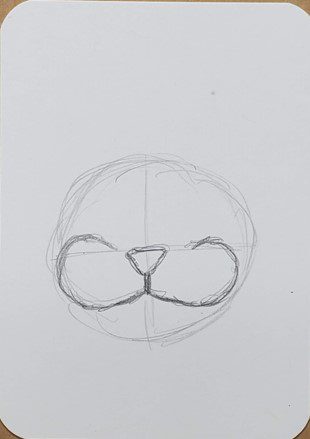
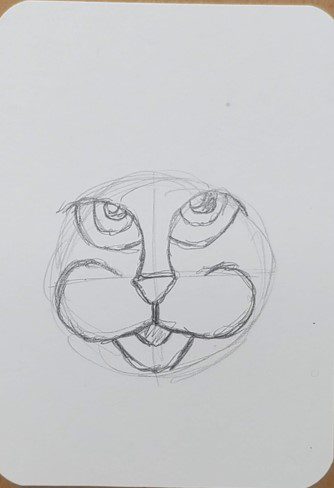
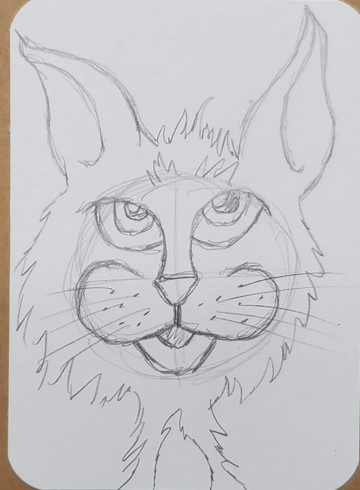
Start by sketching a circle to form the head. Then, split the circle into four equal sections to establish guiding lines.
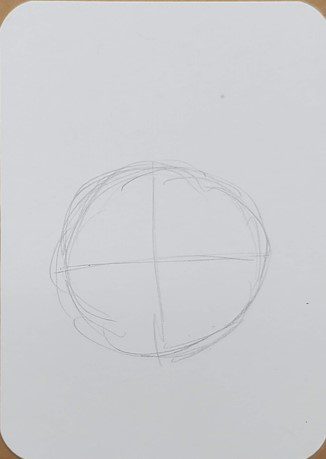
The guidelines assist in positioning the eyes and nose while ensuring the drawing remains balanced and symmetrical.
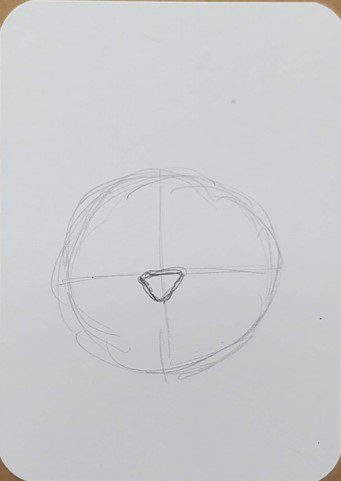
Sketch a tiny triangle at the intersection of the guidelines to form the nose. Alternatively, you may create the nose using an oval or circular shape.
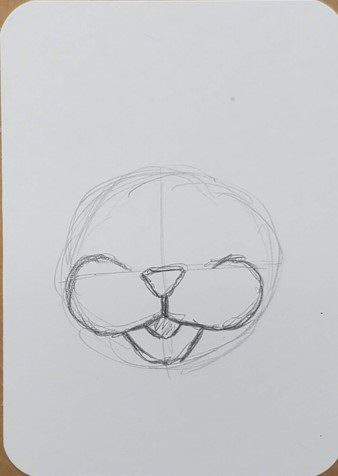
Now, let’s focus on the mouth. Begin by sketching a small downward line from the nose. After that, add a gentle curve on each side of this line.
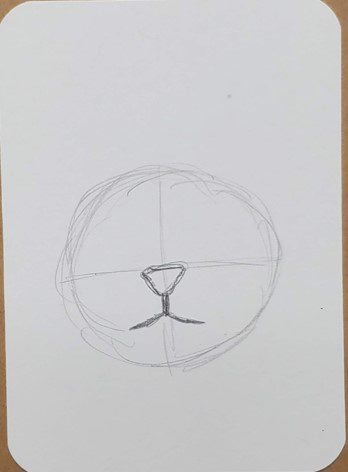
Next, extend those lines around the nose to outline the muzzle section of your cartoon cat. As with many techniques, there are numerous approaches to drawing this part.

Begin by drawing the cartoon cat’s eyes from the top of the nose, creating a line that rises upward before curving back toward the head’s upper edge.
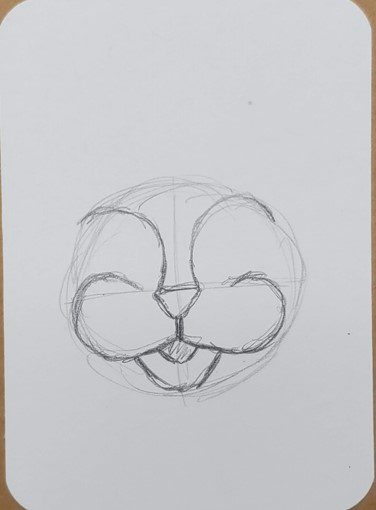
Next, sketch the outline of the eyes. Keep in mind that there are numerous approaches to achieving this in your personal artwork.
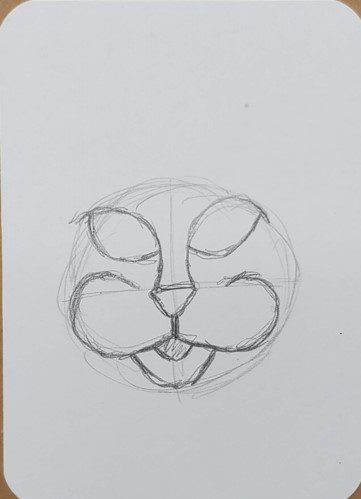
Complete the eyes by incorporating the pupil and iris. You may include reflections now or save them for a later step.
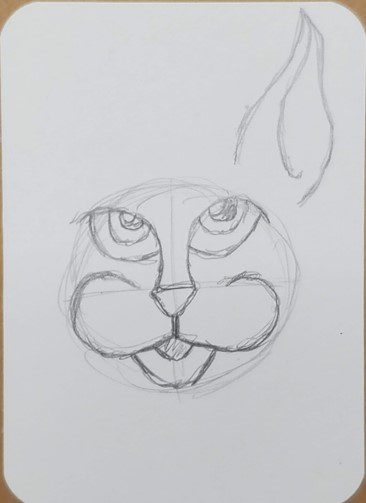
Now we can sketch the ears. In this case, I chose to make them quite big because I find it more playful. You can make your ears smaller than usual or bigger if you prefer.
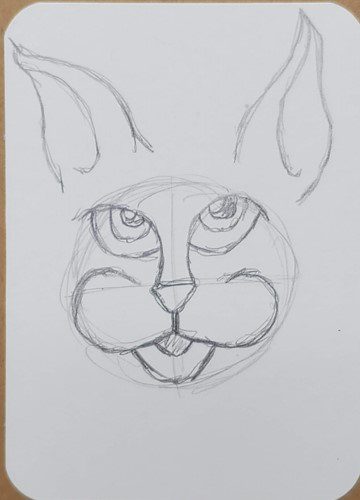
Sketch the ear on the other side with a comparable size and form. Still, perfect symmetry between the ears isn’t necessary.
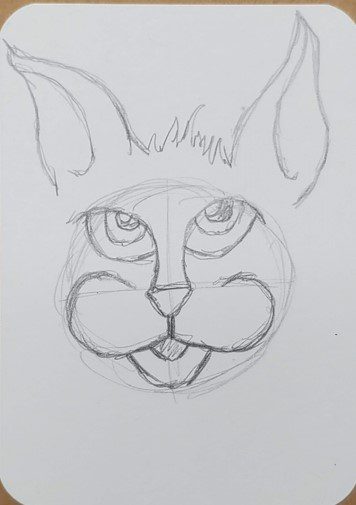
Now, sketch some fur between the ears to finish the upper section of the head. You can create a textured appearance or keep the line smooth.
Complete your cartoon cat illustration by sketching fur to define the head, neck, and body contours.
When incorporating fur, you have several choices. You can use wavy lines to add texture or keep them smooth for a different effect. For additional details, check out our tutorial on .
The final appearance depends on your desired style. Whatever method you use to create the fur works well and will give your cartoon cat illustration a distinct aesthetic.
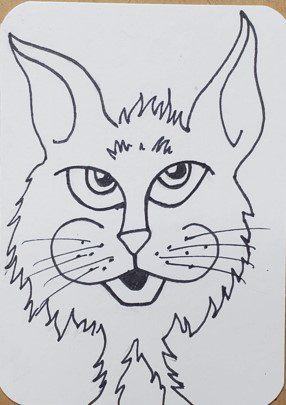
Outline of Cartoon Cat
Creating the outline of a cartoon cat is quite simple. All you need to do is go over your pencil sketches using a black pen or marker.
Your lines may vary in weight, from thin to thick or a mix of both. Choose what aligns with your personal style and what appears visually correct to you.
Consider experimenting with colors besides black, such as gray, purple, or green. Explore different options and enjoy the process.
Follow your artistic instincts. If your style isn’t yet defined, there’s no need to stress. With consistent practice and repetition, your unique approach will naturally evolve.
Consistent practice accelerates the growth of your unique style.
Once your cartoon cat outline is complete, carefully erase any unnecessary pencil marks to tidy up the drawing.
How to Sketch a Cartoon Cat Using Markers
Mastering the art of drawing a cartoon cat using markers is simpler than it appears. Just remember these key points to get started.
To achieve smooth color blending, it’s essential to use alcohol-based markers such as Bic, Sharpie, and Copic, among various other brands.
Second, you must paint while the colors remain wet; otherwise, they won’t blend properly. This isn’t a major issue. Simply focus on one area at a time.
Third, selecting colors that closely resemble one another is essential for achieving a seamless color transition. Markers with stark differences will result in more defined and abrupt edges.
If sharp color contrasts align with the aesthetic you aim to achieve, feel free to embrace that approach.
Using a single block of color in your artwork can result in a dull and lifeless appearance.
It’s completely acceptable if you prefer your illustrations to appear two-dimensional. However, if you’d like more depth, the simplest approach is to apply two or three shades to every section of your cartoon cat artwork.
In this instance, two distinct pink markers were applied to the nose and the ear interiors, while two blue markers were utilized for the eyes.
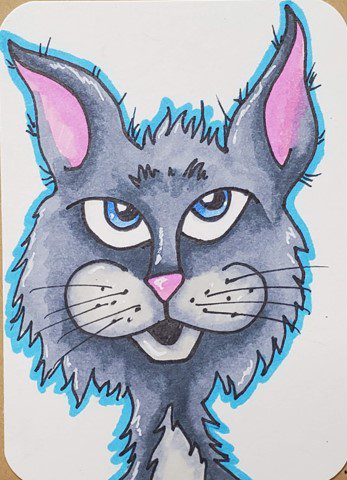
Three distinct gray markers were employed to shade the fur.
Enhance your cartoon cat illustration by adding a colorful halo effect around it. Alternatively, create a full background to complement the artwork.
A white Gelly Roll pen added subtle highlights to the completed artwork.
Concluding Reflections and Future Actions
Now that you’ve learned to draw a cartoon cat, what comes next? To improve your artistic and drawing skills, consistent practice is essential.
You don’t have to dedicate all your free time to creating artwork. It also doesn’t require lengthy drawing sessions.
By committing just a few minutes daily to your artwork, you’ll notice progress quickly.
Set aside dedicated time for creativity each day and integrate it into your regular schedule. Enjoy the process so it becomes something you eagerly anticipate.
To improve your skills in drawing a cartoon cat, push yourself to create a collection of them. Try to generate as many unique concepts as possible within a week.
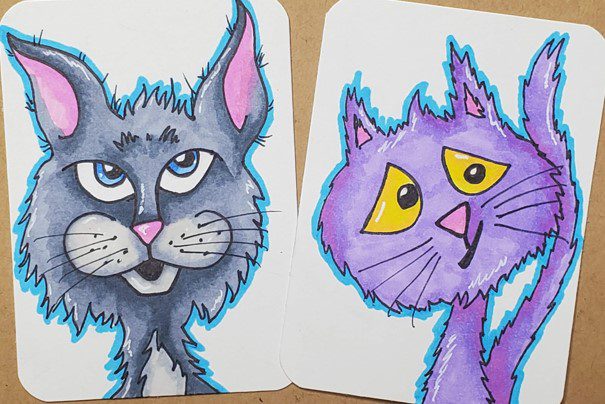
Practicing this will enhance both your creativity and your artistic abilities, including drawing.
Additional Art and Sketching Lessons
- Step-by-Step Guide to Sketching a Lion
- Step-by-Step Guide to Drawing a Cartoon Hand
- Step-by-Step Guide to Drawing a Crown

Roshanda is a blogger dedicated to art education, with a goal to mentor and inspire countless budding artists through her online platform. Discover more about her journey on the About Me page and engage with her on , , and .
